


Navy Blue Bathroom Vanity: How To Renovate Your Cabinet
Want to renovate your bathroom but don’t want to (or can’t afford to) start from scratch? Nieu Cabinet Doors to the rescue!
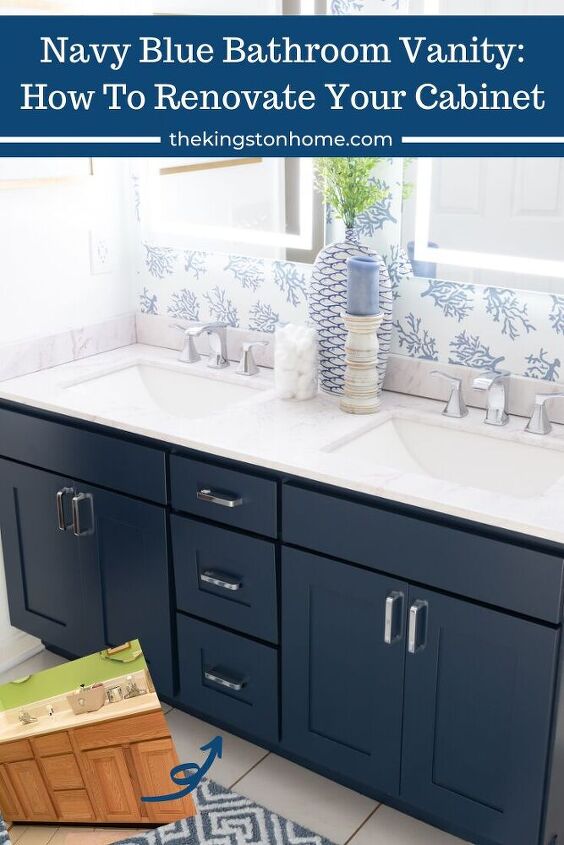
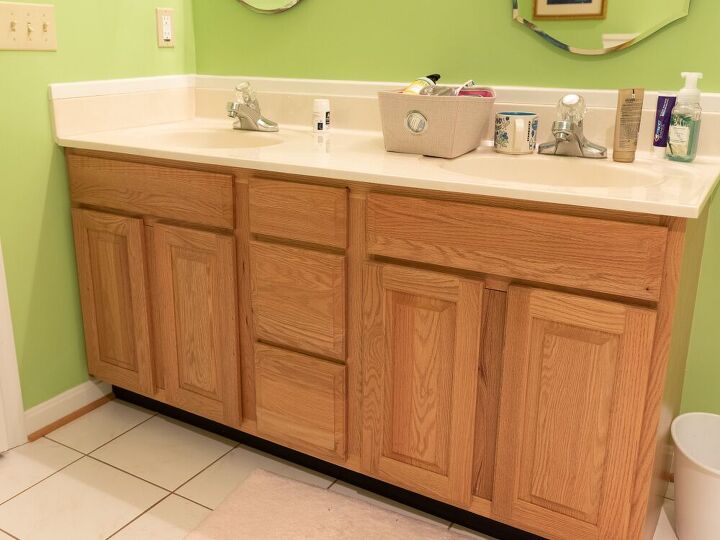
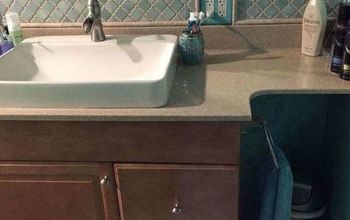
As many of you know we lived in this house as renters for two years before buying it a year ago. We always made jokes about the green guest bathroom but frankly...once you get used to something you sort of forget about it.

I would look at gorgeous bathrooms on Pinterest and think “sure we could paint the bathroom, but we’d still be stuck with that vanity so why bother?” So when Nieu Cabinet Doors asked if we were interested in trying out their cabinet door replacement system we could NOT believe our luck! In this post we’ll walk you through the process, from ordering the cabinet doors to prepping and painting the cabinet “shell” to installing the new doors and becoming OBSESSED with our guest bathroom!! {FTC Disclosure: this is a paid post from Nieu Cabinet Doors but the opinions and the project are mine all mine!}
DESIGN AND MEASURE YOUR CABINET DOORS
1. Measure the cabinet openings according to the instructions on the website (the specific instructions will vary depending on what kinds of cabinets you have). They have great tutorials to walk you through the specifics and they have tech support that will answer any questions you may have. They’ve also got YouTube videos to walk you through it depending on your type of cabinet!
General overview/frameless cabinets
Here is how we measured our cabinets
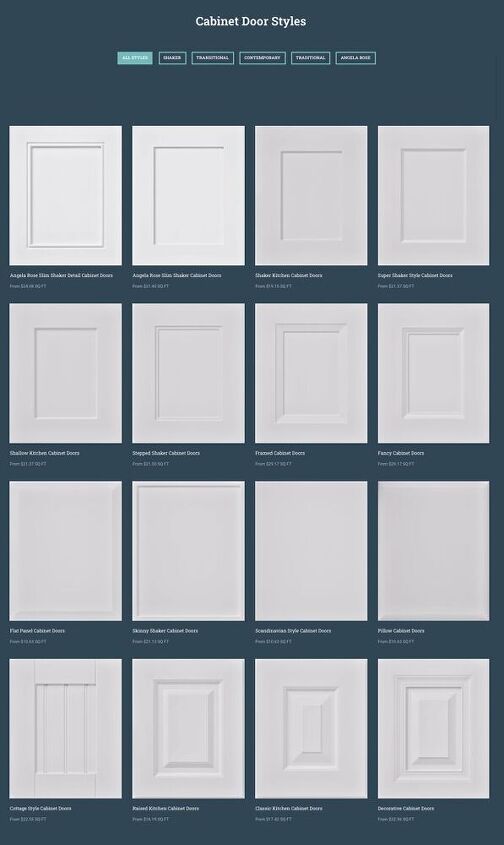
2. Pick out your door design and colors. They have sixteen styles to choose from and use Sherwin Williams colors so you can get the paint locally and try it out first if you’d like to see it in person.
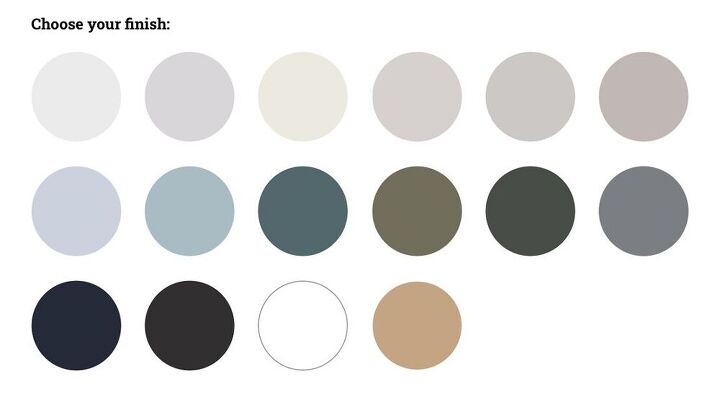
Nieu offers a variety of stock colors, OR you can select from ANY Sherwin Williams or Benjamin Moore color for just an extra fee!
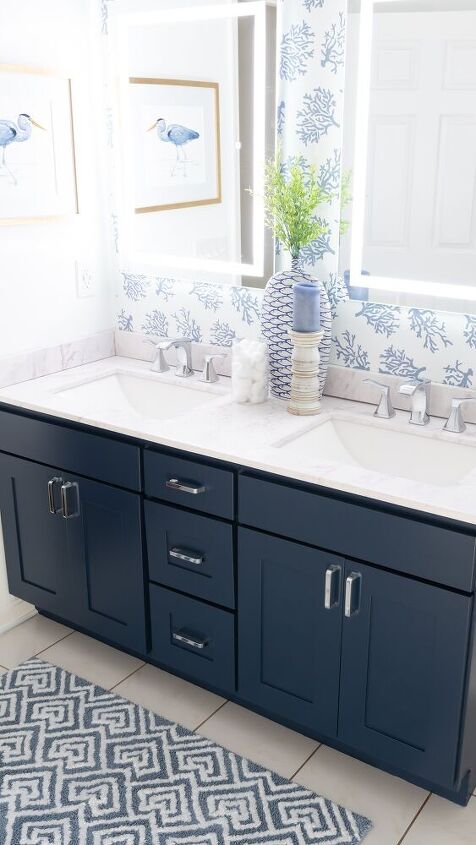
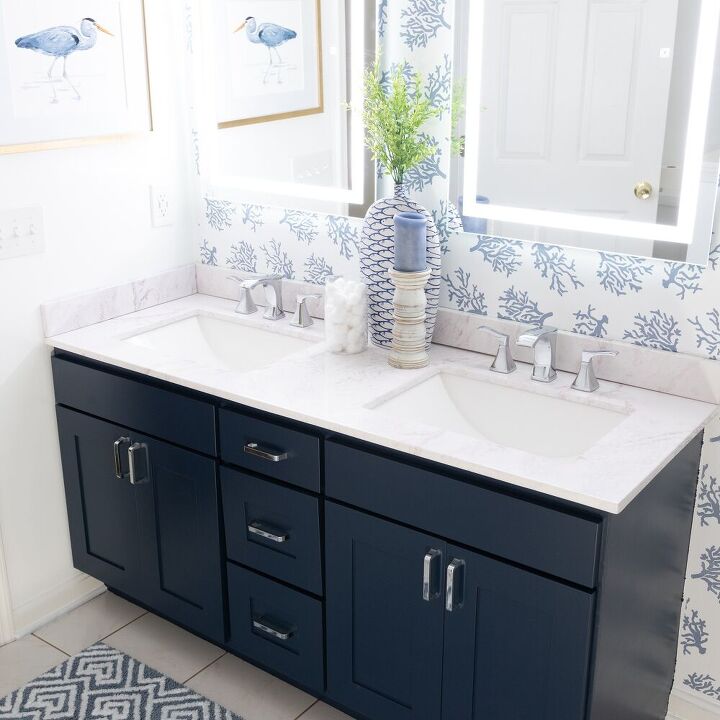
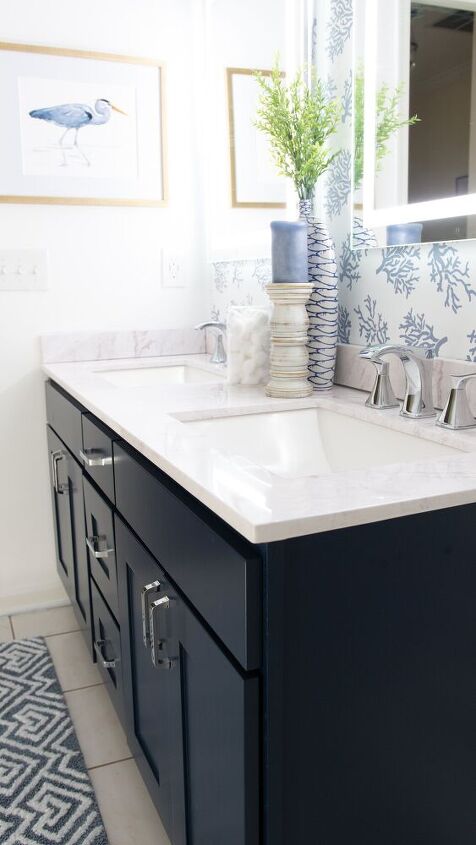
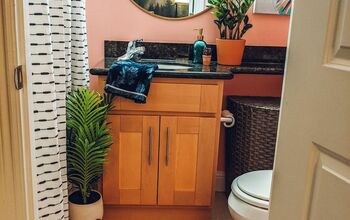
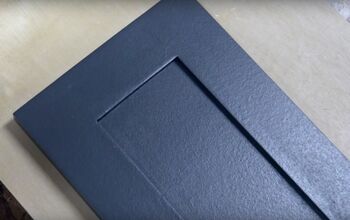
We chose the Shaker in our own choice of color (aka a custom color) called Naval to modernize the raised panel doors that we had on the contractor grade vanity. When in doubt, pick shaker! They’re decor neutral, modern, and great for resale.
3. Send in your order and the doors come in about 4-5 weeks.
SUPPLIES:
- Paint - Nieu Cabinet Doors will give you the Sherwin Williams paint color
- Bin 1-2-3 Primer
- sandpaper 80-150-220 grit
- Paint brush - we used foam brushes and the zibra square brush
- 4” foam roller
- scraper/spreader for wood filler
- Blue tape
- Denatured alcohol
- Rags
PREP THE CABINET
1. Remove the doors, hinges, drawer faces and false drawer fronts.
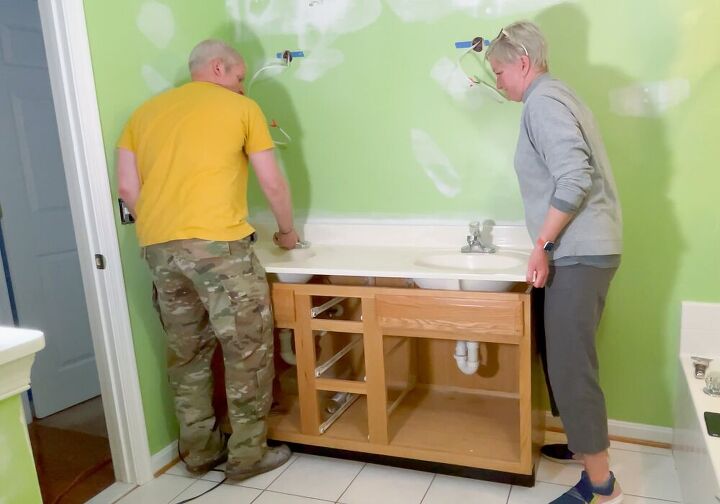
2. If you are changing out the vanity top remove it and the faucets/plumbing. The best part is that you don’t have to! You can leave yours right in place, we were just due for an upgrade.
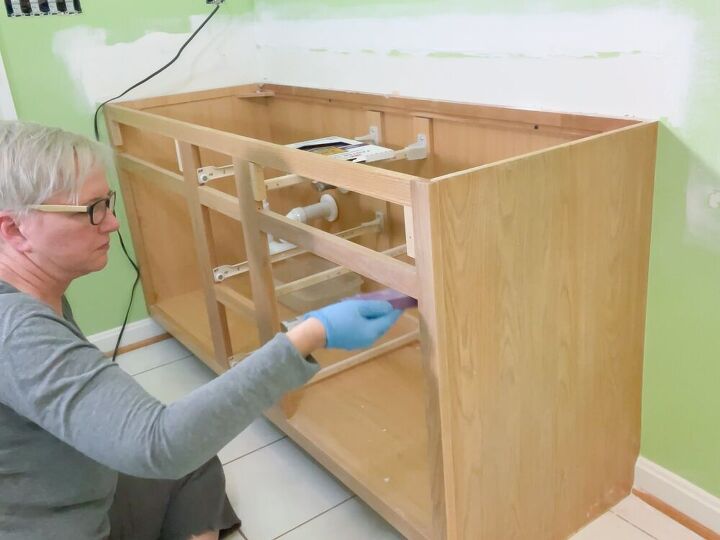
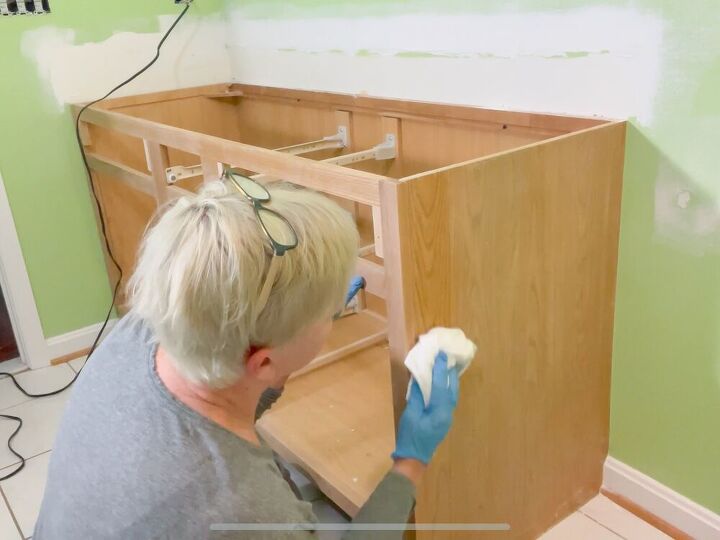
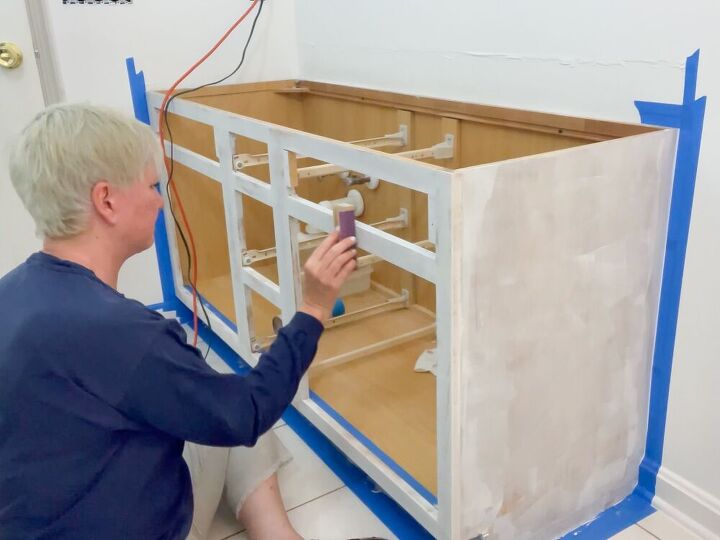
3. Lightly sand the cabinet to ensure good paint adhesion and then remove the dust with a rag and some denatured alcohol or a tack cloth.
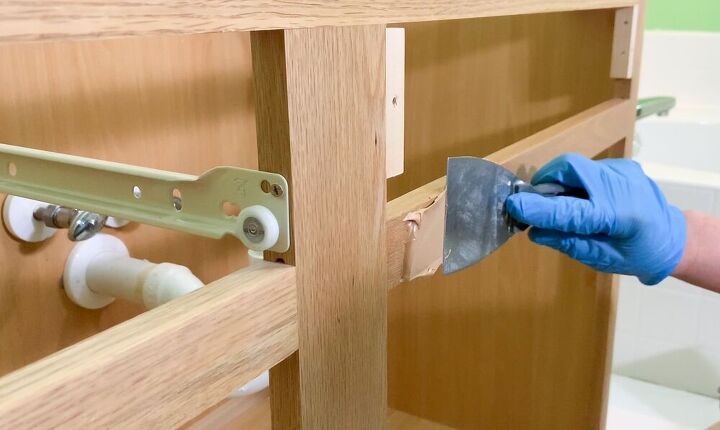
4. If you have a contractor-grade cabinet you will want to use a wood filler to smooth out/fill in the grain. We used a product that gave great results but was hard to work with and required a lot of extra sanding because it dried so quickly. Ask your local paint expert for a product recommendation!
5. Sand the filler again - we needed the 80 grit here to start because we used too much. You should be fine with 120-150 and finish with a 220 grit.
6. Vacuum the dust and wipe it down again with denatured alcohol.

PRIME THE CABINET
1. Tape any walls or floors you need to protect.
2. Prime all of the wood surfaces of the cabinet with the primer. Make sure you don’t have any drips or runs to ensure a good surface at the end - if you do, just lightly sand it away with 220 grit sandpaper once the primer is dry.
3. Wipe it all down once again with denatured alcohol.
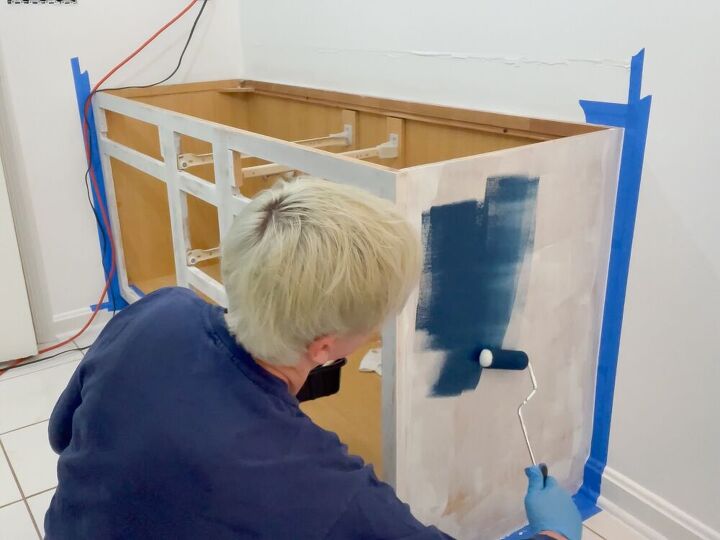
PAINT THE CABINET
1. Paint inside the door openings first then roll the face of the cabinet. This will ensure a smoother finish on the edges of the door openings. You do NOT need to paint the inside of the false drawer openings because those won’t be seen.
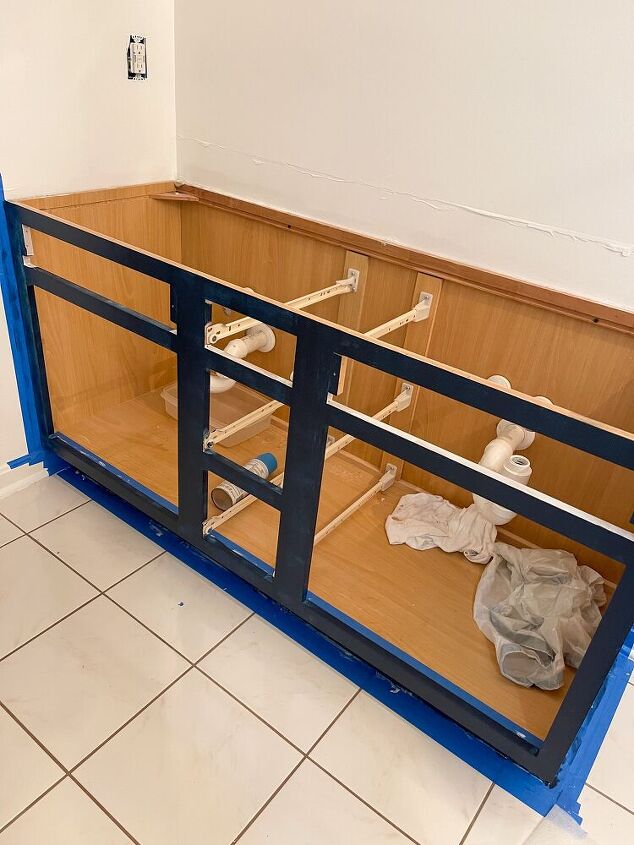
2. Paint the cabinet using light coats to get a nice build up and ensure you don’t have any drips or runs. We did three coats because it was such a dark color.
3. Once the paint is dry, pull off any tape from the walls and floors.
REHANG THE DOORS AND DRAWERS
Tools Needed:
- Hinges
- Drill
- Drill bits - recommend the centering bit kit
- Square
- Screwdriver
- Level or straightedge
- Couple of clamps
NOTE: You can order hinges through Nieu, or re-use your existing ones. If you already bought new hinges at a local hardware store, you can also use those! If sourcing your hinges elsewhere, make sure to buy the hinges with adjustment screws so you can get everything lined up perfectly once installed.
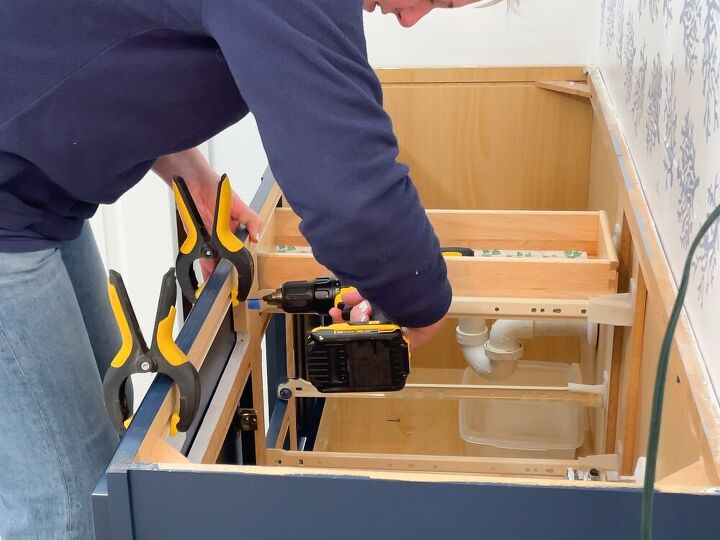
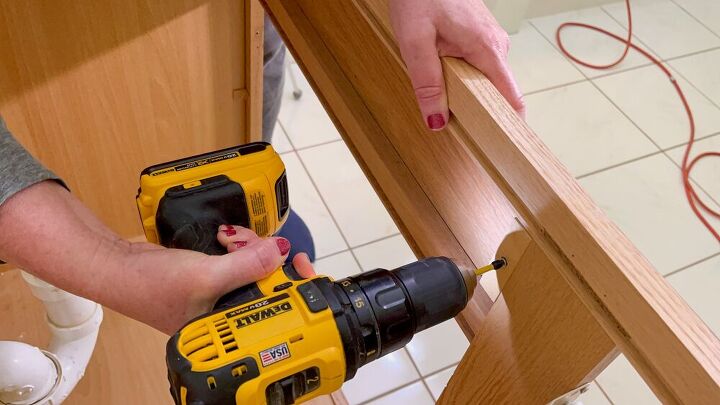
1. Mount the hinges to your doors. You just need a square and a drill to mount them properly to the door.
2. Attach the doors to the cabinet. Clamp a level or piece of wood across the bottom to get them all the same height, then drill your pilot holes and drive the screws.
3. Add your door knobs or pulls.
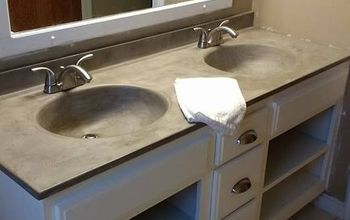
If you removed/replaced the vanity top, put the new one on, reconnect the plumbing and enjoy your new vanity!
We are SO glad we decided to renovate and repaint our existing vanity rather than replacing it - not only is it more affordable but it is easier AND reuses what you’ve already got at home rather than tossing out the cabinet, tearing up the floor, etc. We were absolutely thrilled with our partnership with Nieu Cabinets and are already thinking about what other cabinets we can makeover (they even do custom doors for IKEA cabinets)!!

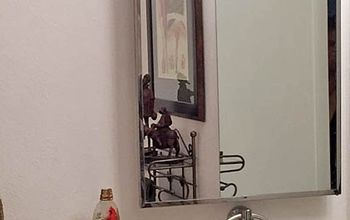
We gave our entire bathroom a refresh because we were so excited about the cabinet! We stenciled the walls, added new mirrors and replaced the vanity top - we are in love with the result! Need a reminder of the before? We did too!
Curious about other DIY projects that can increase your home's value?
Resources for this project:
See all materials


Comments
Join the conversation
-
Really pretty, it looks so fresh .
-
I initially thought it was wallpaper. I like stencil idea. Going to try that in my guest bath.


Frequently asked questions
Have a question about this project?
Beautiful! I am going to attempt to stencil as well. What size coral stencil did you use? And was the wall color white ?
I just scrolled through this whole tutorial. Your vanity color and wallpaper spoke to me and I responded. What a wonderful result. I wish our vanity was that good that we could salvage. Maybe I could, Just change the top. I a finding hope in just the color. Your bathroom looks amazing. Can I just ask you if your bathroom matches the rest of the house? I always wonder if it needs to match the rest of the house or if just makes you happy. I can always dream of the looks I want for our home but sometimes I think as long as a room makes me happy I can be satisfied. :-)
The vanity looks beautiful, but I could not find that color on their website. Also if you select a color the price is double that of unpainted. Am I correct that the doors arrive prepainted? I would hate to receive unpainted doors and a can of paint!lol. I understand you have to paint cabinet box but that is a lot easier than painting doors!