


Library Closet

Downsized and needed to put books in ONE place. This project took a bit longer than most people would be able to do it, but I was SCARED to mess up and would walk away when I ran into a problem to remain calm and think it through. I still made mistakes, but the finished project makes me happy.
My only real advise: Measure and remeasure, to make sure you do it correctly and cut it yourself instead of running back and forth to big home improvement stores. They were over 30 minutes away for me one way!
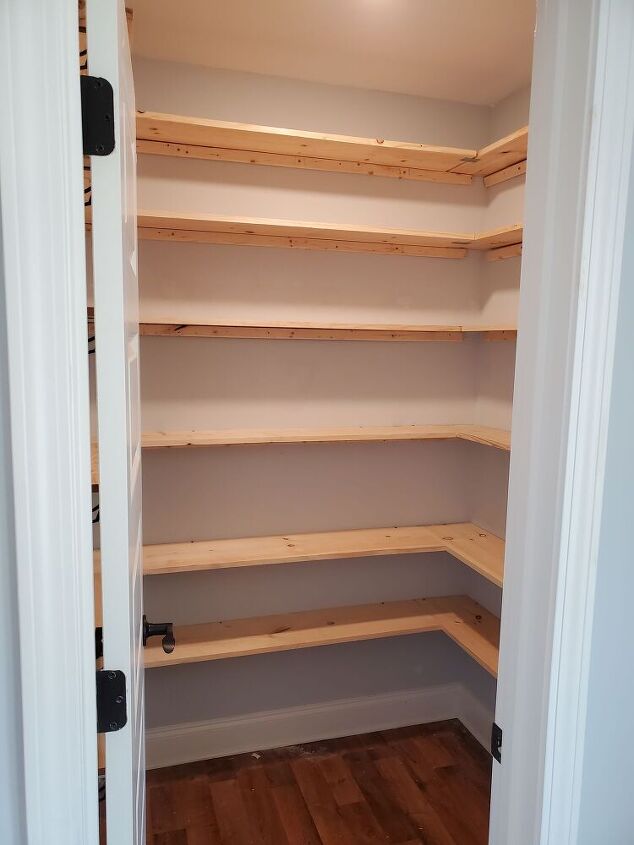
I removed all builder grade wire shelves that was set up for a bedroom. Then I patched, sanded and painted holes. Since this was my first major DIY carpentry project, I took it real slow. I was scared!
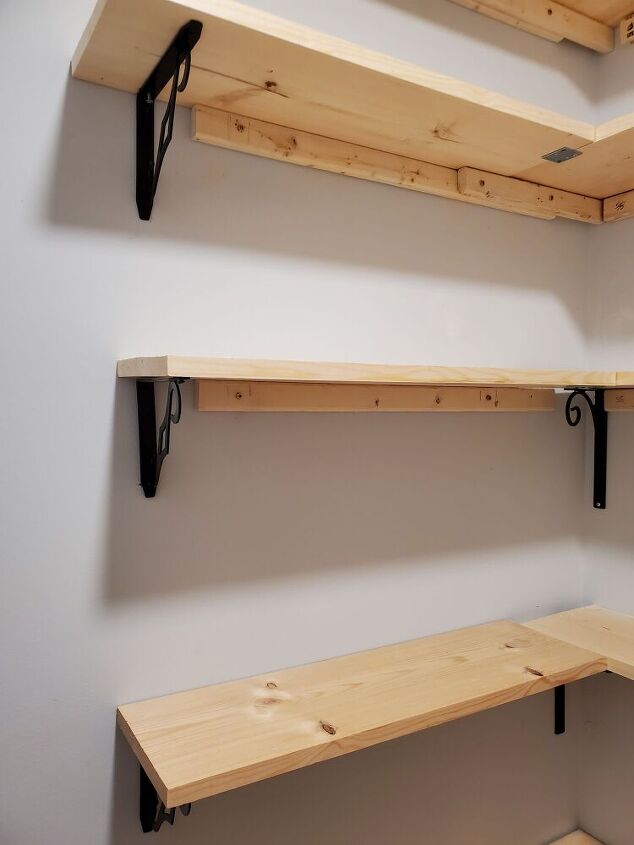
I looked at pantry DIYs a lot! I bought a really good stud finder that also located electrical behind walls and marked the walls with pencil for studs. I measured (I thought correctly) but made all a bit short, so braced all with decorative brackets and screws with wall brackets because the studs did not extend to the locations I needed. Had to redo a couple of longer boards but saved the shorter "mistake" boards for my next project. I had all boards cut for me at Lowes and when their machine "broke" I had to get recuts (on new boards) at Home Depot. This picture is of the left side and is shorter on purpose to allow the closet door to open without banging into shelves.
You can see, even after a recut, I messed up. It was off about 1/2 inch or less, just enough to frustrate me. I braced all with flat brackets to make stronger and secure. My first carpentry project and there are errors, but all came out like I wanted. I left wood natural to match the Murphy bed we had installed (professionally) to match. I then sanded and then sealed with poly.
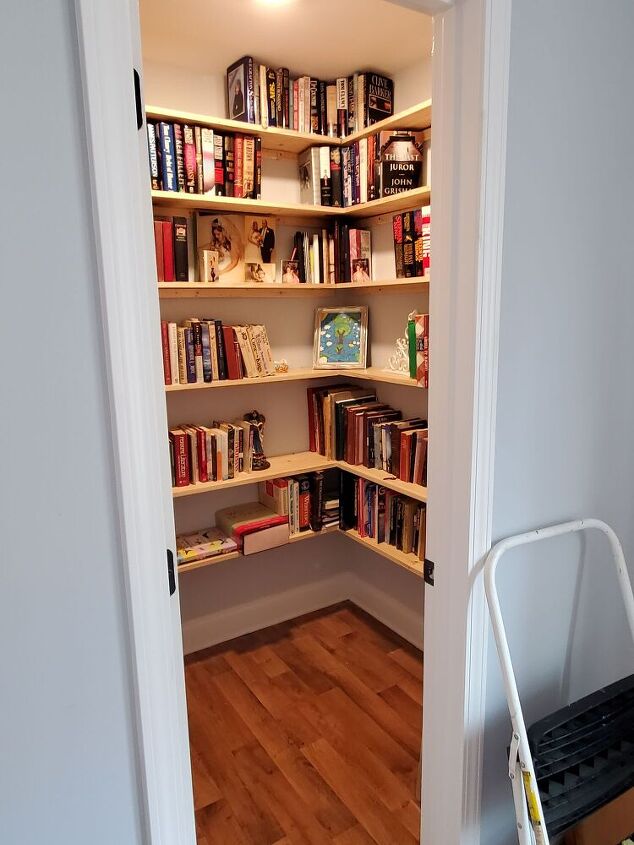
This is the bookshelves with all my books in one place. I put all children's books on the bottom two shelves on the left side. I left the book shelves a bit higher on the bottom so I could place small toy box and two cradles with stuffed animals and dolls that my grandkids play with when they visit. (I do have a few more books on bookshelves that are on either side of Murphy bed unit.)
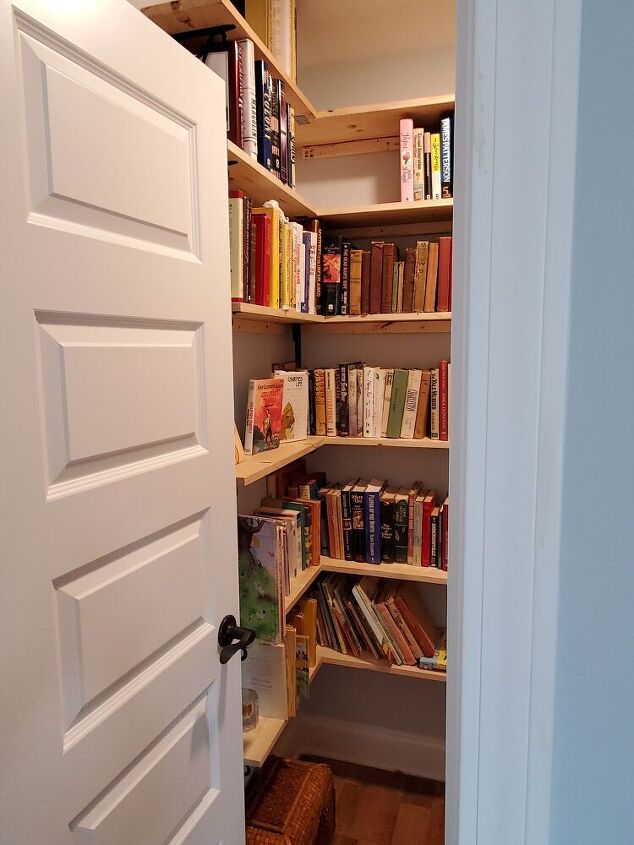
This is the view from the left side showing how easily the door can open and close. When guest come over, door can be left open for them to grab a book of their choice while relaxing or closed for a calming bedroom look.
Resources for this project:
See all materials


Comments
Join the conversation
-
Hey, at least you didn't give up. What you did was acceptable. I have seen worse ( I mean it). You did a good job. Looks great. I myself still "measure twice, cut once". A few more projects and you'll be a pro.


Frequently asked questions
Have a question about this project?