


Decorative Moldings for Furniture | Dresser Makeover
Hi Hometalk! I hope you guys are having a great day! Giving life to old furniture is exciting! Whether you restore it to its original form or paint it, there is something really fulfilling when it's done!
But there are always pieces of furniture that are plain or outdated. And to give a new character and interest, sometimes painting it is not just enough. So, I will be sharing a dresser makeover where I dressed it up with beautiful Decorative Moldings.
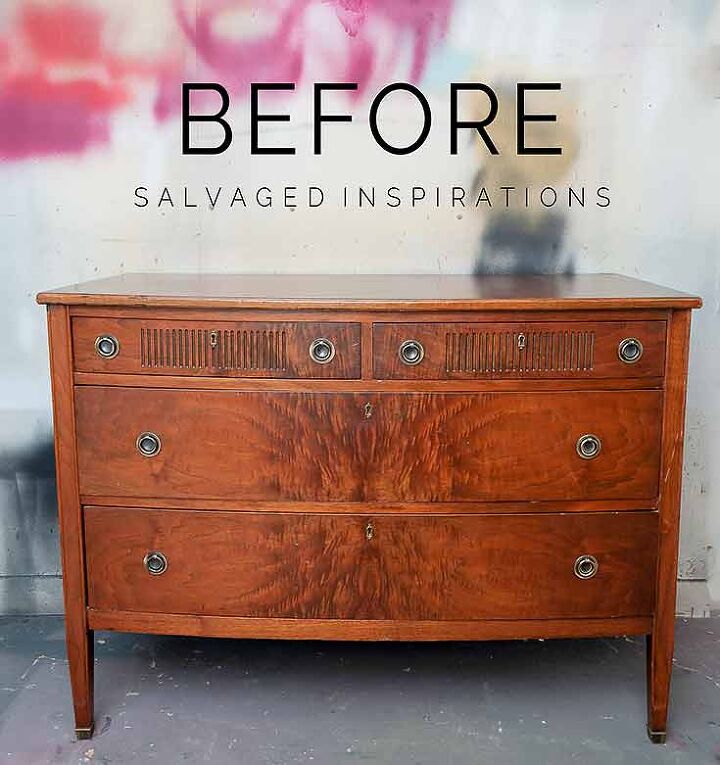
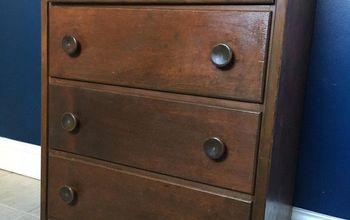
This is the dresser I started with. It is pretty well built and still a very solid piece. But the design is not to my liking. I cleaned the whole piece and then sanded it from top to bottom to smoothen the scratches.
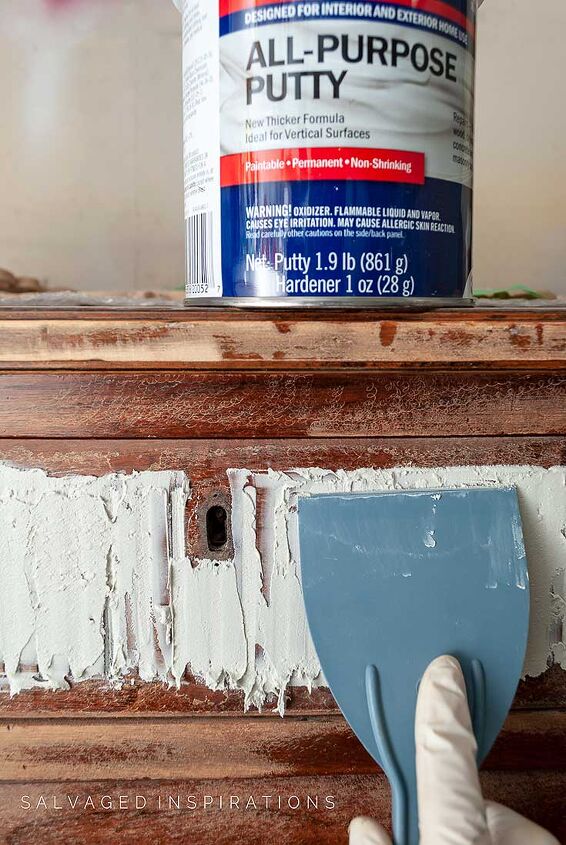
I filled the old design and the mirror holes with all-purpose putty.
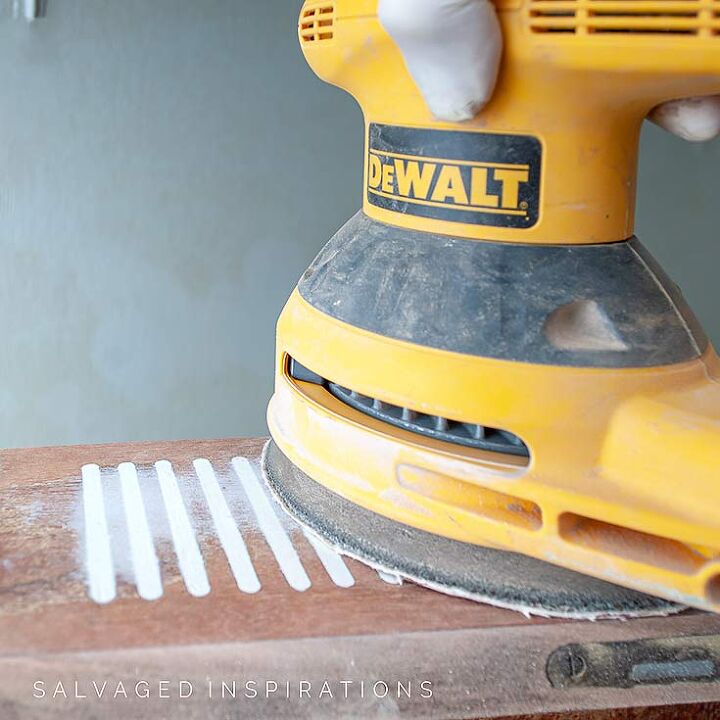
I sanded the filler after it dried for it to be ready for priming and painting.
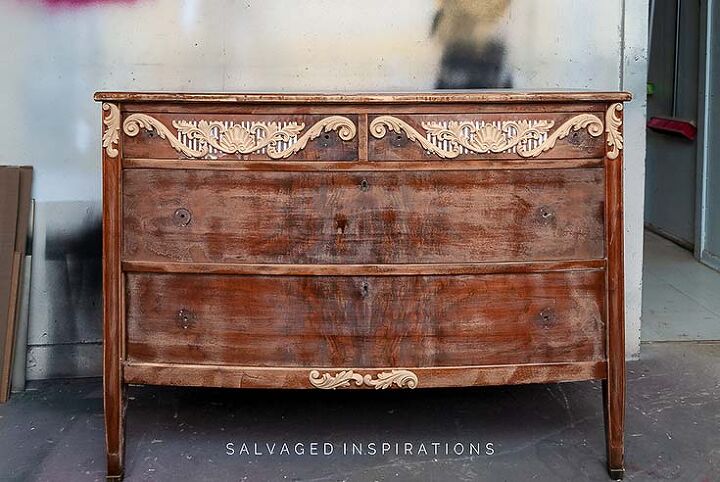
Now for the fun part, I added the decorative moldings to the top drawer, corners, and bottom lip. There are different types of decorative moldings but I suggest you use a versatile one as I used. They are heat-bendable and even cut them and create your own design.
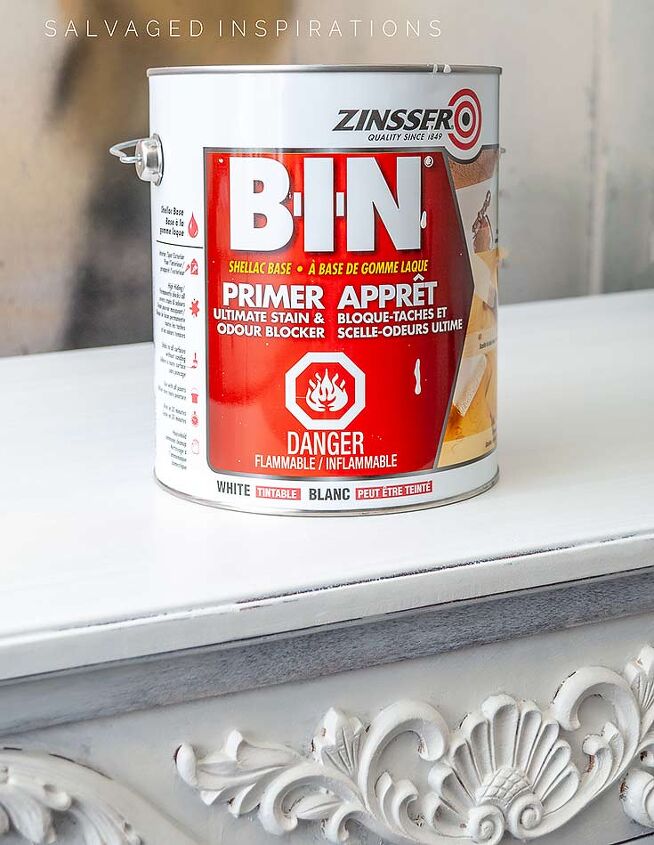
After that, I primed the whole dresser with a stain-blocking primer.
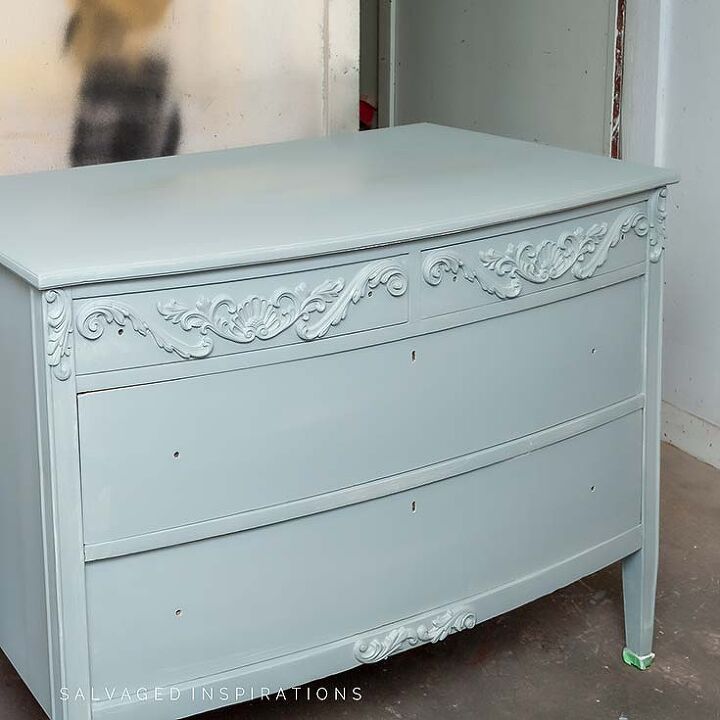
Then I painted it with a custom color. About 20% of a blue-gray with green undertones chalk mineral paint and then 80% of light gray with soft blue undertones chalk mineral paint.
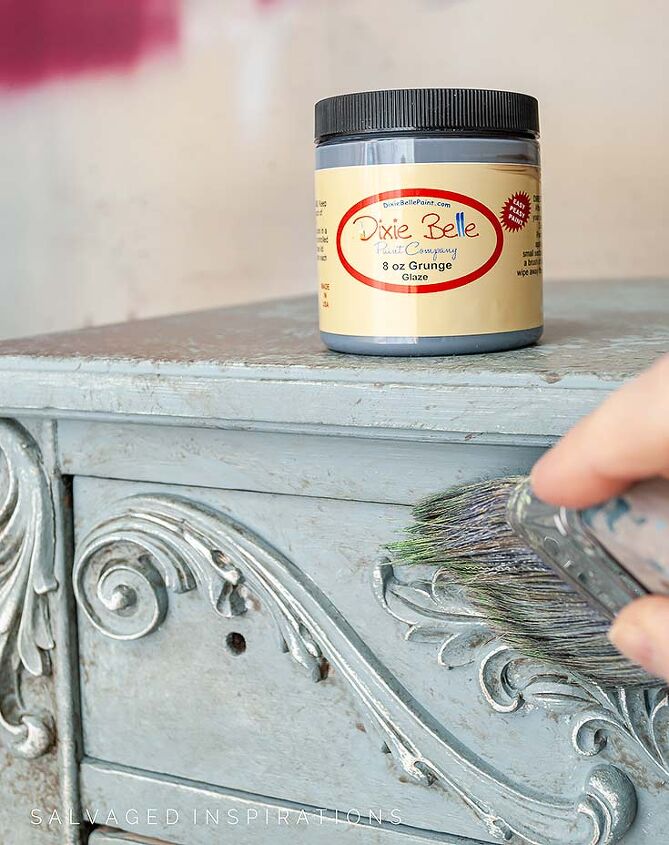
Then I glazed the paint to have an aged finish. I also glazed the molding to have a unique finish that adds depth and dimension.
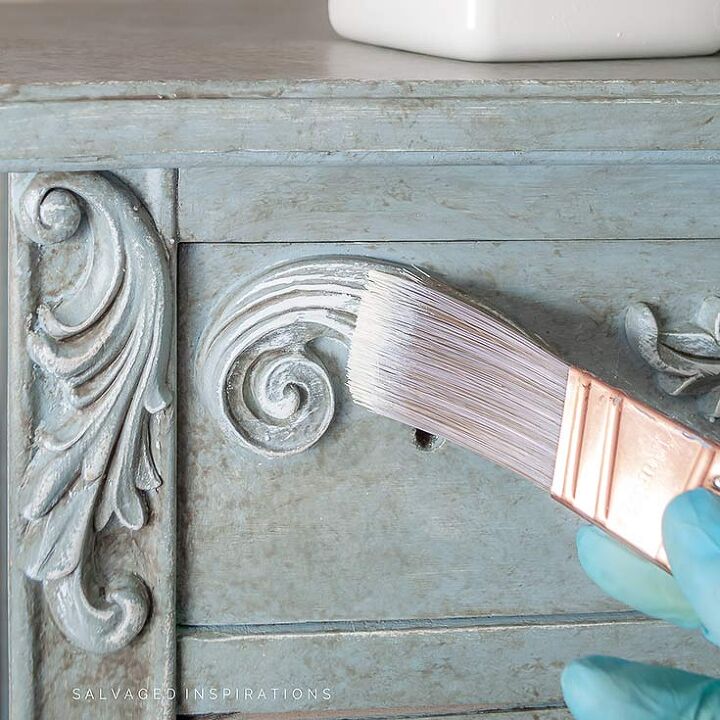
To lighten up the moldings, I dry-brushed it with a white with yellow undertones chalk mineral paint.
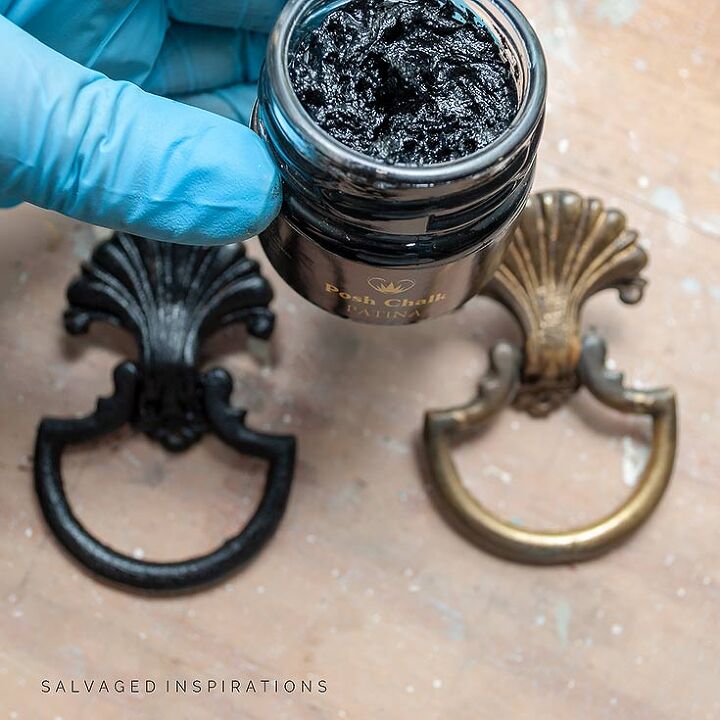
For the hardware, I used Black Chalk Pigment giving the knobs a beautiful black patina finish.
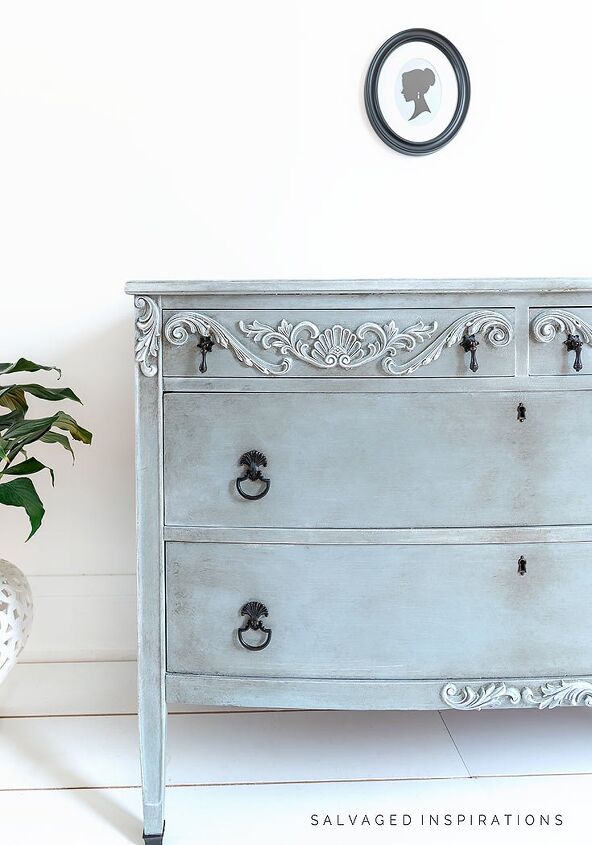
After spraying it with 3 coats of top coat to seal and protect. Here is the finished look! It looks super lovely with the moldings!
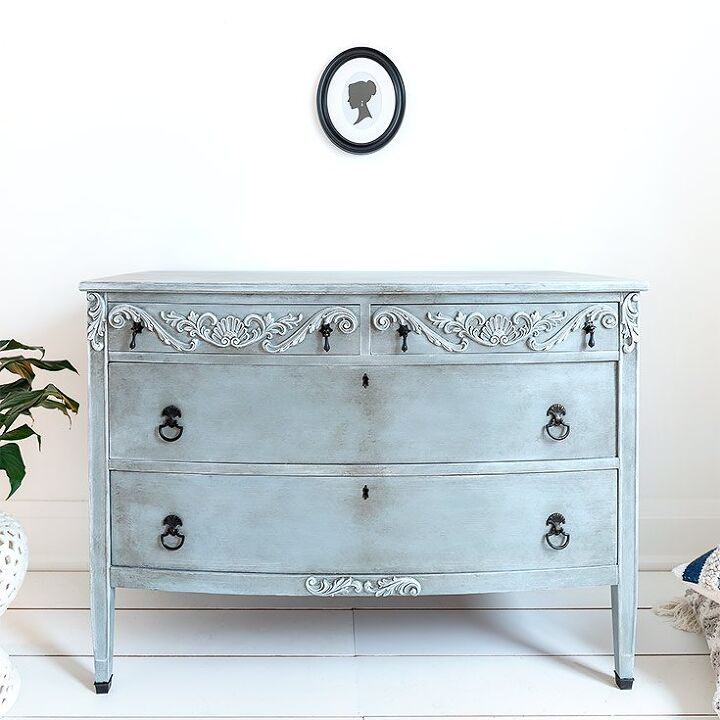
It really has a different character compared before. I am so happy that I rescued this old dresser or else it would be really sad ending it up in a landfill.
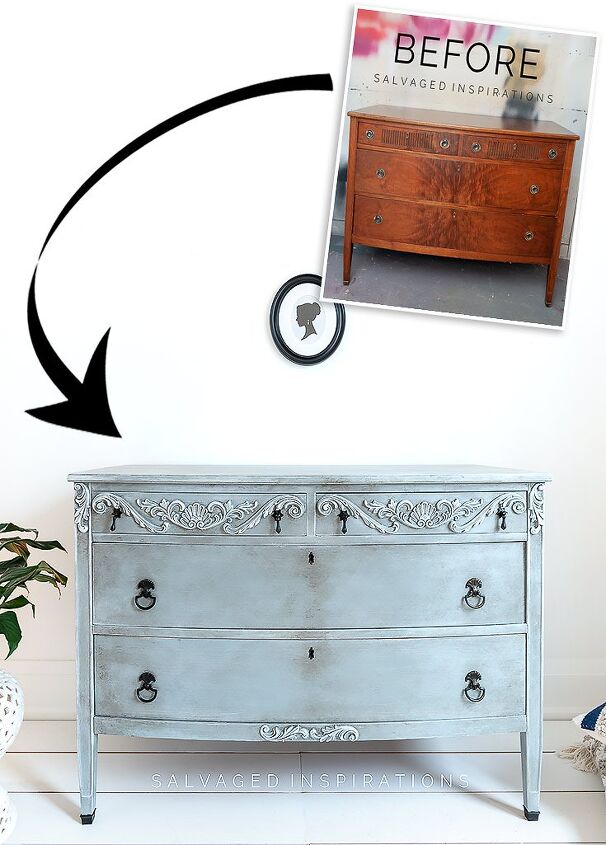
Here is another look at its before and after! I hope you've enjoyed this little makeover and inspired you to use decorative moldings in your future projects!
For original blogpost and source list:
For the Video Tutorial of this project.

Comments
Join the conversation
-
I liked the original straight line design on the top drawers - a shame to fill it in.
-
Love it! Great contrast with the black pulls too.


Frequently asked questions
Have a question about this project?
I think you forgot the center pulls or knobs before you snapped the finished photo
I see empty holes
Looks French...love the original dresser too....just a color change?