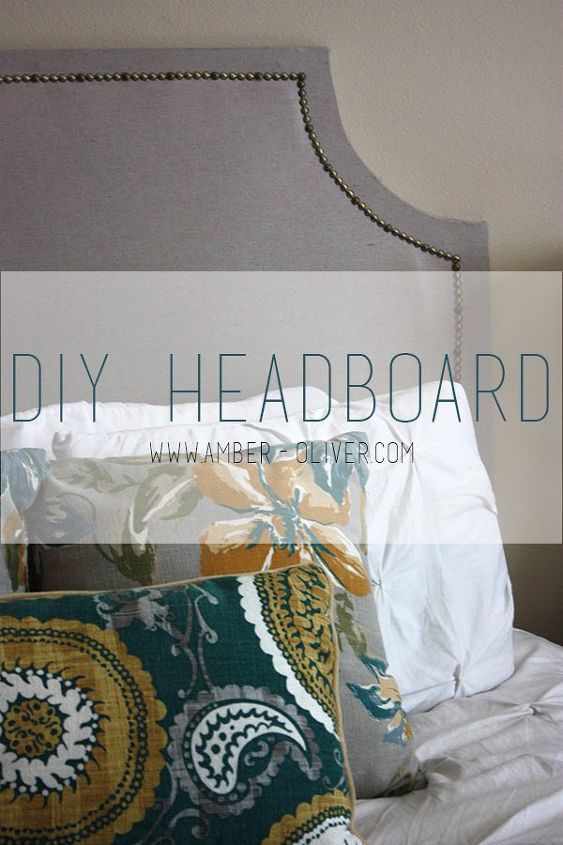
DIY Headboard

8 Materials
$50
3-4 Hours
Medium
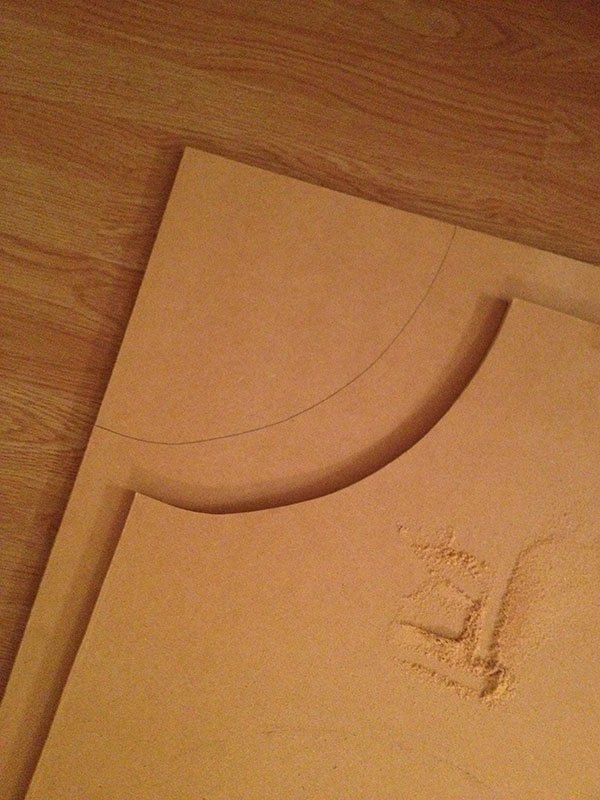
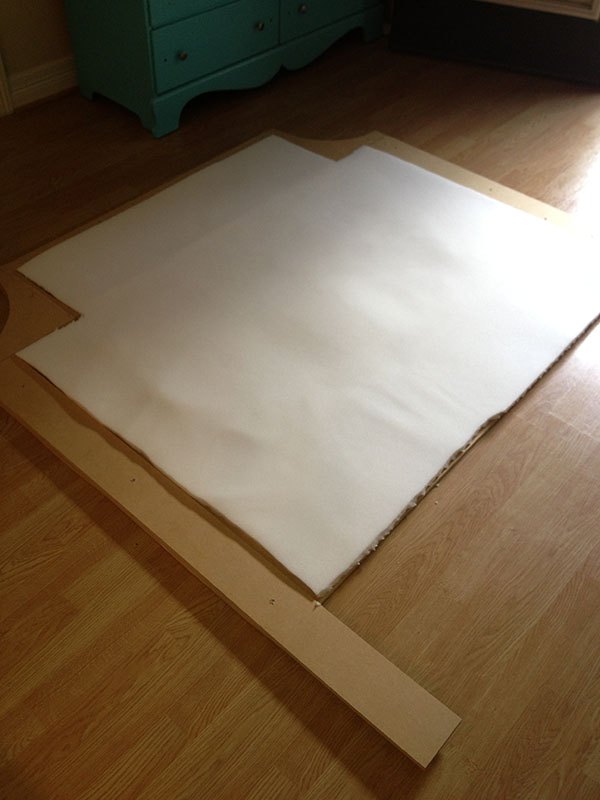
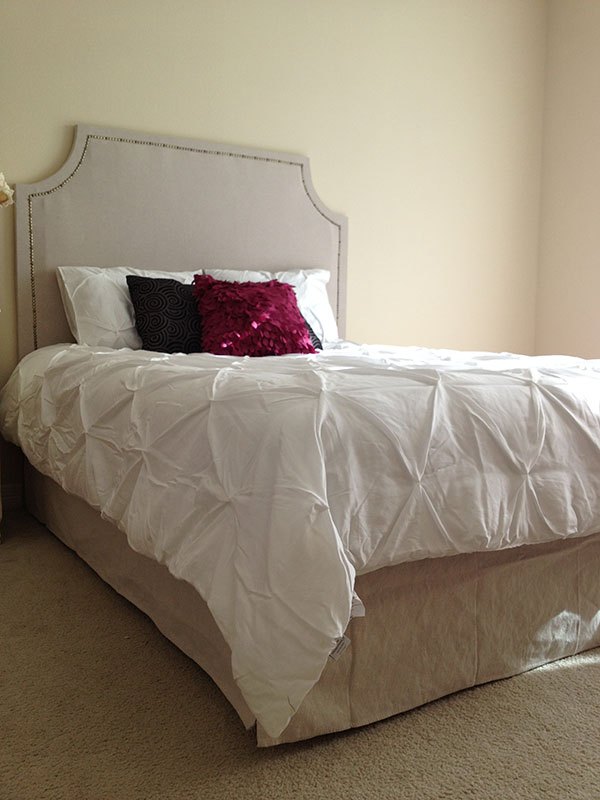
When I moved into my first apartment by myself I, like many recent graduates, had a hodge podge of furniture. I knew for my bedroom the first thing I wanted to do was get a new headboard. The one I'd used in college was really cute but I was ready for something more "grown up". I found gorgeous padded headboards online but they were all wayyyy out of my price range. For Christmas, I got a jigsaw from my mama and decided to create the design myself.
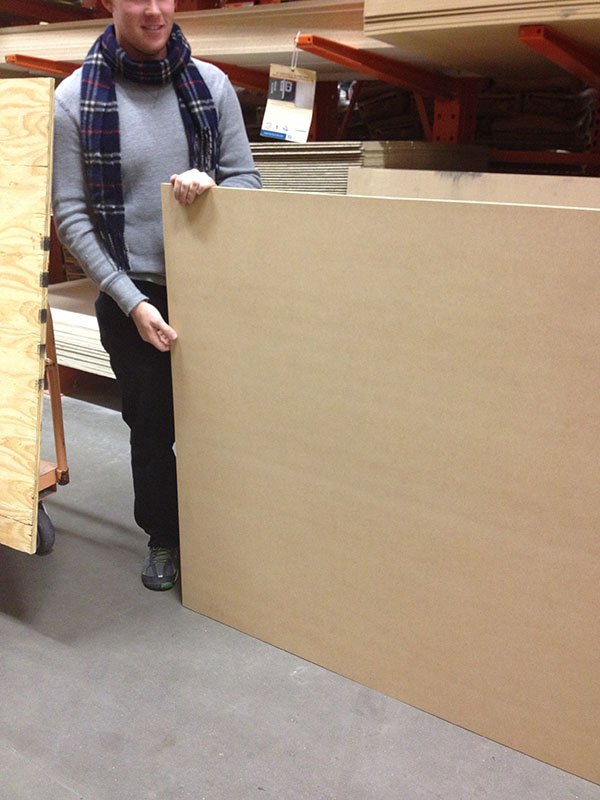
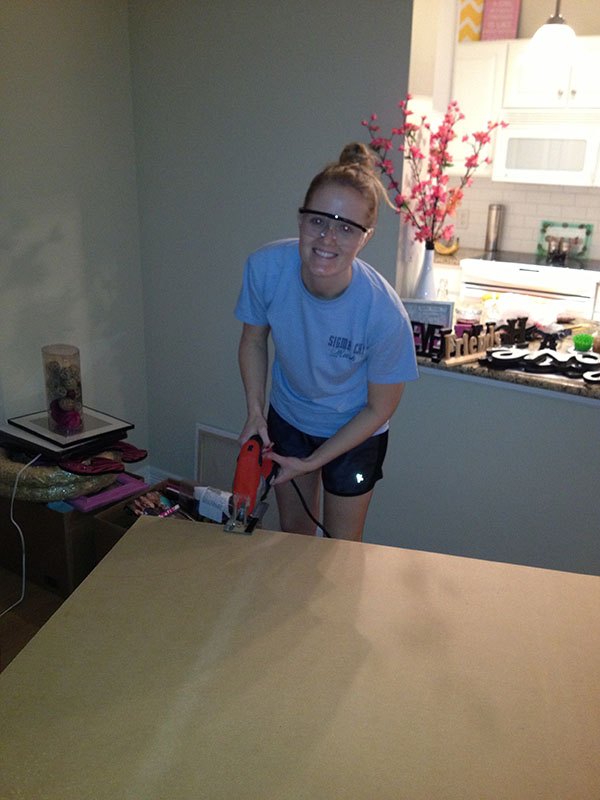
Home Depot was nice enough to cut the board to the right width and cut the legs for me so all I had to do was cut the design I wanted and added the padding and upholstery.
DIY Padded Headboard


Supplies Needed:


MDF Panel


Egg Crate Foam Panel


Staple Gun


Power Drill


Jigsaw


Screws


Upholstery Fabric


Nail head trim


You can cut any design you want along the top. Just make sure you flip it and trace it on the opposite side so it matches. I used a lampshade to cut the large circle on mine. The thickest MDF Panel I could find was 3/4 in thick. After I cut the design in the corners I flipped it around and nailed it to the backing. I then put the legs underneath. That way I had a sort of border for when I added the nail head trim. I did this for three reasons:


1. The nail head doesn't go into the padding very easily


2. I wanted the edges to be sharp/crisp corners instead of soft and rounded


3. It makes the headboard sturdier


After you've attached the legs with screws you can then fill in the middle with the padding - just cut to size and either glue or use a staple gun to attach. You are now ready for the fun part! I really liked the look of linen but didn't really like the price. I used a canvas drop cloth from Home Depot and saved a TON of money. I even used the scraps to make a bed skirt! (Simply staple to the box springs). Cut your fabric as close as you can then wrap around and staple to the headboard. Honestly, you can change it up in the future if you want to redecorate - just pull out the staples. My biggest tip is to use THIS nail head trim. It comes on a roll that you only have to hammer about every 10th one. This speeds up the process and helps you get straight lines! Warning- It's super sharp so be careful when unrolling it.
Amber Oliver
Want more details about this and other DIY projects? Check out my blog post!
Go
Frequently asked questions
Have a question about this project?
Comments
Join the conversation
2 of 48 comments
  • Vallie Cross Vallie Cross on Oct 29, 2015
    "For Christmas, I got a jigsaw from my mama and decided to create the design myself." This line brought a huge smile to my face. You go, girl! You did a terrific job!
  • Debi53 Debi53 on Sep 22, 2018

    Love it! This was fabulous.

Next