


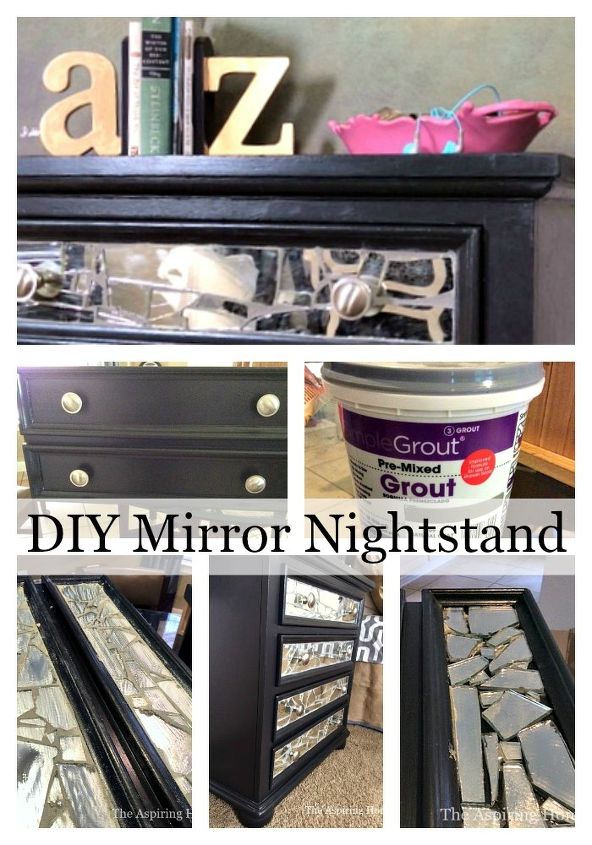
Nightstand Makeover

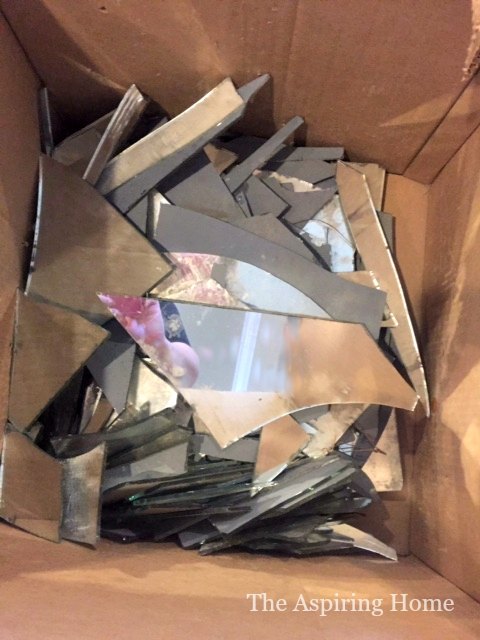
How are you? How's life? Me- I am happy to finish this little project... it was 10 years in the making. Let me explain... picture it- I am overjoyed at the fact that we were redoing our oldest daughter's room out in Cali. The space was the original master and I had a fantastic idea! Why not take the massive closet with the ginormous sliding mirror doors and turn it into TWO closets! and... while we are at it- why not make them completely separate from each other with beautiful louvered closet doors? Being the type of person I am, I had grand plans for the ginormous mirrored sliding doors as well... didn't have a clue what that plan was BUT I knew I had to keep them intact. I was so stinking proud of myself- I was really thinking out of the box. Ha! All went according to plan for about 5 seconds.... yes you guess it. The ginormous mirrored doors fell.. shattering into pieces. Fortunately no one was hurt and the mirror shards made their way into a heavy-duty cardboard box. Flash forward 6 months.... we received the news that a move would be taking place and back to Texas we went - mirror shard box and all. Let's now move forward 10 years... the hubby is cleaning up the attic and came across my cardboard box of mirror shards. A challenge was put forth - I had to do something creative with the mirror or it was going to the dumpster. Challenge accepted mister.
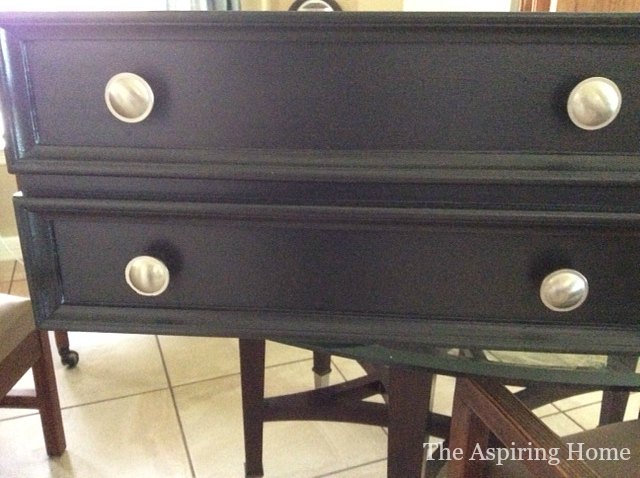
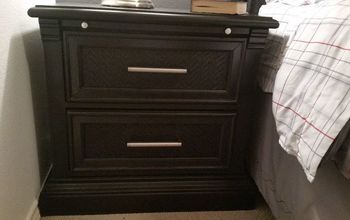
I have been updating my middle daughter's bedroom slowly. Much too slowly. She has a great nightstand that needed a pick me up, the mirror would be a fun accent... I thought.
Now let me tell you, my methods of achieving the nightstand makeover are wrong. In fact I did everything and I mean EVERYTHING against the rules. The whole project kinda stayed in the same vein as when I accidentally shattered the mirror in the first place.
Having warned you- I must say that even though I totally went rogue on this project- I learned a lesson (and I know I went rogue because I do know how to tile, lol, really I do).
I learned that sometimes you fail due to not being prepared and sometimes... you succeed in spite of yourself. Here's to success in spite of me!
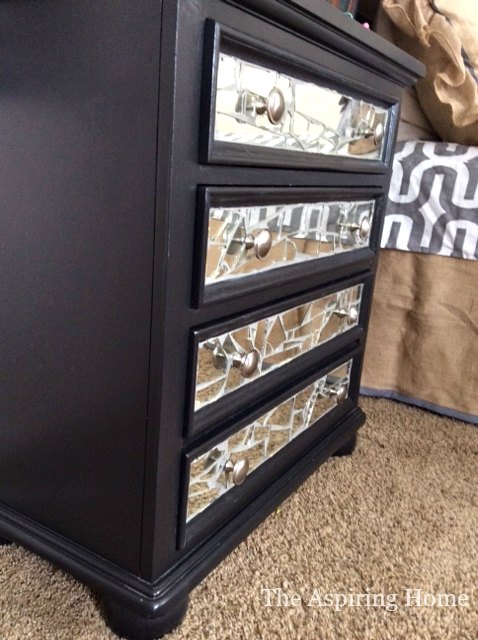
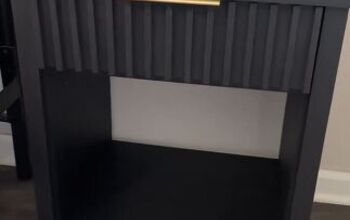
See? not too bad right? Let me show how I "accomplished" this beauty...

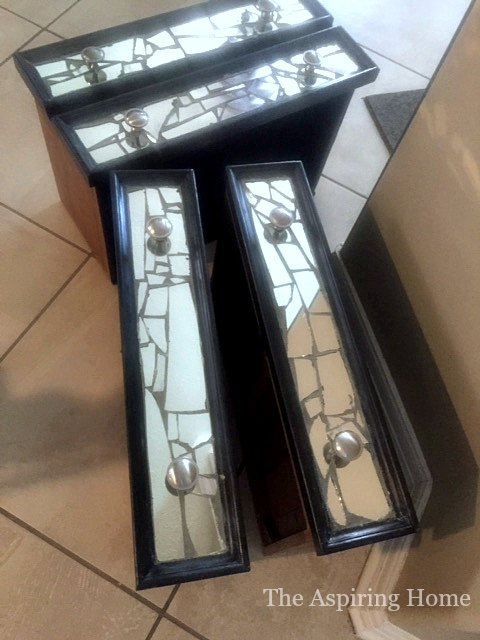
Step 1 - Decide on the layout of the mirror pieces. If you need to make cuts, use a mirror cutter ($6 at Hardware store). Using an appropriate adhesive such as liquid nails to attach pieces in your desired pattern.
What I did... "Hey, look that piece just about fits... let me grab my pliers and take off the end. Ok... that doesn't look too bad. The slightly primitive look will lend character. I recite this through out the process by the way.
Oops- out of liquid nails... Gorilla Super Glue.. that should work." It EXPANDED - YIKES! I had to break out the cheap tweezers and pick away.
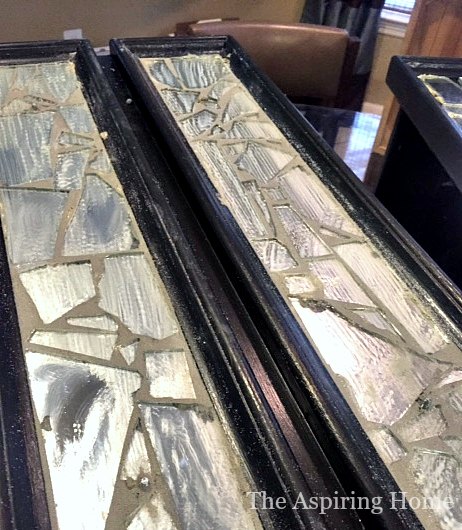
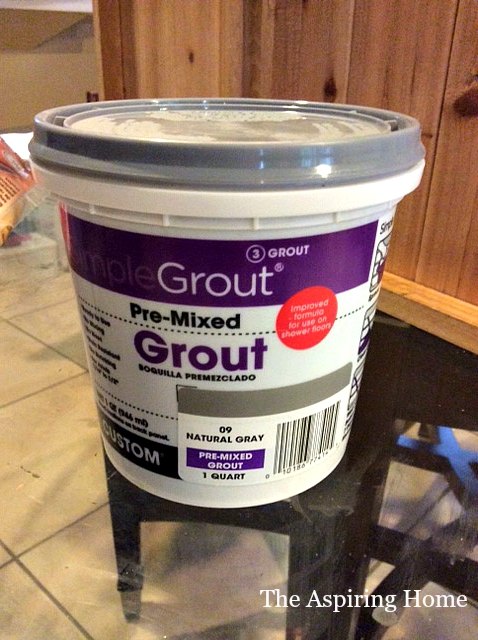
Step 2 - After allowing the adhesive to dry, begin the grouting process using a non-sanded grout. Follow instructions on the grout container.
What I did... I asked my hubby to pick up grout on his way home from work. I didn't specify how definite I was on non-sanded grout, at least the color was right.
After tons of buffing and wearing out a few non scratch sponges and a bottle of homemade glass cleaner... I ended up with this.
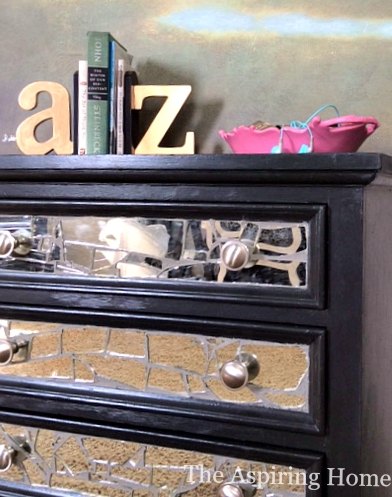
Hubby and I both won the challenge I updated a nightstand and I let him throw away the extra mirror shards.
Here's the Pinterst pin for this post- you know in case ...you want to try it... some day. Perhaps I am not the only one with 10 plus year old mirror shards hanging out in the attic. :)
Till Later,
Joy
Resources for this project:
See all materials


Comments
Join the conversation
-
Cool idea 💡!!
-
Very pretty! Love it.


Frequently asked questions
Have a question about this project?
Will a glass cutter work instead of the mirror cutter? I bought one a few months back that I’ve still not tried (lol) but the wheel part looks the same.
Could you use LePage No More Nails?
Love it! I can do this. However, I would put glitter grout. I'm old, and I still love glitter as much as I always did, so I don't think my infatuation with it will peter out any time soon. I don't have any mirror shards stored away, but I would definitely break one. You say you wanted non-sanded grout, but ended up using the sanded one your husband brought home. What is the difference for this project?