


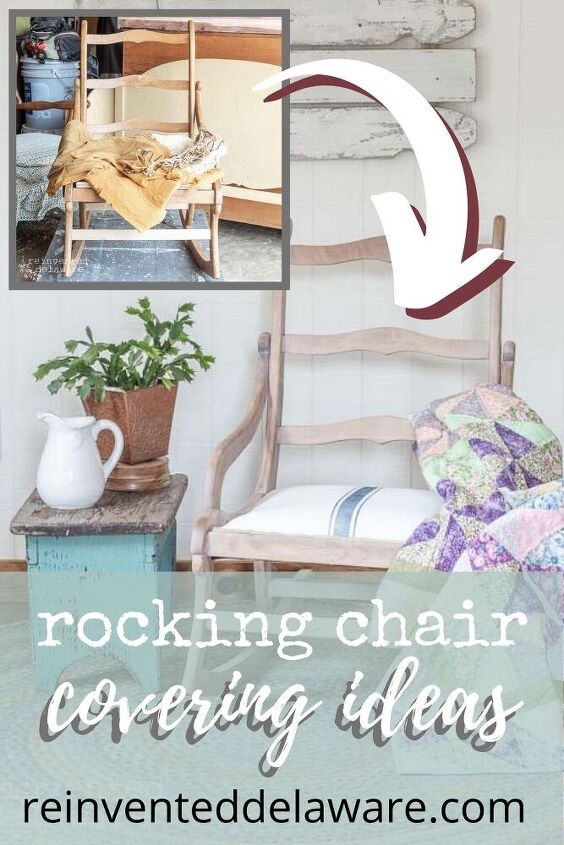
Rocking Chair Covering Ideas

Are you looking for some rocking chair covering ideas? Here’s an easy one you are going to love and will want to do yourself!
Let’s dive in!

DIY upholstered rocking chair
Do you like to go to yard sales? We love it! Especially after the year we have had over the last year and a half of restrictions due to COVID.
Both hubby and I have been avid yard salers over the years of our marriage. There’s something about getting a deal. And the social aspect of it too.
Listening to other people’s stories and connecting with people in the community is a huge plus when shopping at yard sales.
This happened just a couple of weeks ago. We decided to use the Yard Sale Treasure Map iPhone app to help us find some local yard sales.
Our last stop of the day was an estate sale of sorts. I say that because the owners of the home had passed away and the children were holding yard sales weekly at their parent’s home until they could sell the home itself.
They weren’t crazy about getting rid of all the treasures their parents had accumulated but realistically, they couldn’t keep it all. The family had already gotten the items they wanted and there was still a bunch of items left.
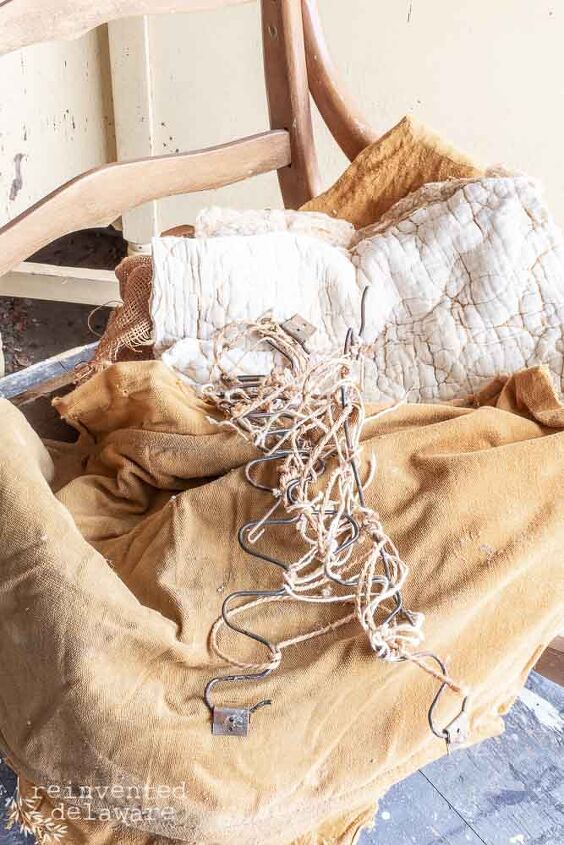
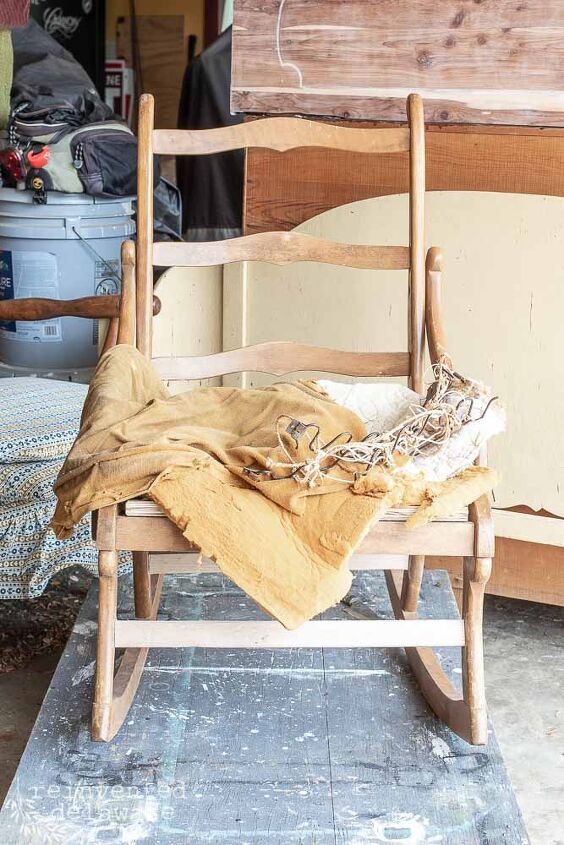
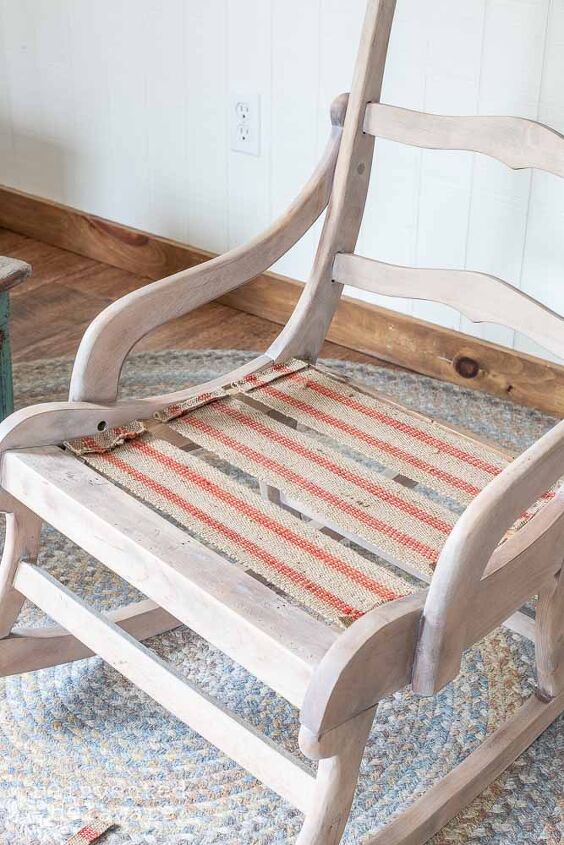
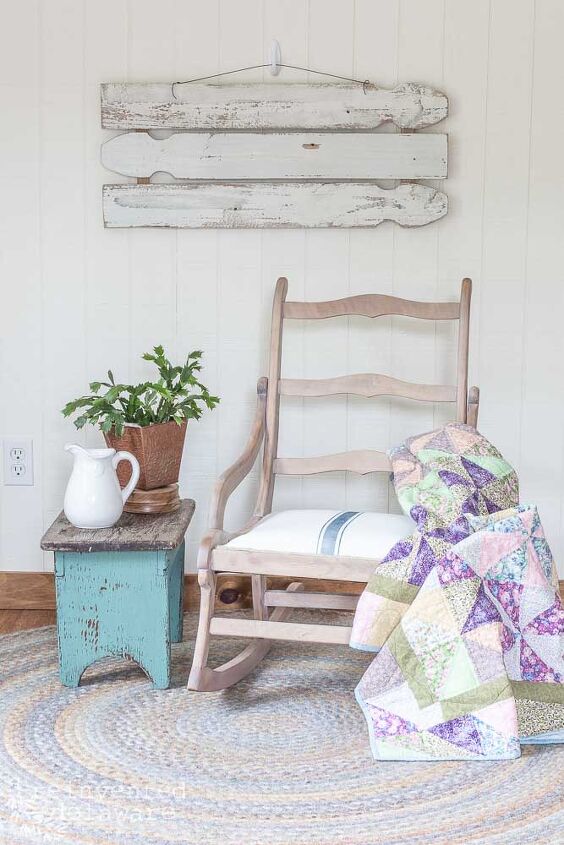
Including this rocking chair. It was broken, the velvet upholstery had disintegrated into dust, the springs were broken and the wood frame was in sad shape.
Well, you know by now that we love the old and broken, the downtrodden, the forgotten, the leftovers. They have a special place in our hearts 🙂

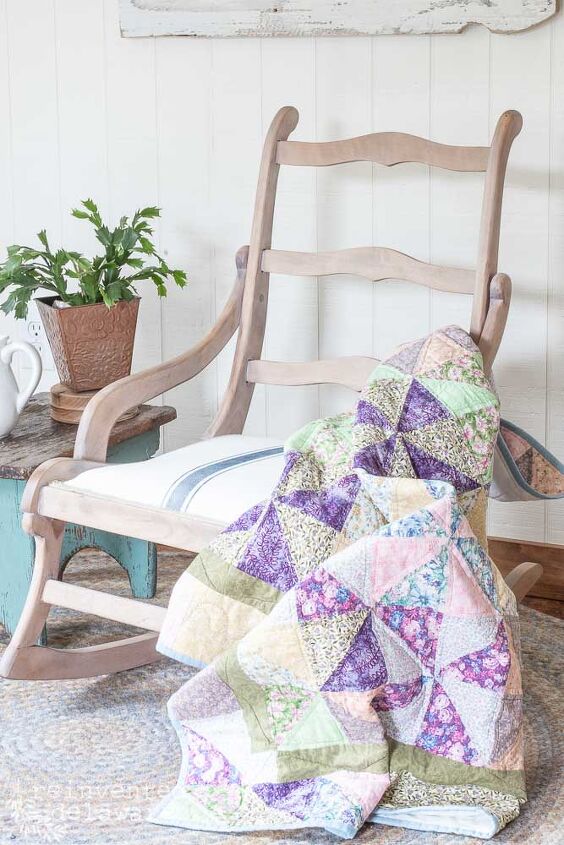
rocking chair covering ideas
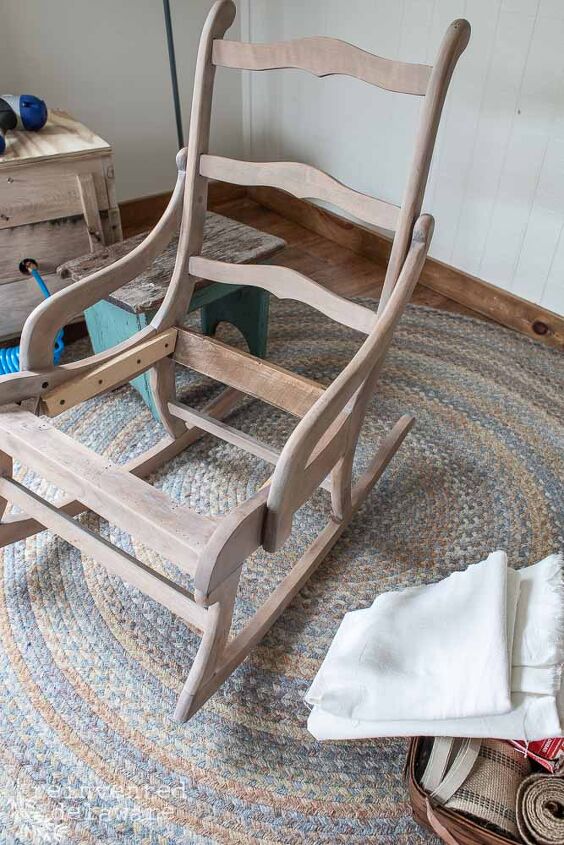
Before I even started thinking about chair covering ideas for this rocking chair, I started the basics with restoring this rocker.
Ripping off the old upholstery, making repairs, and prepping the wood for a new finish is usually my starting point with pieces we are going to reinvent and upcycle.
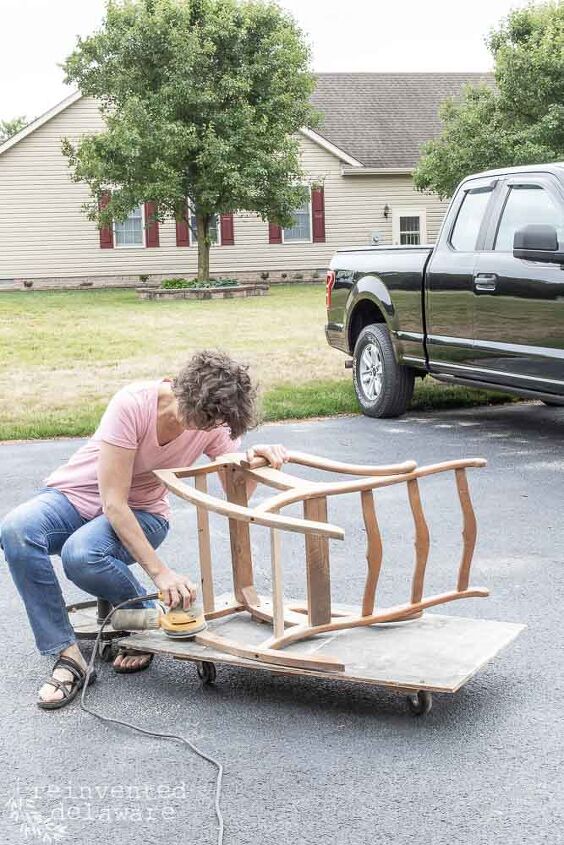
While I am working on these tasks, I start to envision what I want to do to the piece. Like this wood frame on this rocker.
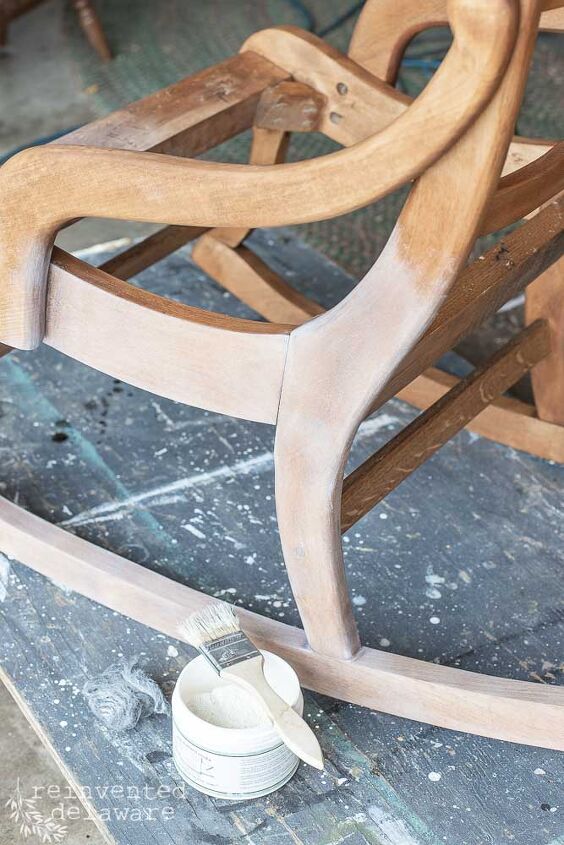
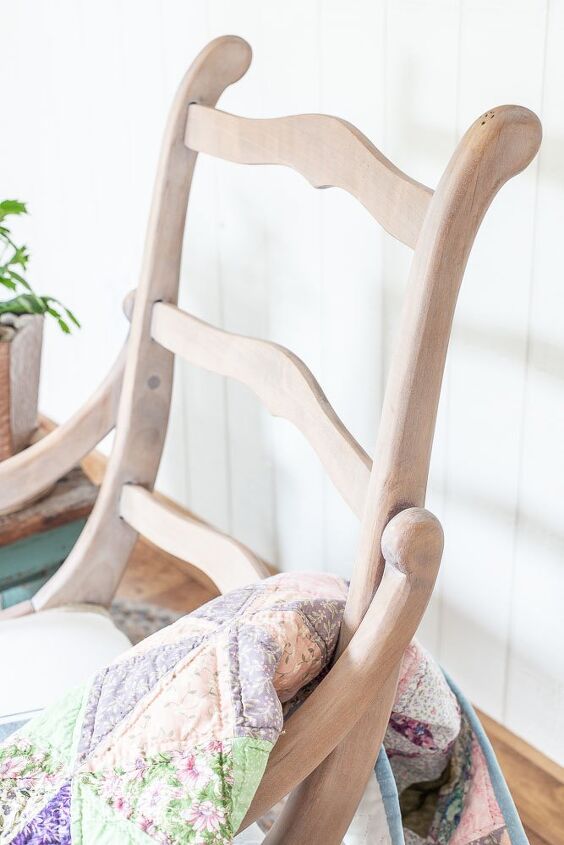
The wood was solid maple and really beautiful once it was sanded down to bare wood and cleaned. The natural state of the wood was too pretty for stain but needed a little oomph.
Restor-A-Finish by Howard Products is an amazing wood restoration tool. It is super easy to use – wipe on, wipe off and wa-la, brand new finish!
I did use a small artists brush to get the Restor-A-Finish into the nooks and crannies of the rocker.
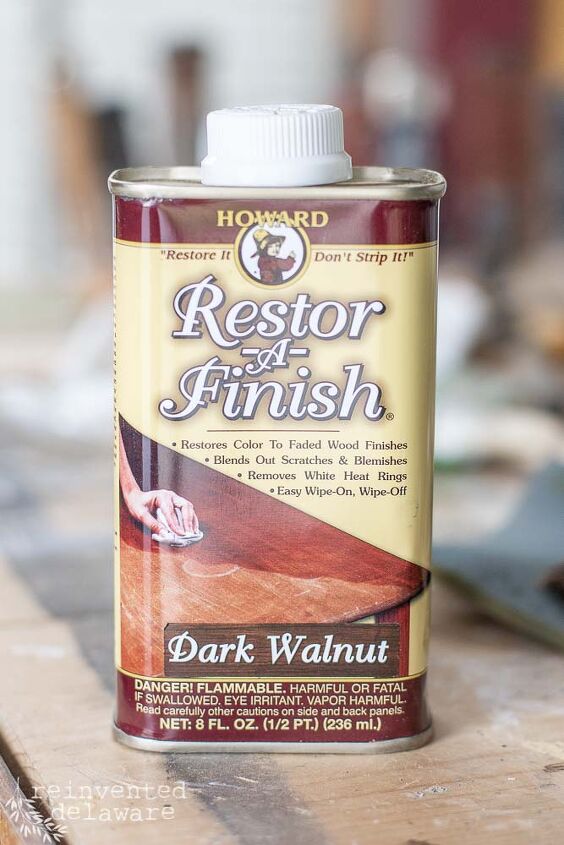
After I applied the Dark Walnut, I realized I had gone a bit darker than I wanted to. So I pulled out another one of my favorite products – Miss Mustard Seed White Wax.
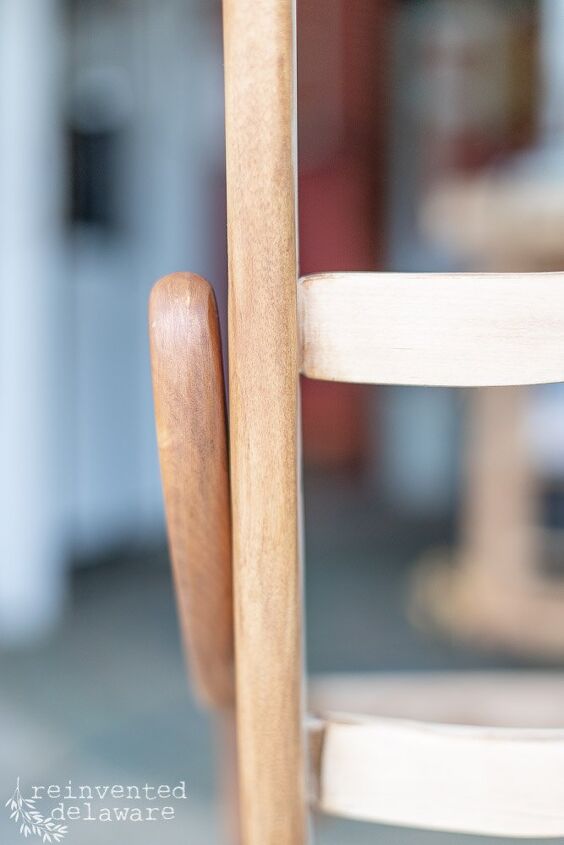
This wax is soft and so easy to use. I applied it with a chip brush and then wiped/buffed it with steel wool. The process created a soft white-washed look and also creates a nice soft finish on the wood.
The wax also knock’s off some of the orangy color in the wood.
easy upholstered rocking chair
Next up was the fabric for the upholstery. Again, I hadn’t decided exactly what I was going to use for the fabric. Since it was such a small upholstery project, I knew I would use something on hand.
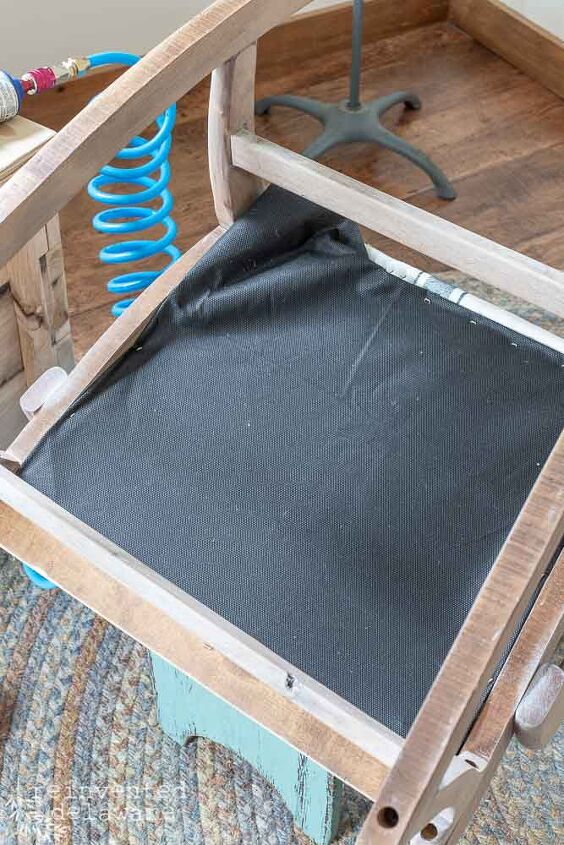
But first, the upholstery webbing had to be replaced.
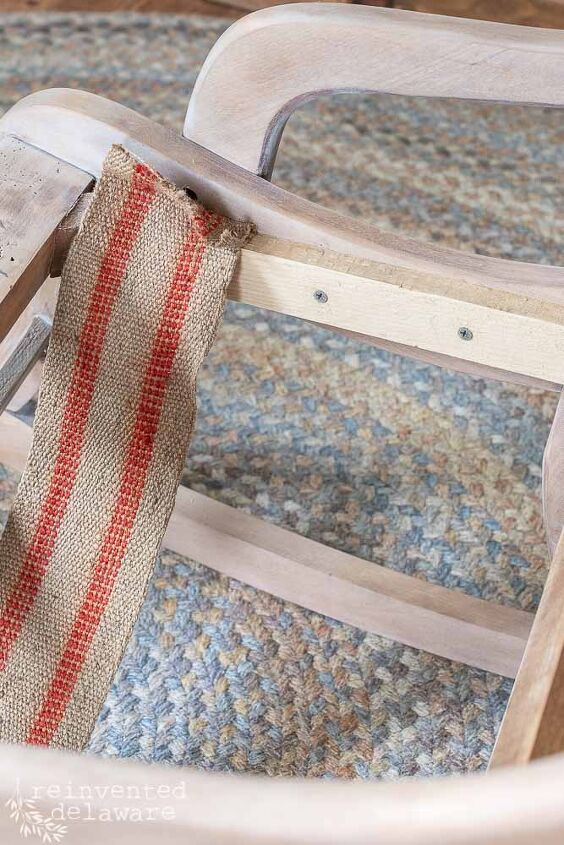
The rocking chair originally had springs but they were broken so I tossed them in the trash. The springs were zig-zag style and were attached from front to back.
I had to create a new support area with upholstery webbing so I cut a board and attached it to the inside of the rocker wood glue and screws to hold it securely.
This creates an area to attach the webbing from side to side as well as from front to back.
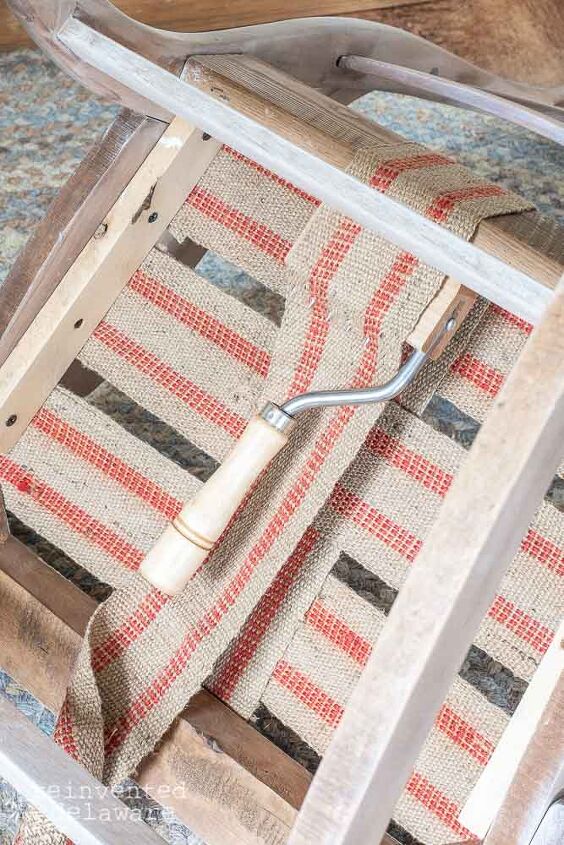
After attaching one side, I used an upholstery webbing stretcher to pull the webbing snug to the other side.
BTW, be careful with this tool! Those spike thingies are super sharp! Keep them out of reach with children at all times!
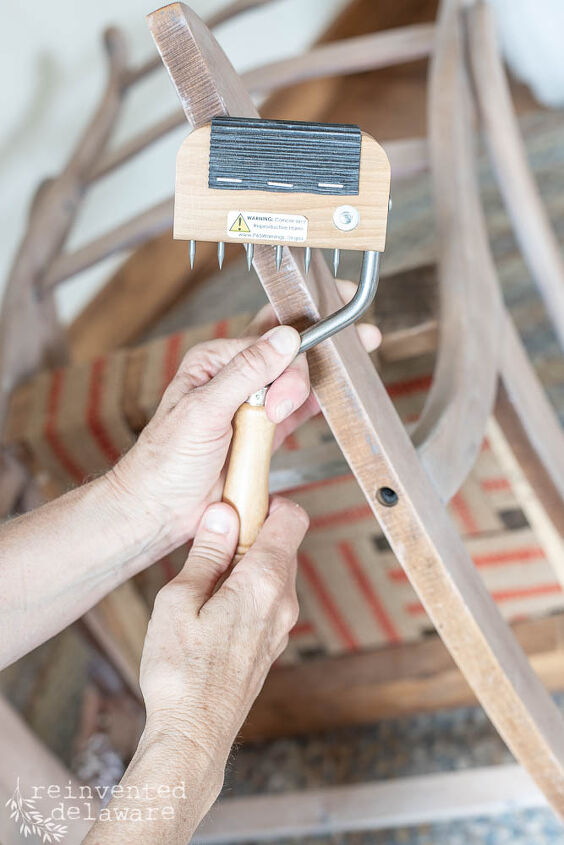
There are lots of YouTube videos about using this tool but basically, you stick the prongs into the webbing a couple of inches away from the area where the webbing will be attached and then pull down to tighten the webbing.
Continue to hold the stretcher in place while you use the pneumatic staple gun to attach the webbing to the underside of the wood frame.
Maybe I should do a more in-depth tutorial and video on this technique. Let me know if you are interested in the comments below!
At this point, I didn’t have any rocking chair covering ideas – what fabric was I going to use? I had no idea!

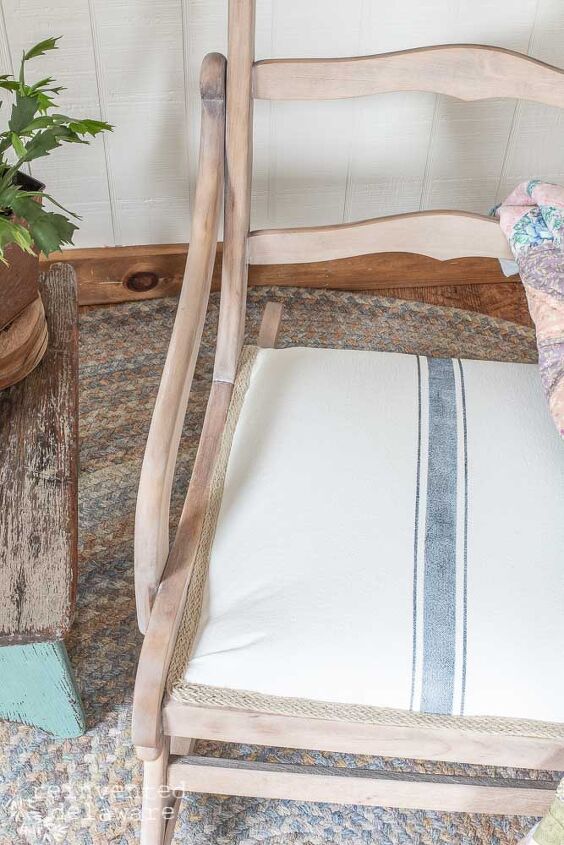
faux grain sack
So I went through my stash and came across a piece of #12 natural cotton duck canvas that was large enough for the seat of this rocking chair. (check out my shopping links for a reproduction grain sack fabric as another option!)
And then I remembered another project I had used this gorgeous piece of fabric on! Pop over here to see what the project was.
So I got out my fabric paint!
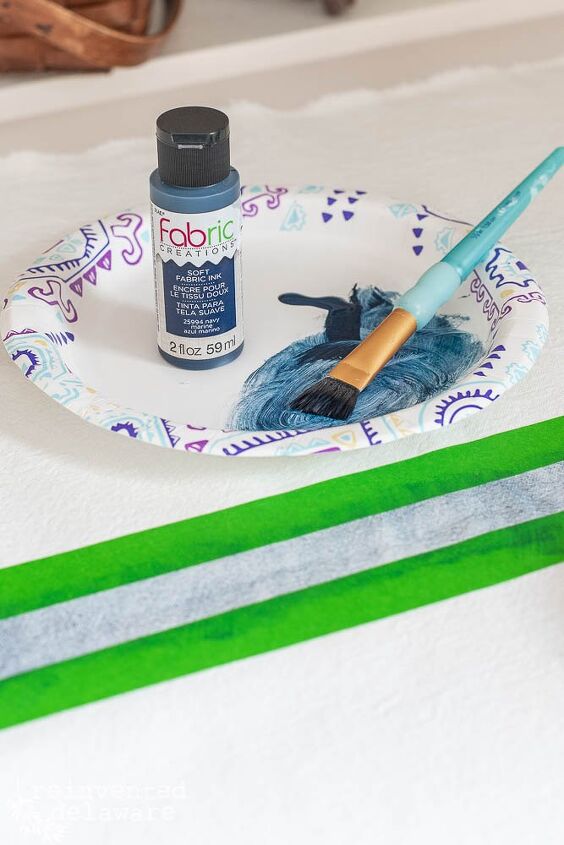
Does that sound crazy? Let me explain.
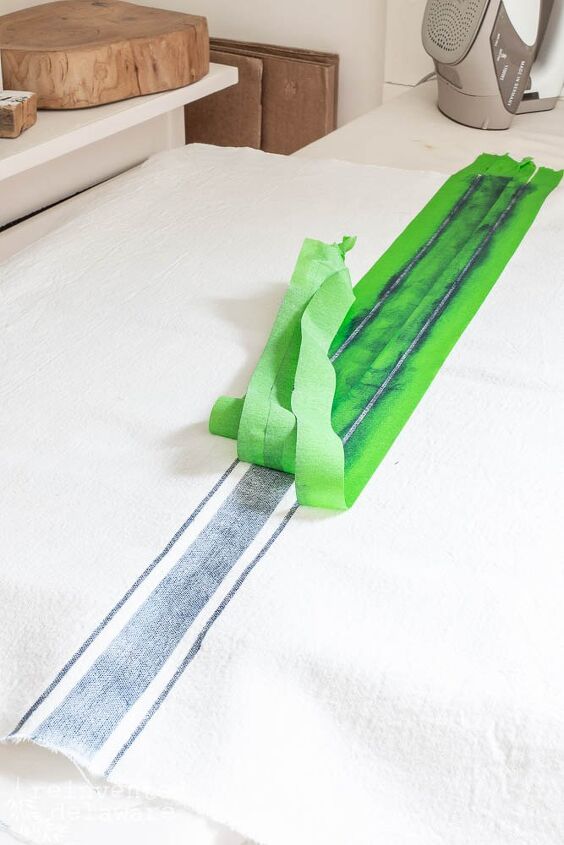
The other project turned out to look like I had used a piece of vintage grain sack. Maybe not exactly, but close! Grainsack can be expensive and besides I didn’t have any in my stash.
So I created my own using FrogTape and fabric paint! This is an easy technique and I will most definitely share a tutorial on this in the coming weeks.
how to recover an old rocking chair
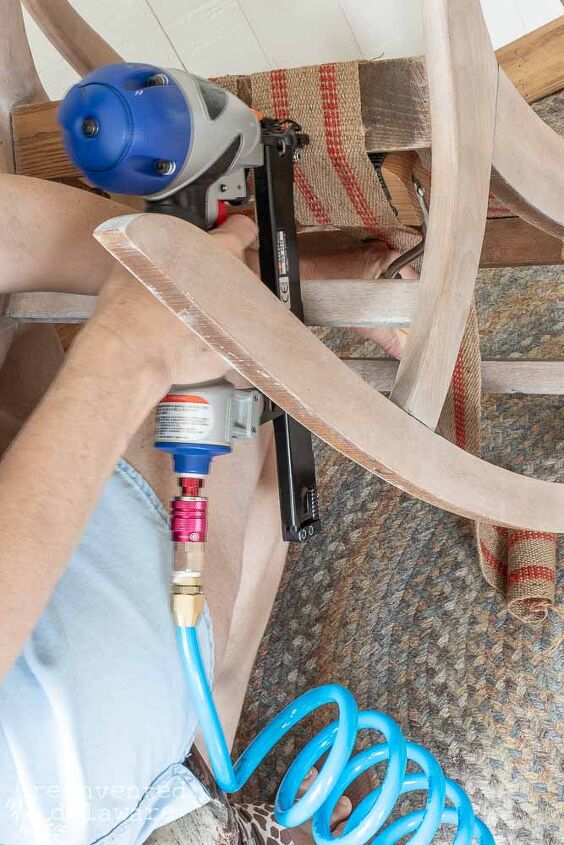
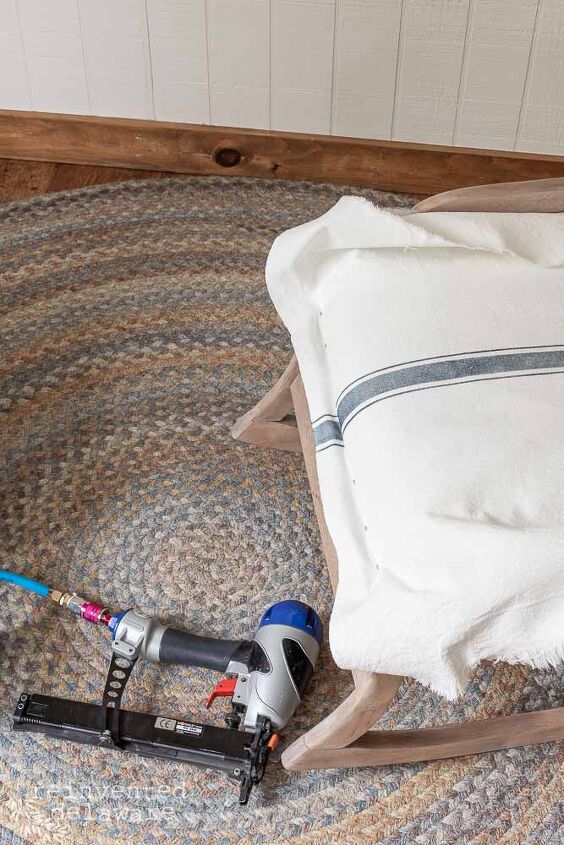
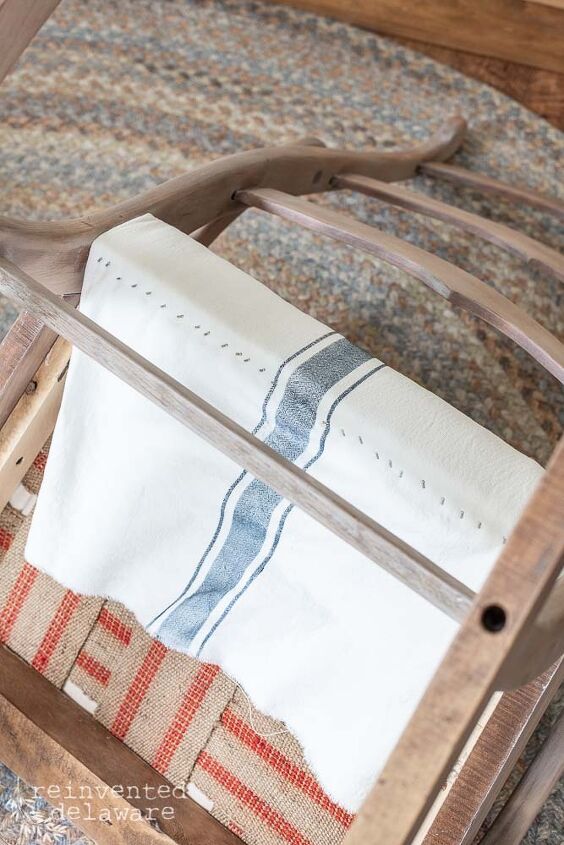
Back to my rocking chair upholstered seat. This is a pretty straightforward and easy reupholstery project. I ran a line of staples down the front edge starting in the center and working out towards the outside edges.
Keep this line of staples straight – it will be covered with trim later and you don’t want any staples peaking out!
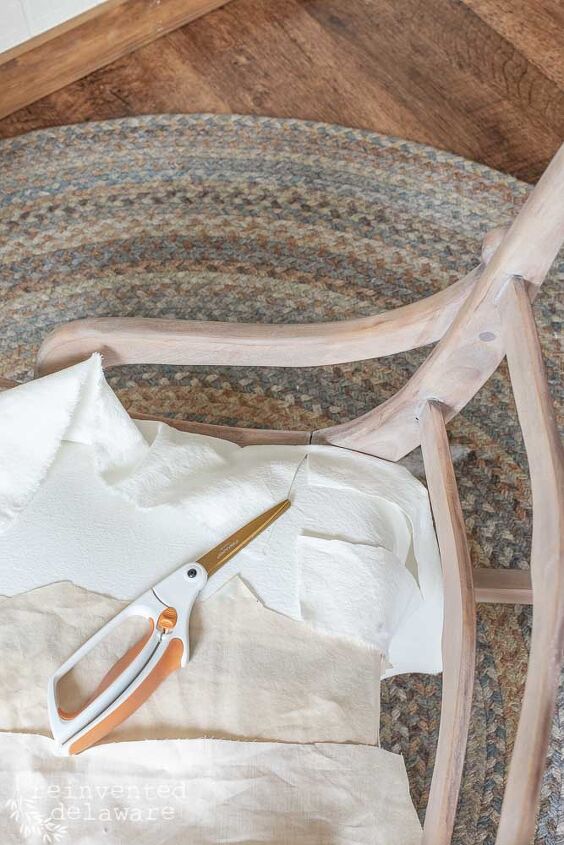
Next, I pulled the fabric towards the back and notched out around the back support and leg section of the wood frame.
The area on the left in the image below will be attached to the piece of wood we added for the webbing earlier.
The area on the right will be the fabric folding inwards and then pulled to the back. You’ll see that in the next image.
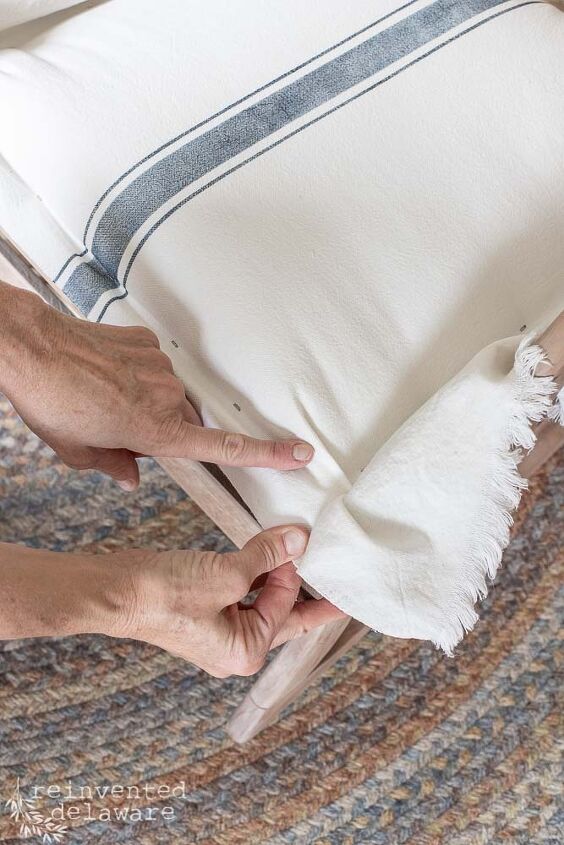
After folding the fabric to create a clean finish, I pulled the fabric all the way to the underside of the rocker and stapled it securely. As with the front edge, start in the center and work out towards the sides. Pull the fabric snug but not so much that you create puckers and pulling on the topside.
Next, I stapled along the side edges where I had attached the extra piece of wood. The steps are the same – begin in the center and work outwards while keeping the fabric taut.
You can see below that I had some excess fabric at the two front corners. That’s easy to fix. Create a pleat and it will look like you planned it!
Your friends and family will be so impressed with your skills!
Once all the sides are securely stapled, it’s time to cut off the extra fabric. Cut close to the staple line being careful to not get too close so that the staples won’t pull out.
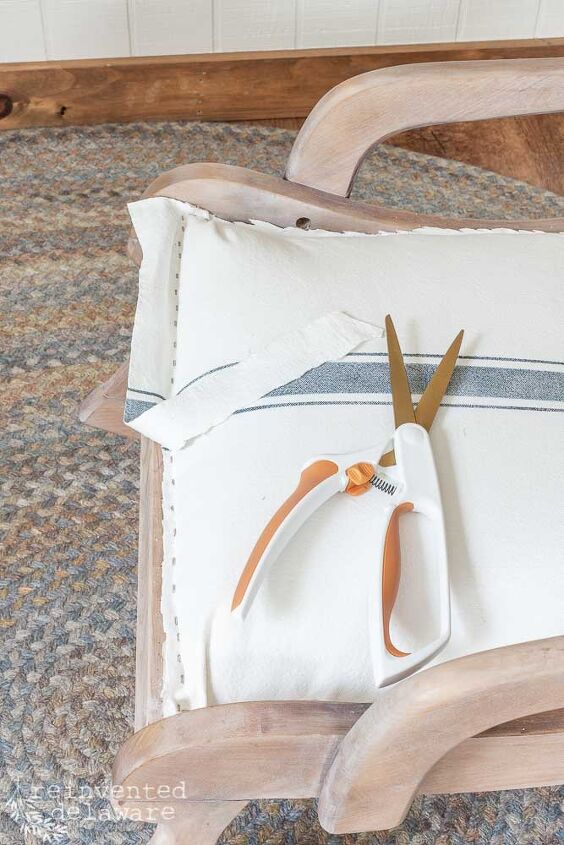
Add the cambric dust cover to the underside of the rocker for a professional look. I wouldn’t say this is a necessity but it sure makes everything look professional!
you can upholster a rocking chiar!
Wasnt’ that an easy upholstery project?? If you are intimidated by upholstery work, this type of project is the one you want to begin with. You’ve got this!!
Let me tell ya, you’re not going to find a good-looking rocker like this one in a new furniture store! There is something about taking the old and making it new again that you cannot replicate in China.
Sorry, not sorry! It’s so true!
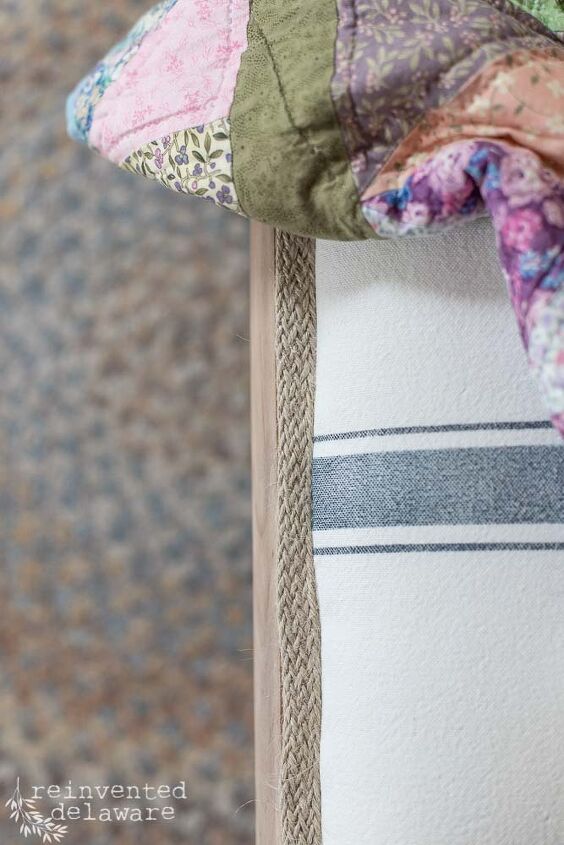
Agh! I totally forgot to mention the jute braided trim I love to add to upholstery projects! Anyway, it’s easy to add it and you can see how in my tutorial on this Reupholstered Antique Settee.
That post is a 3-part series that you have got to read! You won’t believe the before and after on the over 100-year-old victorian settee!
Omgoodness, be still my upholstery-fabric-loving heart!! Anyway, didn’t this rocker turn out so adorable??
Someone local is going to love rocking a baby in this sweet rocking chair. Oh, the memories and sweet moments that will be spent right here 🙂
I’m so glad you stopped by today! And I hope you found this tutorial helpful. Can you let me know in the comments? Do you have any rocking chair covering ideas that you can share with me? I would love to hear your creative ideas!
join our journey!
We would love you to join our journey over on Instagram and Facebook! You can also find more inspiration on our Pinterest page! We’re always pinning fresh ideas!
Looking for a few budget-friendly ways to update any room in your home? Sign up below and I’ll send you my top five ideas!
Until next time…

Resources for this project:
See all materials


Comments
Join the conversation
-
Voila!
-
So glad you were able to restore such a beautiful piece of furniture 😻😻😻


Frequently asked questions
Have a question about this project?