


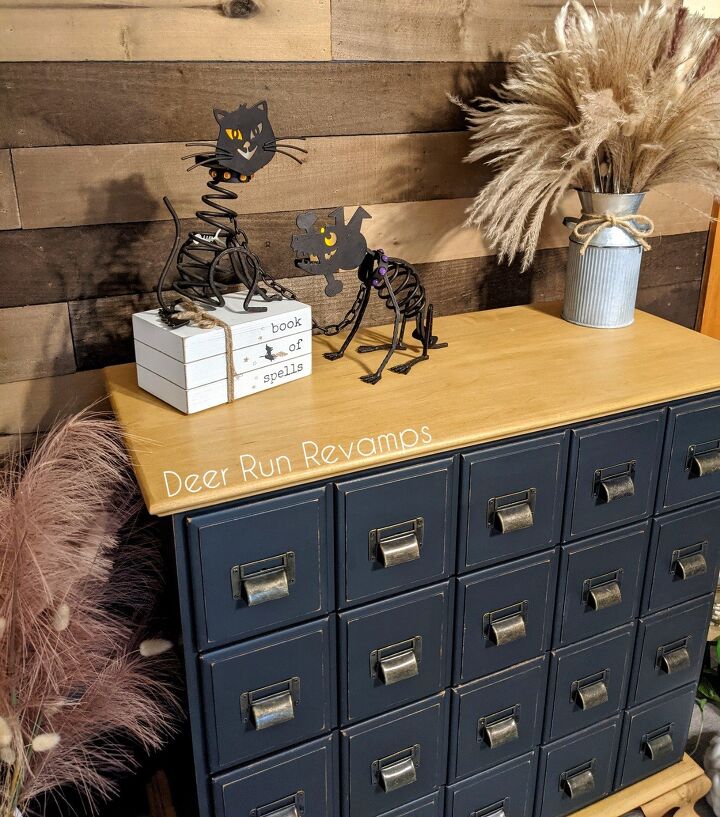
Small Dresser Turned Apothecary Chest Using Homemade Chalk Paint

I absolutely love the look of apothecary chests and library card catalogs 😍 But...both are super expensive!
When I saw this solid maple dresser/chest of drawers, I knew I just had to have it!
Here's how I brought this piece from plain chest to apothecary chest in just one day!
Price listed is for the amount of product used, not the initial purchase price of the products.
Time listed is for work time only, does not include dry time.
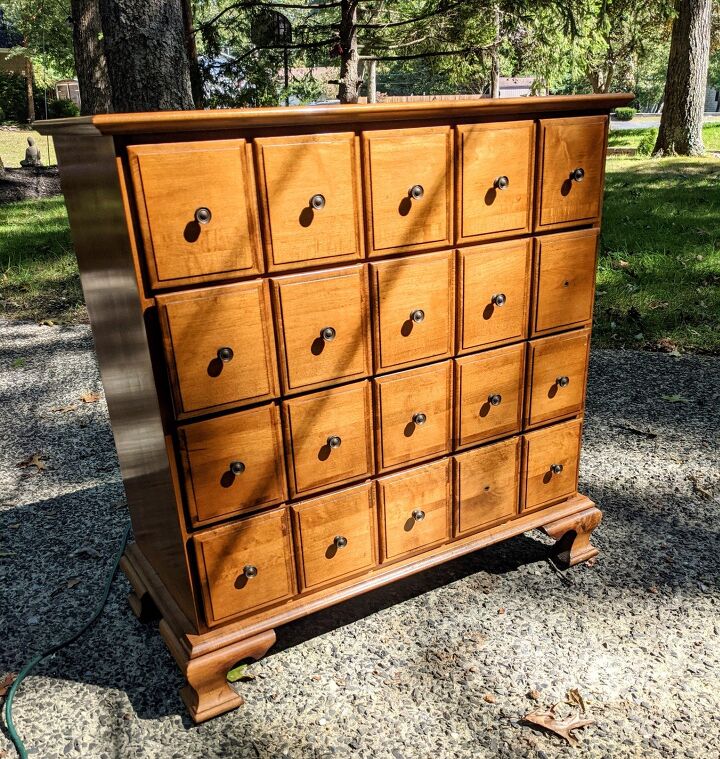
This piece is in great shape and certainly beautiful as is, but simply didn't go with my decor. And, since it's solid wood, it'll be easy to bring it back to it's natural form if I ever want to ♥️♥️
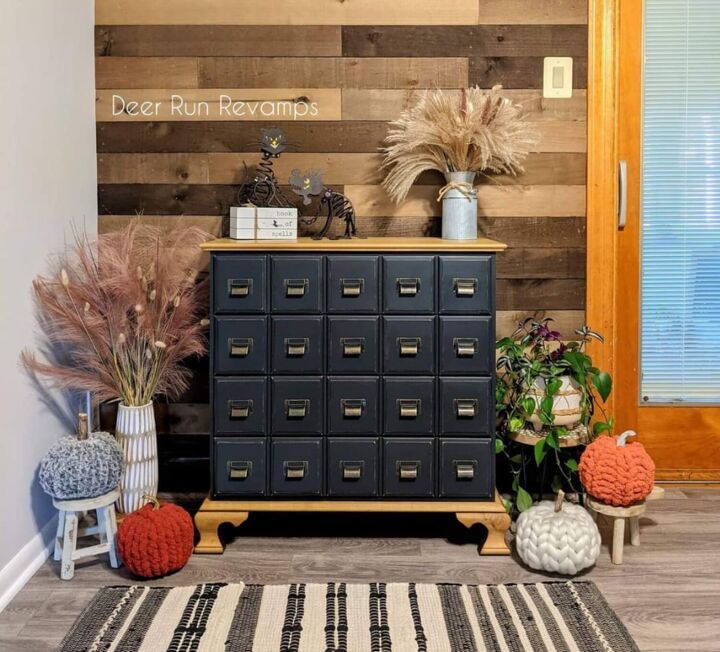
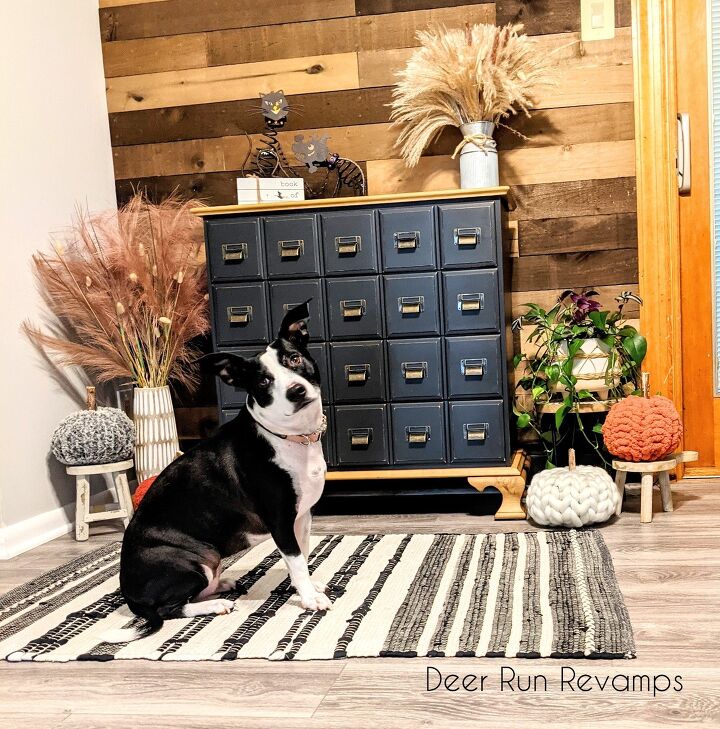
I absolutely LOVE the way this project turned out! I simply couldn't be happier 😍
Prep!
Always always prep your pieces. It's extremely important to spend 15 minutes prepping so that you can have a long lasting finish.
First, clean your piece well with a degreaser...tsp alternative, krud kutter, or even totally awesome from the dollar store work great.
Then do a scuff sand all over where you'll painting...using 150-220 grit sandpaper, "key" the surface. This gives the paint something to really adhere to.
Then, wipe the entire surface with a damp cloth
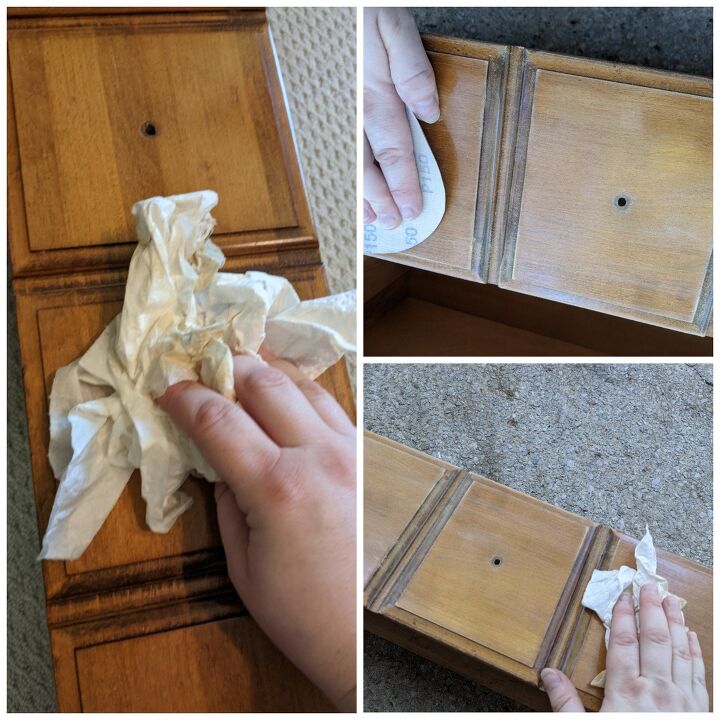
For areas where you'll be staining, you'll want to sand down to bare wood. If your piece has a thick layer of varnish, apply a stripper first.
To get down to the natural wood, start with 100-120 grit sandpaper on a random orbital sander. Remove any leftover varnish and majority of the stain. Then switch to 150-180 grit to smooth it all out and remove any remaining stain. And then finally finish up using 220 grit sandpaper.
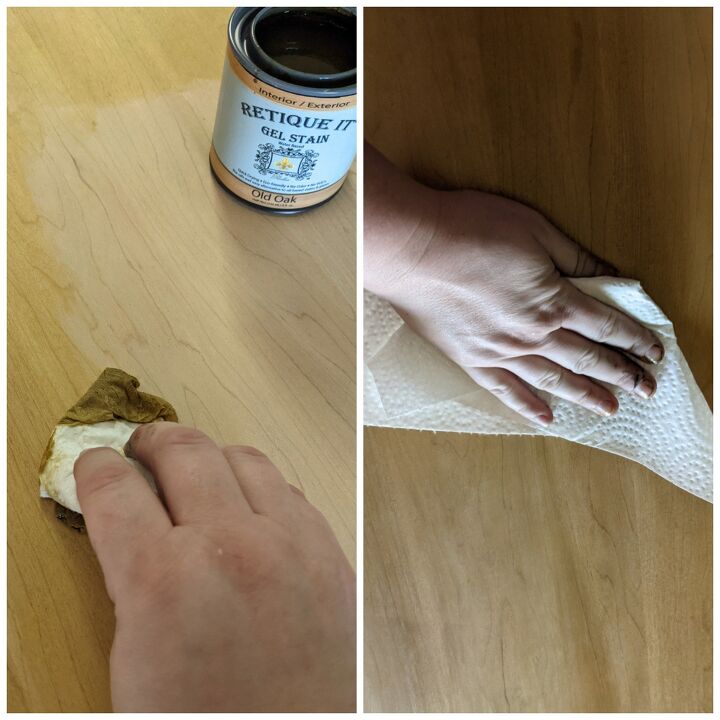
Then, stain the wood you just sanded. I used the color old oak from retique it. It's a waterbased stain and a very light color, enhances the natural maple. And it's easy to cleanup!
Use either paper towels, a rag, or a sponge brush and apply an even layer of the stain, then immediately go over it with a paper towel to remove any excess stain.
Get ready to paint 😁
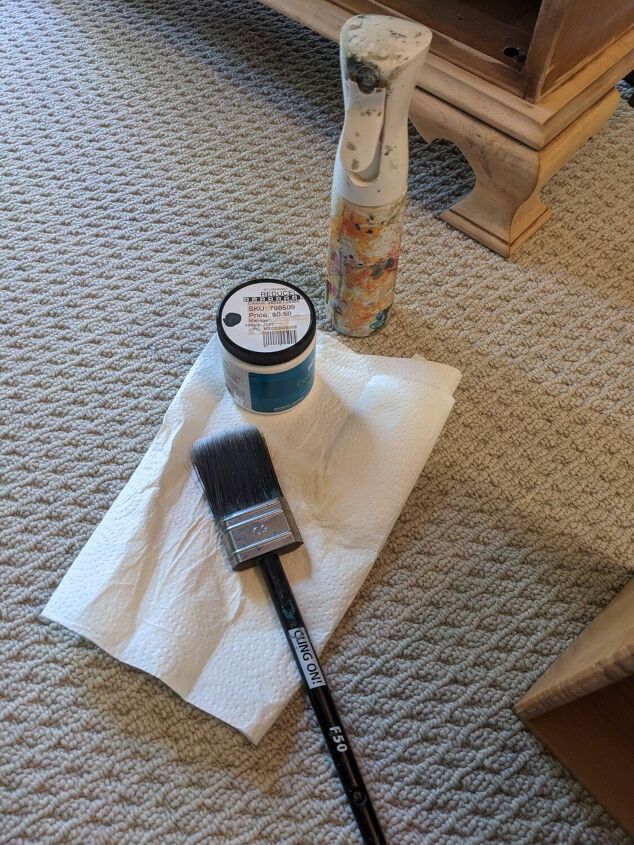
I use calcium carbonate mixed with regular wall paint in a flat sheen. I get the calcium carbonate made by the brand Greenway biotech off of Amazon, it mixes great with latex paints.
I found a small 7.25oz sample size of wall paint in a black color, flat sheen, for $0.50. This is an "oops" sample, meaning it was mixed for someone and then returned or not the correct color. You can find these super cheap "oops paints" in the paint section of your local Home Depot or Lowes.
In a cup, add 2-3 tablespoons of calcium carbonate (more or less depending on how chalky you like your paint), then slowly add HOT water and mix until it's the consistency of thick pancake batter. I'm not sure how much water it is, I just add a little bit at a time until I have the right consistency.
Then, mix the CC mixture into the 7.25oz of paint.

Paint your piece 😁
*Tips for little to no brush marks*
Purchase a mister bottle from Amazon. Misters aren't like regular spray bottles. They allow you to give the surface a light misting vs a spray bottle that is more of a stream of water.
Lightly mist the surface as well as your paint brush.

Then in light coats with a quality paintbrush, apply the paint.
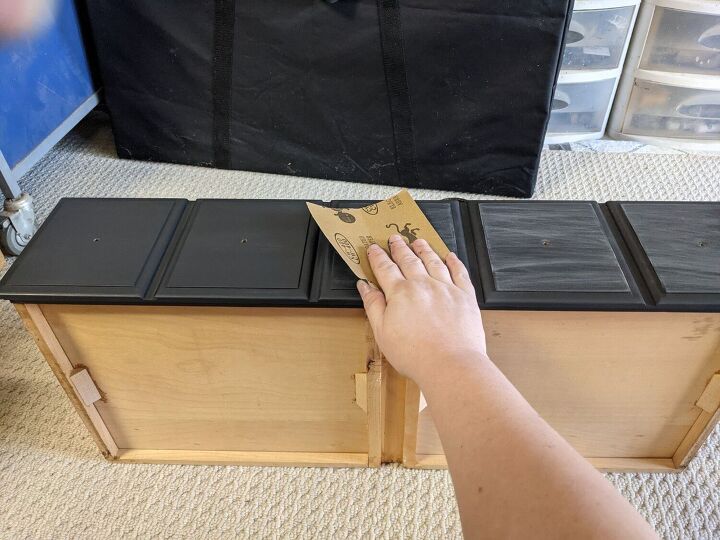
After each coat is dry, sand with 400 grit sandpaper. This helps reduce the brush marks as well as give a soft to the touch finish.
I only needed 2 coats of the black for full coverage.
After the final coat dried, I did extra sanding around the edges for a distressed look.
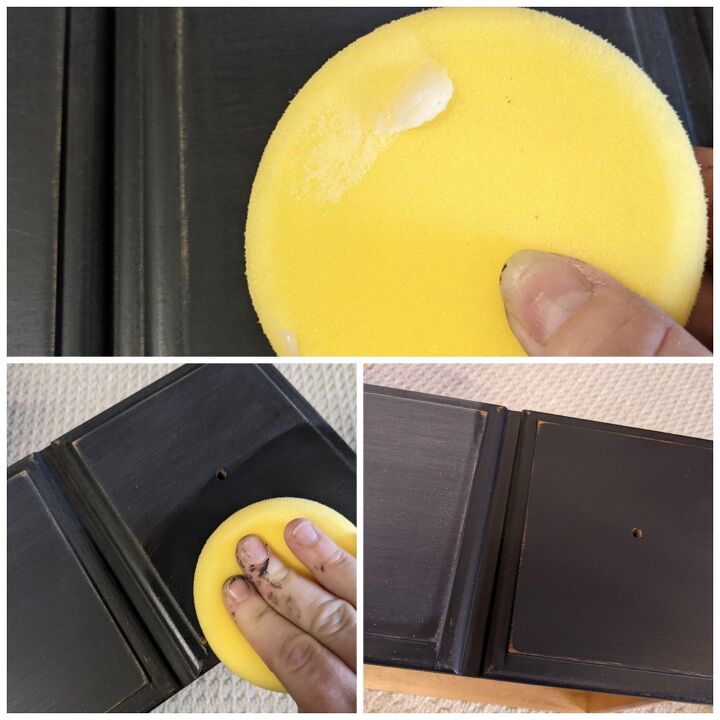
I prefer wax to waterbased topcoats for pieces that will be getting little use. But apply whatever topcoat/sealer you prefer.
I use Behr wax from home Depot along with sponges from Amazon meant for car wax.
Put a bit of wax on the sponge and apply it to the piece in long even strokes, wipe off any excess and buff if you want a shinier finish (I rarely ever buff)
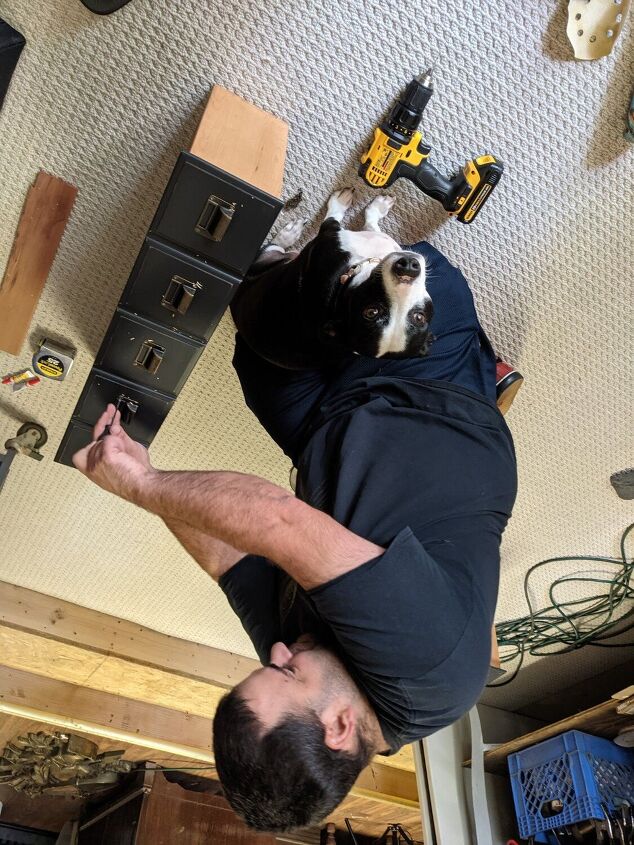
As you can see, our little pup loves to help whenever she can!
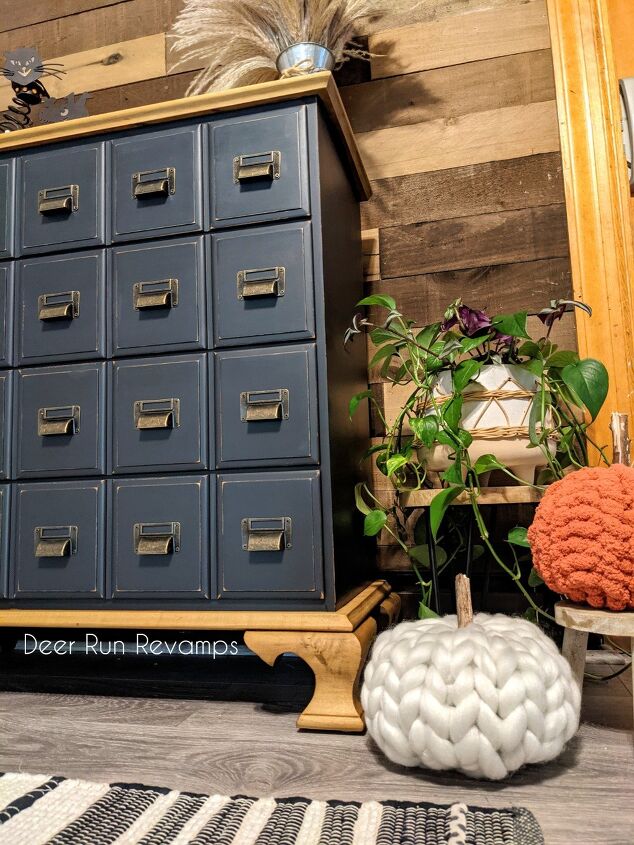
I chose library card catalog style pulls which covered the original hole, so there was no need for me to fill them.
Maple is a hardwood, so we chose to first drill out the holes using a drill bit smaller than the screws. It's very difficult to try to screw in the tiny screws while making sure the pulls are even. Once the holes are drilled, screw the pulls into place.
Decorate, and enjoy!
Our pup even makes a great model and prop! ♥️♥️♥️
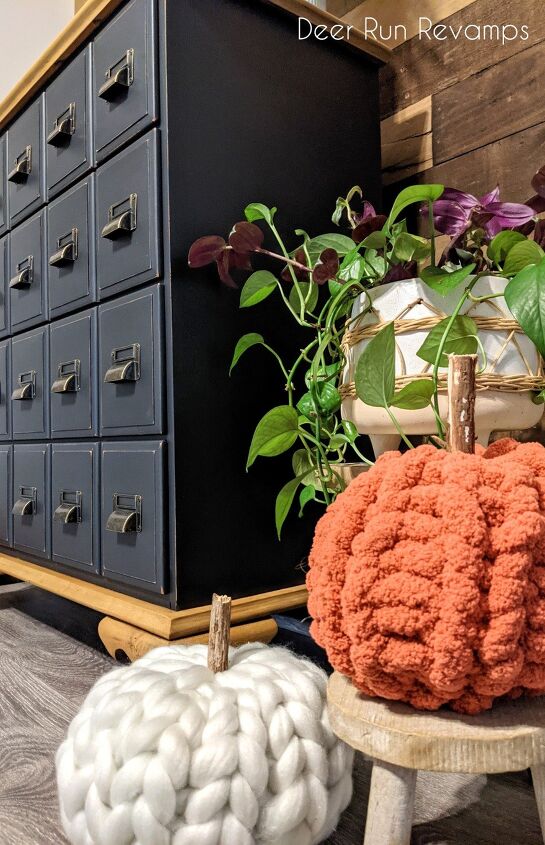
You can find these super cute chunky pumpkins in my Etsy shop! Linked below 😊
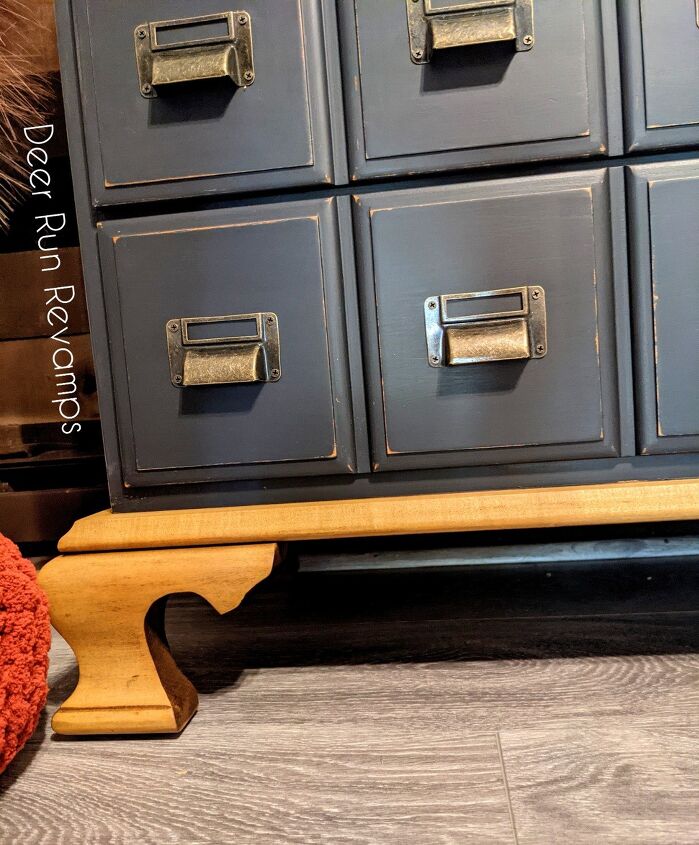
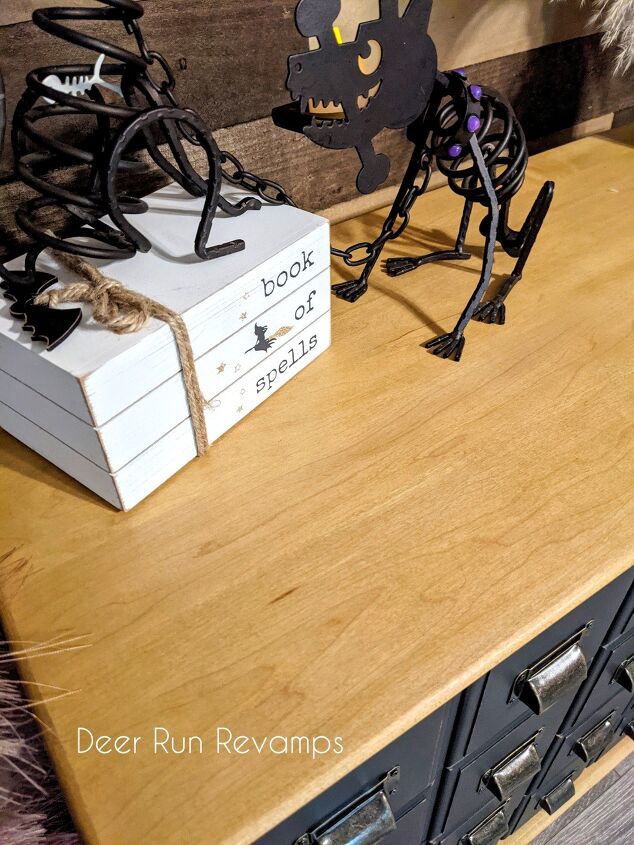
I'm so happy that I left the bottom molding and feet wood. I feel it gives the piece more character and ties the it all together
Check out our Facebook page to see more unique projects!
You'll find tons of products to use for ypur creative projects in our Etsy shop! We have transfers, silicone moulds, stencils, stamps, paints, waxes and so much more!
I hope you've enjoyed this tutorial and are inspired to create something beautiful 💖
Resources for this project:
See all materials


Comments
Join the conversation
-
Very nice...looks great either way...
-
Looks awesome, just like everything you do. I really love the way you staged it too!!! 😍 I suck at staging. LOL


Frequently asked questions
Have a question about this project?
This is probably my favorite furniture makeover ever! Love it!