


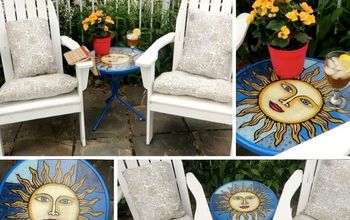
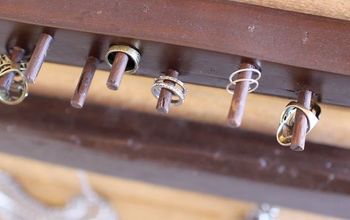
Underside Decoupage Glass Patio Tables

by
CB
5 Materials
$15
1 Week
Medium
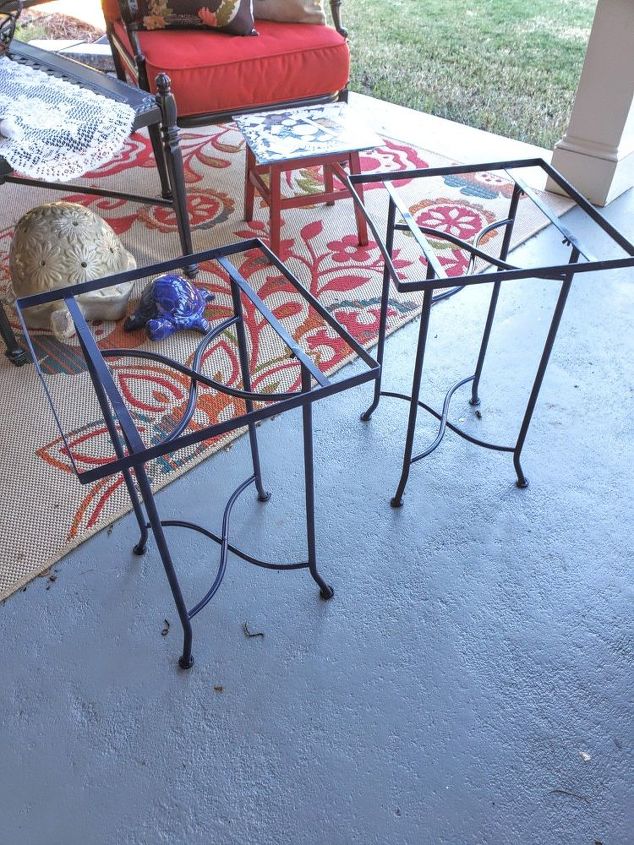
Many years ago, I found these two outdoor tables at Kohl's for only $2.50 each. I've always been proud of my sweet deal, and knew right away that I didn't have the heart to throw them away when they started looking a bit worse for wear. I knew they needed another chance at being put to work on my patio.
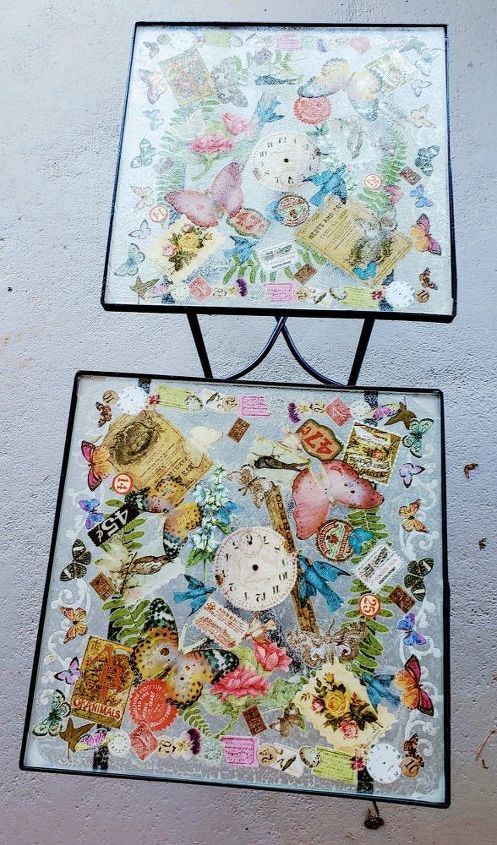
I painted them to go with my current patio decor colors and themes of flowers, butterflies and birds, and then went to work on the glass table tops.
Because they were to be used outside, I used Outdoor ModPodge (green label). I also had to take into account that since the tables would be 'seen' from the top looking down, that the layers of ephemera would have to be layered from top to bottom. This was a bit harder than it originally seemed. Thankfully, laying it all out and taking a picture BEFORE I set it onto the glass with the ModPodge made the project MUCH easier! The photos really helped me make certain that I'd be able to get all of my prepared embellishments pretty much exactly where I thought they would look the best!
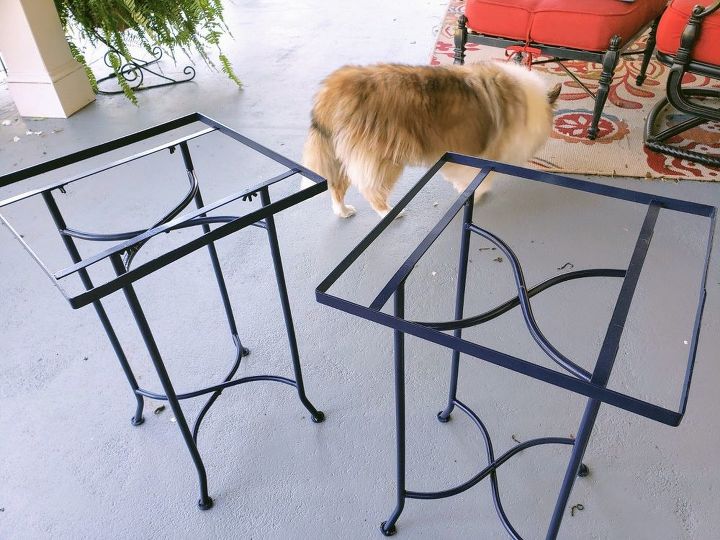
I painted the metal frames with Rustoleum Navy Blue Gloss
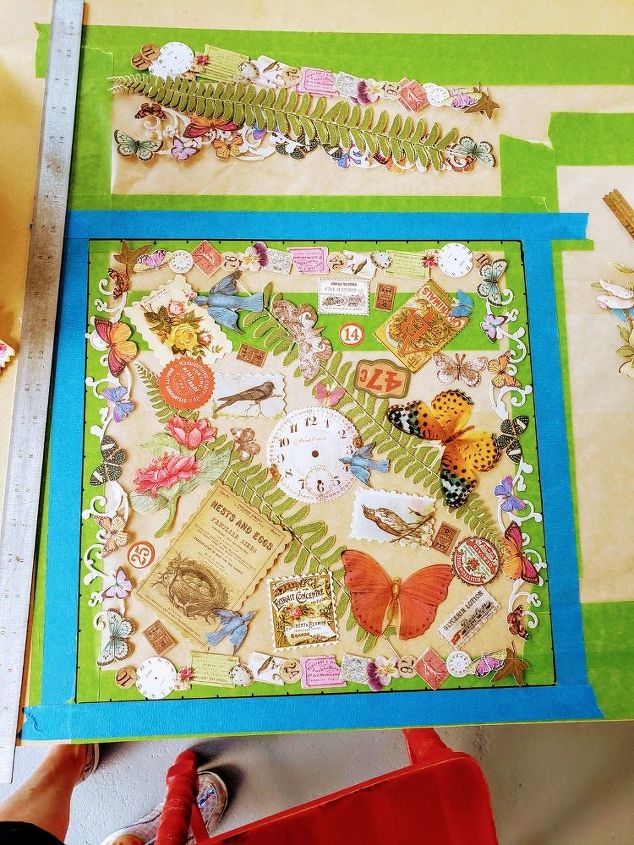
By using painters tape to outline the glass measurements, I was able to lay out a "preliminary plan", for my paper ephemera that I had picked out before hand.
*Since I was doing two tables, I used duplicate packets of different coordinating craft embellishments sold at local craft stores.
*Tim Holtz and K&Company are all time favorites for sure!
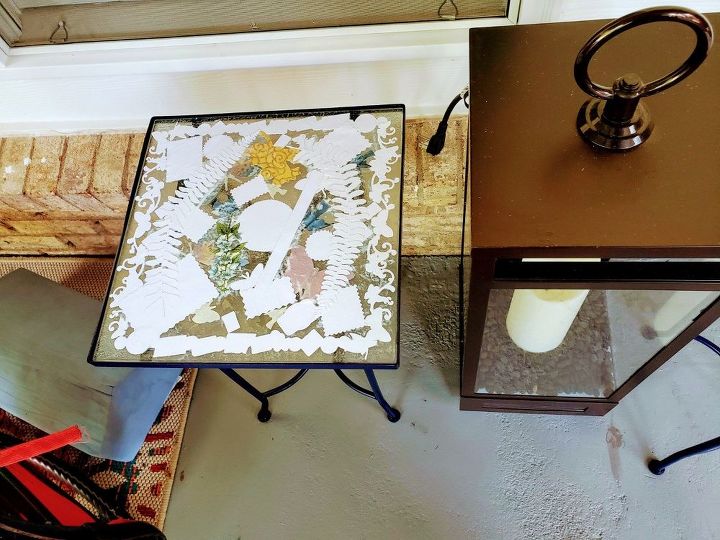
Once the first table was "set", I placed it upside down into the table frame to let it set up and start to dry.
*these did not stay outside to finish drying! The dampness from recent rains would have taken them forever to finally dry. They were brought inside when I was finished decoupaging both of the glass tops. I also let them sit drying for a minimum of three days before I gave them a final coat of the outdoor ModPodge - which I again gave them a three day drying period inside. Once that was done, I used clear silicone to secure them to the frames/bases.
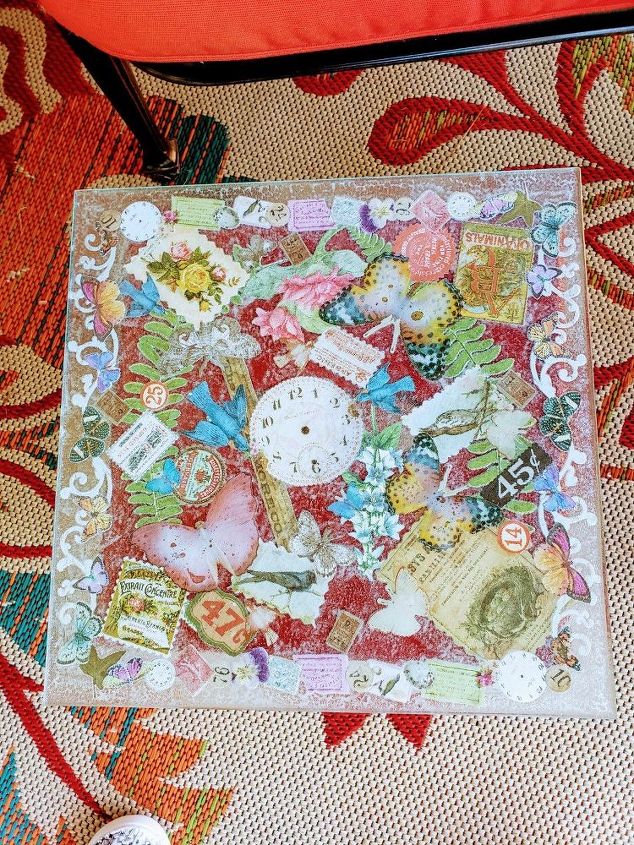
This is what the finished and dried glass tops looked like before going into the frames with clear (outdoor) silicone.
The silicone was applied on the horizontal cross braces, this will hold the glass into place. This step is super important because the tables are being used on outdoor on a concrete patio. I also chose to place a triangle of silicone into each corner - again the silicone was placed on the UNDERSIDE of the glass top that would NOT be seen.
The silicone was placed onto the bracing frames and allowed to try - if you look closely at the corners, you can see the silicone "anchors". The tables are perfectly sized for use anywhere on the patio when they might be needed. I'm so glad I didn't throw them out!
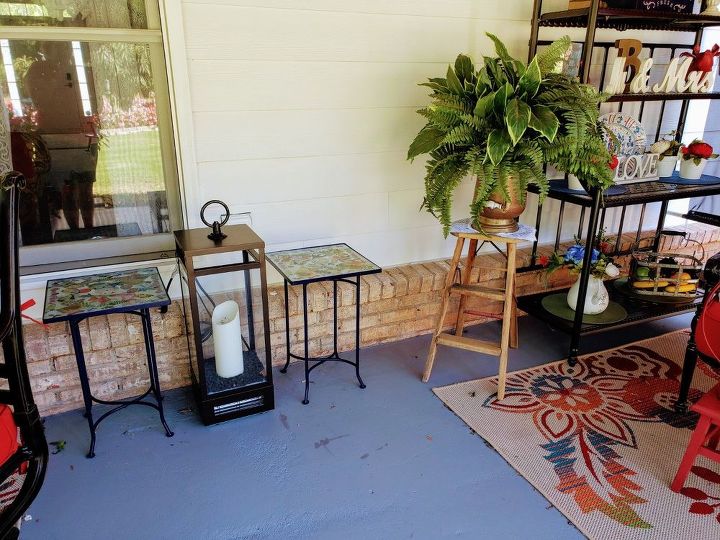
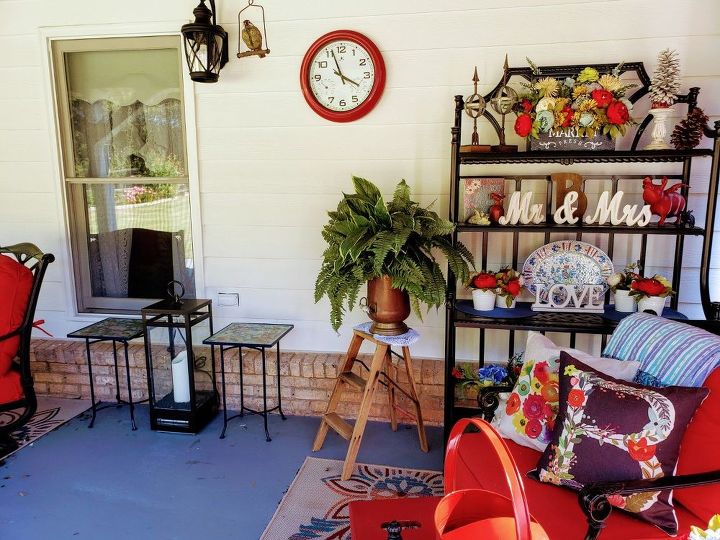
They are sitting in a spot where they are ready for use by anybody that may need them!
Resources for this project:
See all materials


Any price and availability information displayed on [relevant Amazon Site(s), as applicable] at the time of purchase will apply to the purchase of this product.
Hometalk may collect a small share of sales from the links on this page.More info
Comments
Join the conversation
2 of 26 comments
-
So good
-
Brilliant! And funny. I woke up this morning thinking of how I could do something similar to an old glass dining room table that I want to make the back deck table & here you are, doing exactly what I needed. Thanks for sharing and I'll share mine when done.


Frequently asked questions
Have a question about this project?
I love your project and how it turned out. I would like to try something like this but I am unsure about one step. You said once you “set” your table your turned it upside down to dry. Did you apply the mod podge to the top of your decorations and then flip it onto the glass to dry? If so, how did your table stay so perfectly set?