


DIY Cardboard Bookshelves (Make a Kid’s Bookcase!)
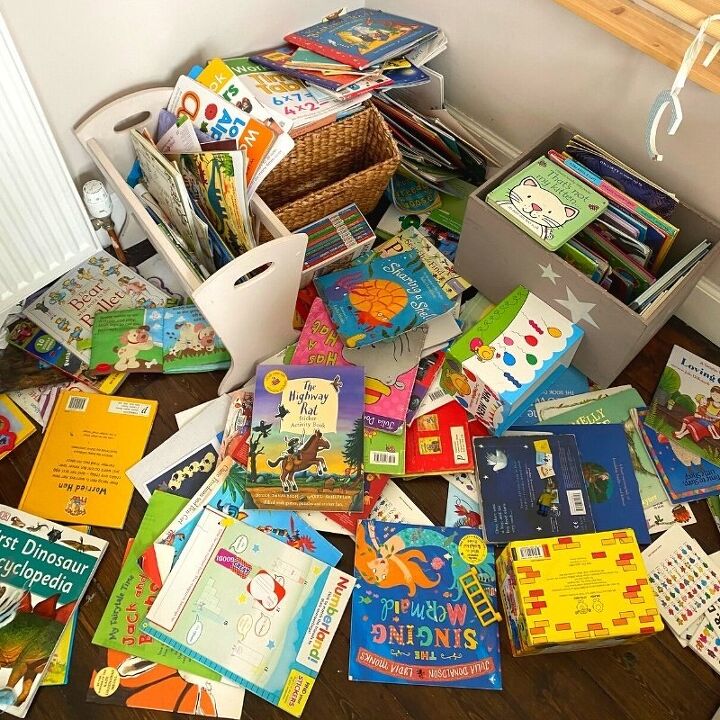
My husband was complaining about the mess of books in my son’s room this past weekend – to which I responded that if he doesn’t like it he should come up with a solution to store them!
He grunted and said he didn’t want to spend money on a bookshelf.
I decided I needed to prove a point – that we had everything we needed to make one in the house already – so I set out to make my own cardboard bookshelves. I was determined to do it in an afternoon….and I succeeded!
Here’s how!
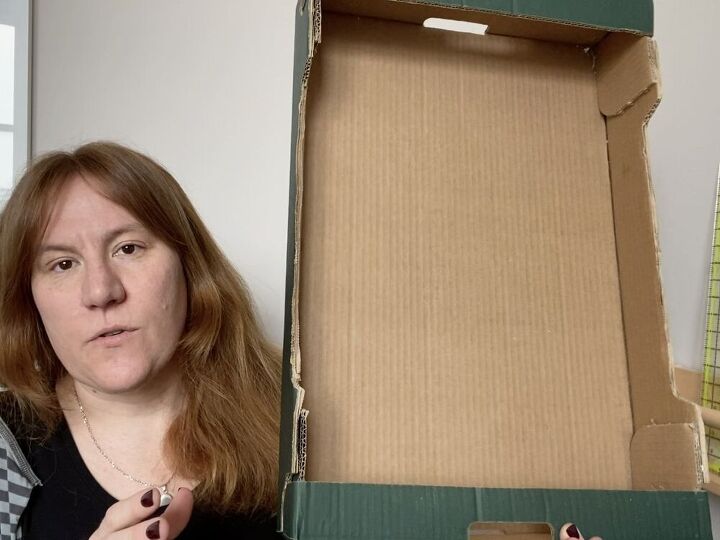
- Materials Needed – DIY Cardboard BookshelvesCardboard Boxes – I used one strong vegetable crate as well as on large and one medium sized cardboard box. Read on or watch the video to see how you can adapt this to fit your own space and the boxes you have available.
- A craft knife
- Glue (I used Gorilla Glue which is actually for wood but regular craft glue will work too) and/or Duct Tape (I used both!)
- Measuring Tape
- Pen or Pencil
- Clamps (optional)
The full written instructions are below or you can watch the video tutorial here:
Subscribe to my YouTube channel for more fun Upcycling Tutorials!
Hometalk Recommends!
Step 1: Decide where the bookshelves will go
The first thing I did was measure the space where I wanted my bookshelves to go.
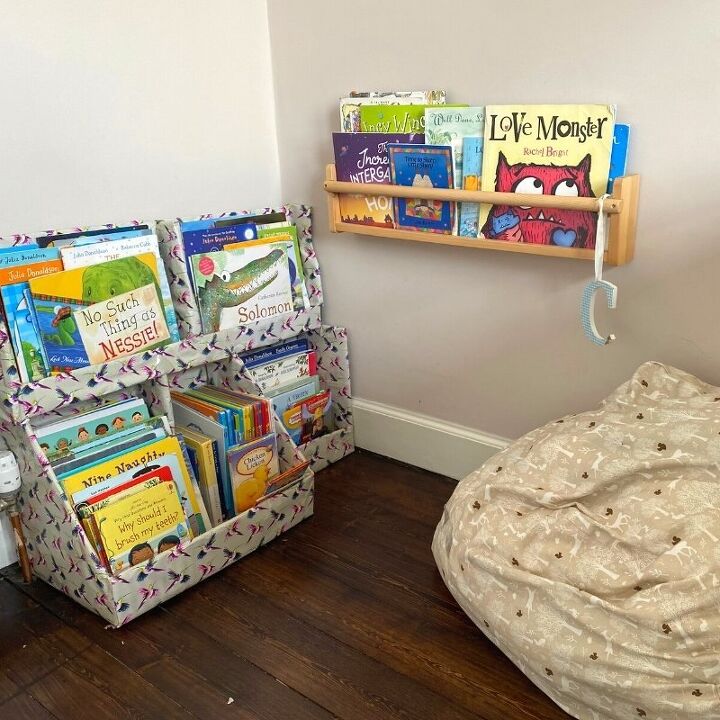
We already had one little ikea bookshelf attached to the wall so I kind of wanted to tuck the bookcase in to the corner beside it which meant fitting it between a wall and a radiator.
As you can see from the ridiculous mess above, our other storage had been various magazine racks.
Clearly it’s not just a storage issue. We obviously need to do more reinforcing with our son that he needs to tidy his books away. But I always think implementing new storage solutions is the best way to start a new habit of tidying!
Step 2: Cut your cardboard boxes
My initial inspiration for the bookshelves (beyond wanting to prove a point to my husband!) was a little cardboard crate type box that we had from receiving a delivery of some vegetables.
I figured out that my son’s books were about half the height of the crate so I decided to cut it in half and place the halves side by side to form the top shelf of my two layer bookcase/bookshelf creation. I wanted to leave the ‘lip’ in place at the bottom to help keep the books on the shelf.

As well as cutting this crate/box for the top shelf I also used two regular cardboard boxes for the bottom layer.
I measured my top shelf for width and I was aiming to get the same width for the bottom.
I didn’t have two boxes exactly right so I cut the side off of one box and glued it to the other.
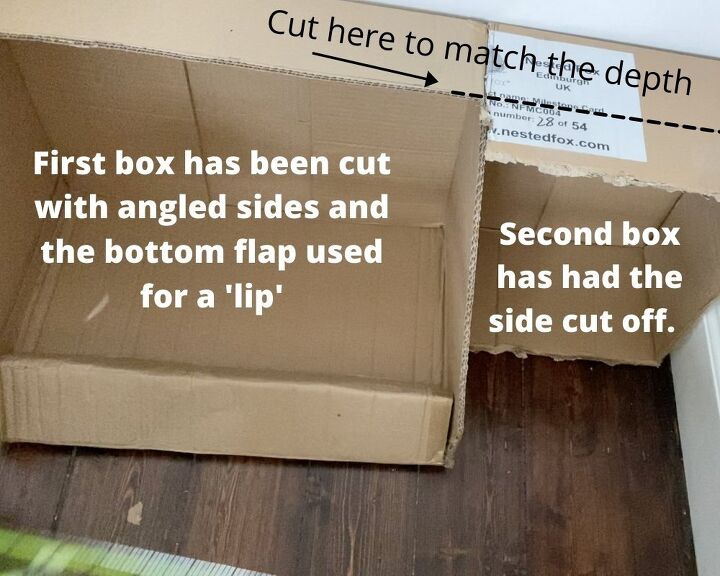
First however I cut up the main lower level box so that it had angled sides and I also cut the top of it so that it became the same depth as the top shelf.
See the video tutorial below for all the details but the basic principle is the same as that used in my Cereal Box Magazine Holder tutorial – except that you also leave some cardboard on the top of the box to rest your top shelf on.
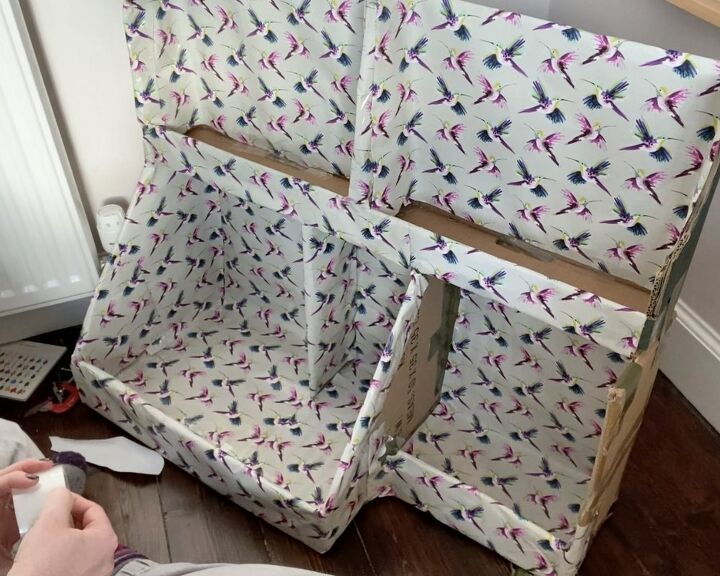
Step 3: Reinforce with Duct Tape
I used gorilla glue to attach the two sides of each bookshelf to each other as well as to glue the top to the bottom.
I let it dry for a short while before I moved on to the next section.
The glue did work to keep the sections together but I just didn’t trust it to hold with all the books on it so I decided to reinforce all the joins with duct tape as well.
I did this for each shelf first before I glued the top layer to the bottom and finished it off by joining it with duct tape as well! Better safe than sorry!
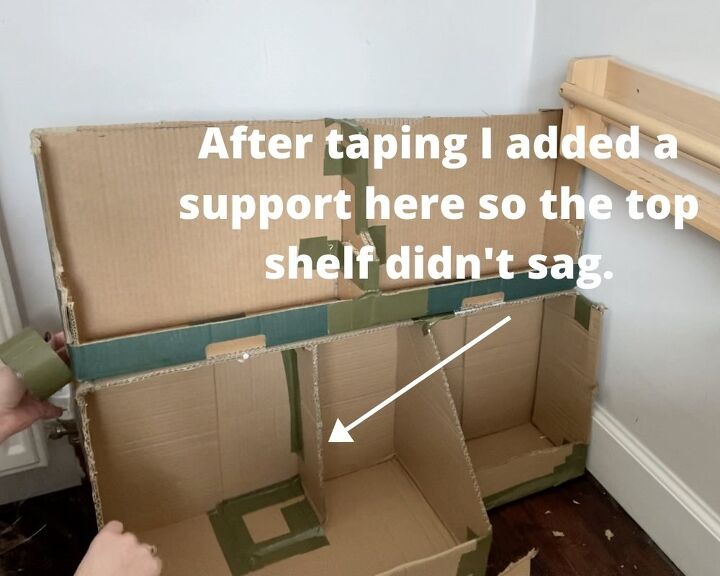
Once I had finished with the duct tape it was feeling pretty secure but I pressed down lightly on the top shelves and found a bit of a weak spot in the middle above the larger bottom shelf so I decided to reinforce it with another piece of cardboard as a support.
I didn’t use the glue for the support I just taped it in place. It actually worked out really well as a divider – it added a new section for different sized books!
Step 4: Decorate!
At this point the bookshelf is built. So it’s personal preference how you decorate it.
I used some bird print wrapping paper that my son picked out. I did find wrapping each section of the bookcase VERY tedious though!
If I was going to do it again I would use contact paper that is already sticky on the back so you would just need to cut it to fit each section and then take the backing off to attach.
The part that annoyed me to no end was constantly loosing the end on my roll of clear sellotape!
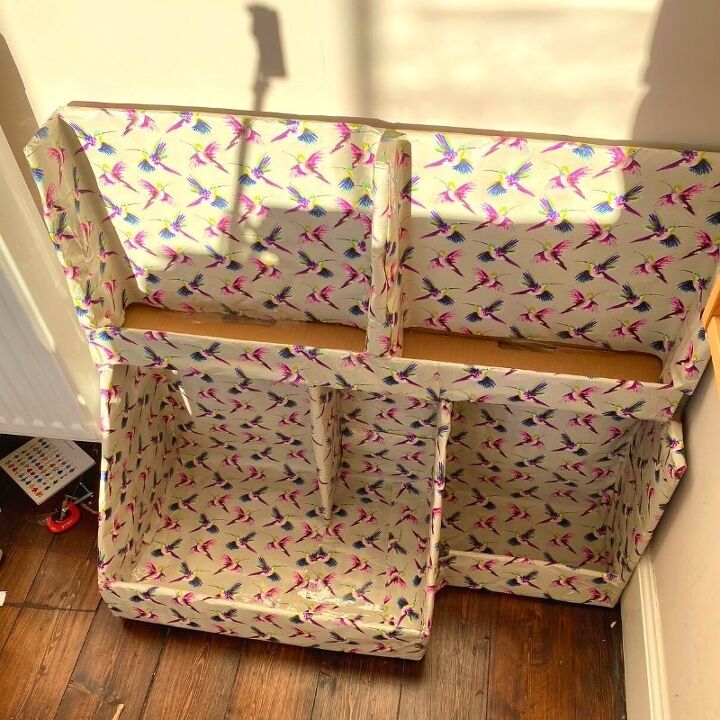
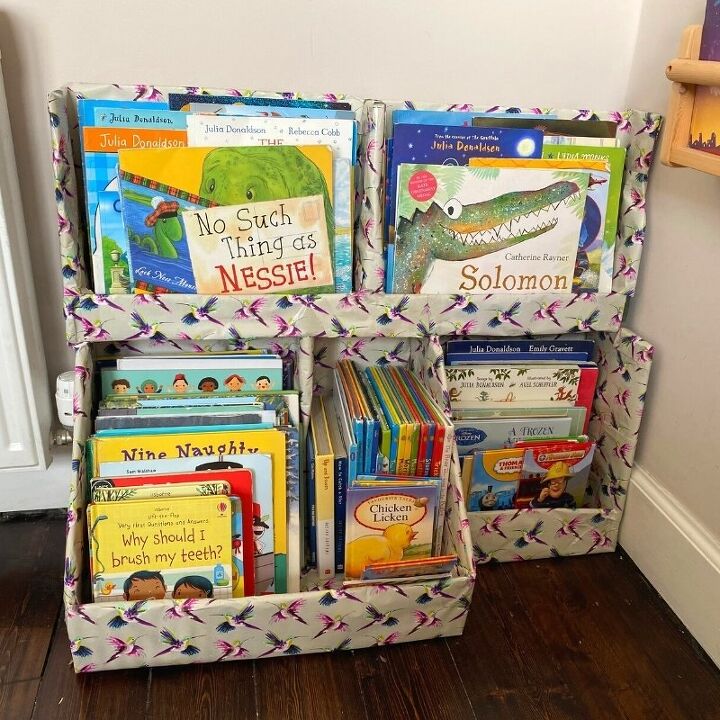
As you can see from the light in the picture the ‘wrapping’ took me almost until the end of the afternoon! I also ran out of paper so thankfully I had strategically left the bottom of the top shelf bare as it will be hidden by books anyway!
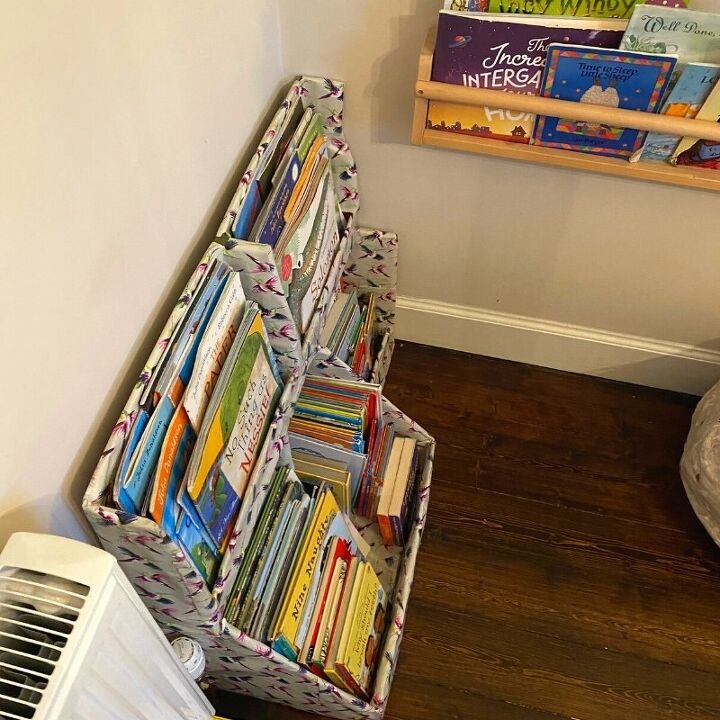
Finished: DIY Cardboard Bookshelves!
The perfectionist in me isn’t happy with the finish of the wrapping paper decoration but all in all I am pretty pleased with this project.
My son loves it, it holds way more books than I thought it could and I successfully proved my point to my husband! Namely that you don’t need to go out to buy something to sort out a messy kid’s room!
If you liked this post subscribe to my newsletter for more.
Resources for this project:
See all materials


Comments
Join the conversation
-
Very clever. Also, it's better than spending money and hearing about it. I think it is adorable and functional.
-
Recn find a more solid box or wood crate to sit yr creation on then u can make shelf 2 wider or even a no 3 shelf hehe
Inside crate have the drawg books & pens - yep done this & works for Mz5🤗


Frequently asked questions
Have a question about this project?
Looks great and anything to make a child area neat is fantastic.
What was your husband's reaction?
What about the heat from the radiator?