


Linen Closet Renovation: DIY Closet Shelving The Lazy Girl Way
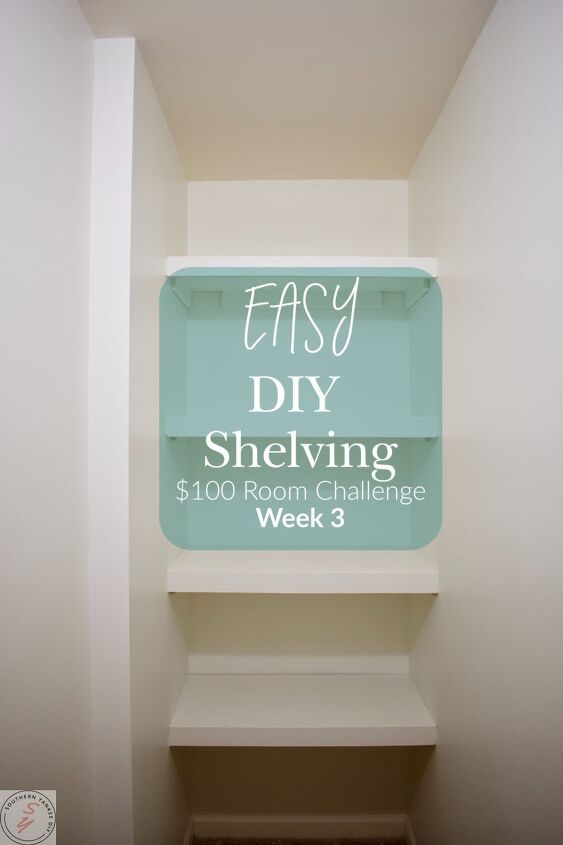
Linen Closet Renovation: DIY Closet Shelving The Lazy Girl Way
Week 3 is like the Wednesday day of the week. We are right in the middle, where the end is in sight but we still have a couple things on our to do list before we can get there, including finishing this DIY closet shelving!
Erin from Lemons, Lavender, & Laundry started this challenge a couple of years ago ( you can read more about that here). Basically, a bunch of very talented bloggers get together to take on renovating a space for $100 or less! We have 1 month to complete the challenge & the hope is to have a swoon-worthy room at the end, all while staying in budget.
This week we completed our DIY linen closet shelving! I love love love adding custom shelving to closets because it gives them a built in feel for super cheap! We added shelving using this same technique to our nursery closet & office.
To keep this part of the renovation super cheap I used mainly scrap wood, but even if I didn’t have scrap wood it still would have been really budget savvy to recreate.
Supplies:
- 1×4 Board
- Paint Grade Panels or Plywood
- 3in Pieces of Scrap Plywood
- Paint (I used Pure White by Sherwin Williams)
- Caulk
- 1 1/2 inch Screws
Process:
1. Start by measuring out your space & deciding how many shelves you want to add. My space was 32in wide & the panels are 16in wide so that’s the depth I used. I definitely recommend at a minimum making your shelves 12in deep.
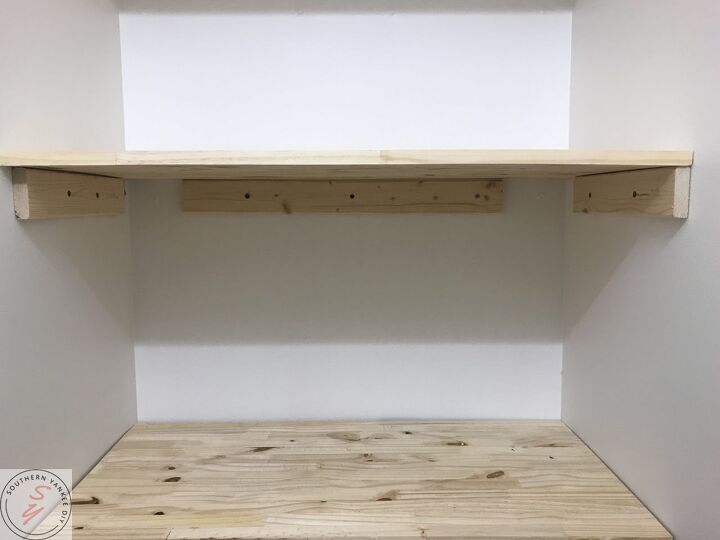
2. Cut the 1×4 in 3 pieces per shelf. The back piece I cut to 23in & the two side pieces I cut to 13in. These are the pieces your actual shelf will sit on.
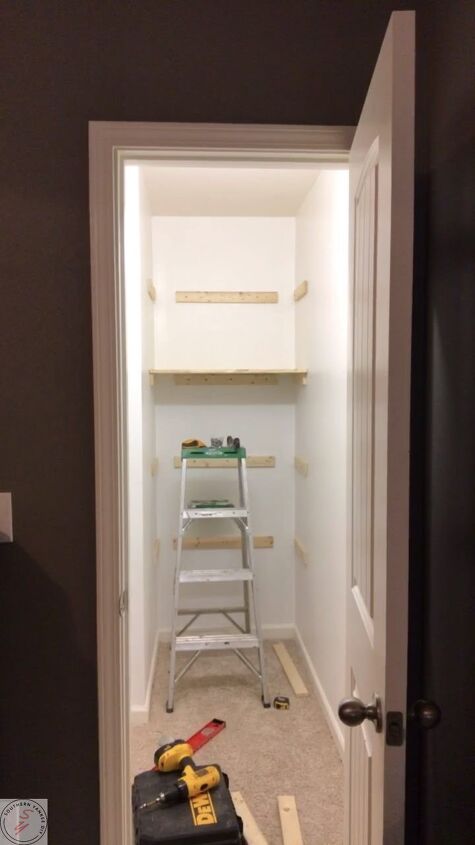
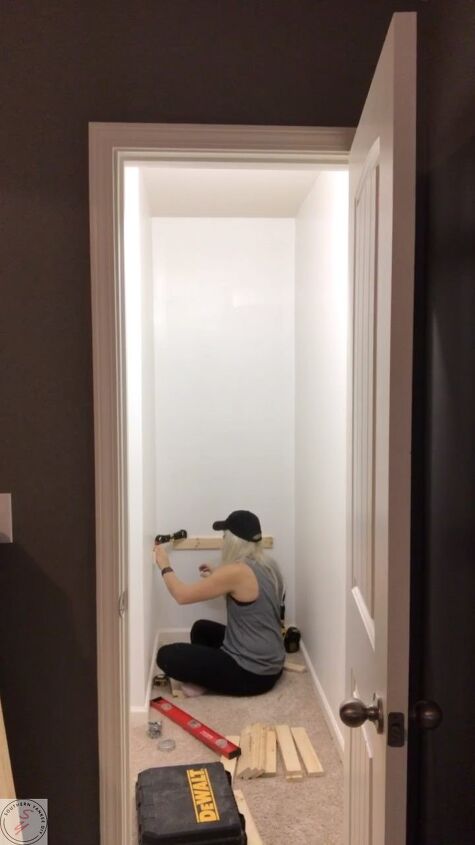
3. Using a level & stud finder mark where your 1×4 pieces will go & use your screws to screw them into the studs. I used three screws per piece to make sure there was a strong hold.
4. Once your 1x4s are in place they are ready for the panel. Cut them to your desired sized & simply lay them on top of the 1x4s. There might be a small gap & that’s okay because caulk is the magic wand of any DIY project! Using a nail gun, nail in the panel to the top of the 1x4s.

5. This is where the magic happens! To make the shelves look thick & expensive I add 3in of scrap plywood pieces to the front of each panel. I use my nail gun to attach them.
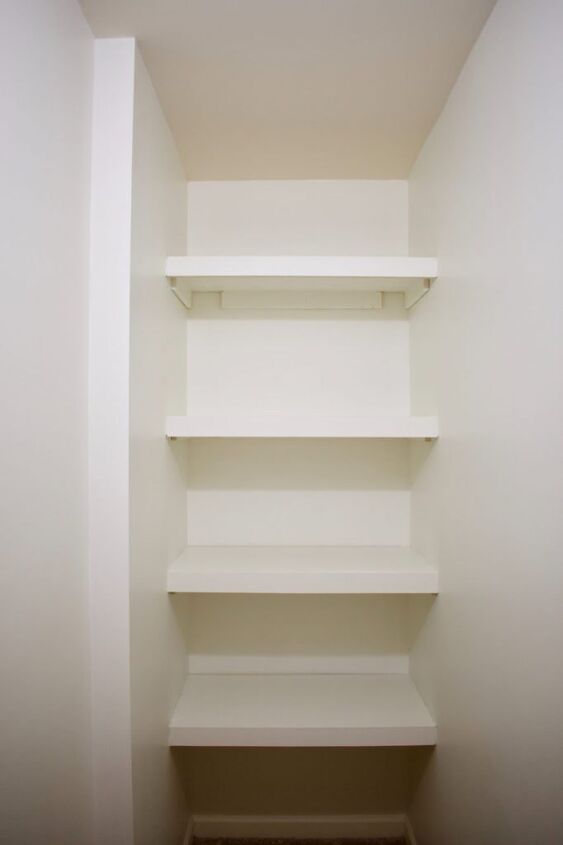
6. Finally, its time to caulk those gaps & paint your shelving! I painted my shelving the same color as the walls because I think it makes the shelving look more built-in.
Ahh there is nothing better than custom looking shelving on a DIY budget! This process is so simple you will want to do it to all your closets. It feels so good to have one more thing checked off our To DO list!
To Do:
- Declutter Linen Closet
- Take Down Wire Shelving
- Paint
- Add DIY Shelving
- Add Hooks
- Buy/Make Storage Bins & Containers
~Coming Soon~
Week 1 ~ Week 2 ~ Week 3 ~ Week 4 ~ Week 5
Be sure to check out everyone else’s spaces below!
You are invited to the Inlinkz link party!
Click here to enter


Comments
Join the conversation
-
It turned out great! If you want to cover the hole underneath, cut some light weight craft foam . It won't show or add any unneeded weight and if you use modge podge on it you can paint it with your extra paint
-
I wouldn’t call this a “lazy” project. It took time to figure out and execute. Looks great and clearly doable.


Frequently asked questions
Have a question about this project?