


How to Clean Your Keurig Coffee Maker for Better-Tasting Coffee

By Alexa Erickson
Who wants to wait for a whole pot of coffee to brew when a perfect, single cup of coffee takes moments to make? That’s the question Keurig answered with its genius single-serve coffee machine. Simply plop an individualized pod into the designated spot on the machine, press the brew button, and your cup of coffee or tea will appear in seconds. The Keurig has become a big hit among coffee and tea drinkers alike, and keeping the device clean ensures your coffee remains at its freshest and prolongs the lifespan of the machine.
Here’s a guide on how to know when it’s time to give your Keurig a good cleaning, and how to do it.
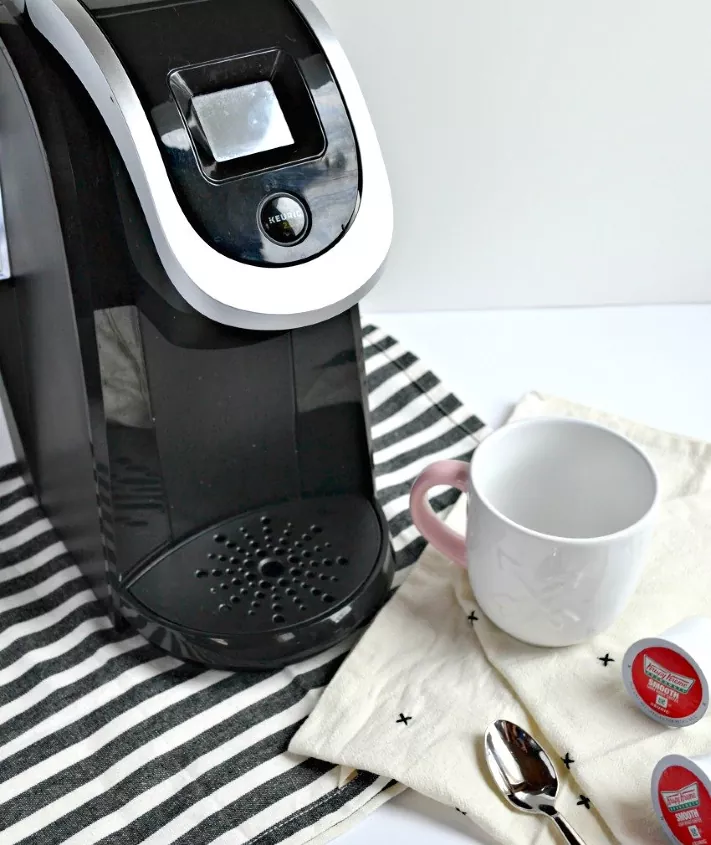
Photo via Abbey D
How You Know It’s Time to Clean Your Keurig
By just taking a look at your Keurig, you’ll know when it’s time to clean the outside of the machine. The drip tray you set your mug on gets sticky and grimy, or dust has settled around the machine. Also, if the Keurig is starting to smell musty, that’s a surefire sign it needs a good cleaning.
But trust us when we say that if your Keurig coffee machine gets dirty enough, it’ll let you know. If your machine isn’t working properly (for example, it turns on, but no liquid comes through when you brew) that might mean that its piping systems are backed up with coffee or tea grounds or mold—yuck!
Risks of a Dirty Keurig
Cleaning a Keurig isn’t just about keeping the machine looking nice—it’s a health and safety precaution. As with any type of coffee maker, Keurigs are subject to mold growth if not properly drained, rinsed, and cleaned.
One study from CBS swabbed the various components of 29 Keurig coffee makers. A swab from one machine contained 4.6 million colonies of bacteria and mold. In another machine, E.coli was detected. And in more than half of the machines, bacteria counts came back in the millions. All of these things can be detrimental to the immune system.
A Keurig machine should also be cleaned regularly to prevent mineral buildup, which affects the taste and quality of the coffee it pours.
How Often Should You Clean Your Keurig?
General cleaning of your Keurig should be done weekly. Choose a day (perhaps on the weekend when you have more free time), to wipe down the Keurig’s exterior, wash out the water reservoir, and clean the drip tray and pod holder.
How to Clean the Outside of a Keurig
The outside of the Keurig will get dirty the fastest since it’s exposed to elements like coffee splatters and dust. Use a wet wipe to wipe the exterior of the machine. Slide out the drip tray, empty, wipe clean with soapy water, and return to its position.
How to Clean Individual Parts of a Keurig
The individual parts of the Keurig require TLC, too! Here’s what you need to know to keep the machine sparkling—and brewing great coffee—on a regular basis.
Tools and Materials Needed
- Warm, soapy water
- Dry, clean cloth
- Paperclip
Step 1: Turn Off Keurig
Turn off the machine, unplug it from the outlet, and allow it to cool if it was recently used.
Step 2: Wash the K-Cup Pod Holder and Funnel
Lift up the lever of the machine to access and remove any leftover K-Cup, the K-Cup pod holder, and funnel. Wash both parts in the sink using warm, soapy water. Dry with a clean cloth.
Step 3: Clean the Entrance and Exit Needles
Use a clean paperclip to clean the needle that pierces the pods on top, as well as the exit needle beneath the pod holder. The pin will loosen up any debris stuck in the needles. ( This video from Keurig explains how to locate the needles.)
Step 4: Clean Water Reservoir
Remove the water reservoir from the machine and wash thoroughly, including the lid, with warm, soapy water. Rinse clean. There’s no need to dry the inside with a towel, as it may leave behind lint residue. You’ll be filling it with clean water soon after for use, anyway.
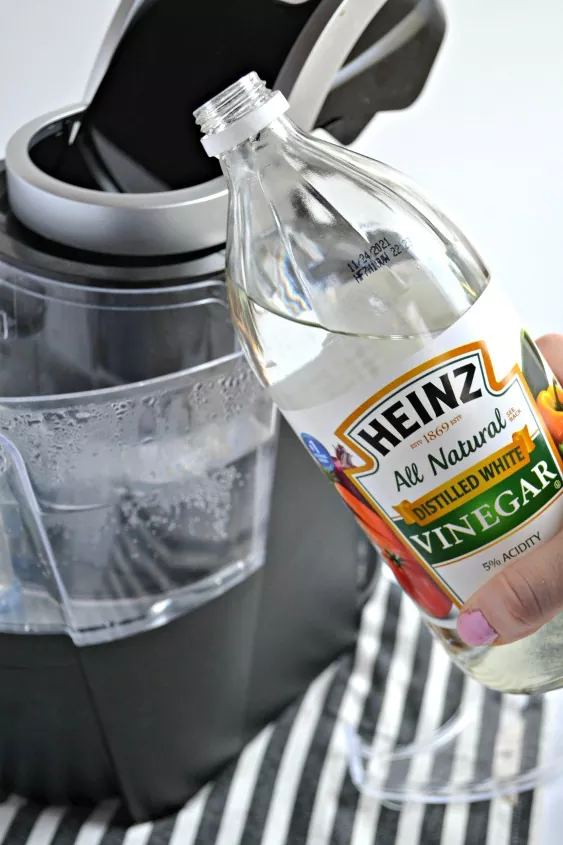
Photo via Abbey D
How to Descale a Keurig
Descaling the machine can be done as the next step after wiping down the exterior and cleaning the individual parts of the machine. The process of descaling removes the normal buildup of natural minerals in the water of your coffee machine’s tank that leave behind calcium deposits.
You can either purchase the Keurig Descale Solution or opt for white vinegar to remove lime and scale buildup. But, according to the cleaning experts at Molly Maid, cleaning your coffee machine with a commercial descaler is almost exactly the same as using vinegar.
Keurig recommends descaling your brewer at least once every three to six months.
Tools and Materials Needed
- Mug
- Keurig Descale Solution or white vinegar
- Filtered water
Step 1: Turn Off Keurig
Turn off and unplug the machine.
Step 2: Disassemble and Wash
Wash removable parts of your Keurig as explained above. Wipe the exterior as explained above, as well. Return parts to the machine, and plug back in and turn on.
Step 3: Add Vinegar to Reservoir
Fill the water reservoir halfway up with the vinegar or descale solution. Fill the rest of the reservoir to the top with filtered water.
Step 4: Run the Machine
Place a mug on the tray as if you were to brew a cup of coffee. Without inserting a K-cup, start the brew cycle, repeating until the water and vinegar or commercial descaler solution has fully emptied from the reservoir (you’ll have to keep an eye on the mug as it fills up and empty it as needed).
Step 5: Rinse and Repeat With Water
Fill the reservoir once again, this time only with filtered water, and repeat Step 4 until the reservoir is empty. This process will remove any leftover descaling solution or vinegar residue.
How to Keep Your Keurig Clean
Weekly cleanings are important for maintaining the lifespan of your machine. After each use, try to wipe down the Keurig pod area of any loose grains. Keurig also makes Keurig Rinse Pods, which can be used weekly to keep the system running smoothly until it’s time to do a full descaling again. In place of a K-Cup, insert the Rinse Pod and brew on the eight-ounce setting. Remove and discard the pod and the brewed rinse solution. Follow with an eight-ounce water brew for an additional rinse.
Are you team Nespresso? We've got a guide on how to clean your Nespresso machine, too!
Comments
Join the conversation
-
Using a regular coffee pot is better than the keurig because of all the the k- cups. But please if you have a keurig make sure you recycle the plastic k-cups. It's easy to take off the cover rinse them out and recycle them. There's too much plastic on this planet and the maker of keurig himself regrets making this now because of all the plastic he created...his words.


Frequently asked questions
Have a question about this project?