


5 Fun Ways to Style a Dough Bowl for Christmas!
Dough bowls are so much fun to decorate with. Today I will give you five unique ways to style them for over the Christmas holidays and lead you through step by step!
As I sit here writing this we are having our first substantial snow fall of the season and I could not be happier. I love snow at this time of the year. Check in with me in January and you will hear another story! In this DIY, two of the stylings of the dough bowl are Christmassy, but three are in a way that I like to refer to as "winter decorating" so they could stay up much longer.
PICKING THE DOUGH BOWL
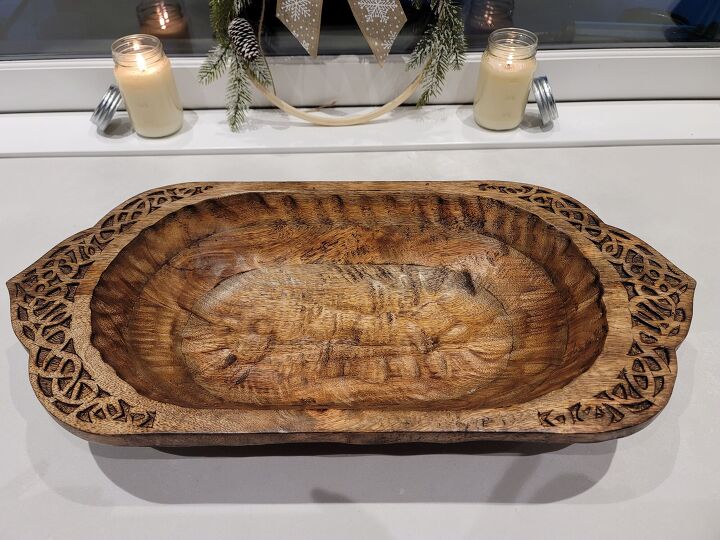
There are so many choices when it comes to dough bowls – long, short, plain, carved, painted, etc. There are even dough bowls filled with wax and make the most lovely candles. Above is the one I got. To be very honest, I was searching for a plain one but I had to purchase one that could arrive quickly so this one was the best choice. I was apprehensive but when it arrived, I fell in love. It is exquisite. The workmanship is beautiful and so well done. Check out my blog by clicking this link to find out where to buy it if you are interested.
PREPARING THE DOUGH BOWL
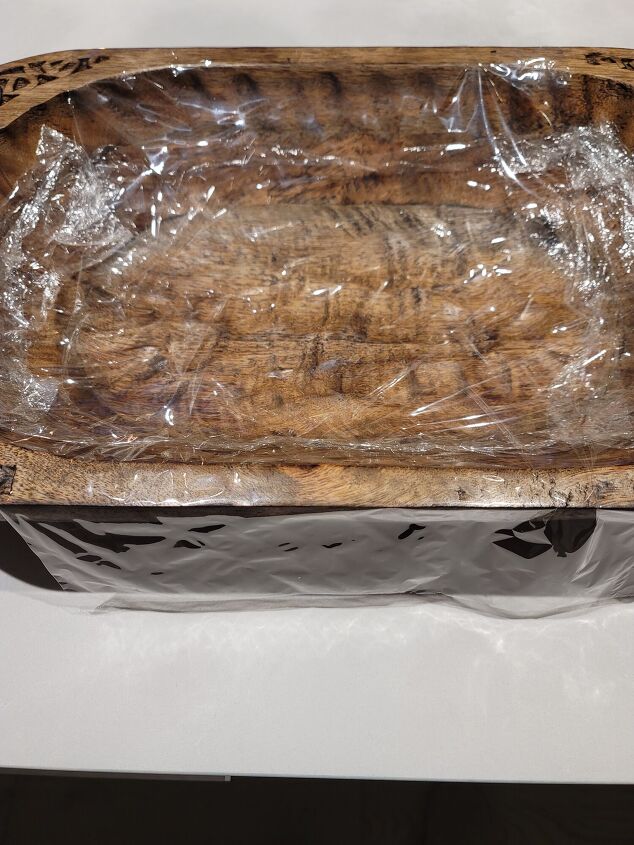
Depending on what you are doing, you must always keep in mind that you do not want to damage the wood with water, sharp materials, etc. So make sure to place some sort of protective barrier down before adding the materials.
For the first project, I will be using live trees and moss which will need to be watered so I covered the inside of the dough bowl with plastic wrap to ensure that water did not damage the wood.
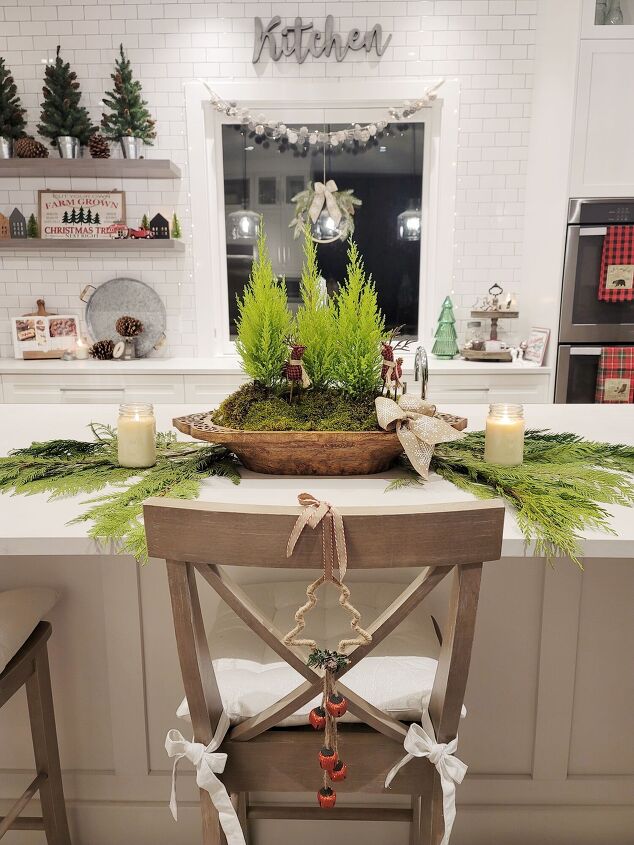
#1 WINTER WOODLAND SCENE
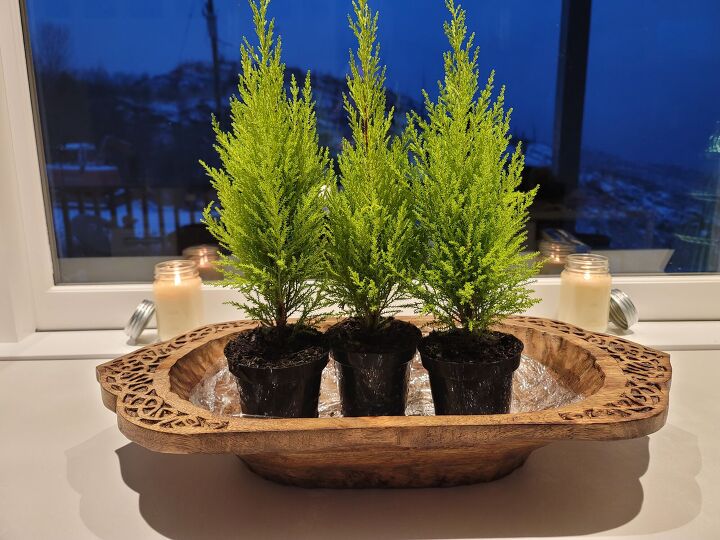
For this one I wanted to create a scene that could last through until the end of February. I chose 3 cypress miniature trees as I loved their bright cheerful color.
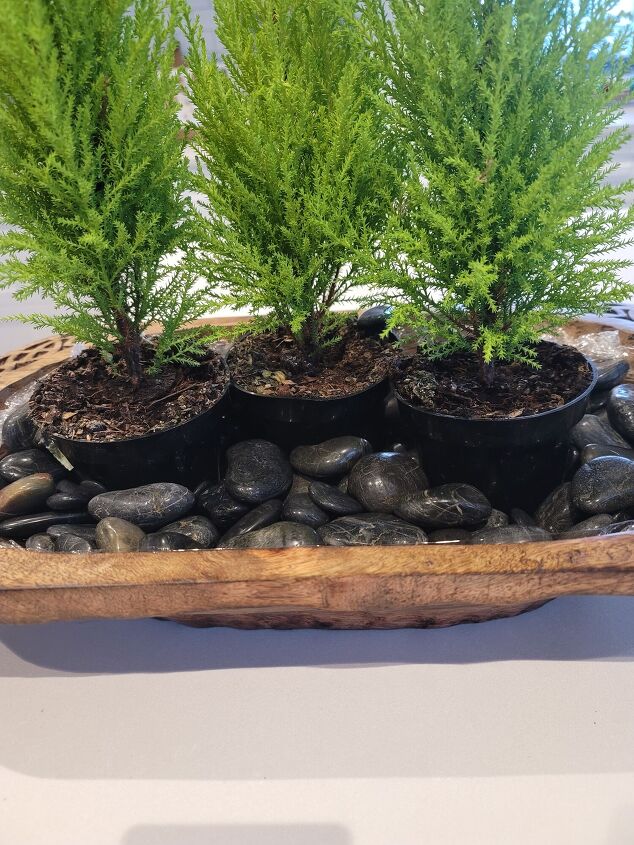
Next I stacked in rocks to secure the trees from tipping over and to provide drainage for the moss.
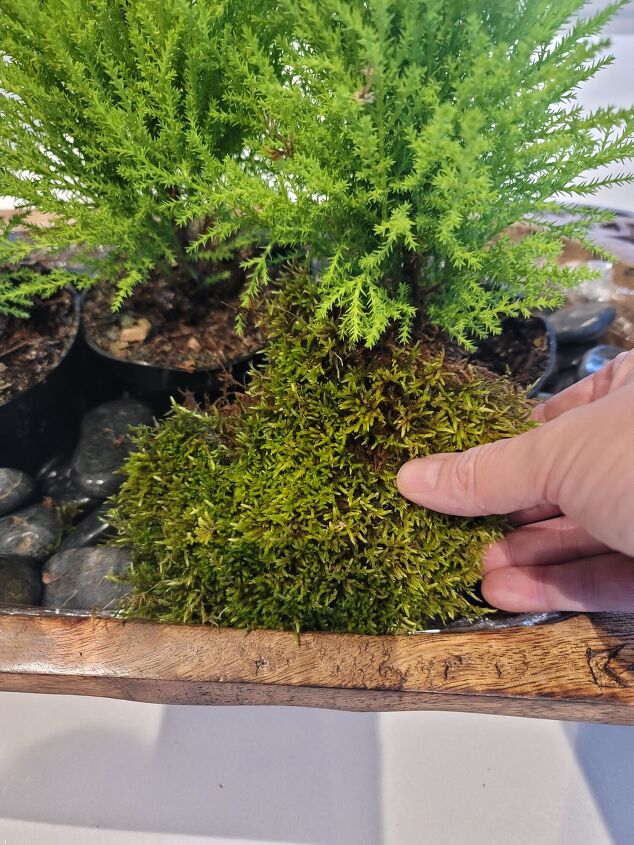
We live in a rural area where there is an abundance of moss so it was as easy as walking outside and collecting thick sheets of moss. If this isn't the case where you live, contact a garden center to see if they have some and otherwise shop online. Place the moss over the rocks to the edge of the dough bowl, but make sure there is plastic under it.
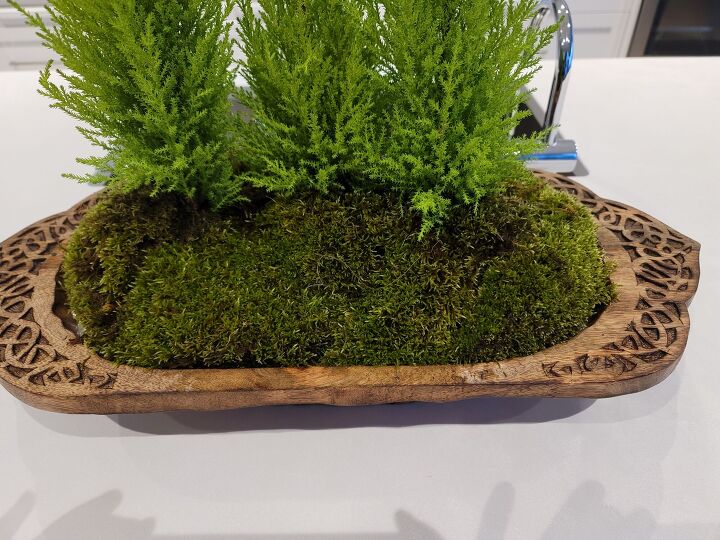
Continue to place the moss to cover the rocks and the pots. I placed the moss right up to the trunks of the trees as I wanted it to appear seamless.
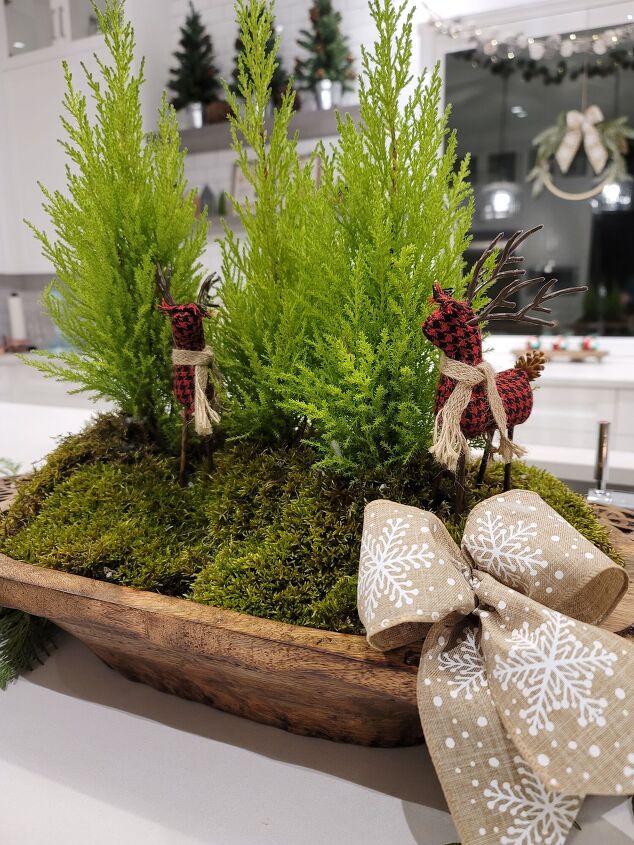
I added in two reindeer I found at the Dollar Store and made a bow out of burlap ribbon I had.
I have really been surprised at the cute items I found at the Dollar Store this year. If you can't find reindeer there, check out craft stores like Michaels or online. Did you notice the cute pinecone tails on the deer?
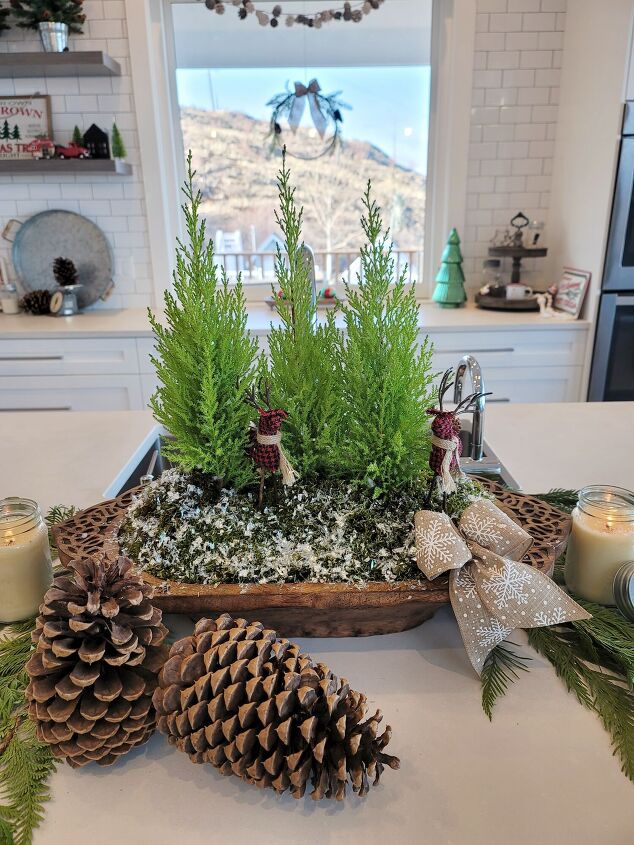
Next I sprinkled on glitter snow flakes. I showered it on as if it was falling from the sky so that it looked natural. That means some landed in the trees, others landed on the moss and some even fell on my counter which actually looked pretty.
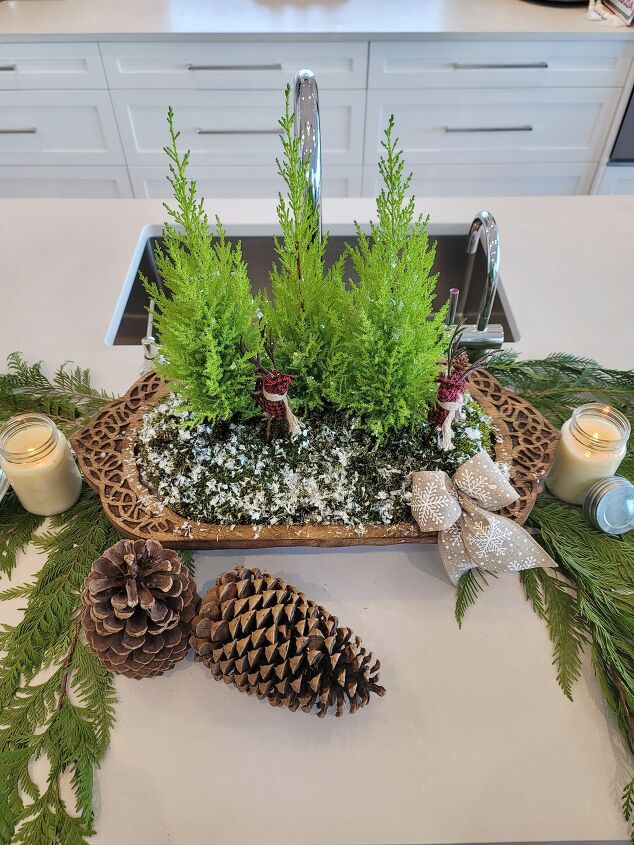
Next, lay out a few cedar boughs on either side of the dough bowl, place mason jar candles with an evergreen scent and pine cones in front.
This results in a lovely natural winter scape that you could place on your counter, entry table, coffee table, etc.
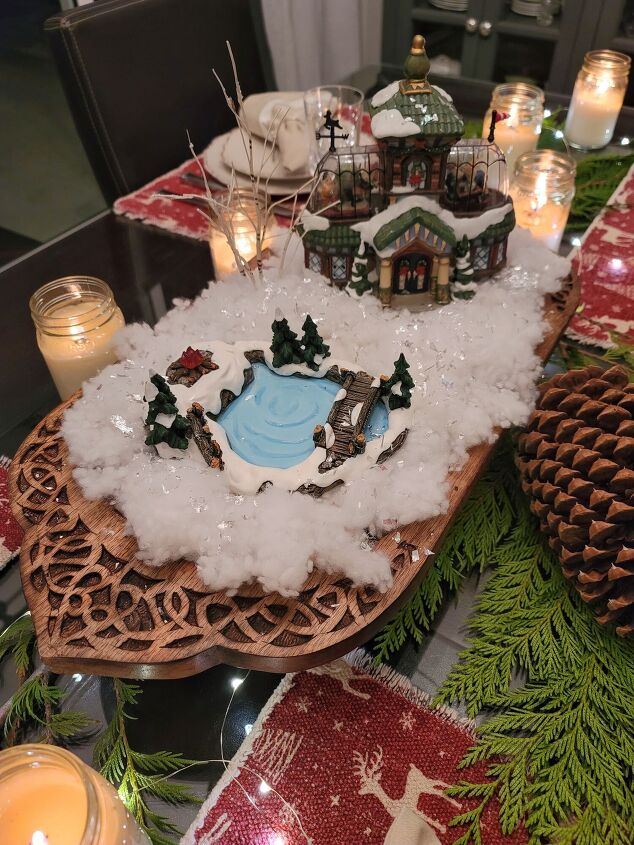
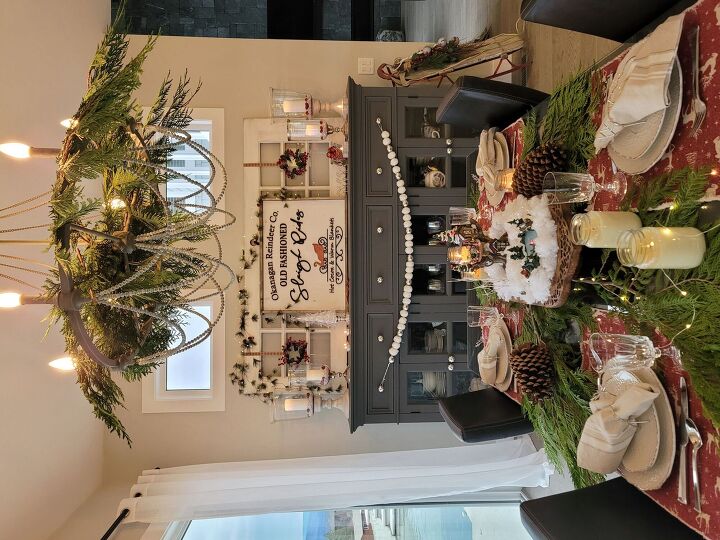
#2 CHRISTMAS HOUSE TABLE CENTER
I have a secret obsession with miniature Christmas houses. I have not counted how many I have but I would say I probably have around 50. To be fair, my mom gave me many of hers so that explains part of the over indulgence. I don’t have anywhere to display them so I try to work them in here and there. When considering a dough bowl in the dining room, I thought this would be the perfect opportunity to make a table center with a house or two.
Transitioning from the tree scene to this one required me removing the reindeer, moss and trees. I left the rocks as they added height and then folded up extra placemats I had as they fit perfectly into the dough bowl and provided a flat surface over top of the rocks. I then added fluffy snow and once the house, pond and tree were in place, I sprinkled it with the flaked snow.
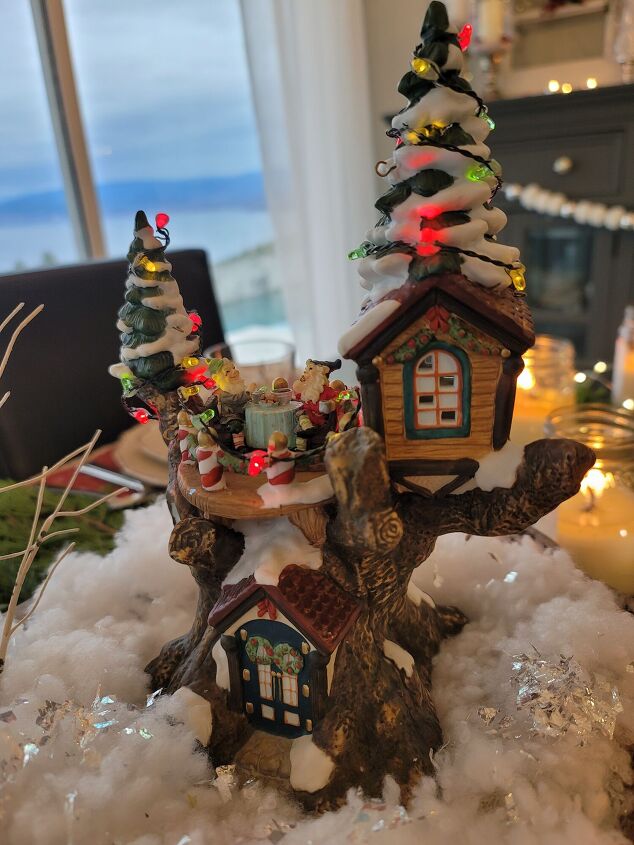
I swapped out the house and replaced it with a tree house where Santa and an elf are enjoying a meal. Can you imagine children sitting at this table? I know if I was young I would be peering into every window and soaking up all the details. This would have been a delightful experience!
I have tried many times to get this photo to be upright, but if it shows up in the post on it's side, please know I have straightened it up several times and it looks straight on my end....ahhhh!!!
As for the rest of the table…I opted for heavy red placemats with a reindeer design, simple ivory dishes, cedar boughs, mason jar candles, twinkle lights and pine cones.
The chandelier seemed to not be tying in with the overall look, so I draped some cedar boughs and suddenly it all came together.
In the background you can see my china buffet with an old french door on it side, candleholders, a rustic sign, a pom pom garland, vintage glass sleigh and more greenery.
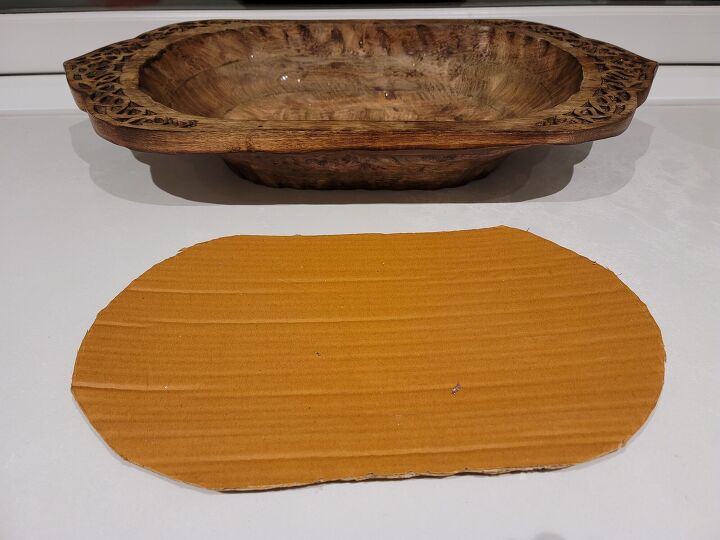
#3 CANDLES & PRETTY BOBBLES IN THE ENTRY
While the rocks were a great base, a solidly flat surface is so much easier to work on. Trace a piece of cardboard to fit the dough bowl at the level that you want your decor to be based at.
The dough bowl I have is very deep. Many dough bowls are shallow so you will not need to do this. A good depth is one inch below the top of the bowl so that the bobbles don't roll out.
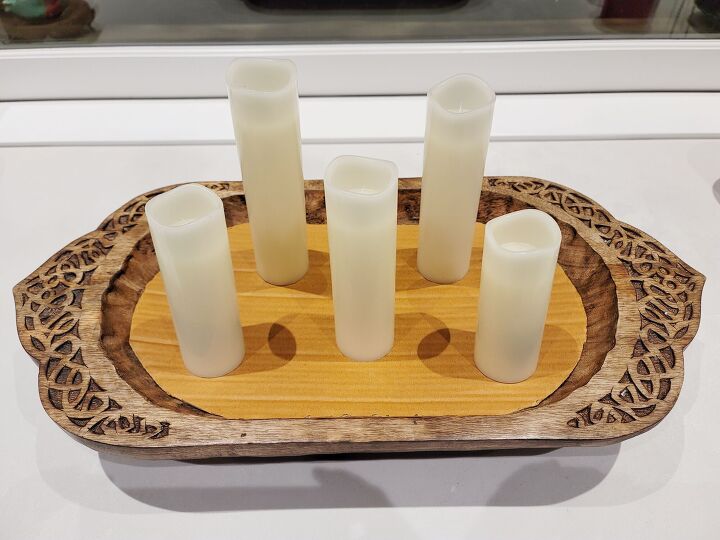
One suggestion I would make is to purchase a good set of battery operated candles. I switched over because we had a number of candles melt through the sides and drip over cabinets and onto the floor at Halloween. What a mess!
I opted for 5 different sized candles. I put the two tallest ones at the back - the left one is slightly taller than the right one. Then I place three candles about two inches in front of the back candles in a staggered fashion. There are no rules on this - do what makes your heart happy. If all your candles are the same size, just go for it.
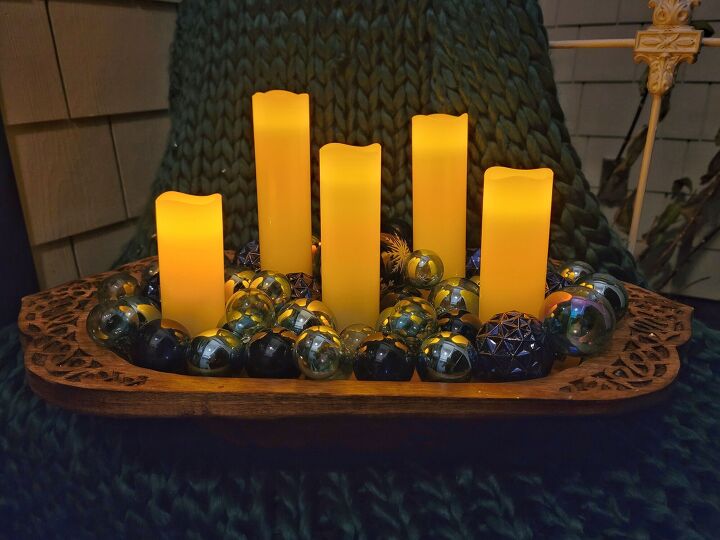
Due to the tones of my bowl I opted for bobbles in blue tones. The wood and the blues, were so stunning together.
My bobbles were three different sizes. I placed the largest ones in first and had very few of them because there really isn't that much space in the bowl once the candles are in. I ended up only using one very large bobble. I then placed all the medium sized bobbles and lastly I fit the smallest ones into the gaps.

Look how dazzling this is!
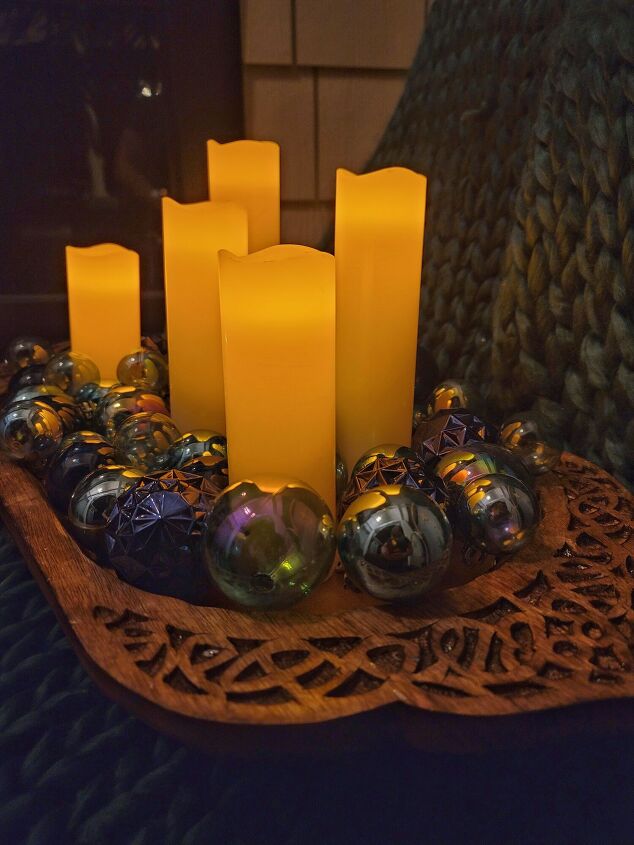
This photo shows how complimentary the wood tone was to the bobbles and the candles.
I positioned this dough bowl on a bench at my front entrance with a dark blue chunky blanket underneath.
The candle light bounced off of the bobbles and the texture of the blanket. It was breathtaking!
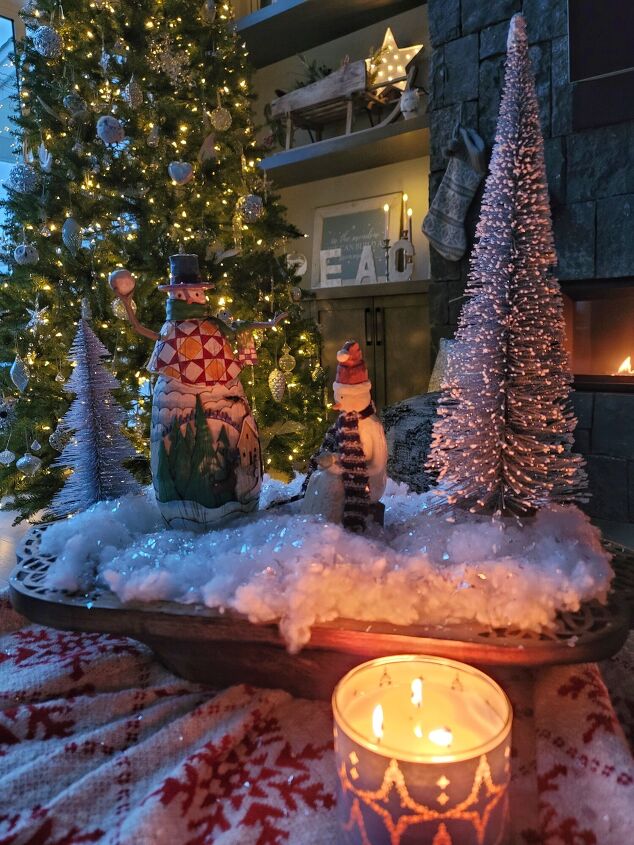
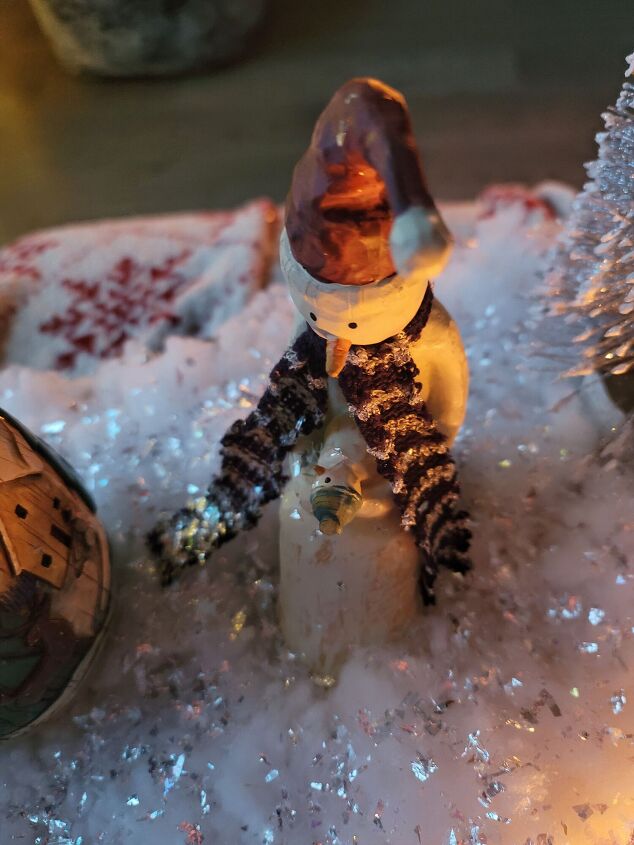
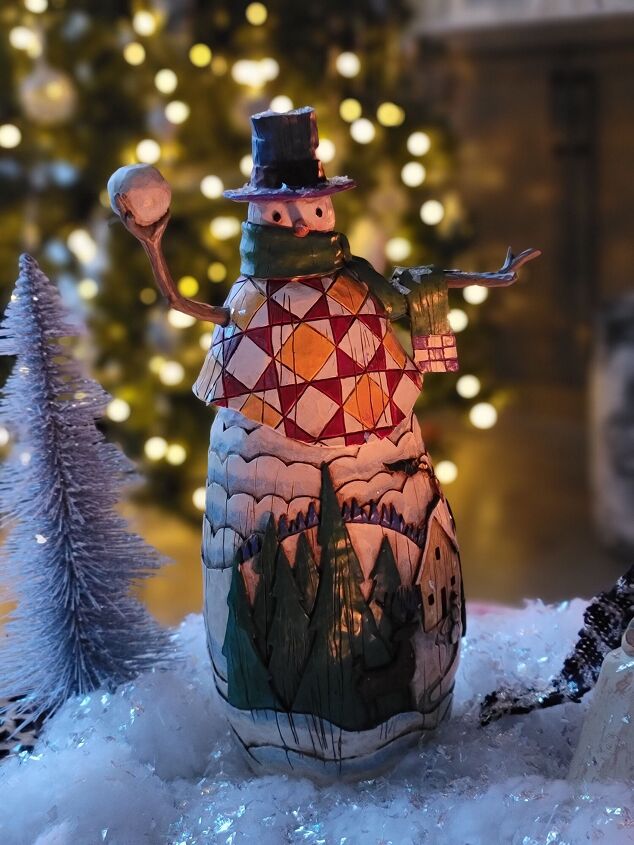
#4 SNOWFAMILY OR OTHER COLLECTION
Is this not the sweetest little scene? A mama snow "person" lovingly looking at her baby while papa snowman engages in a snow ball fight!
Similar to my Christmas house collection, I also have a collection of snowmen. You may have a collection of reindeer, or Santa and elves or a nativity scene. This is your chance to create a vignette with your collection.
As you will see, I added in loads of fluffy snow and silver bottle brush trees. If you were working with a nativity, you could have straw for the base. For Santa and the elves, you could have a simple wood base, or even wrapping paper over the cardboard base might be fun. Think of naturally what would be in the scene and find a way to re-create it.
I placed a wide candle in front of the dough bowl which was to represent a bonfire. The candlelight danced around the scene and truly looked like a little fire.
Sprinkle the glittery snowflake flakes on last. Allow some to land in the trees and on top of your figurines as this will appear more natural.
#5 GUEST BEDROOM TREAT BOWL!!!
This dough bowl was prepared to be in our guest bedroom. When guests stay over, at some point they retreat to their room. I know that when I am travelling I like a little down time to unwind from the day. I collected items that I felt a guest could enjoy.
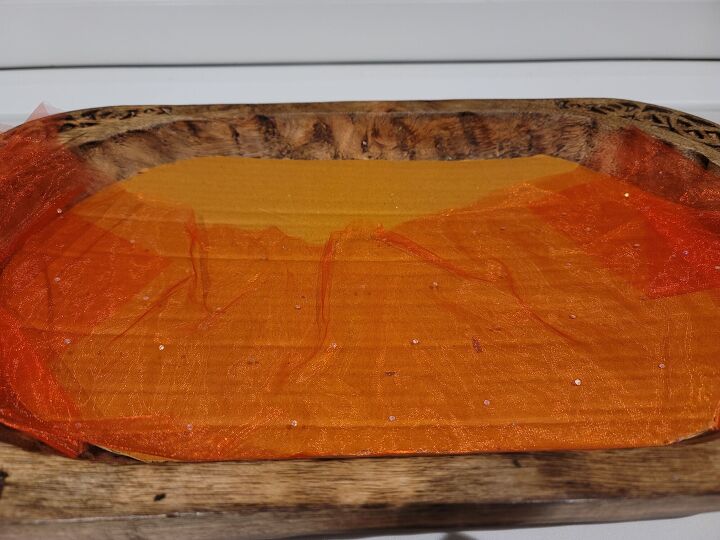
Once again I started with the cardboard riser with a red and gold piece of fabric to cover the cardboard.

As it is Christmas, I found a cute "Peanuts" word search book and thought it would be fun for my guests to use. You may want to provide a magazine or your favorite book.
To provide some height at the back of the bowl, place a plate stand at the very back in the center.
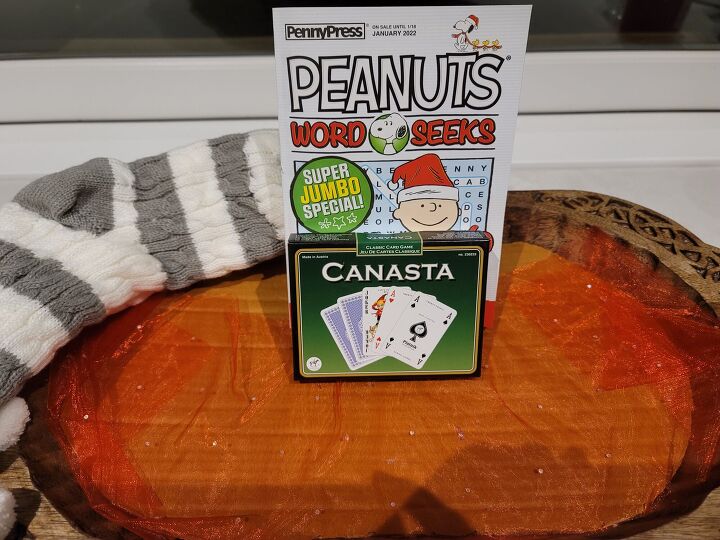
Next add the book or magazine. I also added a box of playing cards. This gives your guests a few options of what to do in their down time if they haven't brought their own books or games. I also added a pair of cozy sock/slippers in case they forgot theirs. (I have two on hand, but just showed one in the dough bowl as the other pair were pink and didn't work in with my color scheme).
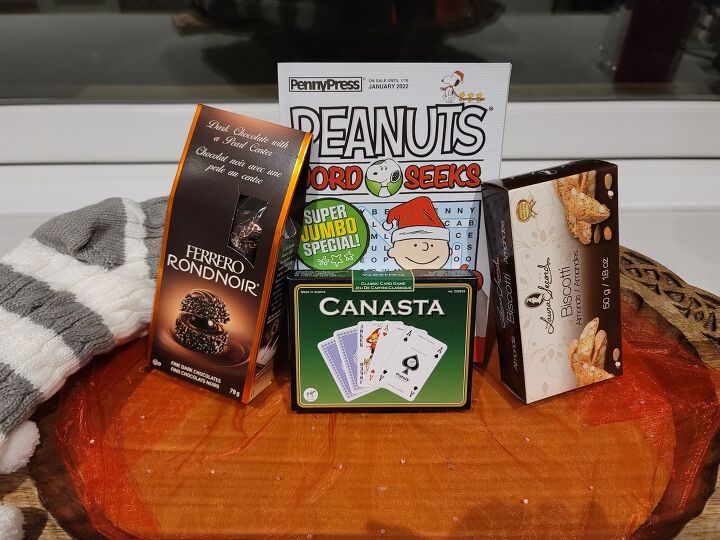
Your guests are on a holiday, so why not provide them with some treats that they may not otherwise have. I added in some decadent looking chocolates and biscotti.
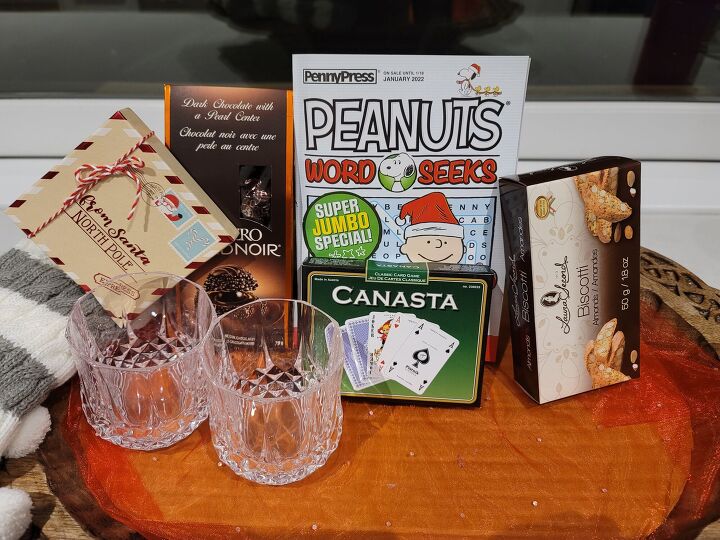
Next add in a couple of crystal tumblers for some special drinks.
See the "From Santa" box behind the tumblers...it is actually a gift card box and in it, I would place a gift card for a dinner out for your guests or perhaps an activity.
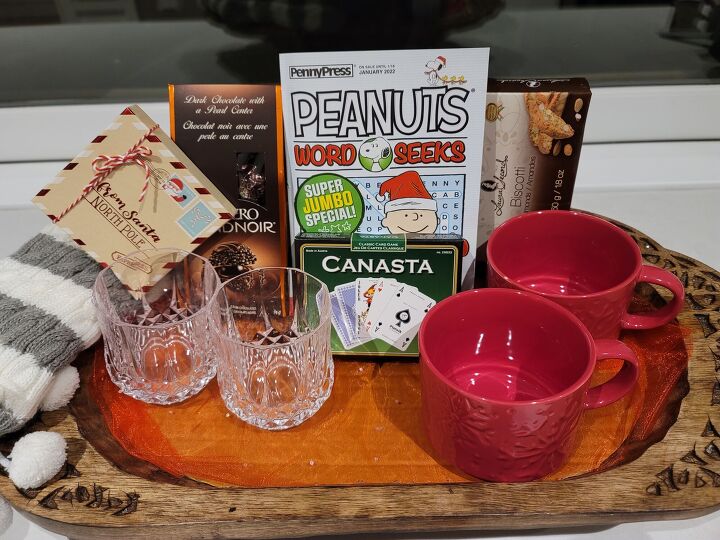
A couple of red snowflake mugs for tea or hot chocolate balance out the right side.
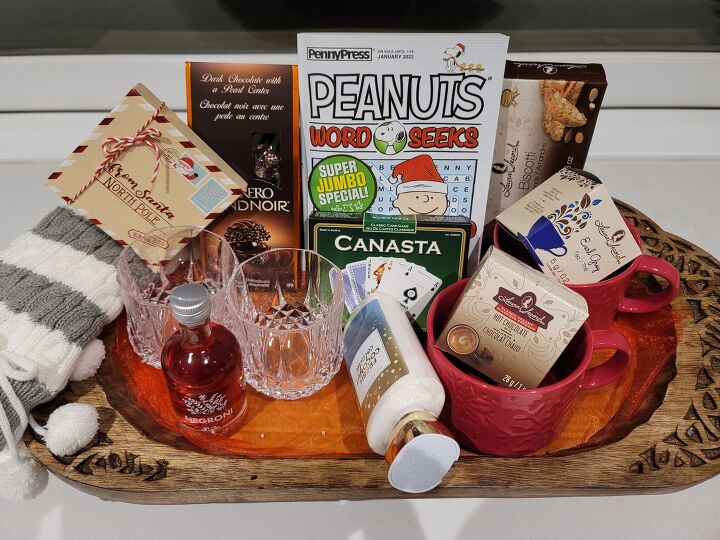
Load in the beverages. Tea, hot chocolate and an alcoholic beverage of your choice. I picked this little bottle of Negroni simply because I thought it was pretty and the lady at the store said people really liked it!
Lastly I added a bottle of body lotion in a beautiful scent. The area we live is very dry and often our guests notice it immediately.
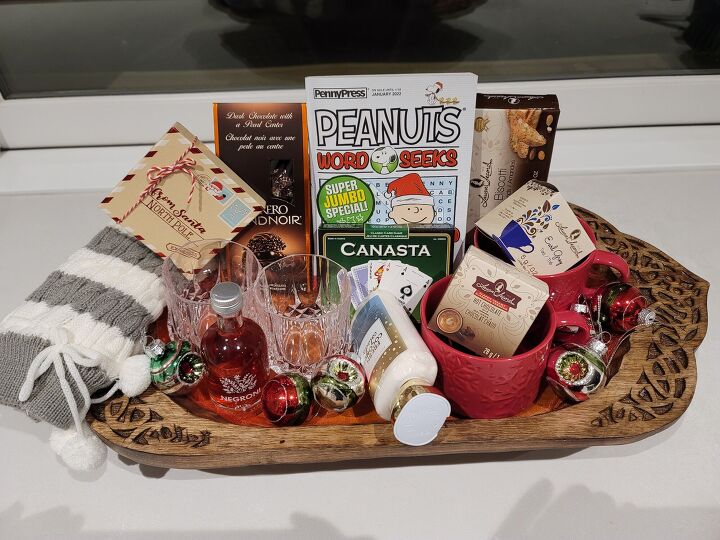
Lastly add in a few ornaments to give it sparkle and fill in empty areas!
Now who wouldn't want to see this waiting for them?
Thanks for sticking with me until the end. Sure hope you enjoyed it.
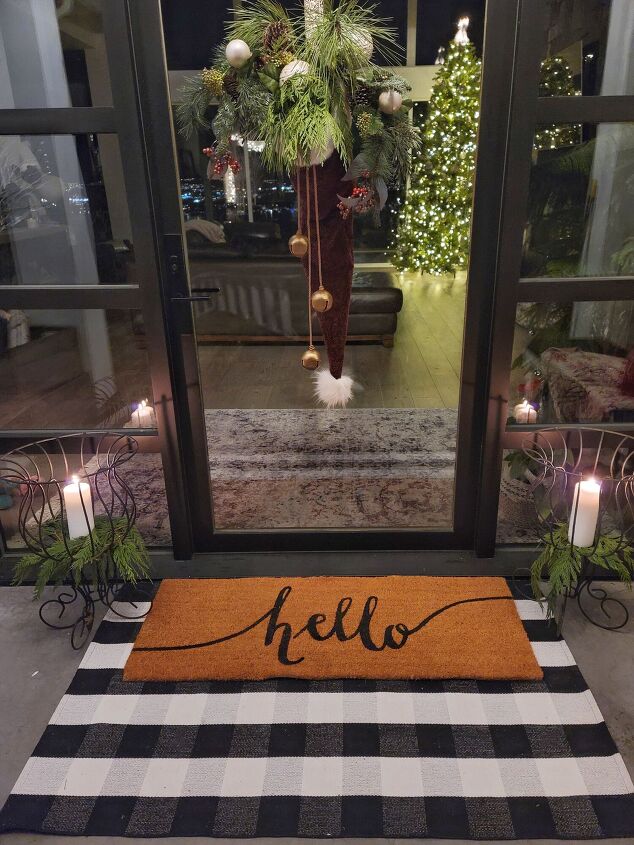
If you are looking for something really unique for your front door? How about switching out the typical wreath for this? Click on this link and I will show you how to make it!

Comments
Join the conversation
-
Wow! You have some awesome decorating skills! All beautiful ideas
-
These are beautiful! Love your kitchen!


Frequently asked questions
Have a question about this project?