


DIY Friendship Bracelet Napkin Ring
This diy friendship bracelet napkin ring is SUPER EASY to make!
I’d never made a friendship bracelet until now, and it was easier than I expected. In fact, once I got the hang of it, it took about 15 minutes to make each bracelet.
Yep, that’s it ~ 15 minutes!
I can’t believe I haven’t made them before. But I did kinda think they were just for young kids to make. Not a grown adult.
But making friendship bracelets was fun. And I love the final results.
I love that these simple bracelets only need one color twine. That they don’t require a complicated pattern that made me stand on my head to figure out. And that they turned out SO FREAK’N CUTE!!!
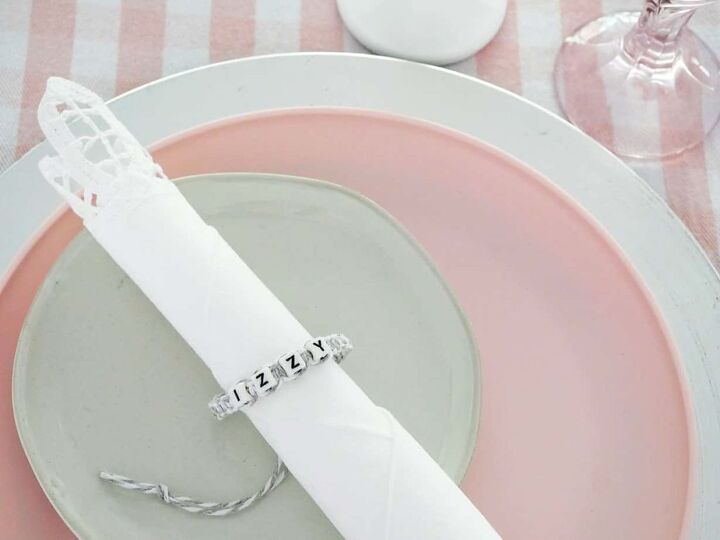
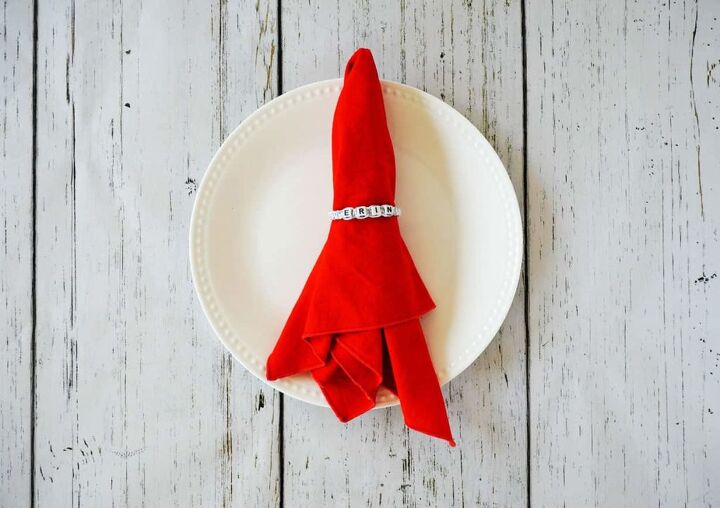
As you probably noticed, I refer to them as “friendship bracelet napkin rings”.
Why?
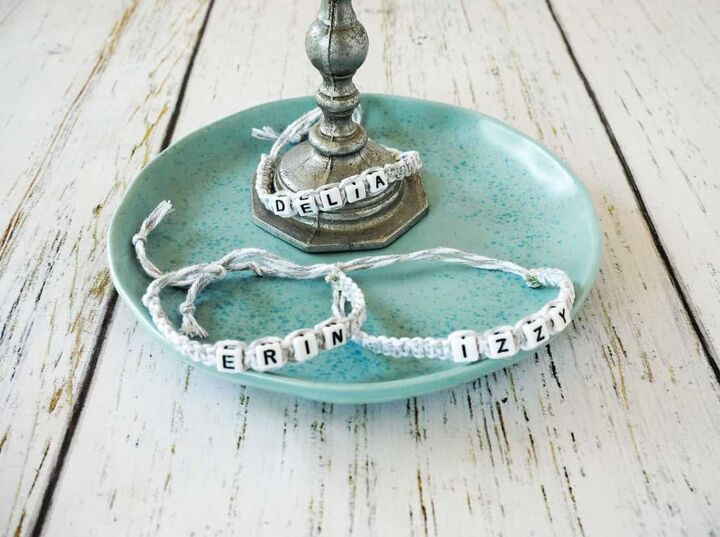
Because I actually used them as napkin rings/placeholders. They were part of a table setting for my girlfriends’ lunch. They had a dual purpose: they went around the napkins AND they identified where each friend would sit. Then they became a fun party favor for each guest to take home.
Isn’t that a great party idea!!!
Think about it for your next besties’ lunch, or maybe your daughter’s birthday party.
I’m sure these friendship bracelets will be a hit as napkin rings for you too!!
Supplies for DIY Friendship Bracelet Napkin Ring
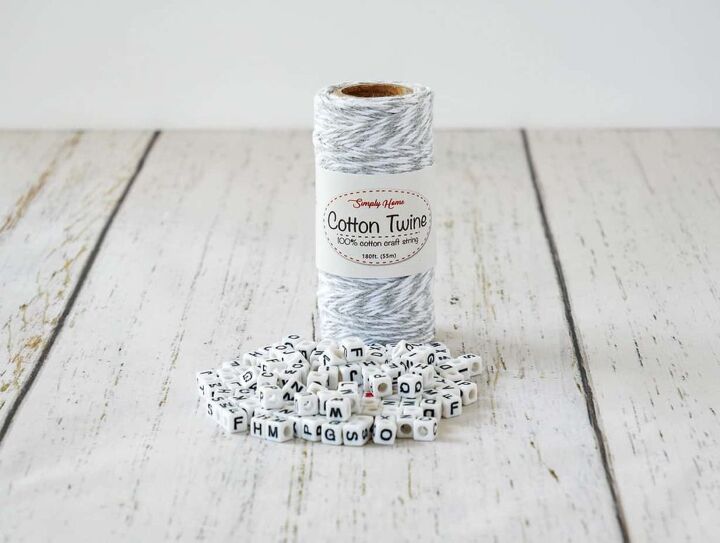
- Twine
- Letter beads
- Scissors, tape, binder clip, and glue
How to Make an Easy Friendship Bracelet Napkin Ring
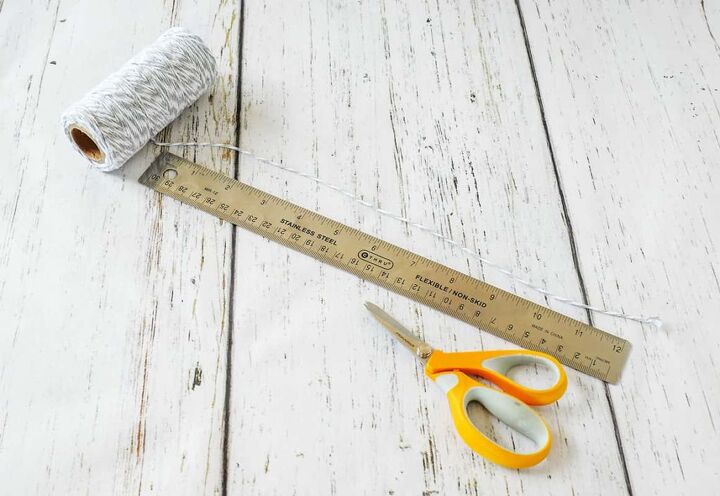
Step 1: Measure & cut the twine for your diy friendship bracelets
To make these easy diy friendship bracelet napkin rings, you will need two pieces of twine. That’s it.
Measure and cut one piece of twine 36-inches. Then measure and cut the second piece of twine about 50-inches long.
The shorter piece will be the stationary, middle of your bracelet.
The longer piece will be used for creating knots and tying your friendship bracelet.
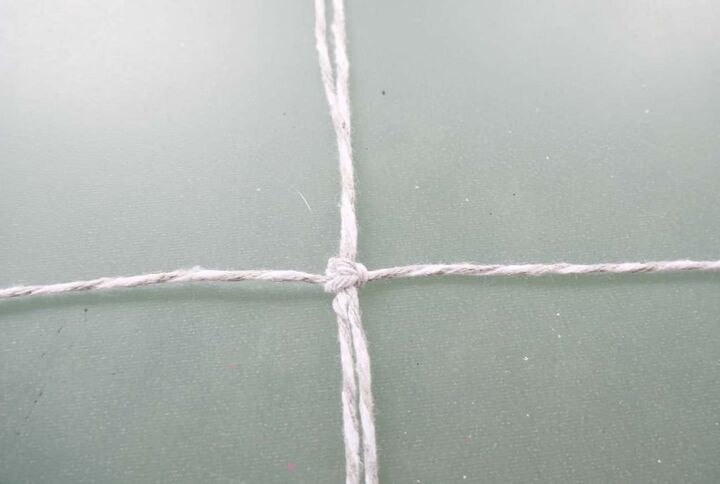
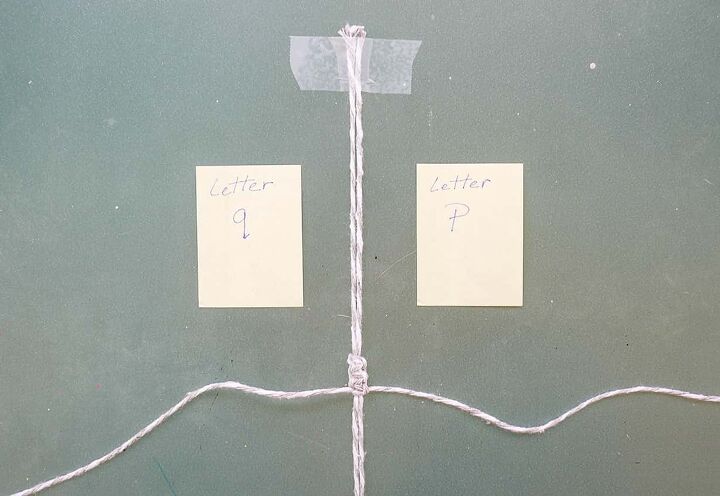
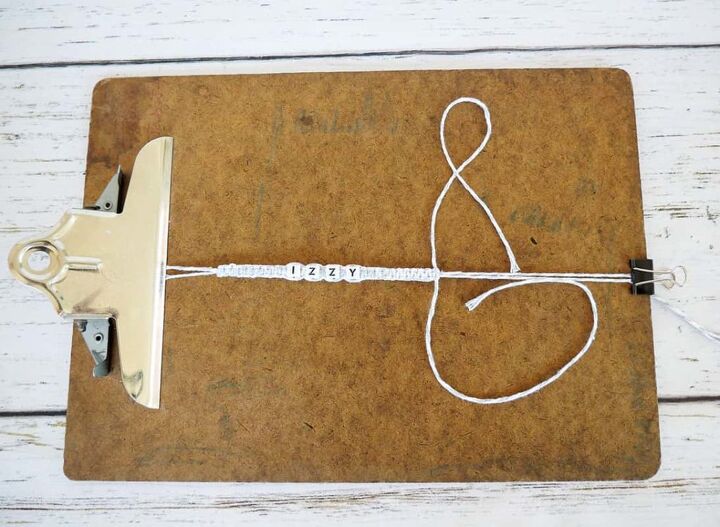
To prep for creating your diy friendship bracelet, fold the short twine piece in half. Then take a piece of tape and secure the side with two raw ends to a table or countertop.
On the opposite side with the loop, attached a binder clip and let it hang off your table. The binder clip acts as a weight so the twine doesn’t easily move as you work.
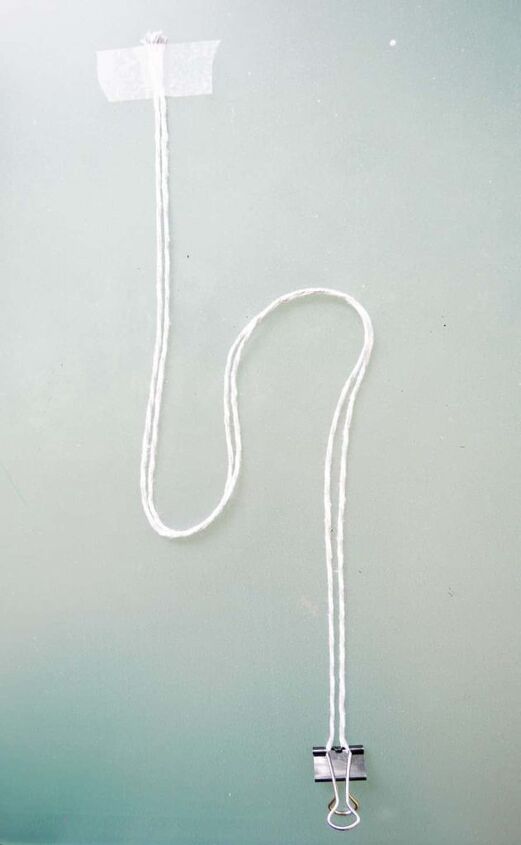
Now you’re ready to start creating your easy friendship bracelet diy project.
Step 2: Start tying knots to create your friendship bracelet napkin ring
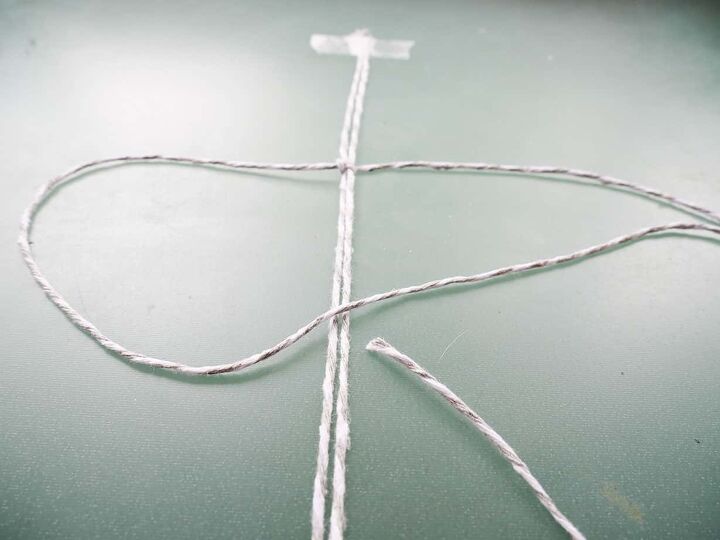
About 3-inches from the top of your stationary twine. Place the long piece under, and center it, so you have 25-inches on each side of the stationary twine.
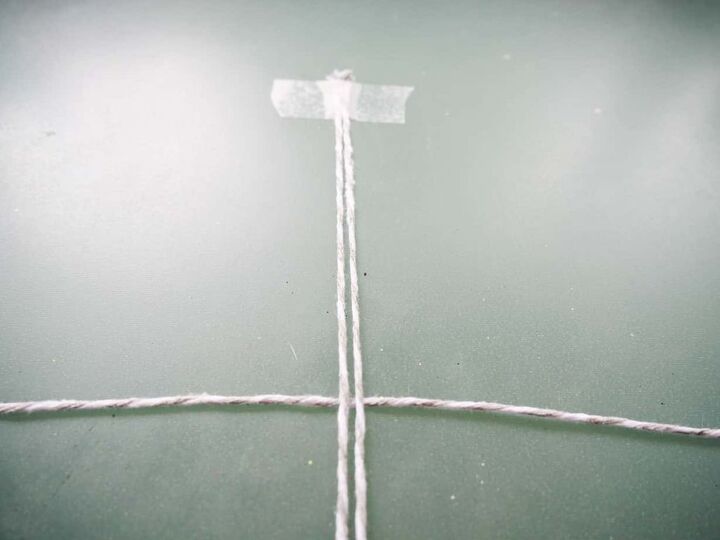
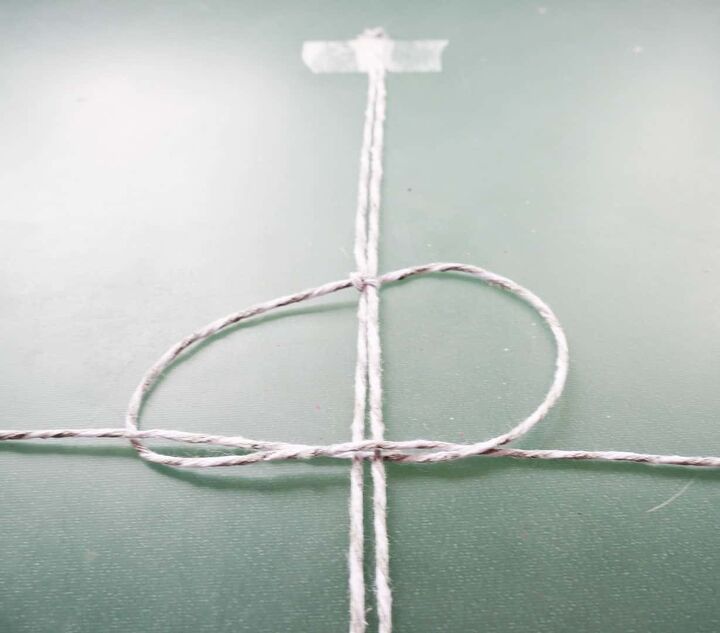
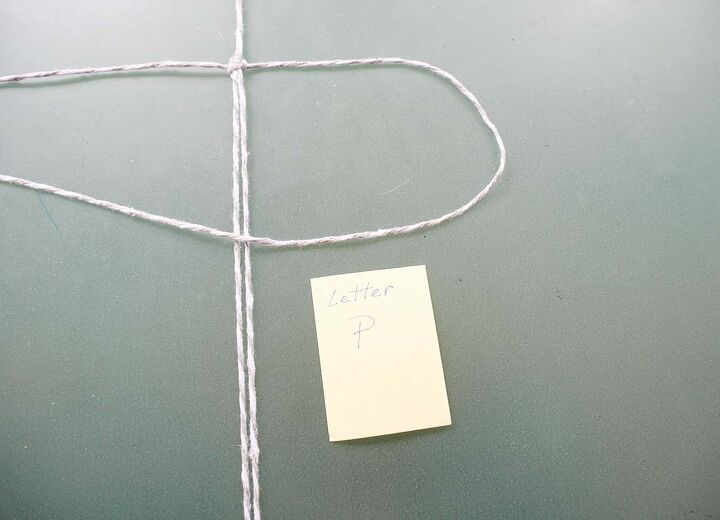
Taking the right side of the long piece, lay it over the stationary twine, so it creates a loop and forms the letter “P”.
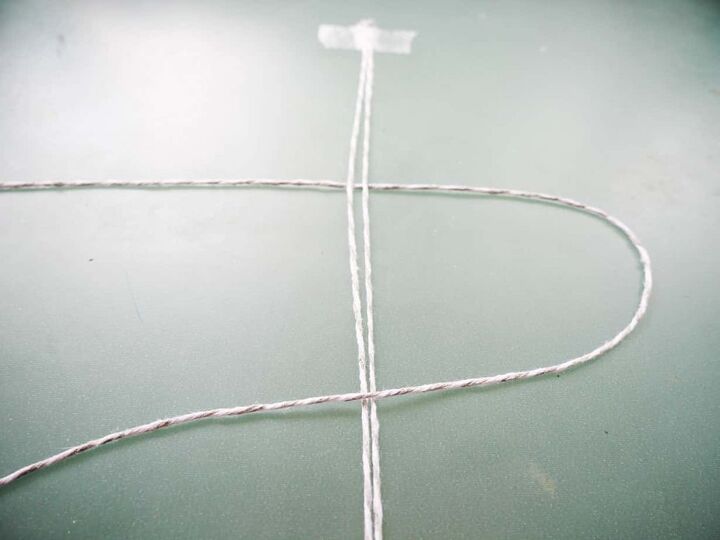
Then take the left side of the long piece, guide it under the stationary twine, and bring it up in the middle of the “P”.
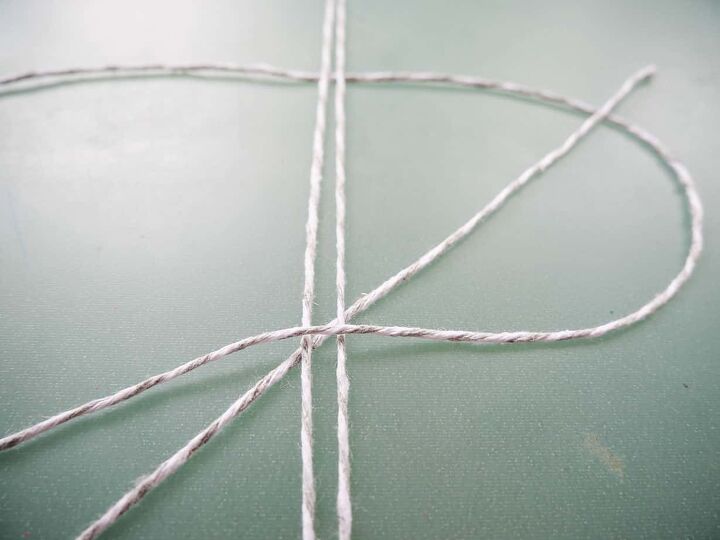
Pull both ends of the long twine piece. See how it creates a knot?
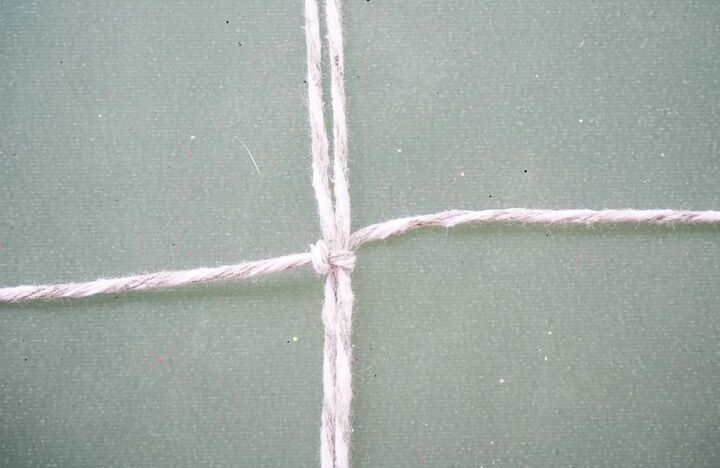
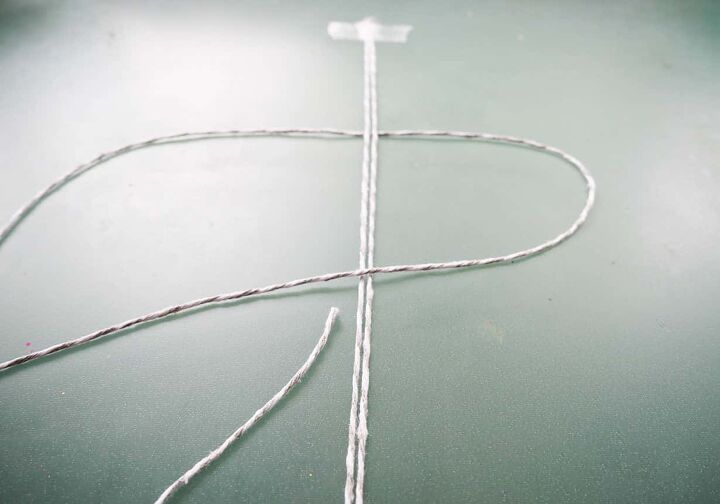
Now you will do the same thing on the other side.
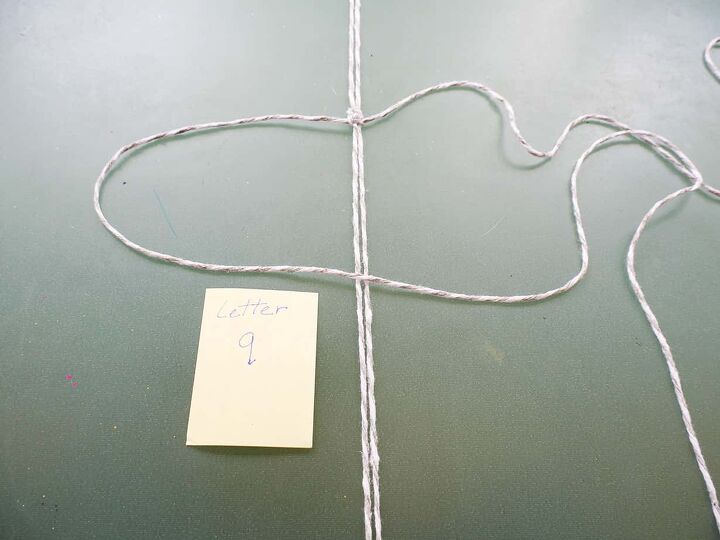
Taking the left side of the long twine piece, lay it over the stationary twine, so it creates a loop and forms a letter “q”.

Take the right side of the long twine. Put it under the stationary piece and up through the middle of “q”.
Pull both ends of the long twine so it creates a new knot next to the first knot.
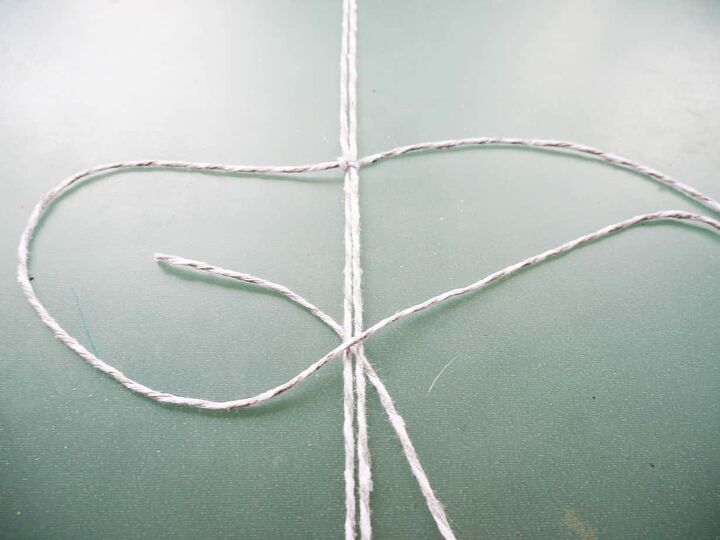
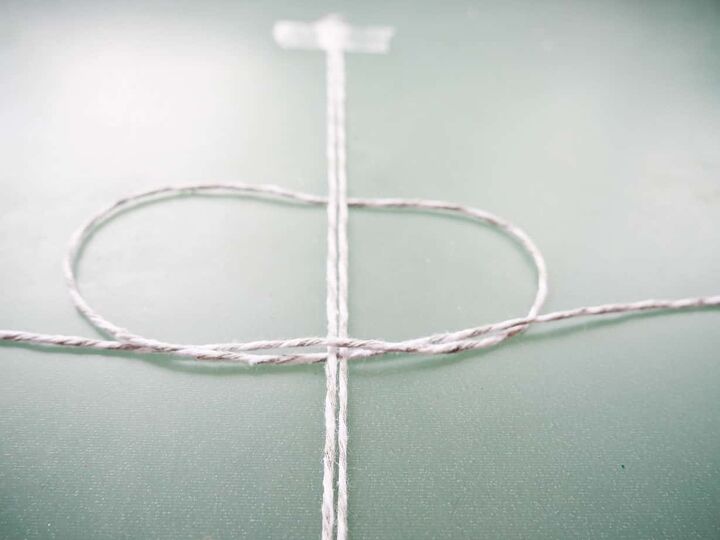
You can see how the knots are alternating on each side of the stationary twine.
Continue alternating tying knots from the right side to the left side (“P” to “q”) for about 1.5-inches.
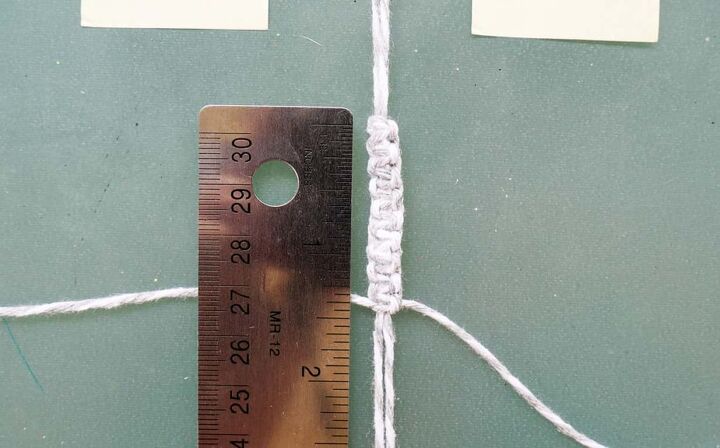
*Tip: place a post-it on each side with the letters to help remind you.
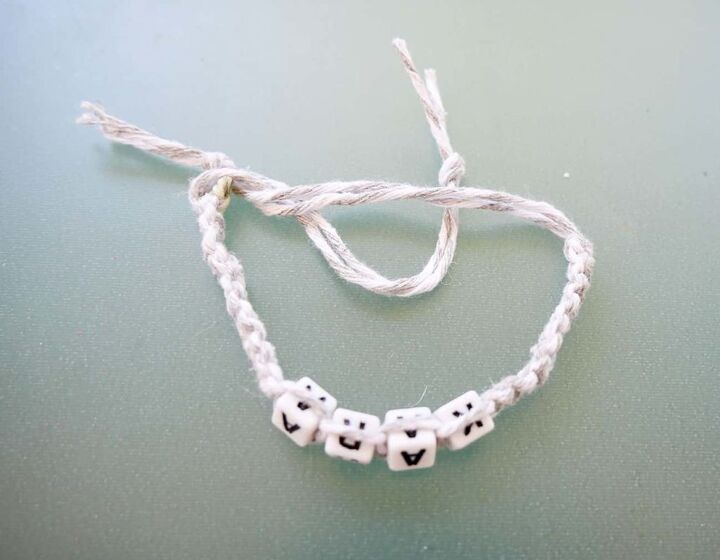
Step 3: Add letter beads to the diy napkin rings
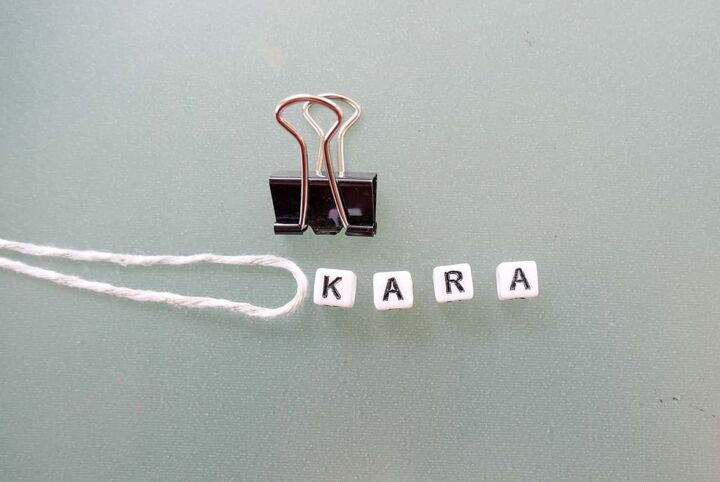
After you have completed tying 1.5 inches of knots, it’s time to start adding letter beads to your friendship bracelet.
First, you will want to unhook the binder clip and then slide all the letters of your friend’s name (or a word: love ~ faith ~ bestie ~ etc…) onto the twine.
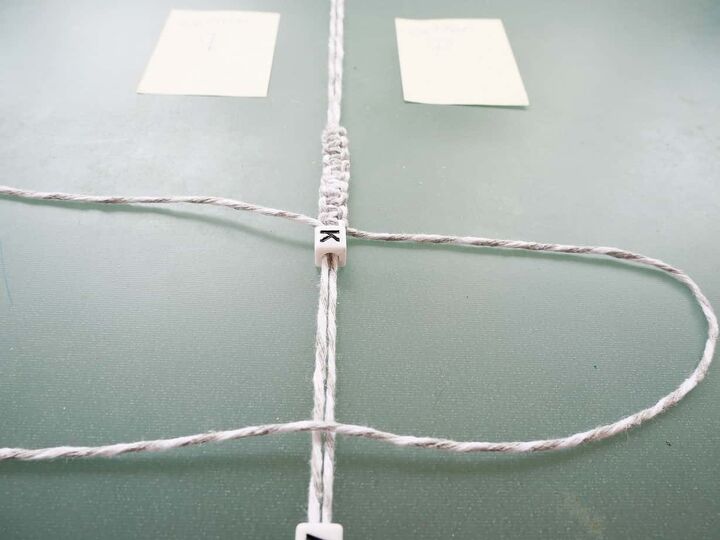
Reattach the binder clip and make sure the stationary twine isn’t twisted.
Next, starting with the first letter, push it up next to the last knot (which should be from the “q” side).

Then make your next knot (the “P” side), and one more knot (the “q” side). This will secure the letter bead in place.
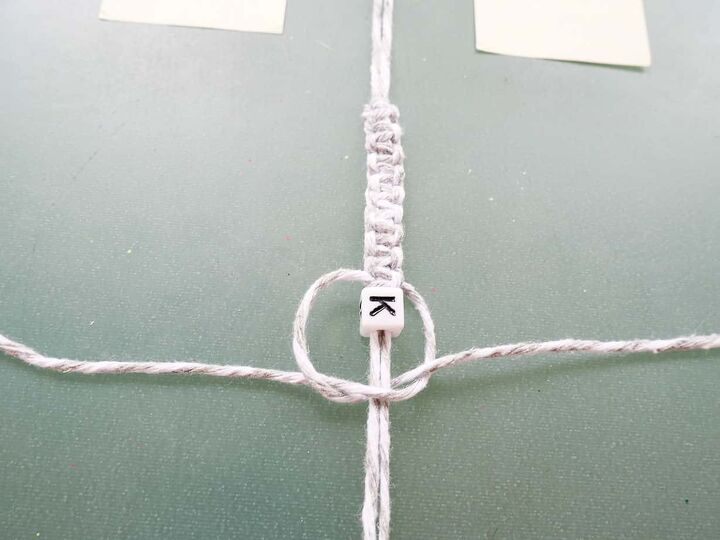
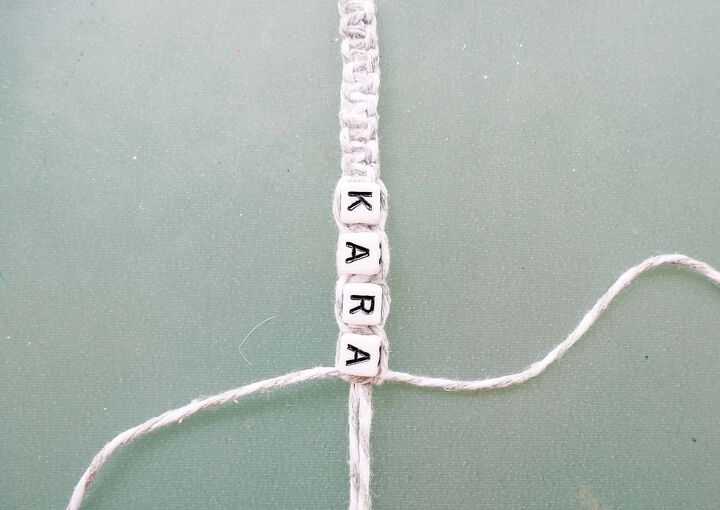
Continue pushing each bead up and securing it by tying two knots, until the final letter bead is in place.
Now continue alternating your knots on either side of the stationary twine for 1.5-inches.
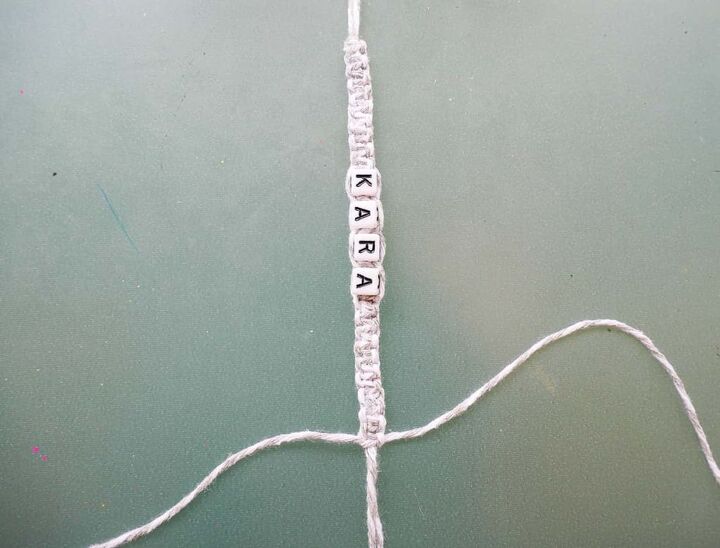
Step 4: Completing the diy easy friendship bracelet
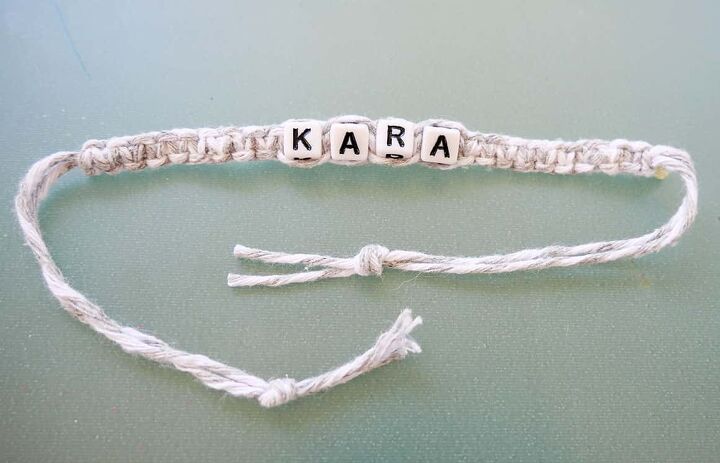
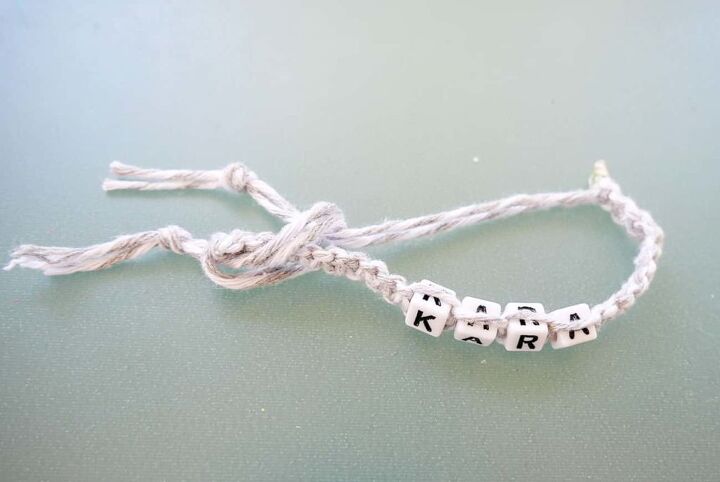
At this point you should have about 3-inches at the top of your simple diy friendship bracelet, 1.5-inches of knots, then the letter beads, followed by a final 1.5-inches of knots.
It’s now time to complete your friendship bracelet napkin ring.
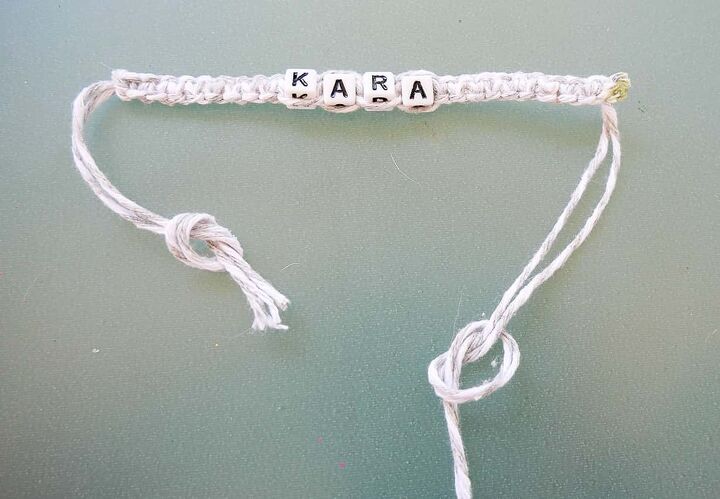
The bottom of your bracelet currently has four pieces of twine. I found it easiest to take the two side ends from the long piece you’ve been tying and tie a simple knot with them.
Don’t do the “P” or “q” knot. Just a simple knot where you tie these two loose ends together. Then tie them together again.
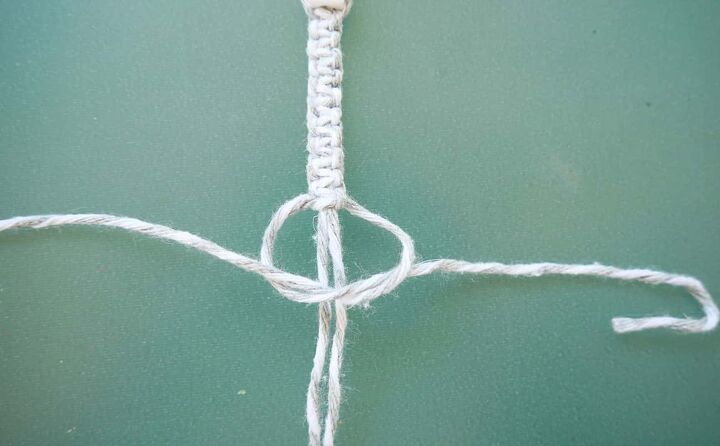
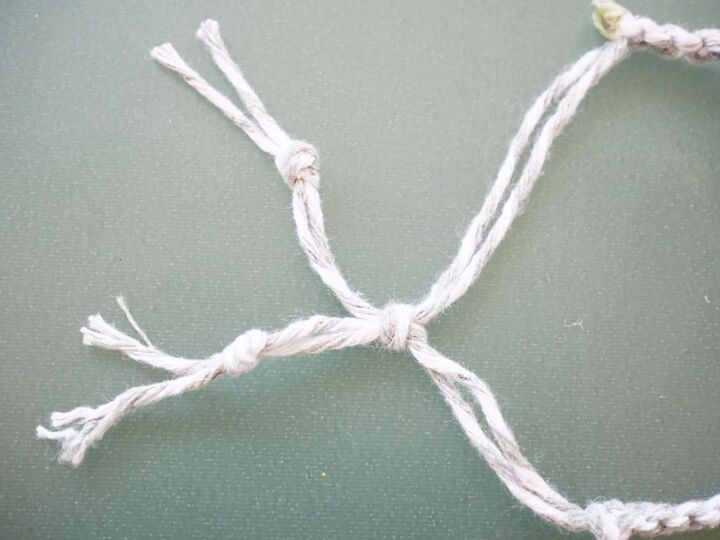
Cut the two long ends close to the knots you just tied.
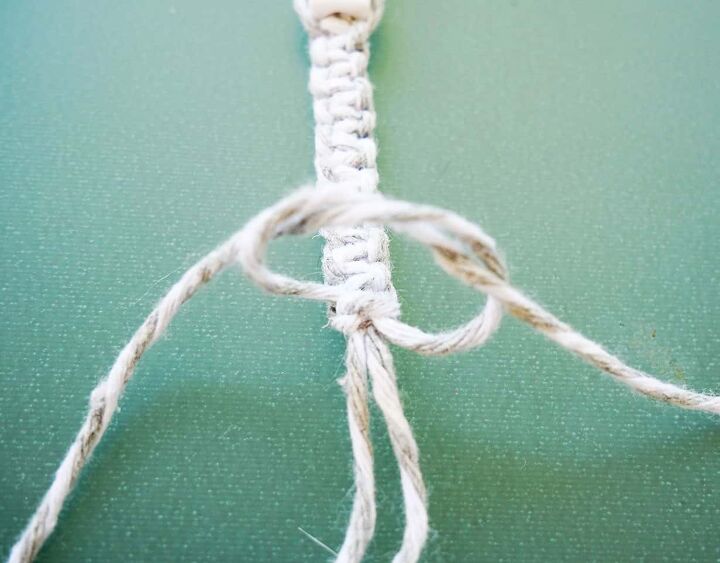
Next, take a little fabric or E6000 glue and add it to the raw ends and the end knot. This will keep the ends from fraying and the knot from coming apart.

Let the glue dry.
Step 5: Create a slip knot to easily put on and take off the diy friendship bracelet napkin ring
You’re almost done making your easy diy friendship bracelet.
(It’s been pretty simple, huh!)
Now we need to make it into a wearable bracelet. (This next step is actually easy, but might be a little hard to understand at first.)
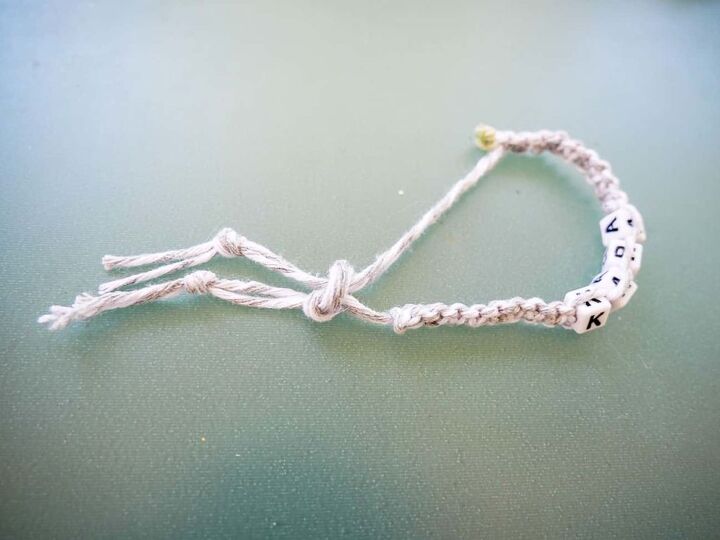
First, tie off each end of the bracelet. Then flip it upside down, so the loose ends are on top and the letters are facing down.
Next, take the left side and place it over the right side.

Create a loop by pulling a section of the left side under the right side of the bracelet.
(This is where it gets a little hard.)
Now carefully pull the left side through the loop. Hold the two knotted ends in place. You don’t want the ends to go through the loop.
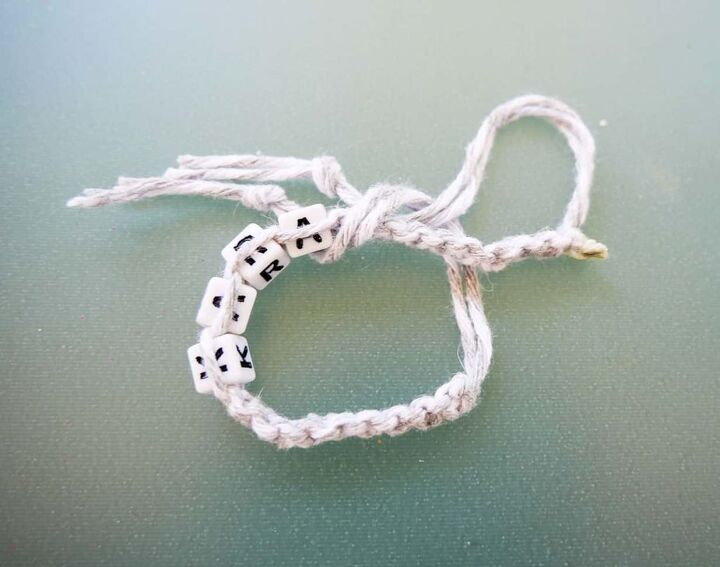
As the left side is almost completely through the loop, you will notice that a slip knot is being formed. That’s what you want.
Pull the slip knot tight about a 1/2 inch from the knot on the end.
*If you have done it successfully, you will be able to pull one side of the bracelet to loosen and tighten it.
Yay! You have completed your first easy diy friendship bracelet!!
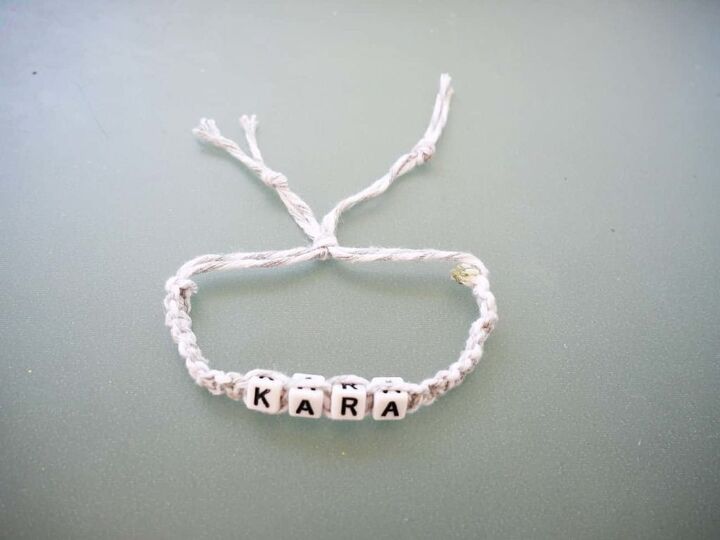
Now to use it as a napkin ring ~ just slip it over a napkin and secure it in place.
Won’t your friends love seeing it on your table?!
**TIP: instead of taping the twine to a tabletop, you can use a clipboard. Just clip the twine under the top and it won’t move. Plus it makes your diy friendship bracelet portable!
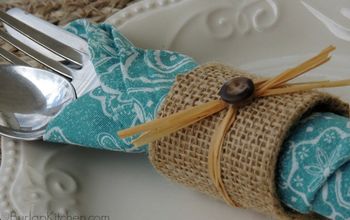
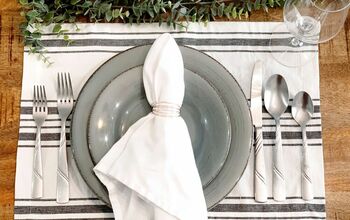
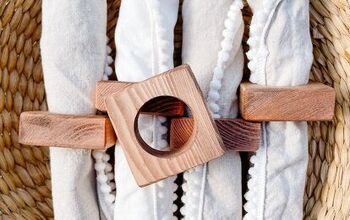
Check out other easy diy projects:
- DIY Wooden Target Tray Transformation
- How to Stencil Cloth Napkins: Easy DIY
- Easiest DIY Napkin Rings for Everyday
- Pretty Lace Flower Pot DIY
- DIY Unique Menu Holder
- Simple DIY Wood Tray with Handles
- DIY Wine Cork Napkin Rings
- Simple Moss Bowl Centerpiece DIY
- Diamond Napkin Rings
- Twisted Paper Flower Napkin Rings


Frequently asked questions
Have a question about this project?