


Upcycled Vintage Handkerchief Charger
Ever ask, “What can I do with old vintage handkerchiefs?” Here’s a fun, no-sew upcycle to enjoy many Seasonal Hankies at once
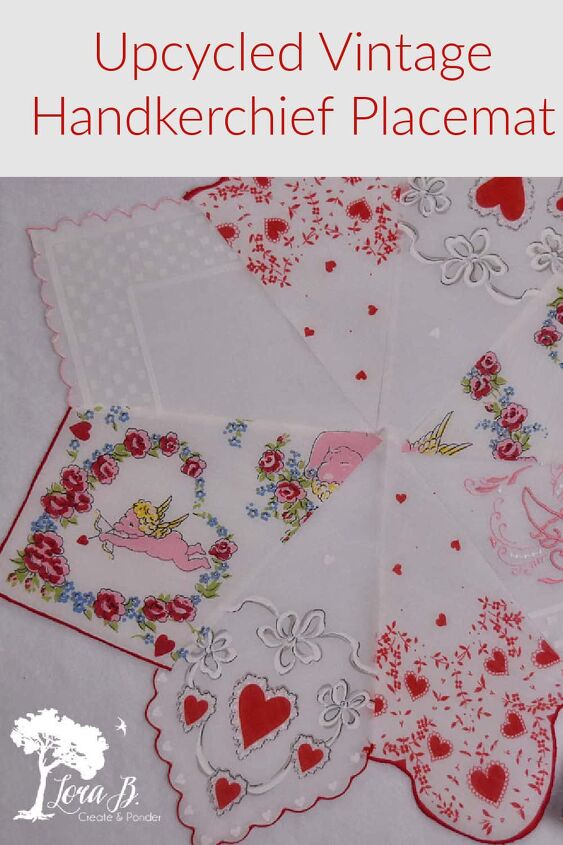
Do you have a stash of a relative’s old, seasonal hankies packed away in a box somewhere? They’re so cute, but are you asking, “What can I do with old vintage handkerchiefs?” Modern tissue has made these old nose blowers obsolete. Time for an upcycle! This Upcycled Vintage Handkerchief Charger is an easy no-sew DIY project that you can make for any season.
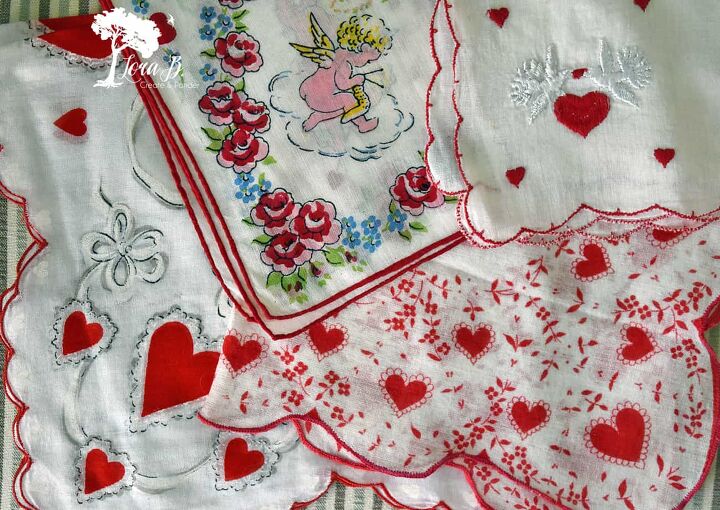
My grandma had hankies for every season. She must have been a coordinated dresser, because she had jewelry for all the seasons, too. This handkerchief repurpose is a fun way to enjoy grandma’s hankies in a completely different way.
It was hard to cut them, but I’d rather enjoy them then have them hiding in a box somewhere. I pictured these vintage handkerchiefs, pieced together in a snowflake-type pattern, since February is still very much winter, here in MN. I also like the idea of seeing all these pretty patterns together, like a quilt.
Upcycled Vintage Handkerchief Charger
Materials Needed
old handkerchiefs-4
white fleece fabric
large paper-packing paper or grocery bag
plastic sewing ruler
cutting mat
rotary blade
Spray Starch
Spray Adhesive for Fabrics
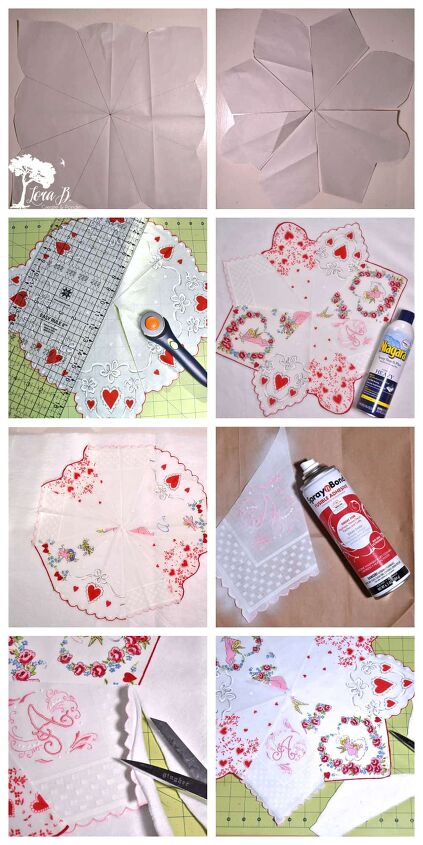
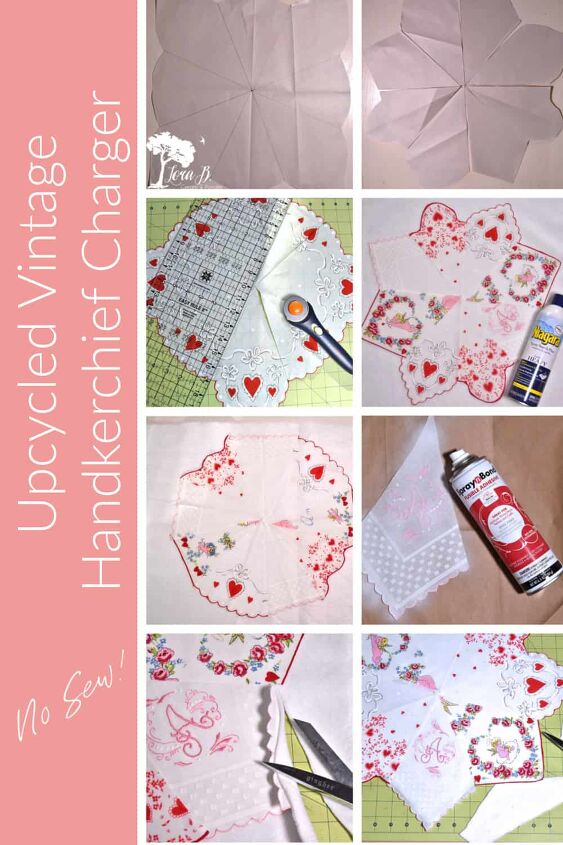
1) To start, experiment with your design options. Trace around 4 hankies on some paper. With a ruler, draw lines to divide the square. Each hankie is different. Hopefully seeing my pattern idea will give you possibilities.
2) Then cut out the pieces and mix the different hankie pieces together to resemble a flower or snowflake.
3) Time to cut! Using a rotary cutter, mat and hard plastic ruler, cut the handkerchiefs like you did the paper.
4) Iron your hankie pieces and lay out your design on white fleece fabric. The thick fleece fabric will give the flimsy handkerchiefs some body.
5) Make sure to line up the outside edges where the patterns meet and slightly overlap the edges.
6) Depending on your hankies edges, some of the designs may look funny. I didn’t like the look of this one as well as the first one.
7) To adhere the hankie pieces to the fleece, spray each segment (on the back side) individually with Spray Adhesive. Use a scrap piece of paper for overspray.
8) Trim the excess white fleece, cutting about 1/4″ under the cute hankie edging.
9) Finish off the project by sewing a vintage button in the middle, to cover where all the seams come together.
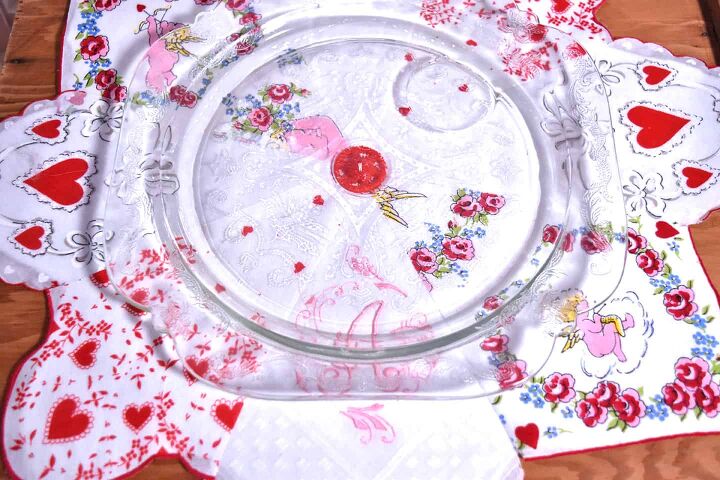
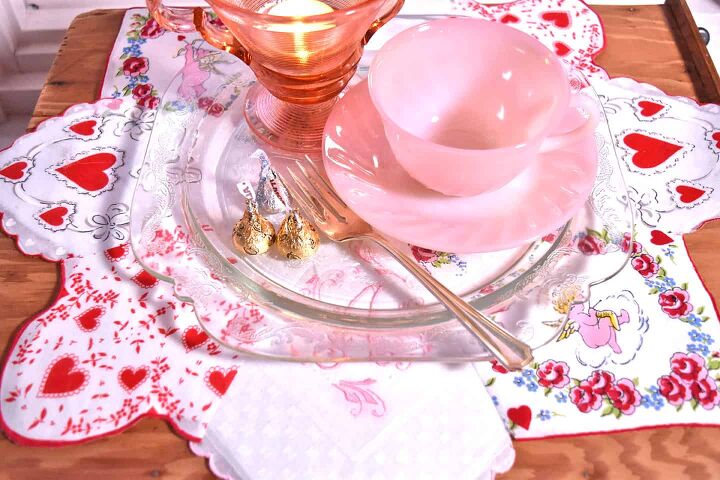
Perfect with Clear Plates for a Seasonal Table Setting
These upcycled chargers or placemats would be perfect at each place setting, or individually for the centerpiece. If you have clear glass plates, you can enjoy seeing the design. Such an easy, no-sew project! And a great way to enjoy some treasured family linens! If you have springtime or Christmas handkerchiefs, they would be adorable, too!
If you’ve been wondering what to do with those old hankies, I hope this No Sew Vintage Upcycled Handkerchief Charger will be a way to enjoy them!
For more vintage-inspired Upcycling and Repurposed projects, see HERE.
And make sure to FOLLOW ME on Hometalk!


Frequently asked questions
Have a question about this project?