


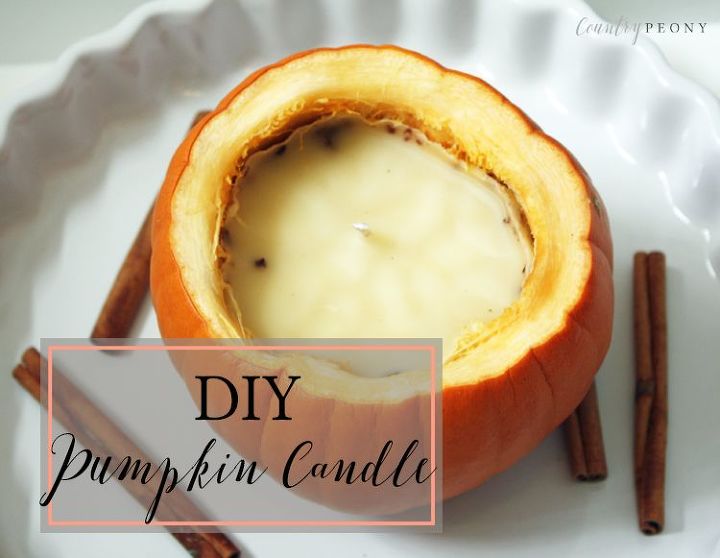
DIY Real Pumpkin Candle
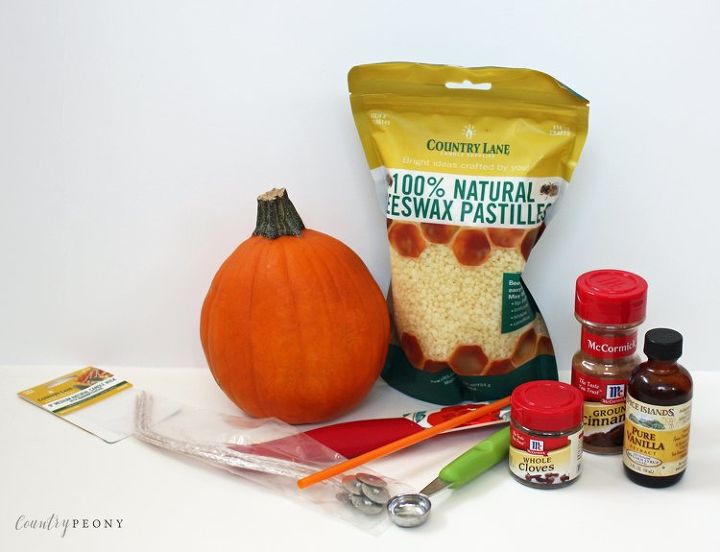
11 Materials
$25
30 Minutes
Easy
Indulge your Fall-loving heart with the scents and sights of Fall through this homemade candle using a real Pumpkin.
Some housekeeping before we start:
- Dependent on the ripeness of the pumpkin its shelf life is 1-2 weeks.
- A pumpkin can catch on fire. Never burn the candle unattended.
- The candle making process is very messy and dangerous. The wax is VERY hot and should not be done with children in attendance.
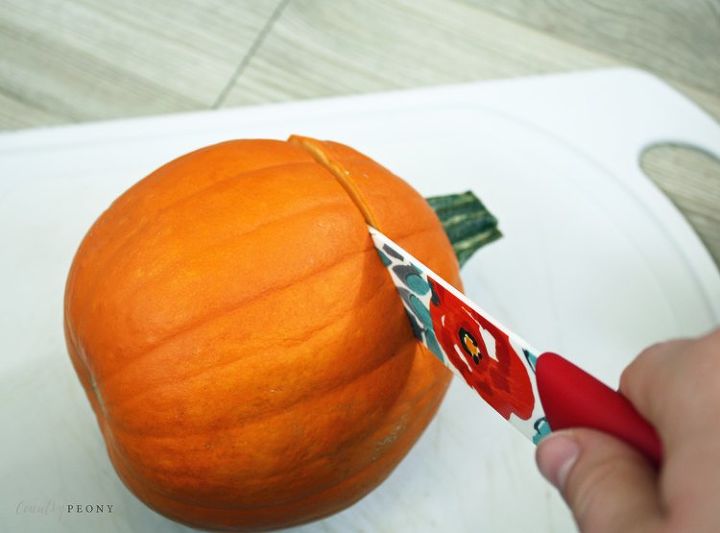
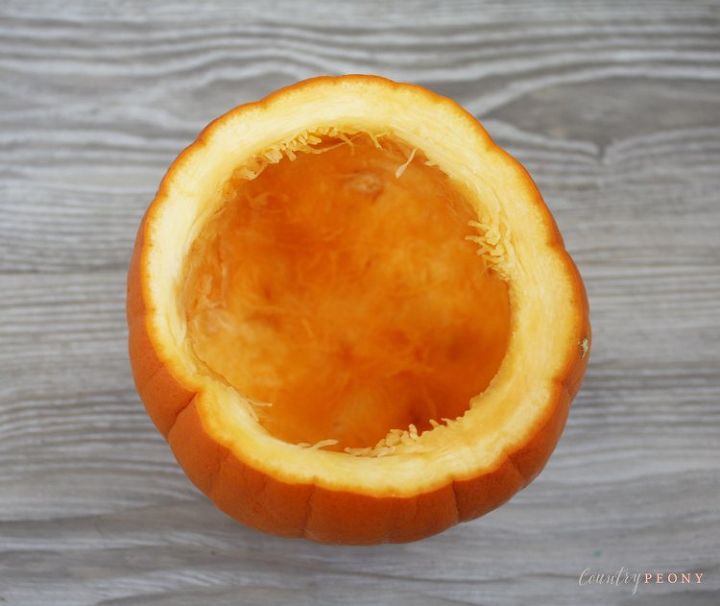
Step 1: Cut the pumpkin 1/3 of the way down. Keep the stem for future use to close the pumpkin with, or throw the stem away.
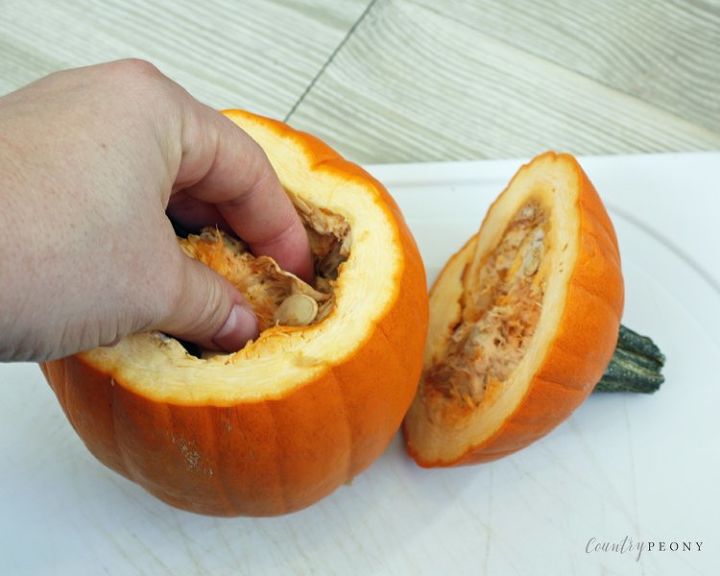
Step 2: Remove the pumpkin guts with your hand. Save the pumpkin seeds for later to roast and place in your yogurt, or to eat alone for snack time.
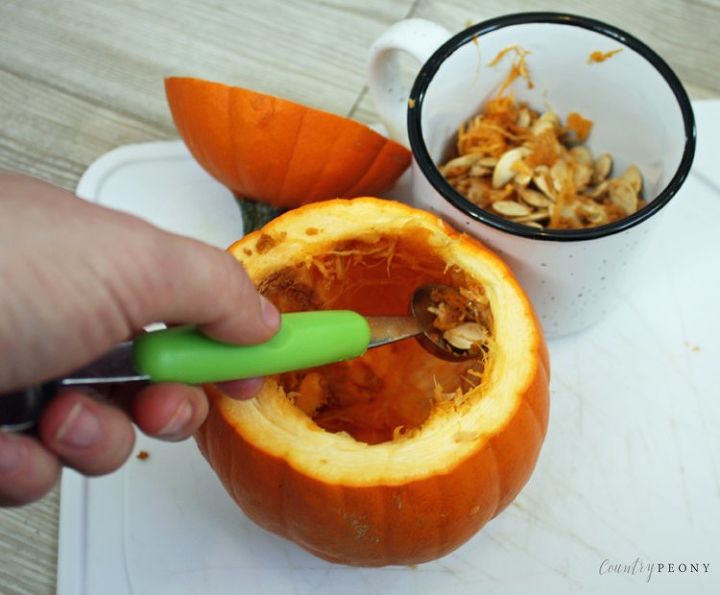
Step 3: Once the majority of the guts are removed, take the melon scraper and continue to remove the guts from the inside sides of the pumpkin.
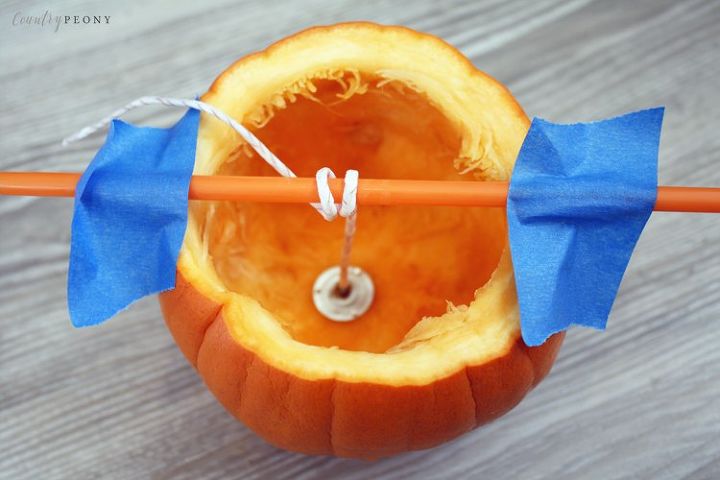
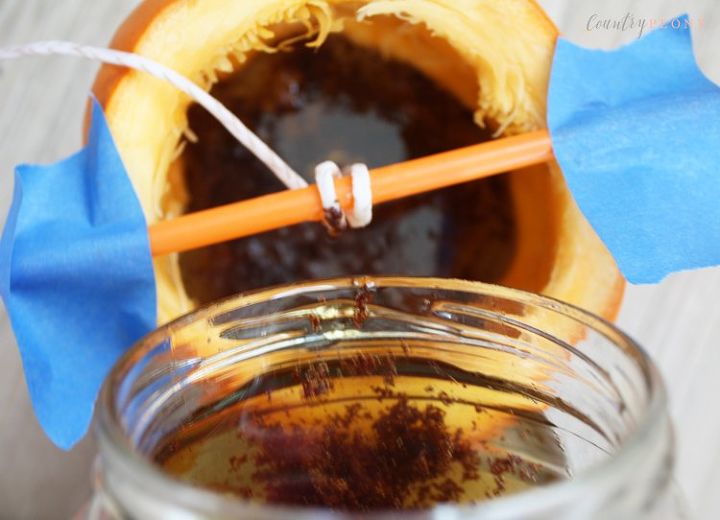
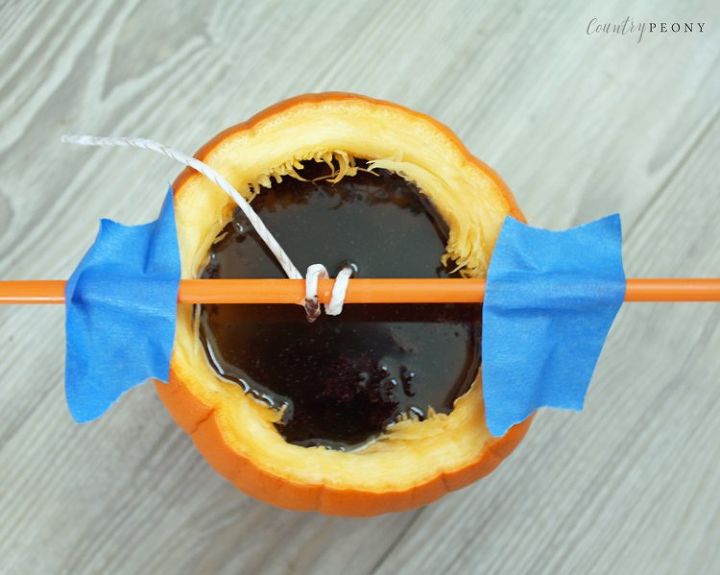
Step 4: Once the inside of the pumpkin is clean, nestle the metal part of the wick at the bottom and center of the pumpkin. Wrap the wick around the straw, and then let the straw sit on top of the pumpkin in preparation for the melted wax. Keep the straw in place by securing it to the pumpkin with painter's tape.
Set the hollow pumpkin aside. Now it is time to make the scented wax.
For the candle I followed The Happier Homemaker's DIY Autumn Cinnamon Spiced Candle recipe.
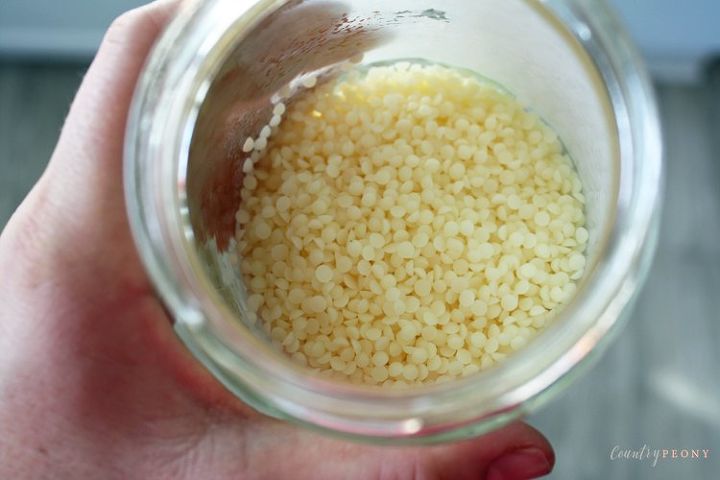
Step 5: For this project you will use 2 cups of beeswax pellets. However, we will melt 1 cup of wax at a time. You can find a variety of beeswax options at your local craft store or online at (affiliate link) Amazon.
The wax is very hard to remove, so use a glass jar specifically for candle making, or use a recycled glass jar (like I did).
Take 1 cup of wax pellets and place in the glass jar. Place the jar with pellets in the microwave. IMPORTANT: Place a paper towel over the jar to keep your microwave clean. Microwave for 2 minutes. Then microwave at 1 minute intervals. Once the first cup has melted, place another cup of wax pellets into the jar and continue to microwave in 1 minute increments. Like the tutorial, my wax melted after 5 total minutes in the microwave.
Step 6: While the wax is melting mix the cloves, cinnamon and vanilla extract together. You can do any dry spices you like to add fragrance to the candle.
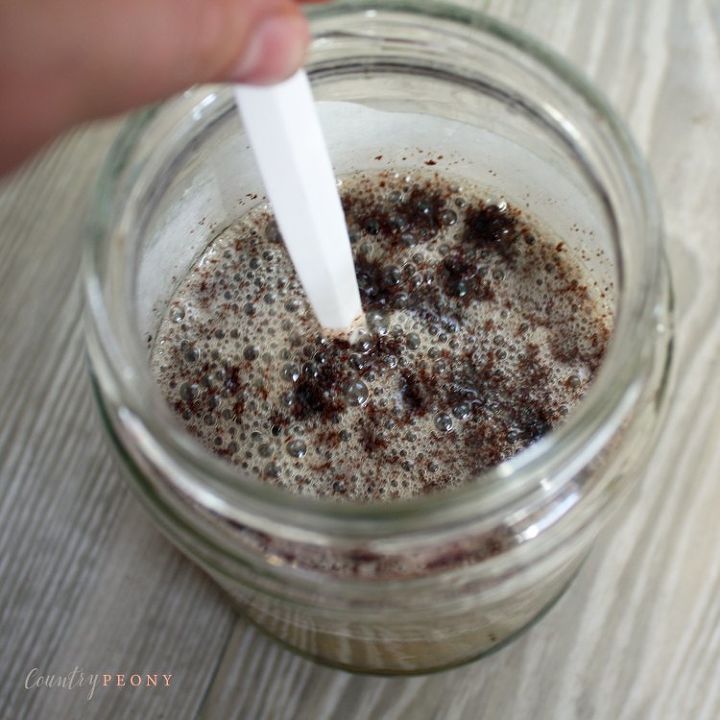
Step 7: Once the wax is fully melted pour the spices in. Use a disposable spoon or the wooden skewer to mix the spices into the wax. CAREFUL: This process is very hot. Keep children away.
Step 8: After the wax and spices are fully mixed, use an oven mitt and pour the wax mixture into the pumpkin. Ensure the wick stays in the center of the pumpkin.
Step 9: Let the candle sit for 5 hours. Once the wax is dry, trim the wick to about 1/2 inch from the top of the candle.
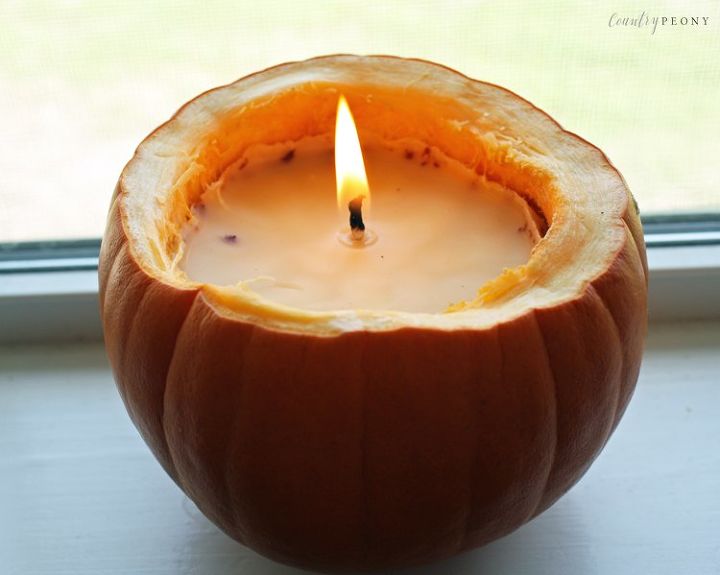
Step 10: Enjoy!

Want more details about this and other DIY projects? Check out my blog post!
Comments
Join the conversation
4 of 8 comments
-
I use my pumpkin to make soup afterwards so I don't use a real pumpkin for projects like this.

-
I never knew you can use household spices for scenting candles. Thanks! :)


Frequently asked questions
Have a question about this project?
$25? Is the beeswax real expensive?
Would it help the pumpkin last longer if you sprayed the inside with a sealant such as verathane prior to putting the wax in?
Could that $25 candle wax be removed from the decaying pumpkin and reused?