


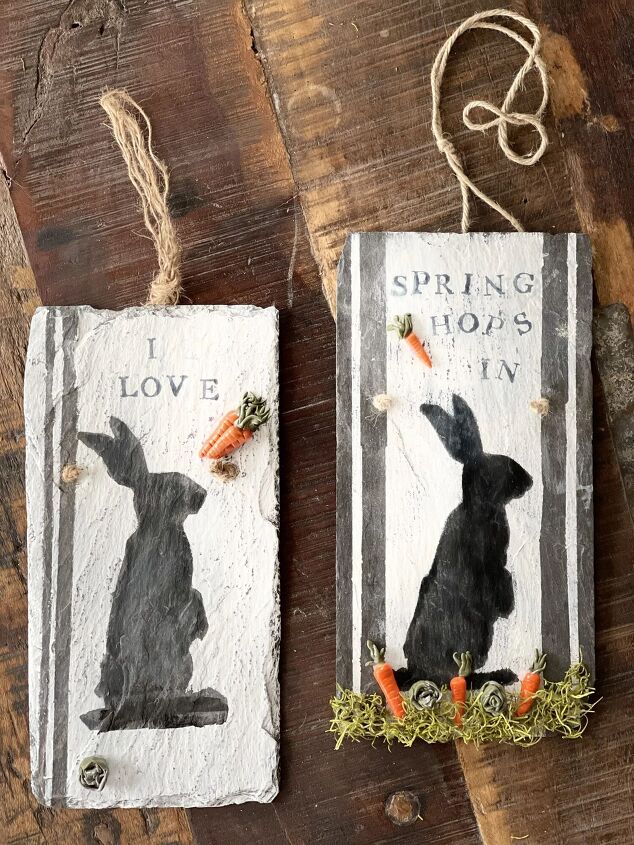
SLATE SHINGLE BUNNY
Do you want an easy and cute idea using slate?
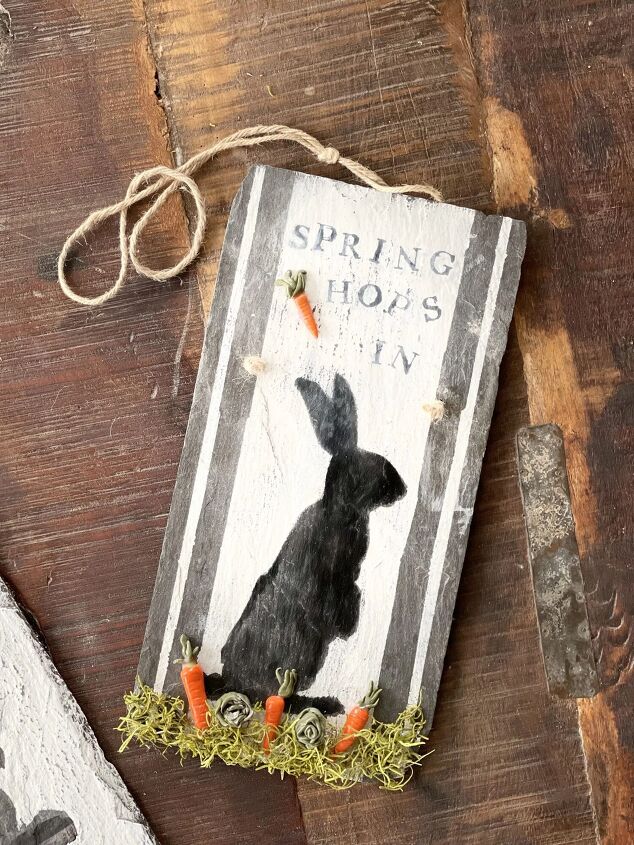
I’m sharing how to make a silhouette bunny using a one of a kind vintage slate shingle.
I love sharing ideas with you. Especially ideas that are inexpensive. I don’t know about you but I definitely do not have a large budget for seasonal decor. Actually I don’t have any budget but I do love to decorate for holidays and the seasons.
Easter is one holiday that ranks right up there with Christmas for the amount of decor I have. I’ve collected or made things over the years and I have some items that were my moms.
I’ve had a thing for bunnies forever so many of them are sporting rabbits.
Well I guess you can add this to the list.
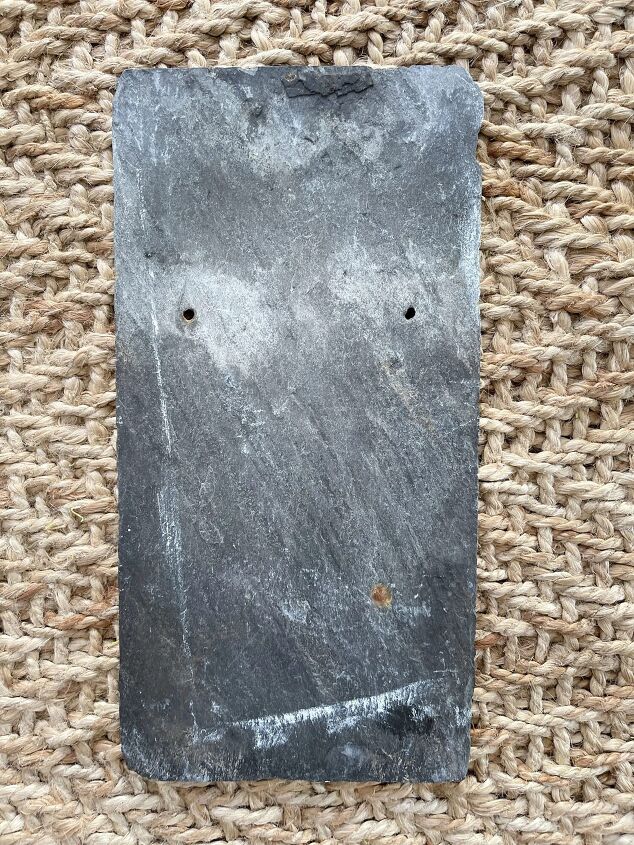
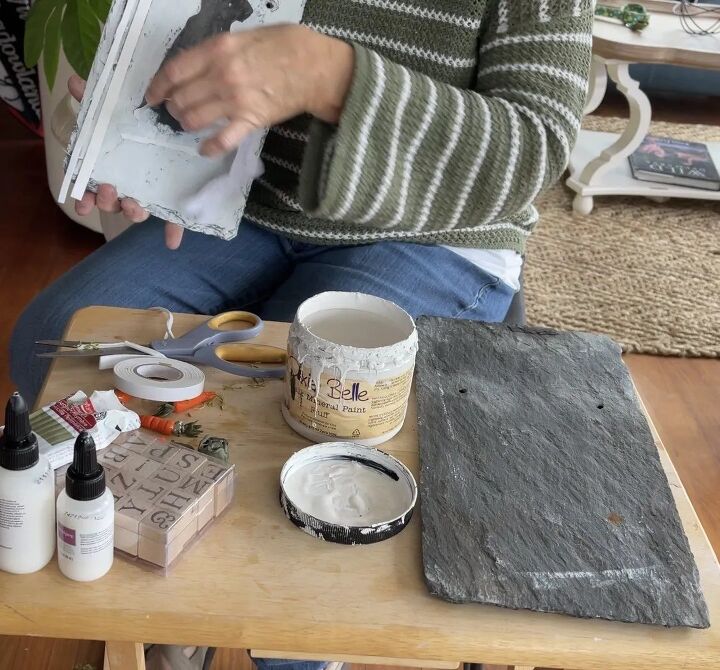
Shockingly I found these vintage slate shingles at a reuse warehouse in the city. They were $1 each. These are great for signs, cheese plates, and trivets.
SLATE SIGN TUTORIA
One way to know they are real vintage shingles is that they will have two holes in the top third of the slate.
Not always the best spot but at least you know where your twine or rope has to be.
STEP ONE
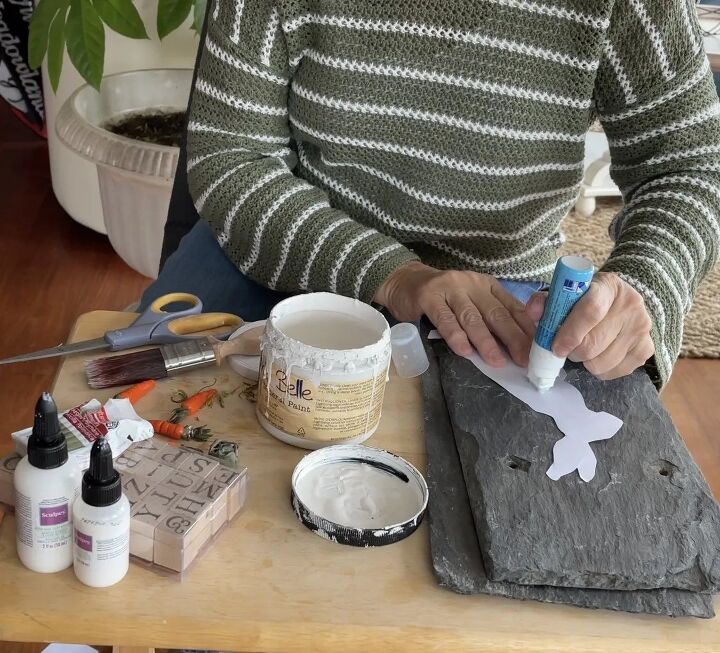
Using only an image from the computer, I printed out a bunny silhouette (can I tell you how many times I tried to spell that before I had to look it up?!) and used a glue stick to attach to the shingle.
STEP TWO
Next I added a few pieces of painters tape on one, and an adhesive strip on the other to create lines.
STEP THREE
The entire shingle was painted with Fluff Chalk Paint by Dixie Belle. So I covered the bunny and tape.
SAVED FROM SALVAGE TIP:
USE A HAIRDRYER TO SPEED UP DRYING TIME ON YOUR PROJECTS
When dry I removed the paper bunny from the shingle.
After removing the bunny, I removed the painters tape or adhesive strip.
STEP FOUR
For a more vintage or worn look, I sanded over the entire shingle.
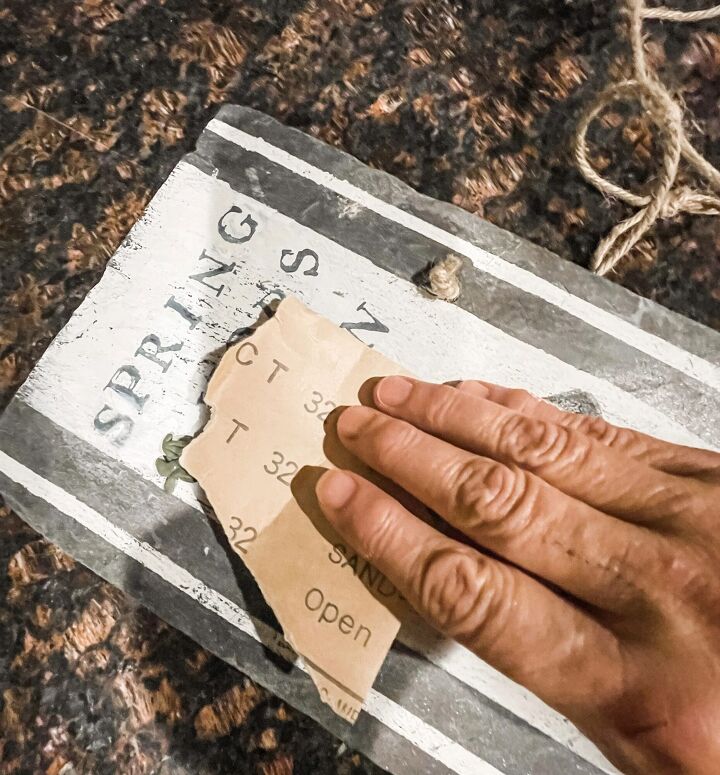
I wanted to add words so I thought the easiest way was to use my stamps I bought when I personalized my napkins last week. You can see that here.
STEP FIVE
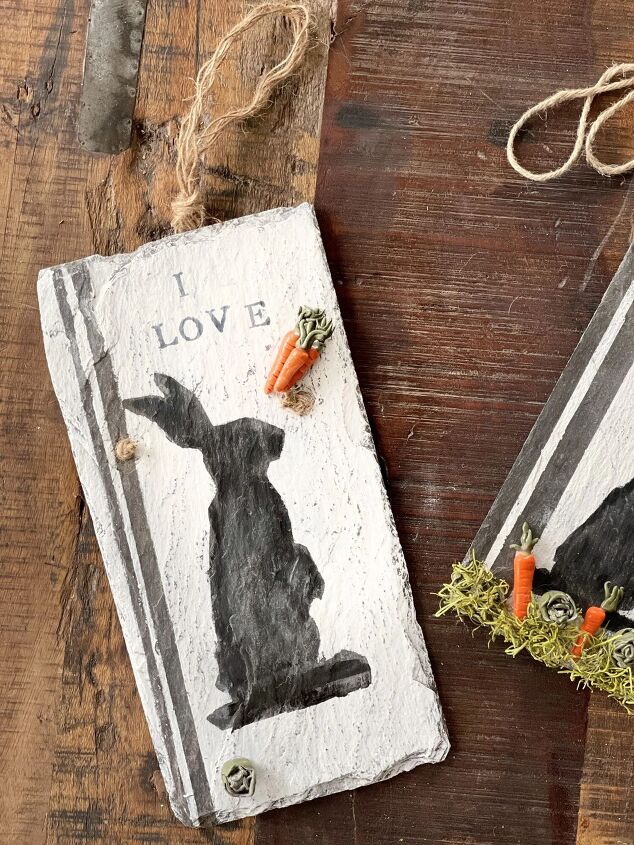
The wooden stamps worked perfectly, I created a different saying for each sign.
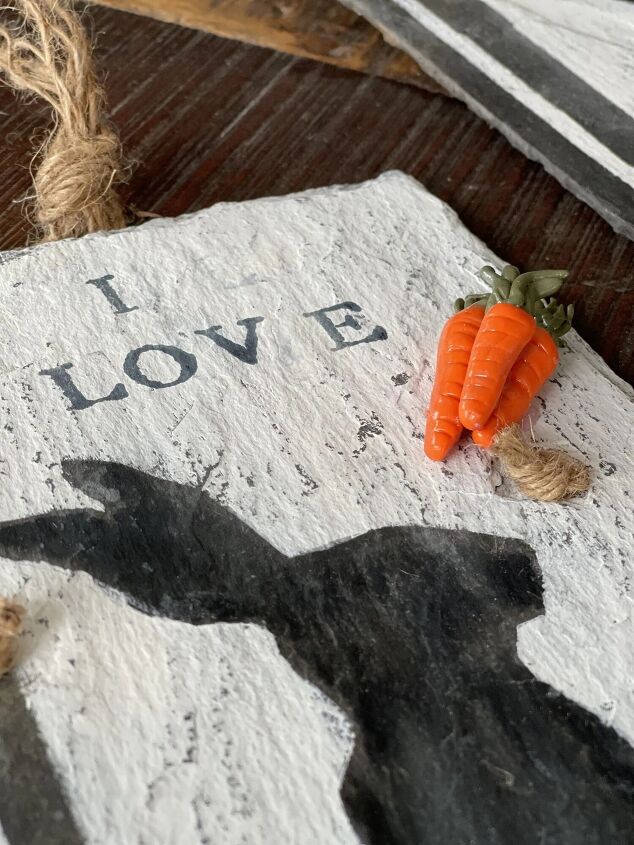
STEP SIX
You know I love playing with clay so I made some more carrots and cabbage ( I know they look like green flowers) out of polymer clay to add to the signs. I had already made some carrots and birds nests for my spring gifts post.
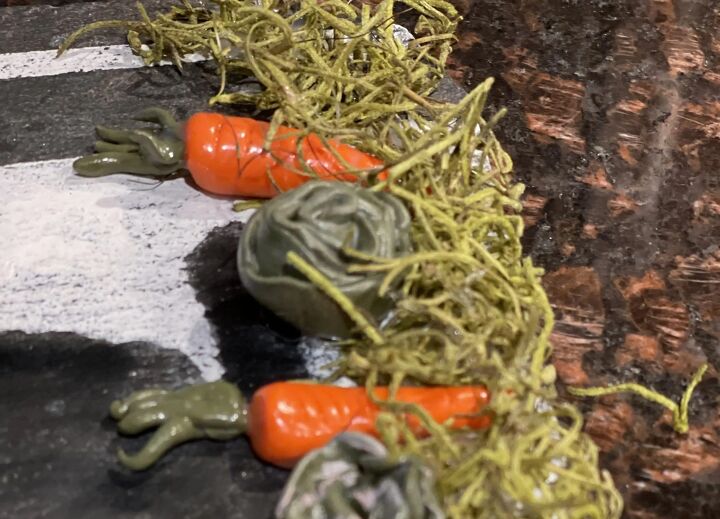
The last thing was to decide where I was going to attach the carrots and cabbage. I decided to make one look like the carrots and cabbage were laying in the garden grass.
SUPPLIES FOR SLATE SHINGLE SIGN
Slate Shingle
Twine
Scissors
Glue Stick
Paint
Brush
Polymer Clay
Polymer Clay Gloss
Painters Tape
Spanish Moss
THANK YOU
This was such an easy project. Fortunately I had all the supplies on hand. What I liked best was I had the black background on the shingle so I didn’t need to paint the bunny for the silhouette look I wanted and no Cricut or stencils were needed.
I hope you enjoyed this DIY idea for Easter. Be sure to check out the posts below from some blogging friends. Everyone is sharing all about bunnies today.
More Amazing Easter Egg Inspiration
Click the links below the images to go straight to their posts. ENJOY!
Chalking Up Success // Cloches & Lavender // Simple Nature Decor

A Life of Balance // Sweet Valley Acres // Bluesky at Home // This Dear Casa
Cottage in the Mitten // Saved from Salvage // Cottage on Bunker Hill
Have a wonderful weekend – Make sure to subscribe to the blog to get inspiration in your inbox.
XO, Regina
This post contains affiliate links. If you order from these links, I receive a small commission at no additional cost to you. Thanks so much for supporting my business.
SHOPPING LIST FOR SLATE SHINGLE SIGN
 MY BUNNY PROBLEM


Comments
Join the conversation
-
The Slate makes the project so good. Good hunting! Really upgraded the DIY to a markable product I would buy!! Great job!


Frequently asked questions
Have a question about this project?
Can I paint a cloth lamp shade?