


Gift for a Sentimental Coffee Drinker

3 Materials
$7
14 Days
Easy
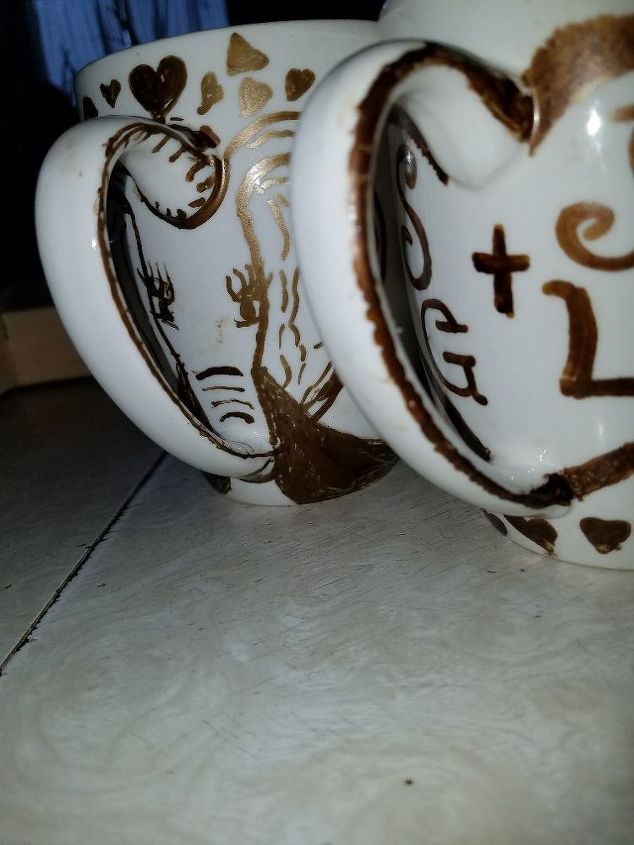
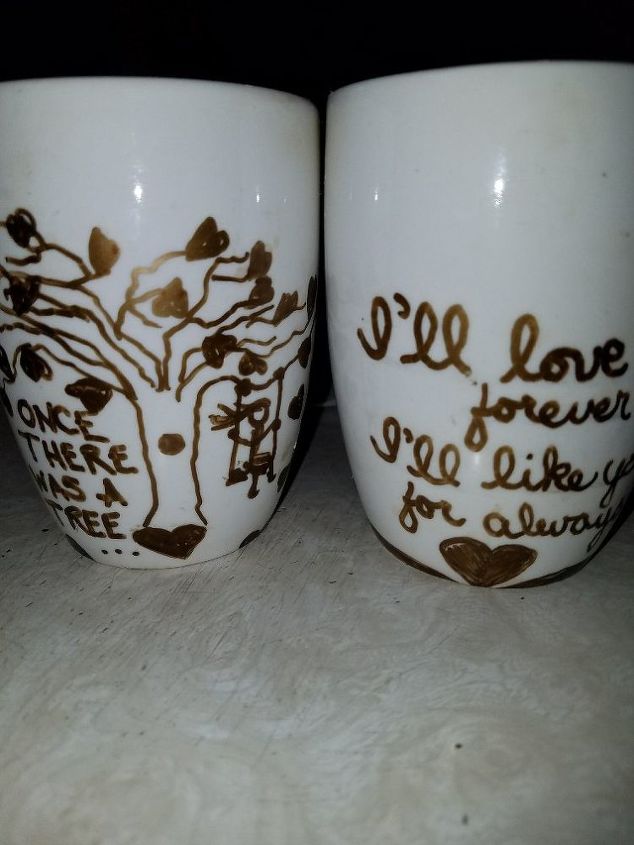
My only child is turning 47 years old this year, and she is still as tender and soft hearted as she was at 17. Sentiment always makes her eyes overflow. As a child she had two favorite books that I read to her over and over again, and she read them to HER two daughters as they were growing up. The thought came to me that this year I would try decorating some plain white coffee mugs with custom graphics that might make her smile through her sentimental tears (the elephant has no connection to the sentiment on the body of the cup that is from a book she loved, but she loves elephants too; and the graphic in the heart of the cup handle is something you might carve into a tree when you love someone).
This project began simply enough, with 2 plain white cups and a gold Artskills marker I had picked up at Walmart. I also picked up a can of clear acrylic sealer just in case I needed it, and if I didn't, well then I would have it for a different project.
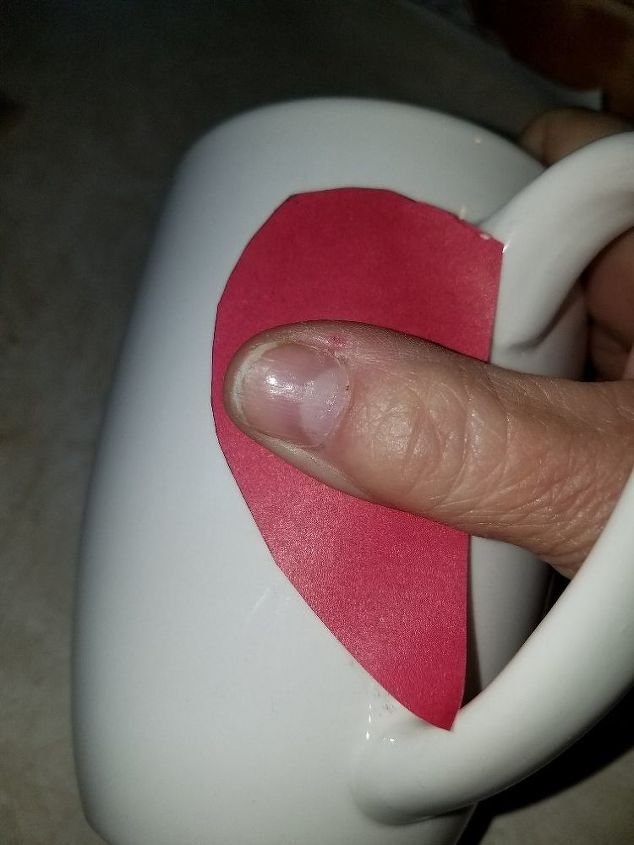
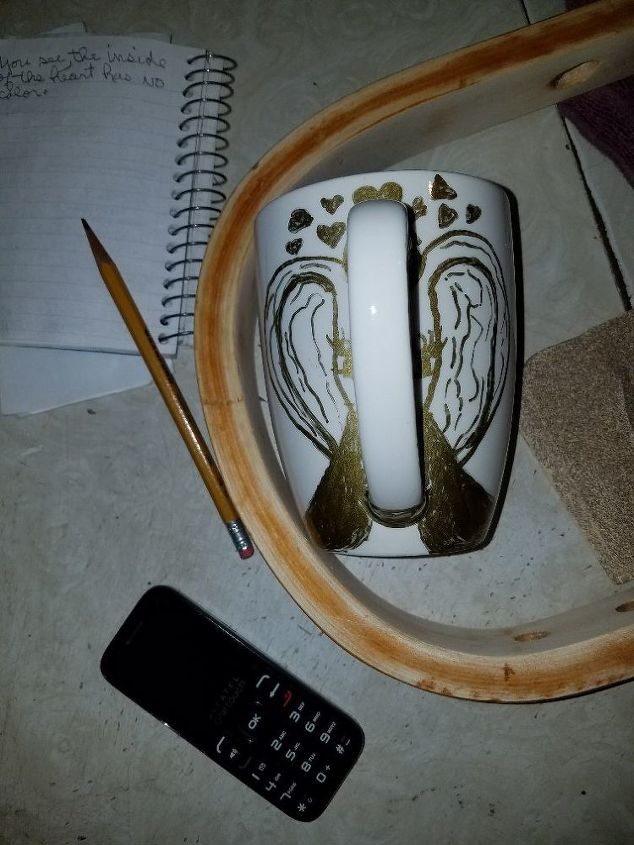
After purchasing the cups and bringing them home, I used a piece of paper to meaure out a half heart shape. Then I gave the cups a good washing in hot water and let them dry on their own. While they were air-drying I cut out the half-heart shape and set things up that I would be using, like a piece of lined paper and a No.2 pencil, the gold marker, and a few Q-tips and nail polish remover in case of mistakes. When the cups were dry I held the half-heart shape in place and traced around it back and forth several times so the pencil would show up. Then I went over the pencil line with the gold marker.
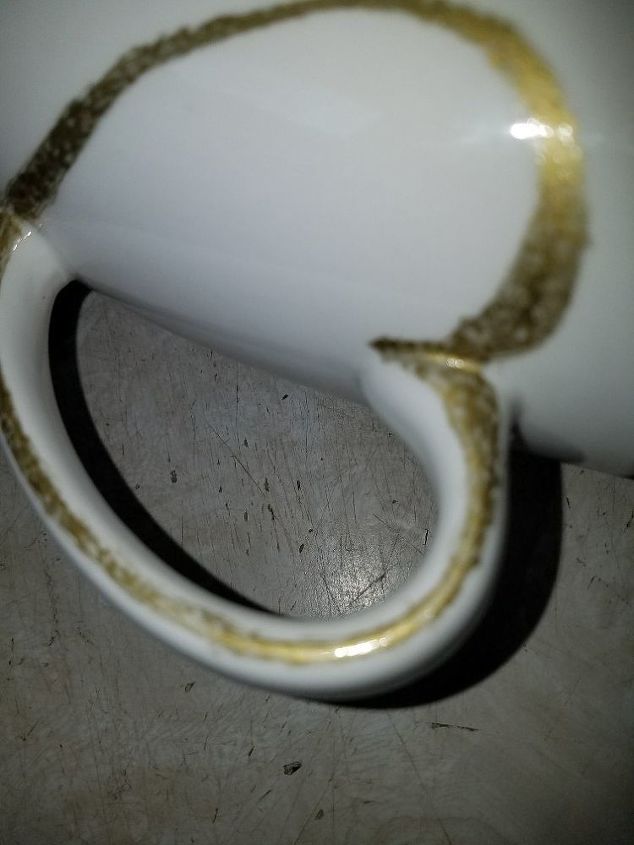
I thickened the lines and tried to make it look as much like a heart as possible, and tried keeping things as tidy as possible (I notice that after the baking any of the tiniest smudges of mistakes that I didn't see DID show up in the final baking! GASP and too late). Then I carried the outline over onto the handle to complete the heart.

I then drew a half-heart on the other side and carried it onto the handle there too. This way, looking directly at the handle you can clearly see a heart shape of some sort, as well as looking at the handle and cup from the side view, so I was happy.
I took the lined paper and my pencil and darkened the lines on the paper so I could make a graphite transfer onto the cup, which could easily be removed later with a Q-tip. This was so the sentiments would be written as straight as possible on the side opposite from the handle. It wasn't as easy as I thought it would be to write the 4 line phrase onto the cup (while making sure to leave a clean edging of 1 - 1 1/2 inches down from the edge of the cup ... to make sure lips would not touch it ... just in case ... it's a safety thing I have).
After about half an hour, when the gold message on the side of the cup felt dry, I carefully placed it on its side and held the cup as still as possible while drawing turning the heart shape on the cup handle into the head, and ears, of an elephant. Those big dark things are supposed to look like tusks that sort of wrap around toward the front of the cup).
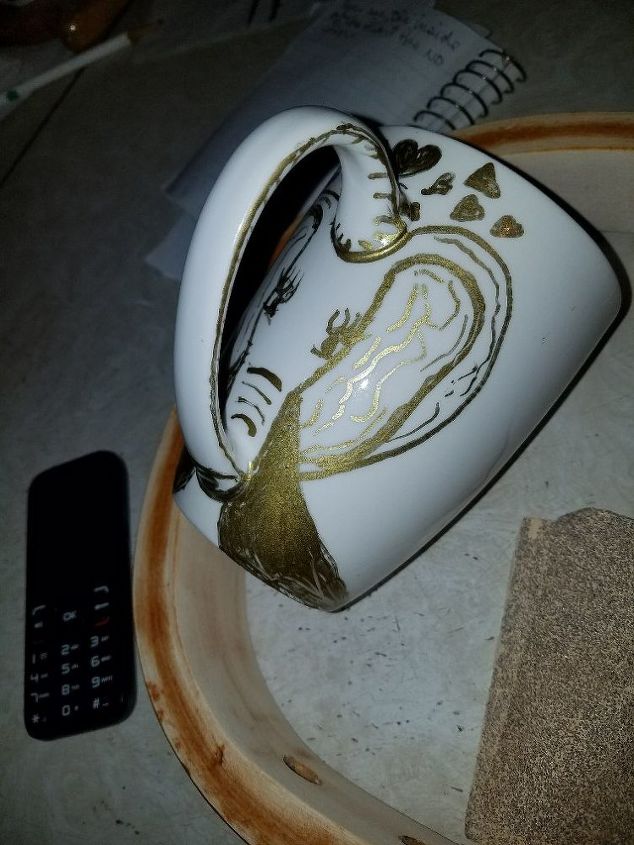
I even made sure to add an open mouth and little heart-shaped tongue under the uplifted truck ... and I guess the tusks don't "kind of" wrap around to the front, they DO wrap around to the front. As a last thought I put hearts above the head in an attempt to make it look like the elephant was showering hearts from its trunk.
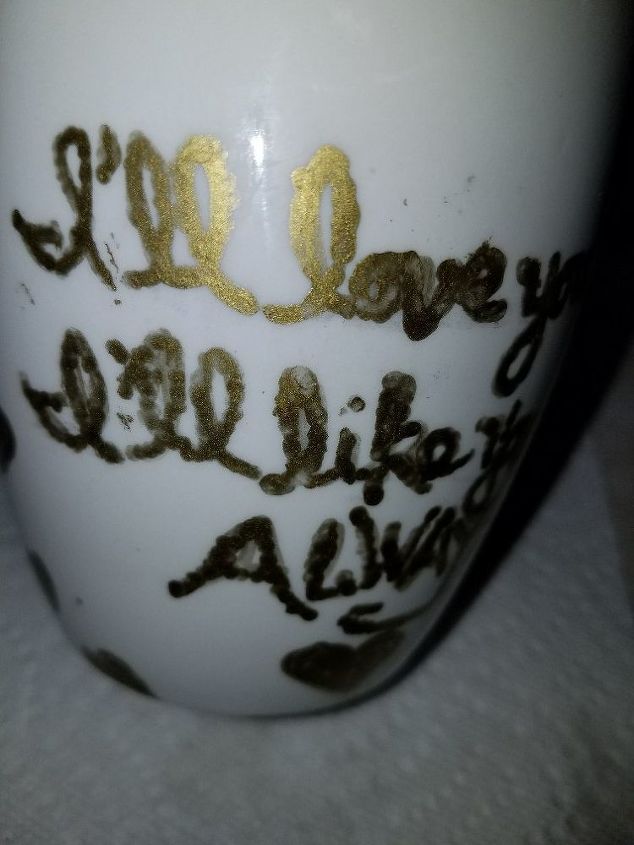
WHAT'S THIS? OH NO! In spite of the fact I thought it was dry, and all my careful maneuverings, my carefully lined up message was smeared! Good thing I had the Q-tips and nail polish remover handy. I ended up, however, using a paper towel dampened with remover because the Q-tips just were too small to effectively do a job this size. After cleaning it all off, I very CAREFULLY washed and rinsed this side of the cup only, and then it was dried with a clean cloth.
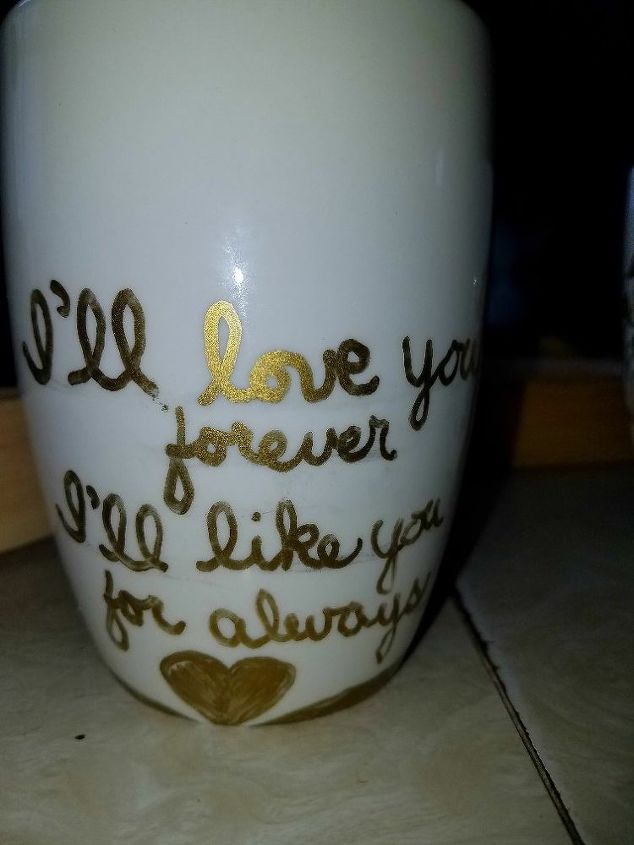
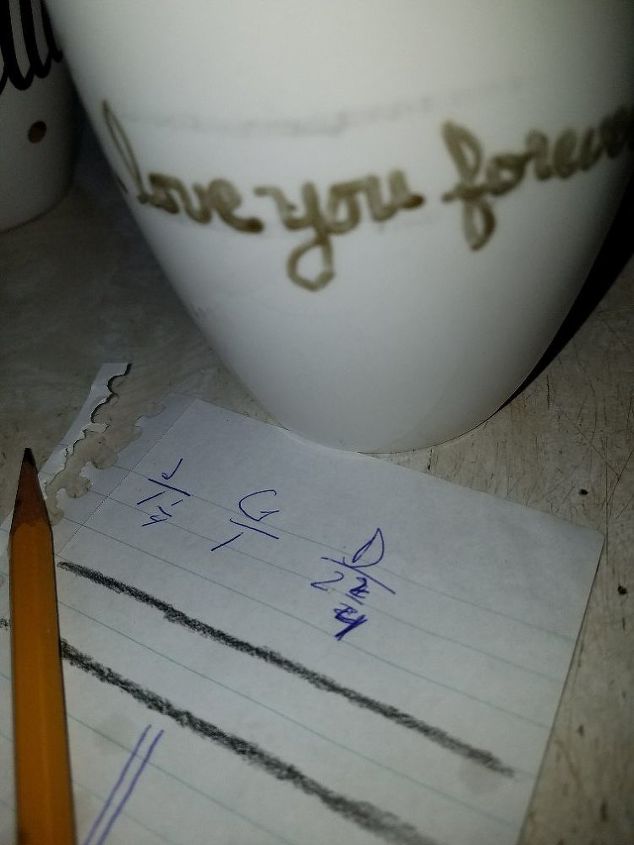
As the old saying goes, I tried again. This time the words from the book TITLED love you forever is MUCH clearer and easier to read. I am happy. So, I checked the handle area to make sure it was ok, and it was. (and even though it is a a Mom and her baby boy s he is growing up, it doesn't matter. Any gender can relate to the sentiment in this book). Time to let this cup set to the side overnight to dry, and go on to the next one.
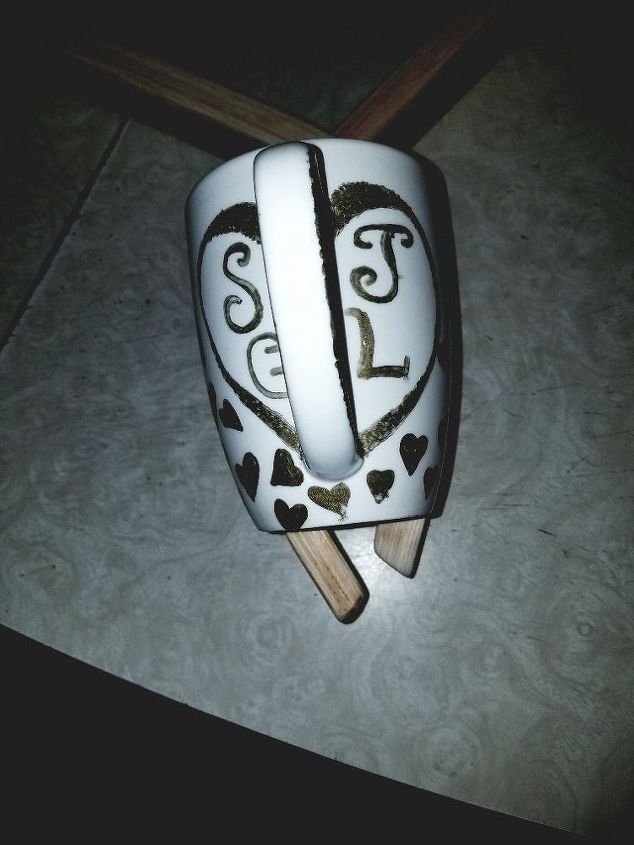
THIS TIME I used a project I am working on to effectively brace the cup AND I worked on the handle FIRST so, that afterward, I could insert it into that slit you see when I am ready to work on the opposite side of the cup. I later did NOT like the top of the "J" because it makes it look like a "T, and I scraped it off carefully with the tip of my nail, forgetting to use the polish remover and Q-tip ... big mistake, because even though it was not visible BEFORE the baking, it lightly showed up afterward. Live and learn.
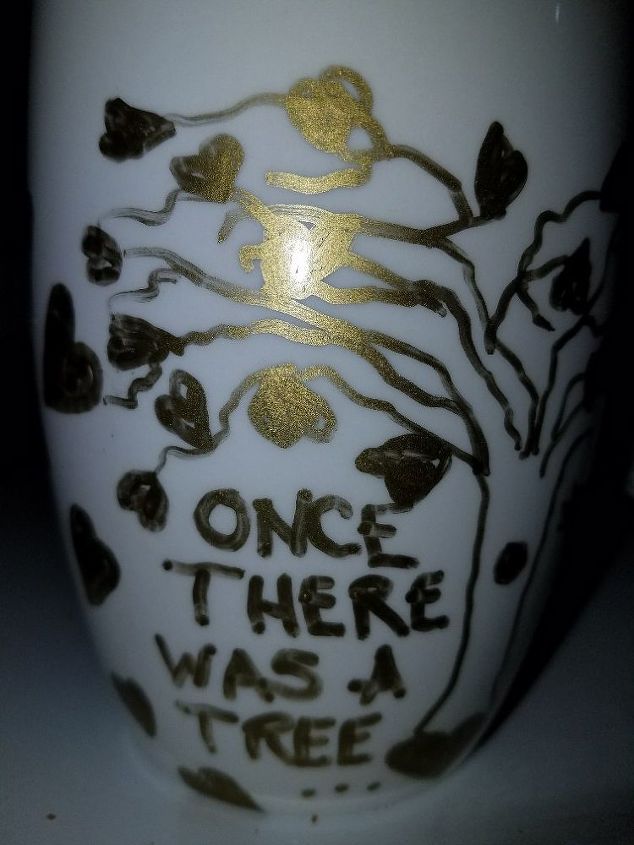
The side of the cup opposite the handle not only had a worded sentiment, it had a drawing to go along with it, and it spread around toward the sides of the cup. I had to make sure that the entire inch -to-inch-and-a-half of the cup's edge, downward, remained clear of th sketch.
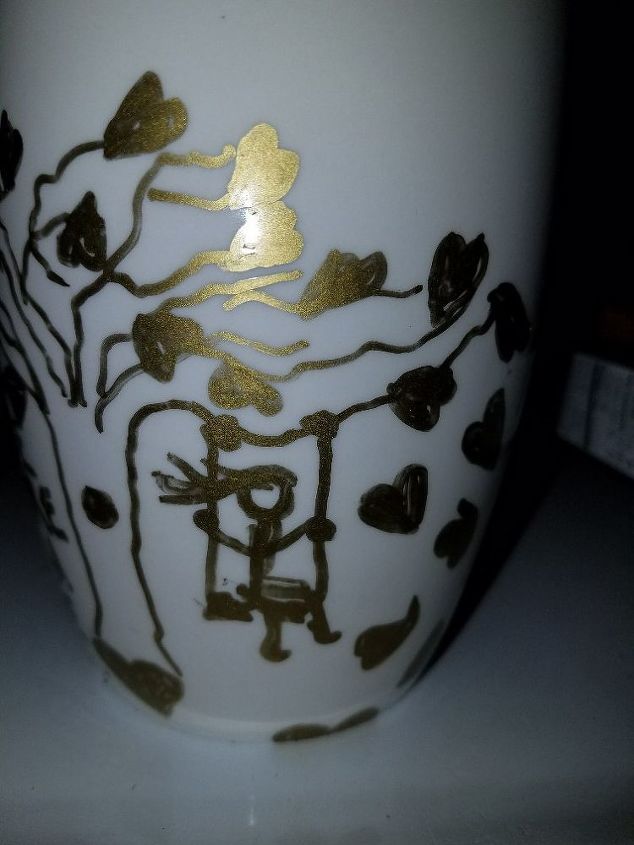
That's supposed to represent my daughter swinging even though the book THE GIVING TREE is about a boy and a tree. Just like the other book, any gender can relate to the sentiment written about in this book, too.
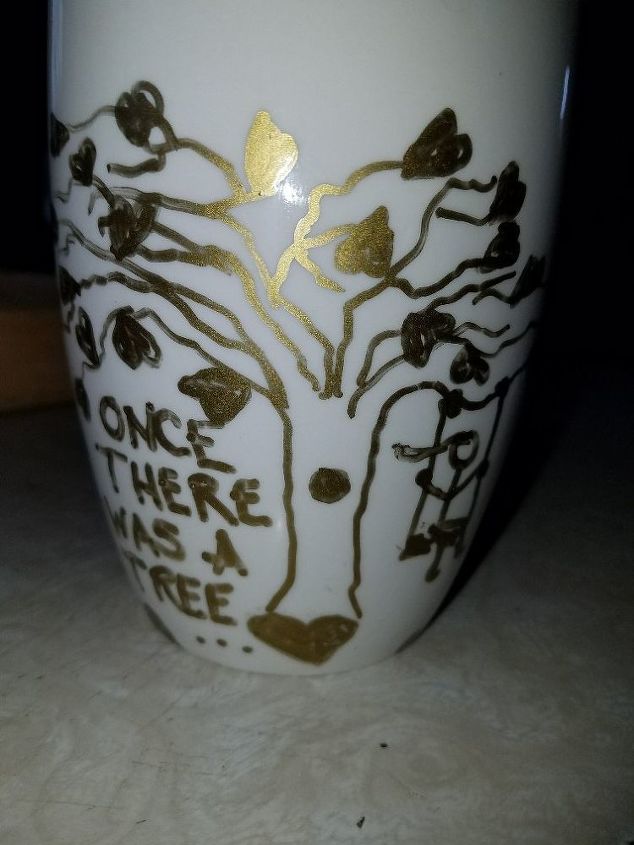
In this picture you can se how it wraps around to the sides and I made sure the marker's paint did NOT encroach on that "safety" distance I had to have. In fact, the closer it got to the area where lips would touch, the more the branches were lowered to make sure safety is in place. Now this cup was also set aside for a 24 hour waiting period along with the other.
I don't want any cracks being made from extreme temperature differences, so I put both cups on a baking tray into a cold oven, then turned it on to 425 degrees and let them slowly heat up. Once the oven reached the 425 degree mark I began the timer and let them bake for about 20 minutes .. well, no, closer to 30, but not quite (ok, I was busy). When I realized time was up, I turned the oven off and LEFT THE CUPS INSIDE to cool off gradually, which took several hours. Even after the oven itself was cold for awhile, when I took the cups out THEY were still lukewarm to the touch. If I would have taken them out of the oven immediately they would certainly have cracked from the shock of the temperature difference between the oven and my home. Seriously. I am glad they were lukewarm, and it wouldn't have hurt for them to be left in overnight. You can see a difference in the color of the paint. It definitely got darker during the cooking (and the house got VERY stinky; in fact, I had to close the kitchen door between the kitchen and the rest of the house, but left the main back door open so the stink could exit through the screened door, but the smell seeped into the main portion of the house, too). So if you try this, make sure you can open the windows and doors. The last step is taping off around the lip area of the mugs, stuffing the mugs with paper towels and spraying them with clear acrylic sealer. They then have to sit at least 10 days to two weeks to "cure" before they can be used (again, this is due to my "safety" thing because "ya just never know, ya know?" ... so just in case).
Comments
Join the conversation
4 comments
-
Aw these are so sweet!
- See 2 previous


Frequently asked questions
Have a question about this project?