


How to Make Kraft Tags From Upcycled Cardboard
If you love the look of Kraft Tags for as gift tags and you like upcycling then this tutorial is for you!
It’s all about how to make your own upcycled Kraft Tags using cardboard and paper from your recycling bin.
This is a super easy project and it only takes a few supplies.
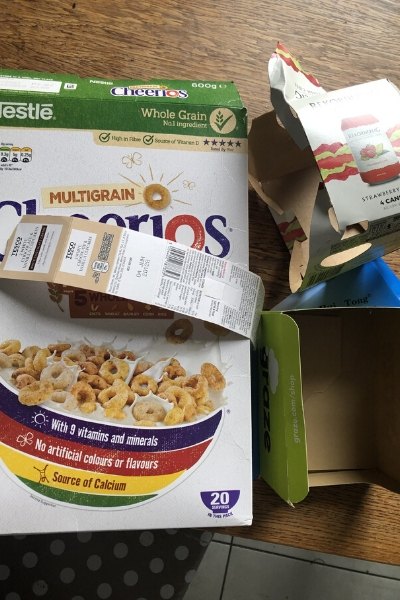
Don’t worry to start off with if your cardboard has print or writing on it for the moment. I’ll give you options for how to disguise this.
You can sort your cardboard into only brown cardboard (like traditional Kraft Tags) or use a mix of white and brown like I did. But again don’t worry about the text or marks on the reverse side just now.
If you want to make these in bulk you need to get a bit of a system going. So here is mine.
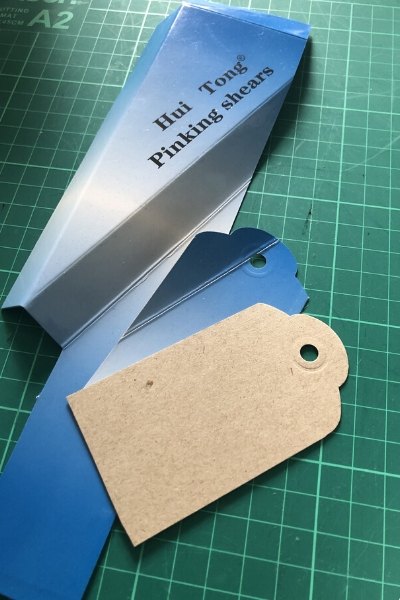
First you need to decide what width you want your product tags or gift tags to be.
My gift tag punch is from Amazon and it does three different widths of tag – 1.5″, 2″ and 2.5″. You can buy similar punches at many hobby stores.
Once you’ve decided on the width, you want to cut the cardboard in strips of exactly that width.
Make the strips as long as you can (this will depend on the size of the packaging or box that you are upcycling).
Make as many strips as you have materials that you want to upcycle.
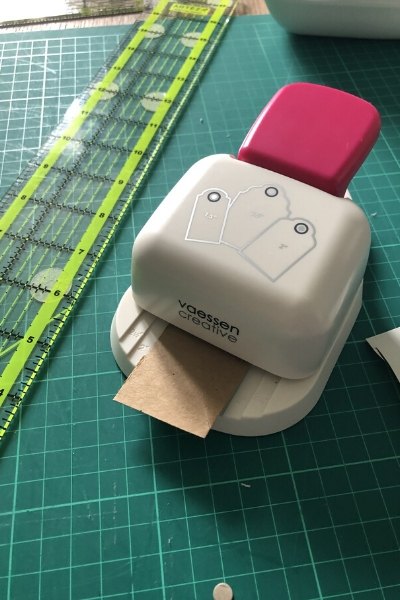
Once you have the strips feed the first strip in to the tag punch as far as it will go and push down on the lever.
The end of your strip will now have a curvy kraft tag end with an embossed hole for you to string your twine or ribbon through.
Now obviously at this point that is a rather long product tag you are holding. So the next step is to decide on how long you want the tag to be.
Cut it to whatever length feels good to you and then feed the strip back into the tag machine to make another tag.
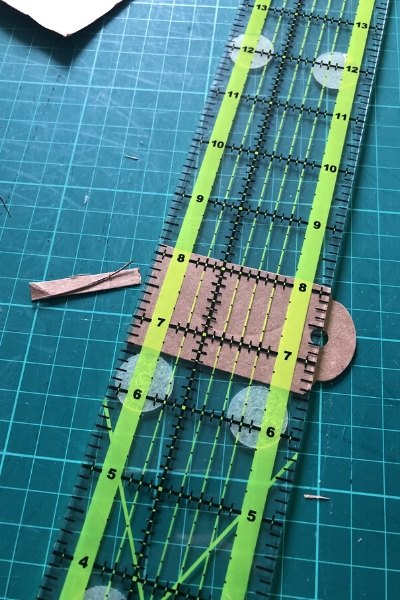
Repeat until you get to the end of your strip and then repeat with each strip you have cut out.
P.S. – don’t worry about the fancy ruler and cutting mat – you don’t need those I just used them as I was doing this at the same table where I do my sewing!
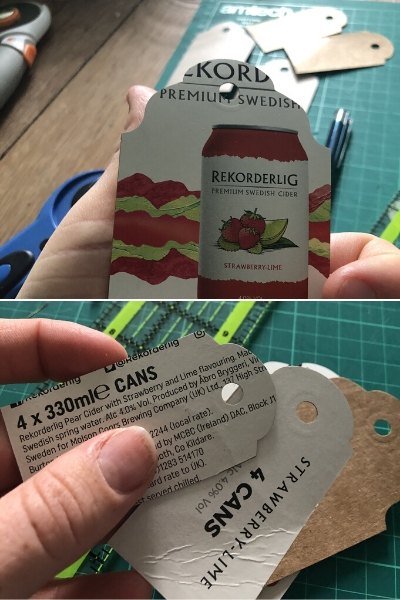
Now obviously, the issue with these tags you’ve just punched is that most of them are going to be printed on one side as you are using packaging and other recycled materials.
If you were able to find some appropriate cardboard without print on it for this you are laughing – just add some twine or ribbon and you are done!
However if you have printed cardboard on one side of your tags you’ve got a couple of options.
One is to plan ahead and try to strategically cut your strips and tags so that you’re just getting a plain colour on the back rather than any actual text or logos.
Another easy option is to decoupage the back side of your tag with thin decorative paper using mod podge.
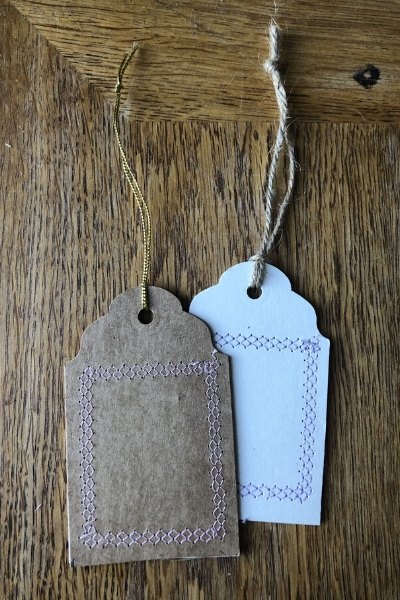
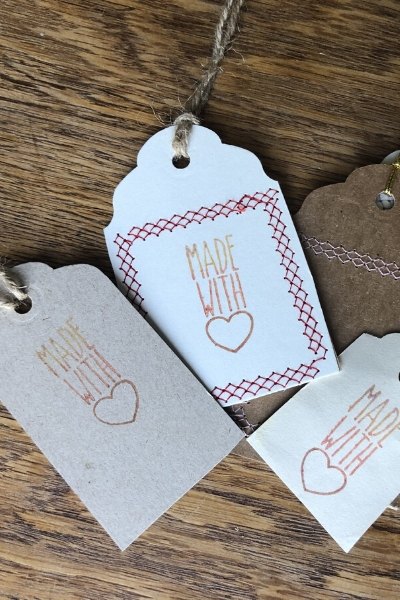
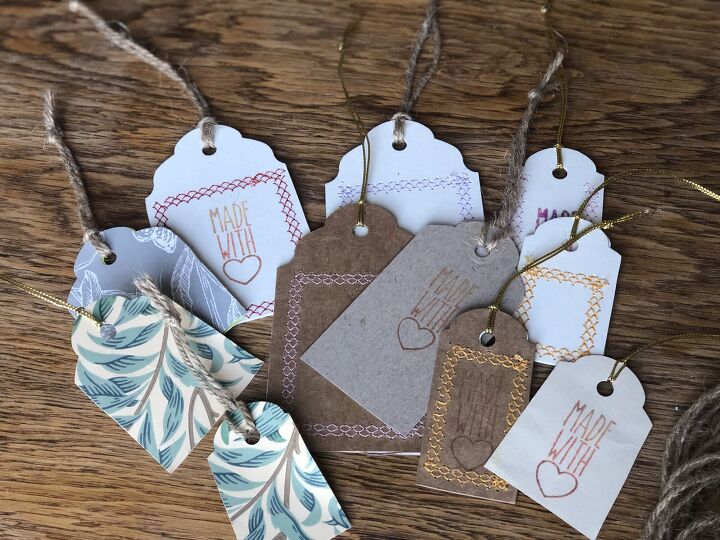
The last option – which is my favourite – is to take two tags of the same size and line them up text sides together (so plain unwritten sides facing out) and then use a decorative stitch on your sewing machine and a pretty colour to sew them together.
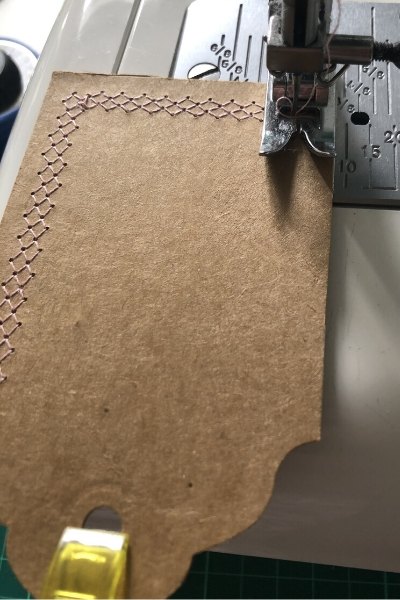
You’ll need a strong denim or leather needle for this and you’ll need your machine on a pretty high tension.
I use a wonder clip to keep the tags together as I sew.
I sew around in a square around the edges or just up both sides depending on the size of the tag.
The two ends of the tag where the hole is will still be loose but once you put your twine or ribbon through that will hold that end together nicely.
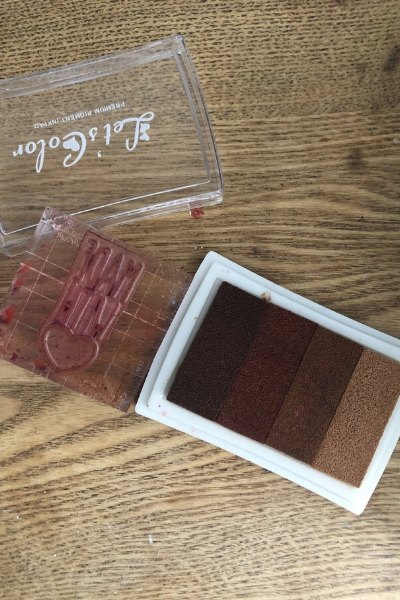
I used a stamp I bought on Etsy to mark my tags ‘Made with Love’.
You could simply handwrite a gift message or a product price if you prefer.
You can also buy personalised stamps like mine with your small business logo or even just with ‘Handmade by ___(your name)’.
Feed some twine or ribbon through your kraft tag holes to attach them to your products or gifts and your done!
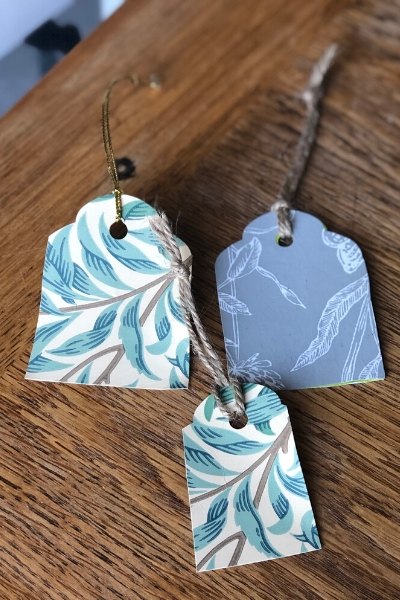
I have also tried this with thick wallpaper, as well as wallpaper samples, and you could do it with maybe really thick wrapping paper or another kind of craft paper as well if that’s what you have on hand.
I just think these handmade and upcycled kraft tags look really cute.
And I love that the supplies you need to make them are one purchase items (the gift punch and a stamp), you can just keep reusing them and reusing them without having to spend more to make more tags.
If you like’d this post, you might also want to have a look at my post called The Upcycler’s Guide to Gift Wrapping.


Frequently asked questions
Have a question about this project?