


5 Ways to Make a Unique Decoration With a Plastic Ball Ornament

I started making these simple but beautiful ornaments probably 20 years ago! I still love the ones I made way back then, and have continued to make them through the years. So, I want to share 5 ways to make a unique decoration with a plastic ball ornament with you.
Even if you’re not typically a DIYer, this craft project is super easy. You just need a few simple supplies.
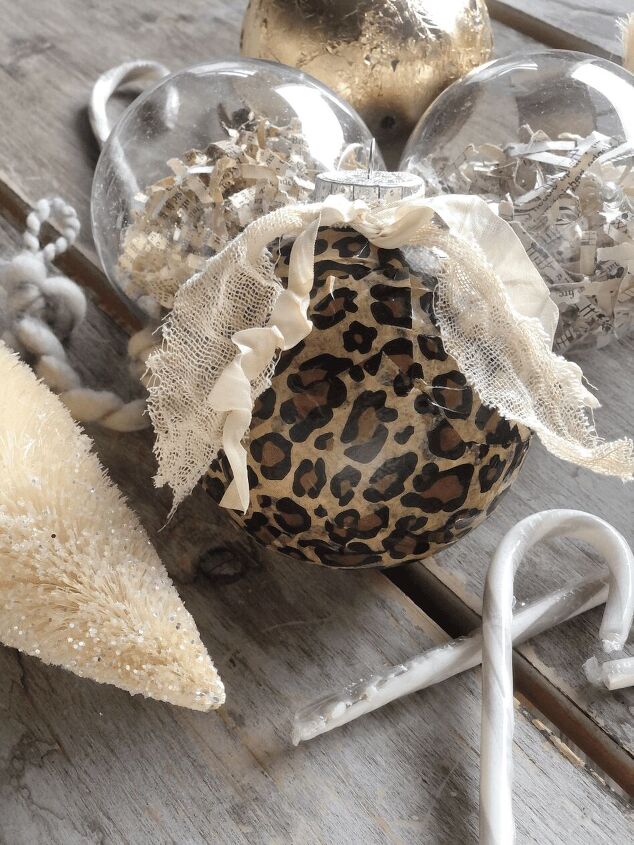
Many years ago I made these using leopard print tissue paper. That went with my color scheme back then, and I loved them. As a matter of fact, I still have about 20 of them, because I just can’t part with them.
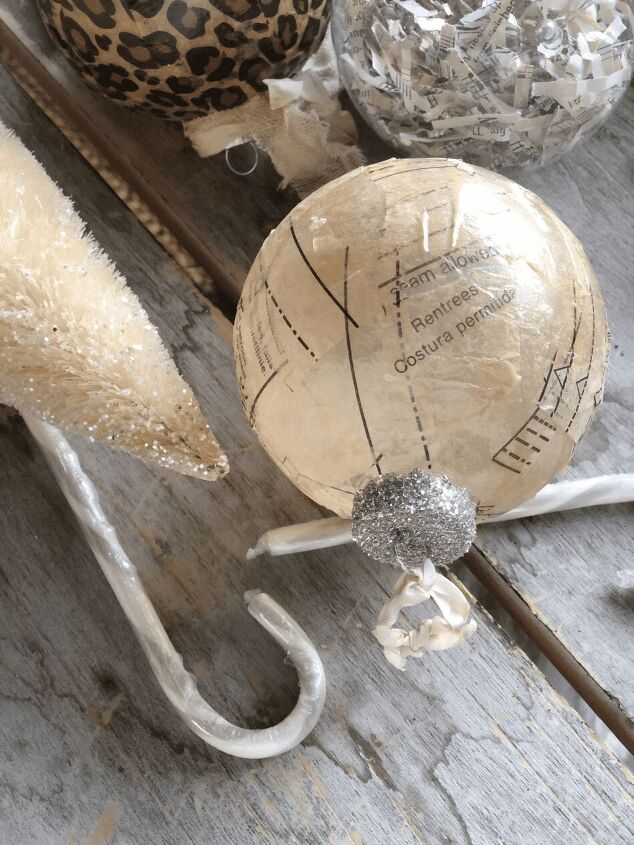
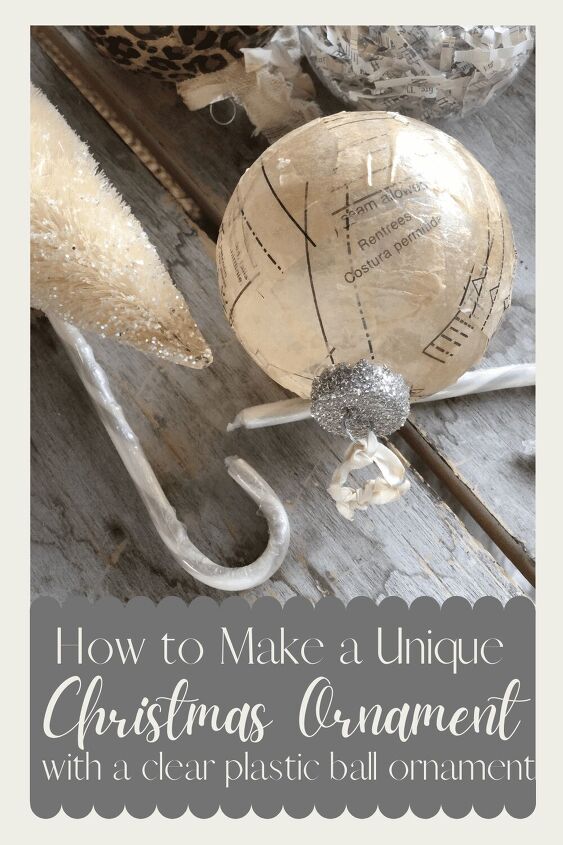
In more recent years, I transitioned to a more neutral and vintage look, so I make ones that look like this.
I love to dig in my ribbon and tissue scraps and create new ones every year.
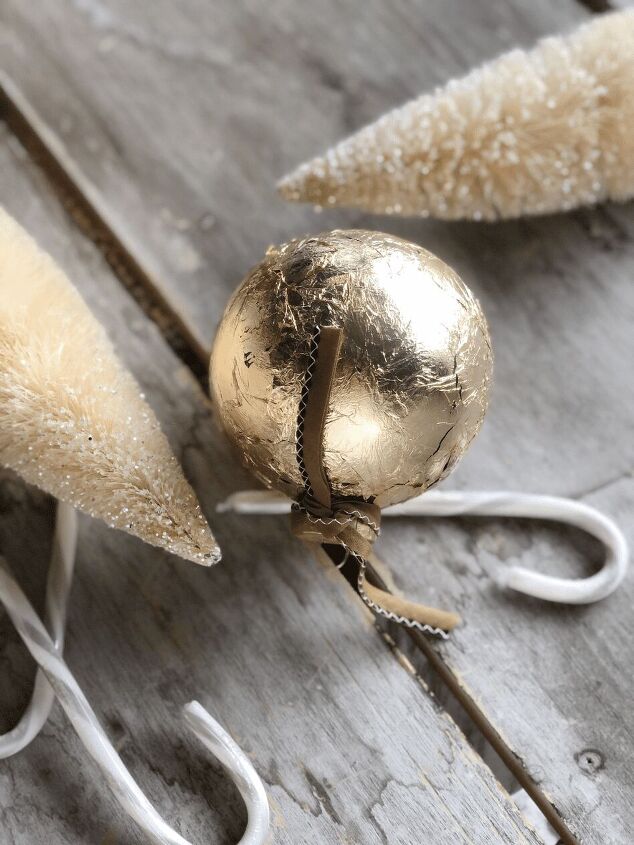
I even tried some recently with gold leaf. That was only because I had some left over from a project. Gold leaf is a bit pricey and very delicate to work with.
These also make fun and unique ornament exchange gifts during the holidays.
supplies for your plastic ball ornaments
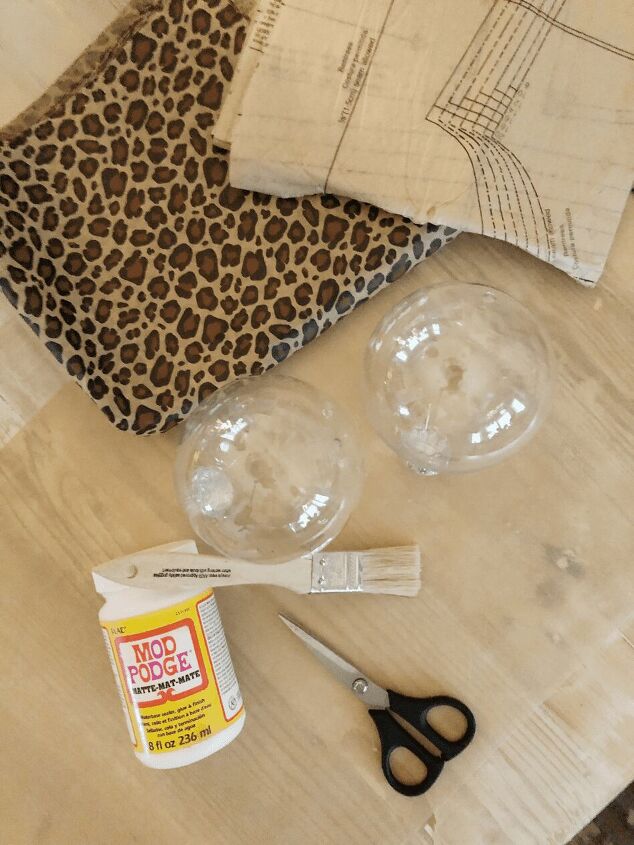
Clear plastic or glass ball ornaments (these come in several sizes)
Assorted tissue paper or sewing pattern paper
shredded book pages
scrap ribbon or trim
Mod Podge
paint brush
book pages or sheet music
paper shredder
glass glitter or regular crafting glitter (optional)
silver pipe cleaners (optional)
artificial snow (optional)
directions for making unique Christmas ornaments using tissue or pattern paper
Cover the surface where you will be working with some sort of paper or an old sheet. This project is a bit messy.
First you want to cut your patterns or tissue into small pieces. I cut mine into about 1″x2″ pieces. It really doesn’t matter exactly the size. You just want something manageable.
Next, you will want to cover part of your plastic ball ornament with Mod Podge. I use a small chip brush, but any paintbrush will work.
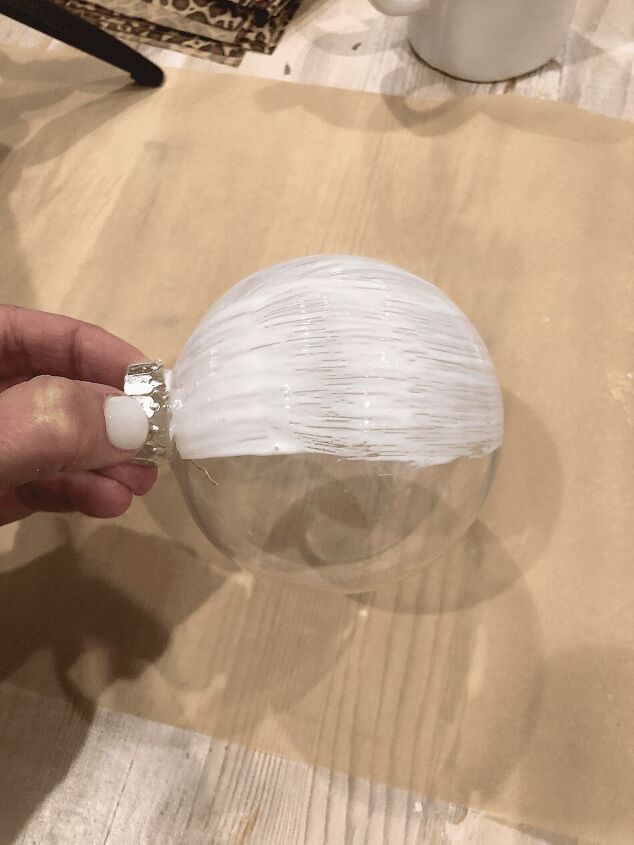
I only cover about half of the ball at a time.
Paint half of the ball generously with Mod Podge and start adding strips of tissue or patterns.
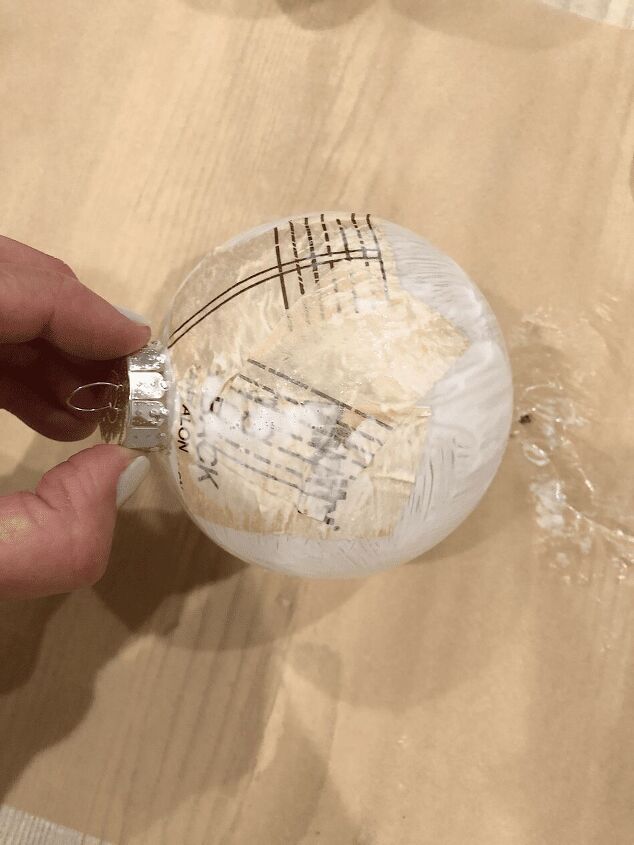
You will need to overlap the tissue pieces to cover all of the ball. And you may have to add a bit of Mod Podge here and there to make the pieces stick to one another. The Mod Podge will dry clear, so it doesn’t matter if it is over the top of the tissue paper.
When the ball is dry, you can go back and make sure it is covered, and add pieces where you may have missed a spot.
Sometimes, it’s hard to tell if it is completely covered when the ball ornament is still wet.
directions for making a unique Christmas ornament using shredded paper
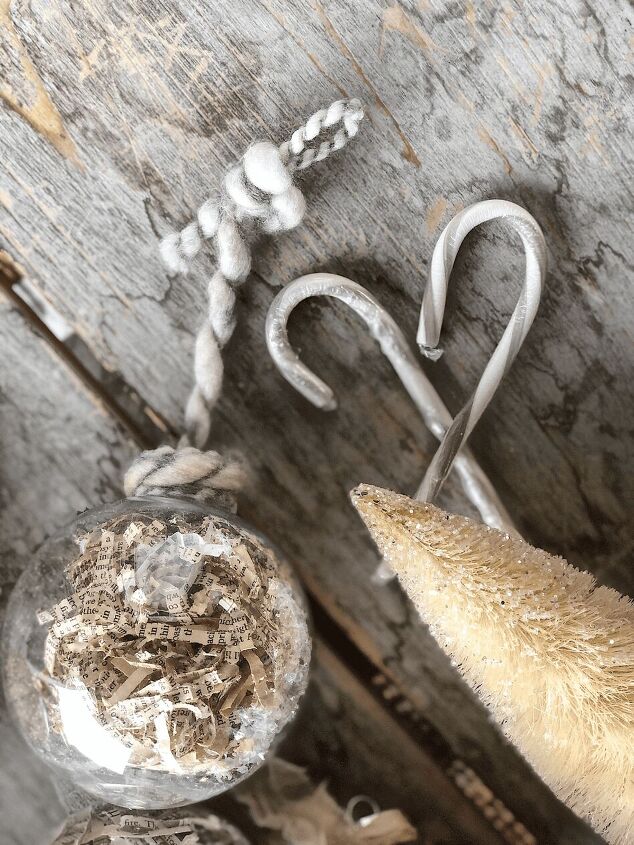
For the shredded paper ornaments, you will need to shred your book pages or sheet music.
I make sure the container on the paper shredder is empty before I start. This way, when I am done, my book pages are the only paper in the shredder container.
Tear sheets out of you book or use sheet music pages, and feed them into the shredder.
Empty out the shredder container. I store my shredded paper in a large ziplock bag to keep on hand for other projects.
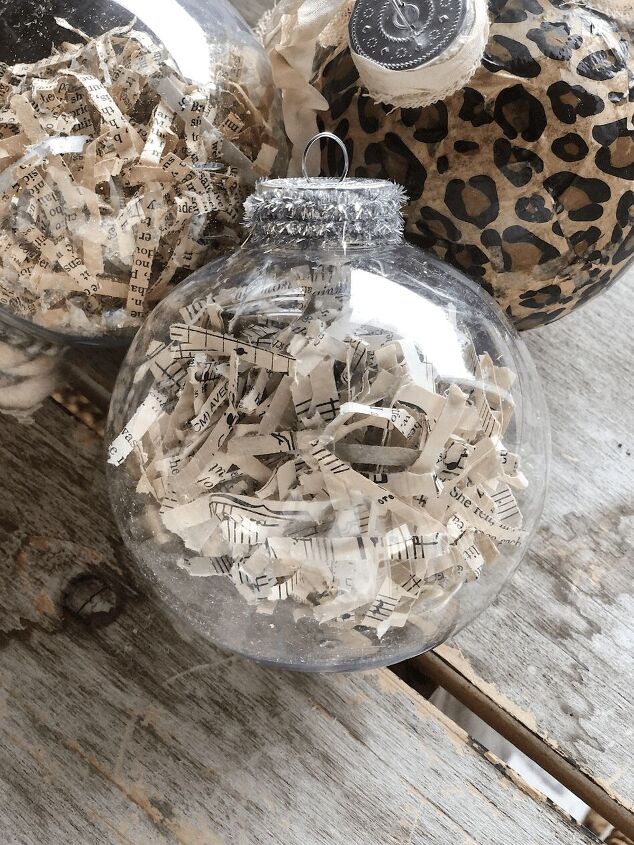
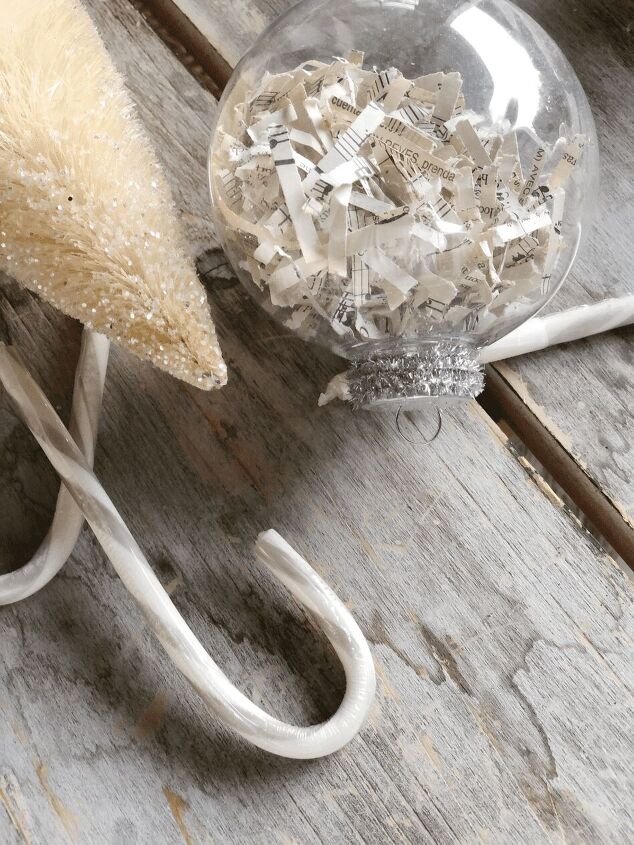
Take the tops off of the plastic ball ornaments and add as much shredded paper as you like.
I like to add a bit of artifical snow or glitter with the paper to add a bit of sparkle. This, of course, is up to you.
Use your creativity here, because adding pearls or other decorations is also fun and cute.

3 unique ways to cover the tops of your plastic ball ornaments
This is where you can get really creative!!
Glitter Ornament Tops
For some of my ornaments, I like to add glass glitter to the top. Regular glitter will work too.
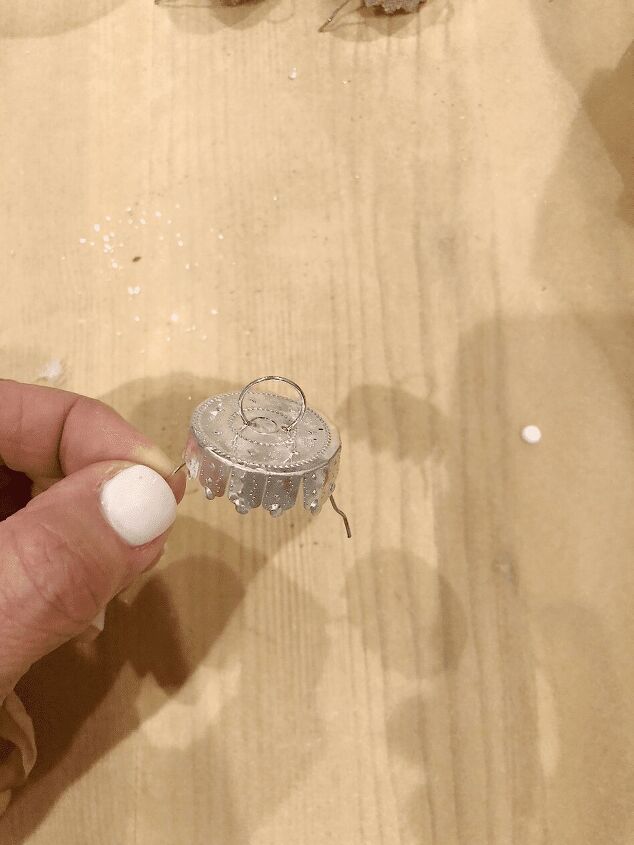
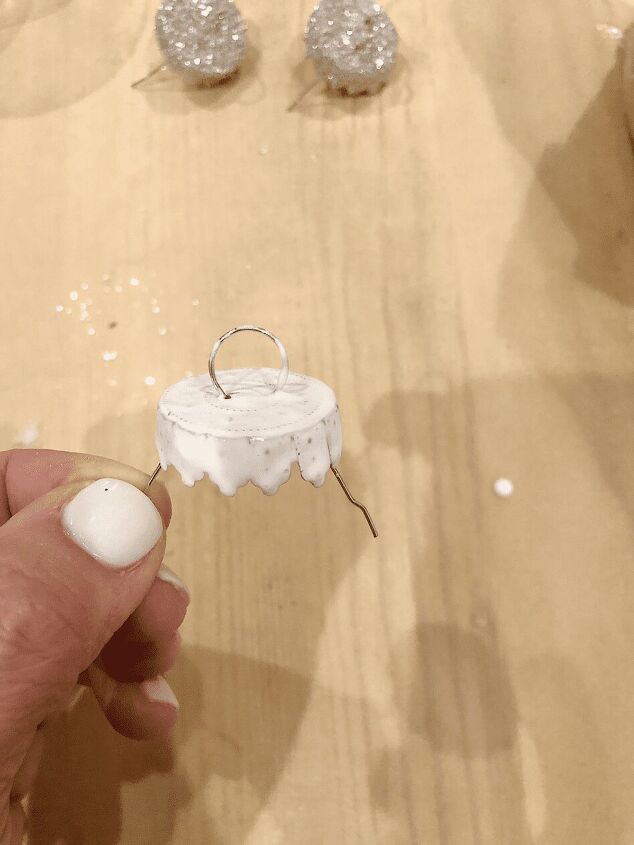
Paint the top of the ball with Mod Podge or any type of glue and spoon the glitter over the top. Making sure to cover all of the top.
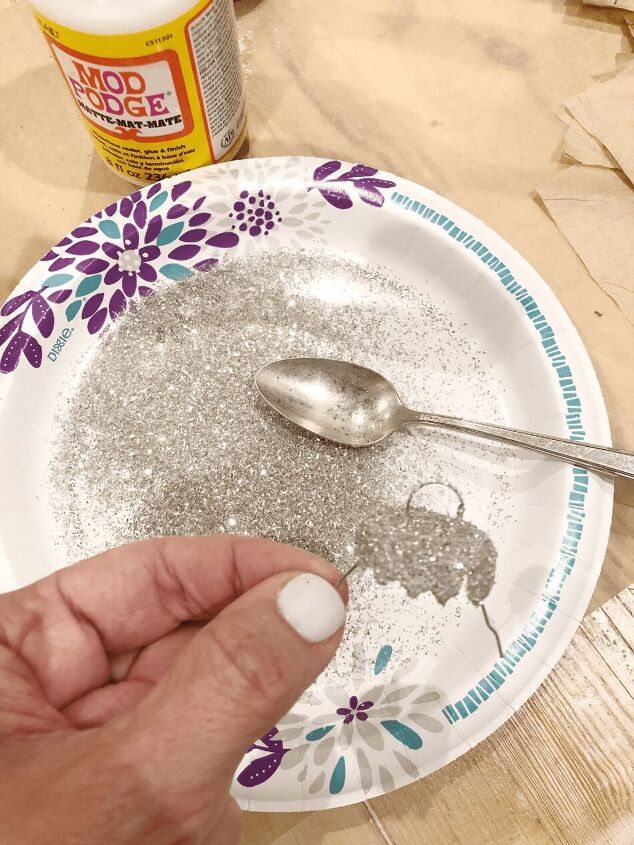

Be sure and use a paper plate or something to catch the glitter that falls off, so it can be reused.
The glass glitter, and of course, regular glitter come in all different colors. So use whatever goes with your color scheme and theme.
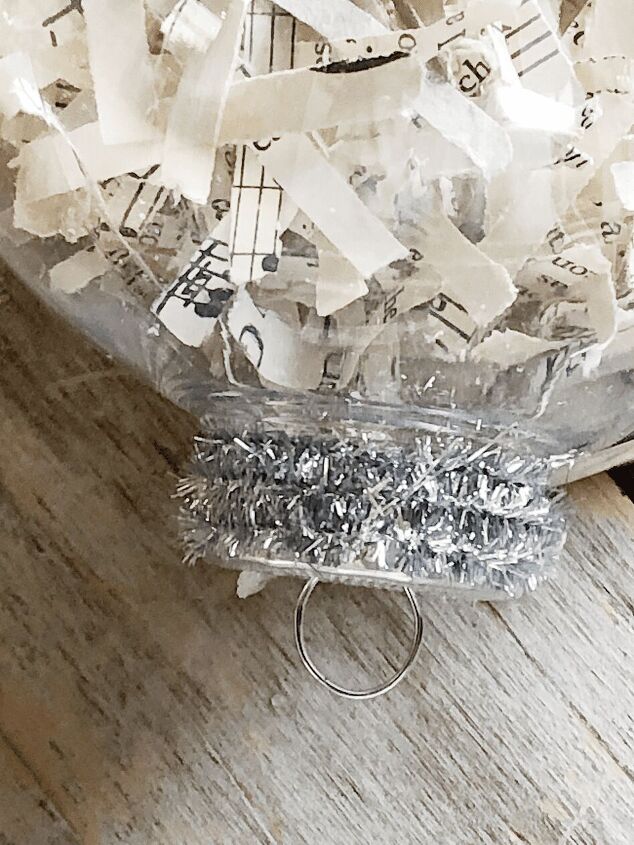
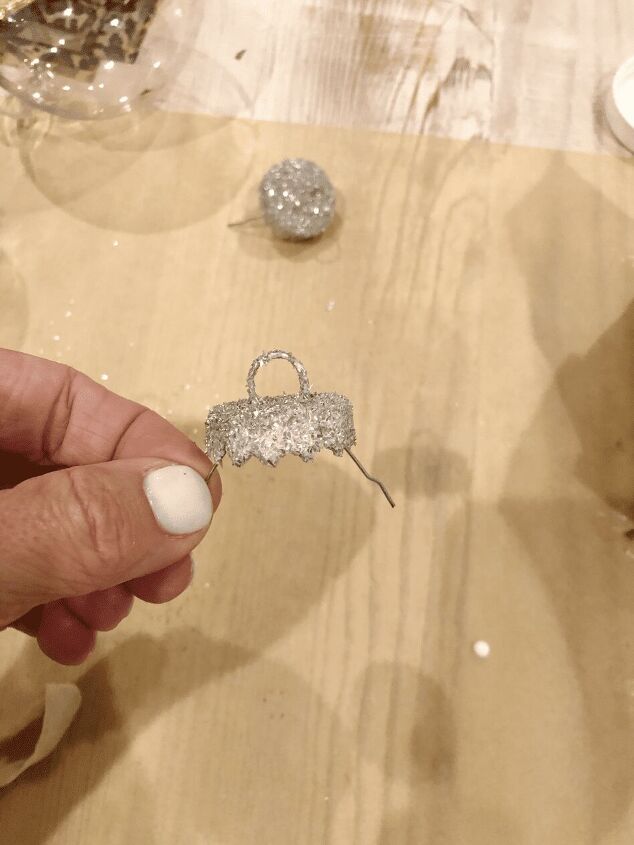
Ribbon or Pipe Cleaner Ornament Tops
For the pipe cleaner tops, I like to use the silver or gold metallic pipe cleaners.
Hot glue one end of the pipe cleaner to the base of the hanger on the top of the ornament ball. Tightly wrap the pipe cleaner around the hanger until you reach the end of the pipe cleaner or have covered the entire top of the hanger, then glue the end down.
And that’s it!! Super easy and unique Christmas ornaments.
You can get really creative with these and add things that go with your theme and color scheme.
And, wouldn’t it be fun to host a ladies get together during the holidays and make these? Everyone could bring some supplies to share, and take a few ornaments home.
Kind of like a cookie exchange, but with ornaments.
I hope you’ve enjoyed and been inspired with these 5 ways to make a unique decoration with a plastic ball ornament!
I would love to hear if you try it!!
blessings and happy crafting,
If you liked this post, be sure and Pin It to remember it….
Comments
Join the conversation
-
All kinds of cute ideas. Let the imagination and creativity flow. Good share


Frequently asked questions
Have a question about this project?