


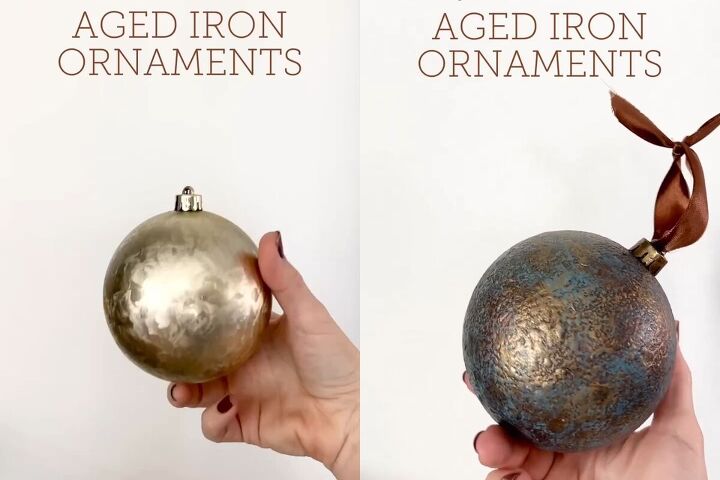
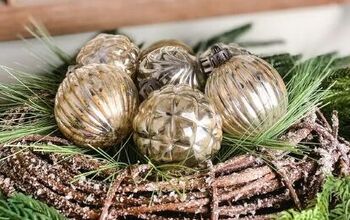
How to Make DIY Vintage Ornaments With an Aged Iron Patina

Today, I'm excited to share my DIY vintage ornaments tutorial with you. We're going to create aged patina iron ornaments. So, let's roll up our sleeves, gather our supplies, and embark on this creative journey to craft some unique holiday ornaments.
Tools and materials
- Round ornaments (2.5-3.5″ in diameter)
- Drywall mud or spackling
- Black/dark spray paint
- Copper and gold paint
- Teal/blue paint
- Paint brushes
- Paper bowls
- Skewers
- Tape

Steps
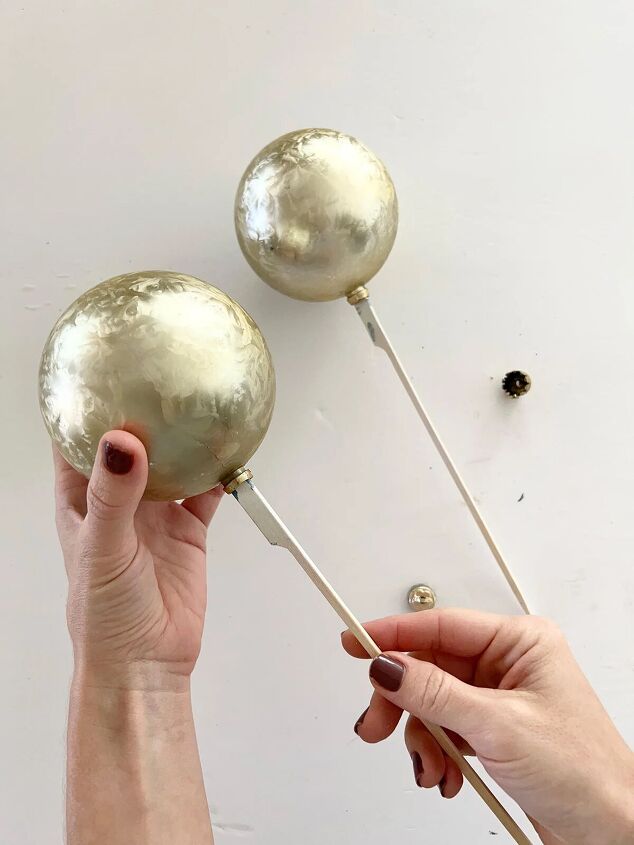
Step 1: Attach Ornaments to Skewer
Start by removing the ornament caps and placing a skewer inside. If the opening is too wide, use some tape around the base to secure it snugly.
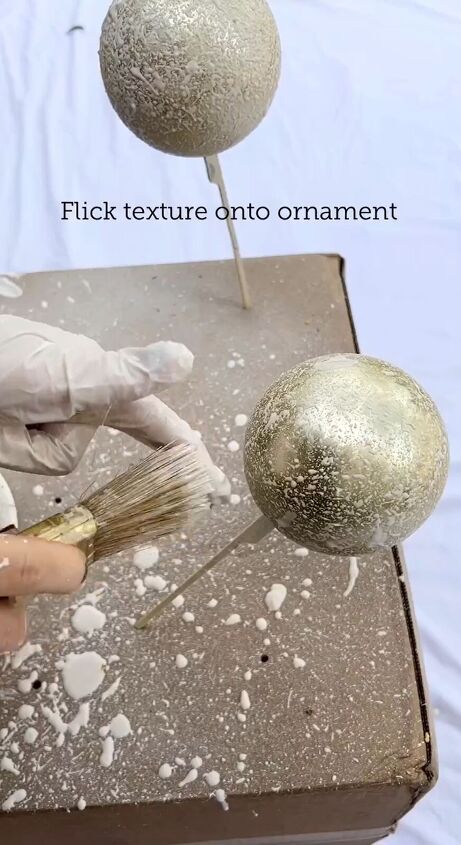
Step 2: Apply Drywall Mud Texture
Choose a material that dries and hardens like joint compound, plaster, or putty. In this tutorial, we're using spackling mixed with water. Aim for a pancake mix-like consistency that splatters easily.
Insert the skewer ends into a box, then dip a stiff brush into the texture mix and flick it onto the ornament to create a splatter pattern. Continue until you're satisfied with the texture.
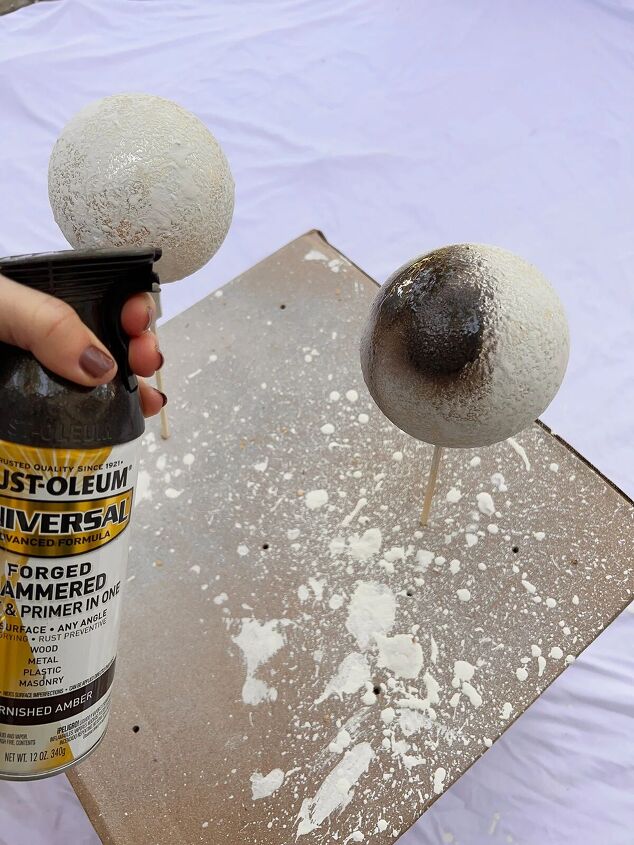
Step 3: Spray Paint the Ornament Black/Dark
Allow the textured surface to dry completely, which usually takes 1-2 hours. You can use any dark or black spray paint.
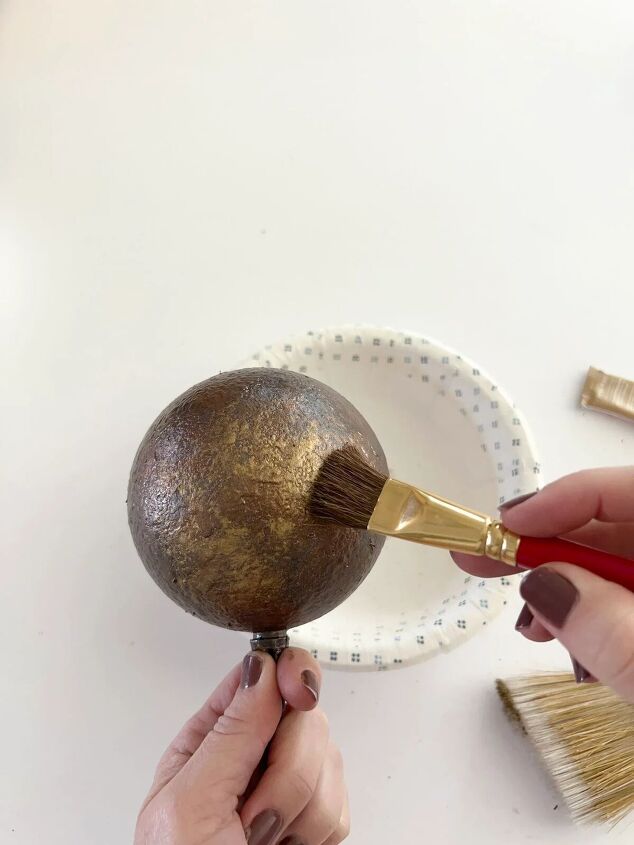
Step 4: Add Copper and Gold Paint/Wax
For a rich patina look, you'll need two contrasting shades of gold. Start with the darker color, dabbing it on with a brush. Ensure some of the dark paint shows through.
Then, apply the lighter color randomly, allowing the underlying colors to show through in some areas. This layering technique will give your ornaments depth and character.
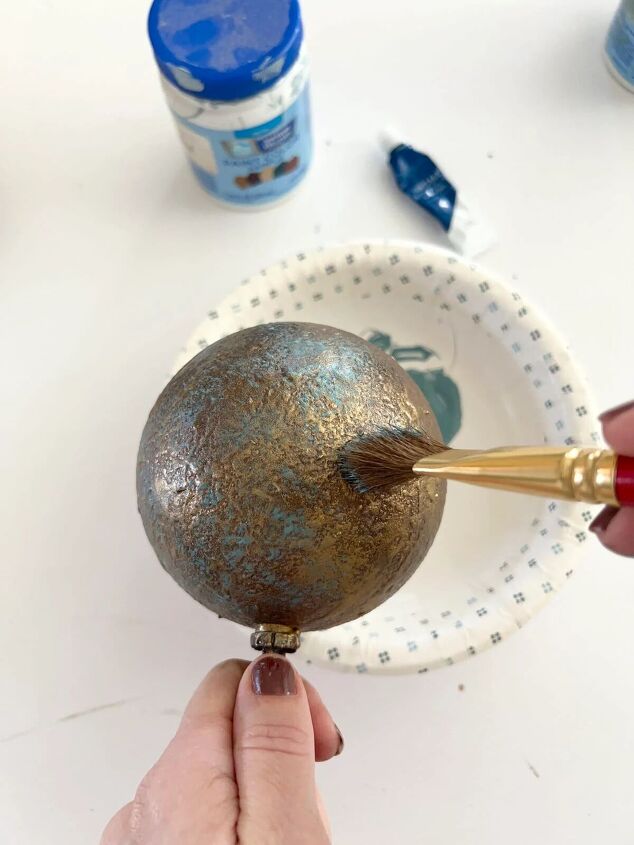
Step 5: Add Blue Patina
Real copper patina has a teal-blue hue. Mix your closest teal and blue paint colors together. Lightly dab this mixture onto the ornament, focusing more on some areas than others. Don't overthink it!
Gently buff the paint to fill in the grooves and achieve a realistic effect. Your aged iron ornaments are now complete. If desired, you can use a clear matte sealer for added protection.
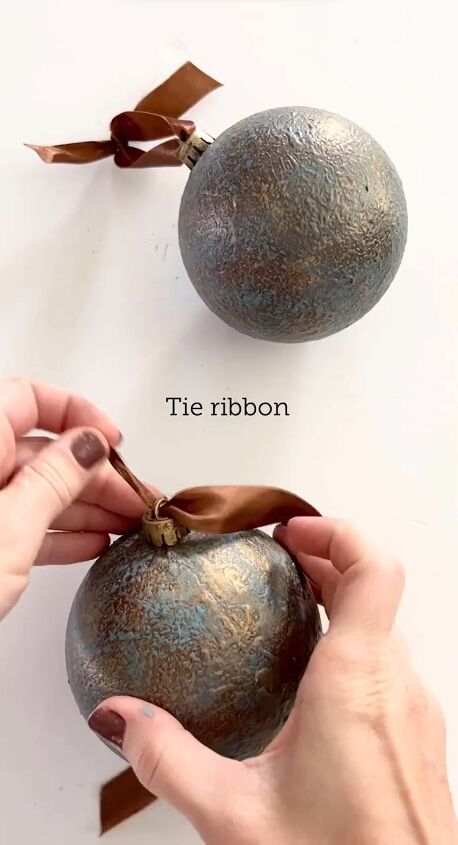
Step 6: Tie Ribbon
Finish off your ornaments by tying a brown satin ribbon onto the caps.
DIY vintage ornaments
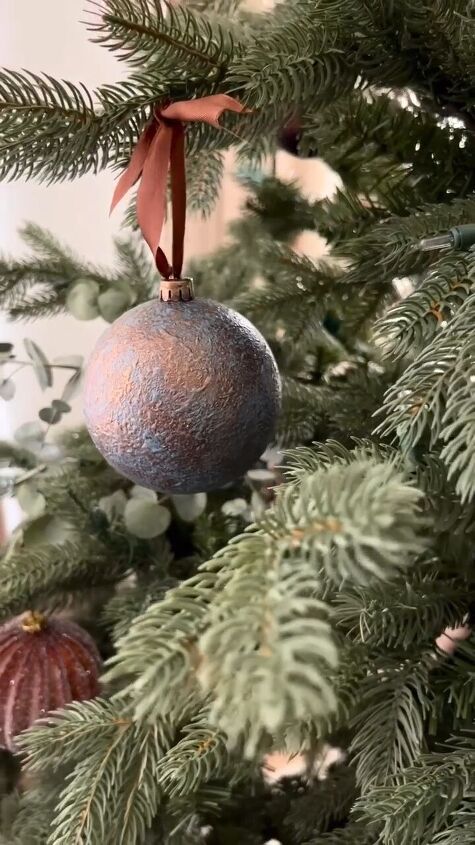
There you have it, your very own aged iron ornaments that are sure to impress your holiday guests. This DIY project captures the charm of vintage ornaments on a budget. What do you think of the effect? Let me know in the comments.
I hope you enjoyed this tutorial and have a blast creating these unique holiday decorations for your home. Happy crafting!
Follow @jennasuedesign for more DIY ideas.
DIY Christmas decorations
For more festive decor projects, discover Hometalk's best DIY Christmas ornament ideas.
Comments
Join the conversation
-
They look great! Fantastic job!
-
Gorgeous! I’m going to give it a try!!


Frequently asked questions
Have a question about this project?