


How I Re-purposed a Bookcase Headboard Into a Keepsake Hutch

by
Sharolyn T
When our son went to Heaven at the age of 19, I knew I wanted to keep the headboard of his bed as a keepsake. The headboard was a bookcase style that I could see as a precious 'memory' piece. Hubby and I have done lots and lots of basic home remodeling, but this was totally my project...and a finish carpenter I am not! I'm the "Use it up, wear it out, make it do, or do without" kind of gal. So, with lots of prayer and kicking it around in my mind I finally finished my 'keepsake project' today.
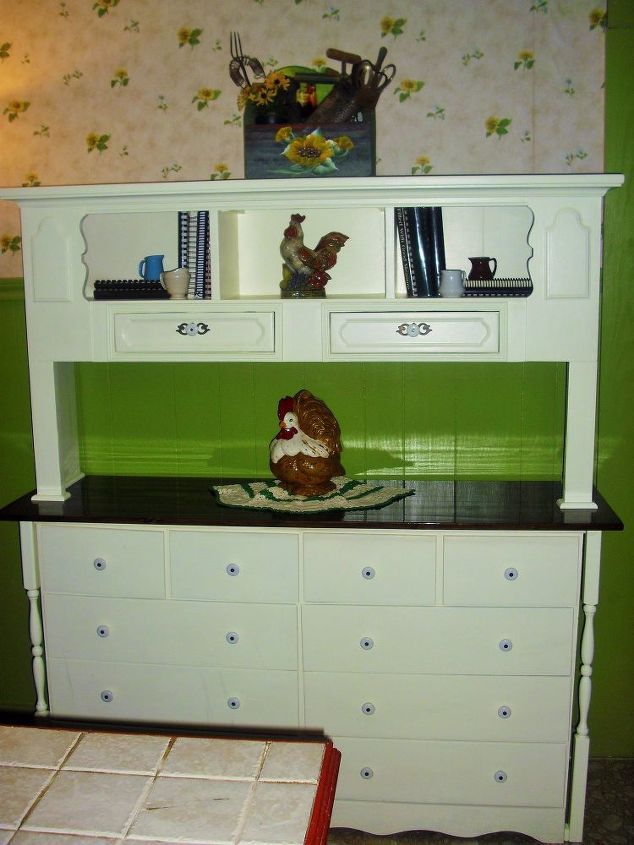
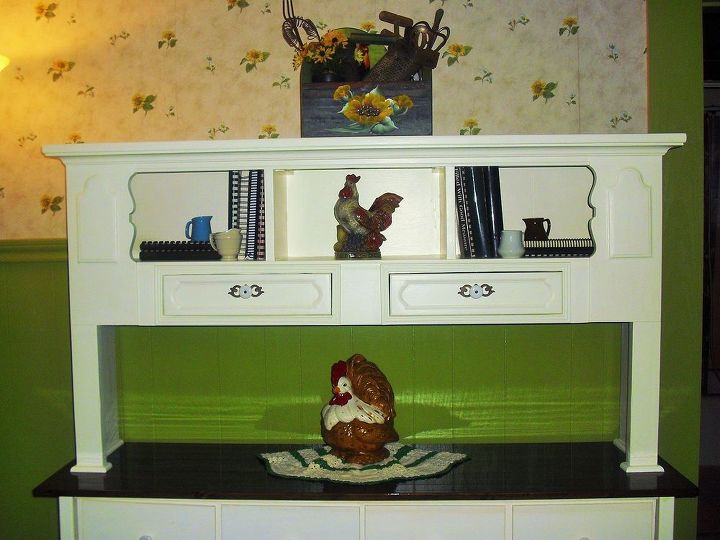
~*~my keepsake hutch~*~
This is the after. The finished picture of my keepsake hutch! I LOVE how it turned out!
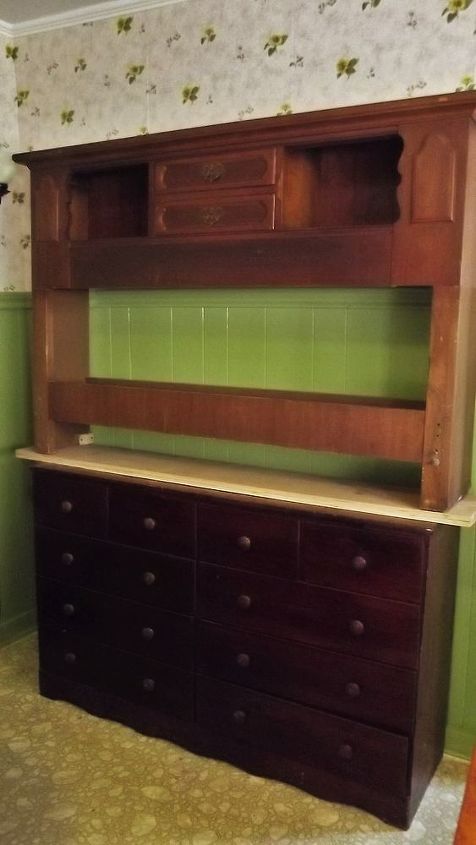
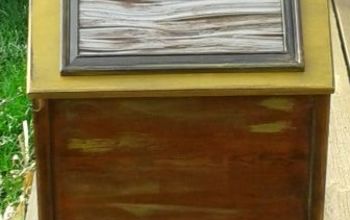
before
The headboard was too tall, and out of proportion with the chest I was adding it to. I added a longer top to compensate.
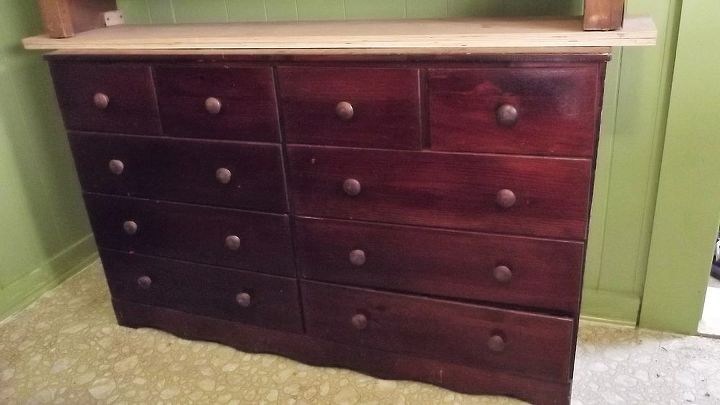
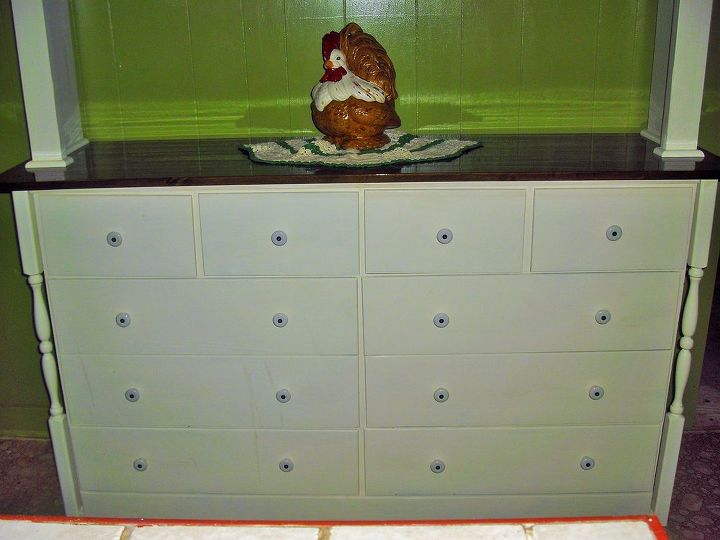
This chest belonged to my husband's Grandmother, and was left to him as his inheritance from her. She was an important part of our lives so it was necessary to make this a part of our 'memory piece'. (The unfinished board on top was not a part of the original chest.)
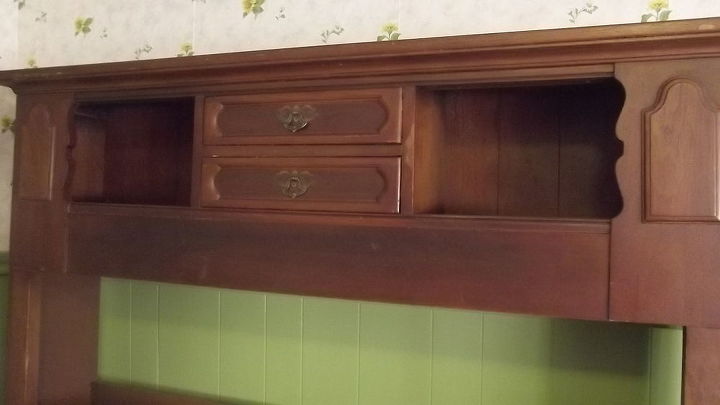
A close-up of the headboard with the drawers intact.
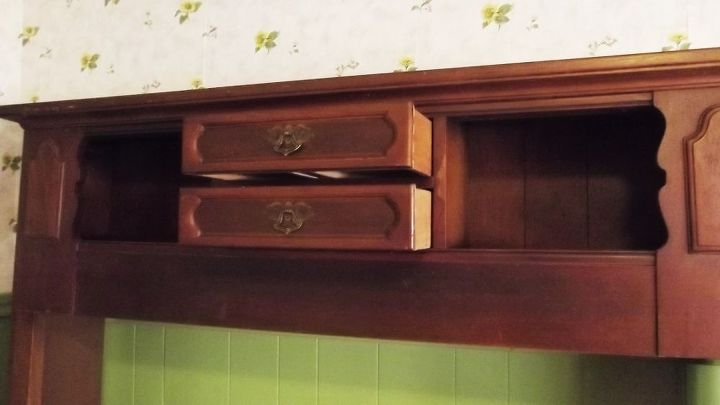
I really wanted to be able to keep the drawers as a part of the finished piece, but the drawers in their original place were too high to be used properly, or even look right.
A close-up of the bottom of the headboard, so tall it looked out of proportion. I cut 15 inches off the bottom before attaching to the chest.
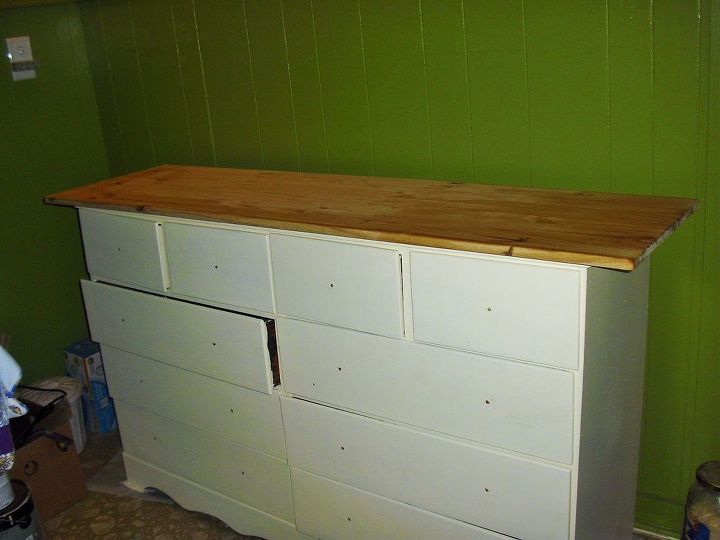
The painted chest with the new top attached. Because the headboard was wider than the chest, it needed a new top added.
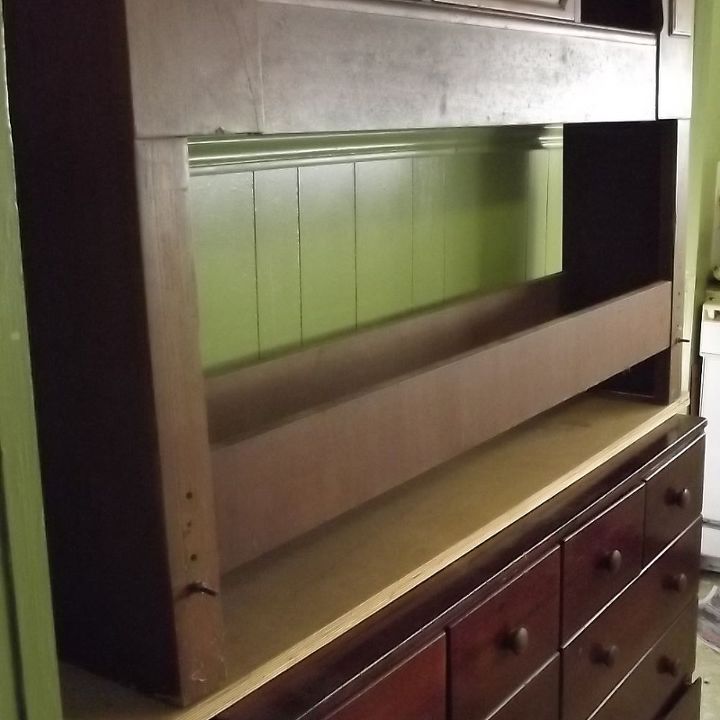
The headboard has been cut off and now attached to the new top.
Do you see what I did with the drawers? I totally removed the drawers and all of the hardware, but so wanted to keep them permanent. I discovered the flat board below the openings was wide enough to hold the drawers! Woohoo!
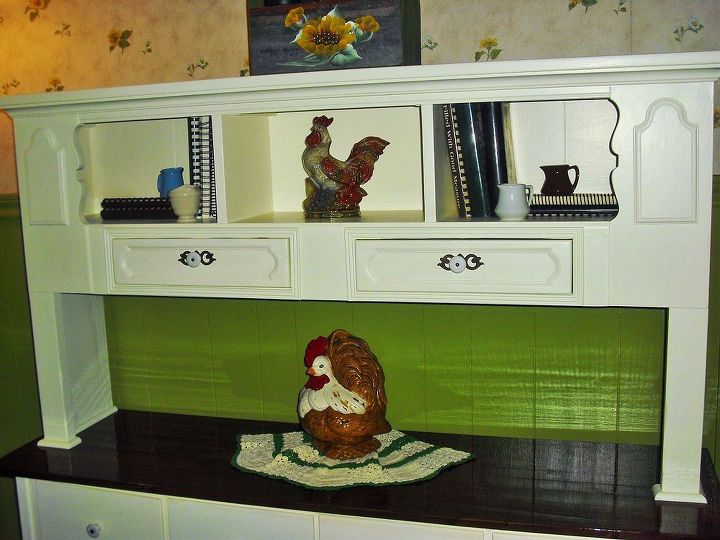
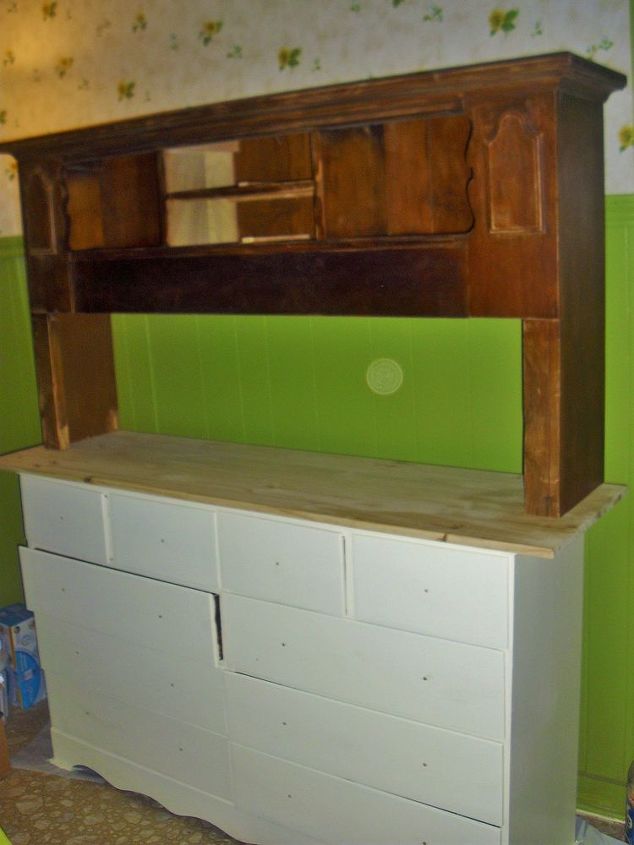
I cut out openings the size of each drawer, added drawer slides for the drawers to glide on, then added mitered, 1/2 inch thin wood around the drawers openings.
Here I framed the legs of the headboard, where it joined the chest, with 1/2 inch quarter round. I stained the top with a mahogany stain then put on 4 coats of clear gloss. I love the contrast with the off white. On a trip to Goodwill, I found a zip-lock bag of white glass knobs. The perfect accessory to to finish this off with, and I only paid $2.99 for 24 knobs!

To take your eye away from the wider top I put spindle legs at each corner. I think it really finished the look I was going after! (At this time I have not put a back on my hutch, but may decide to do so at a later date.)
Comments
Join the conversation
2 of 12 comments
-
Beautiful idea and it turned out so well. Tfs
-
I have used my grandmother’s bookcase headboard as a very short bookcase (no legs like yours) and I love it. It takes up a lot of floor space and I’m trying to figure out a way to mount it on the wall. Hmmm.....


Frequently asked questions
Have a question about this project?