


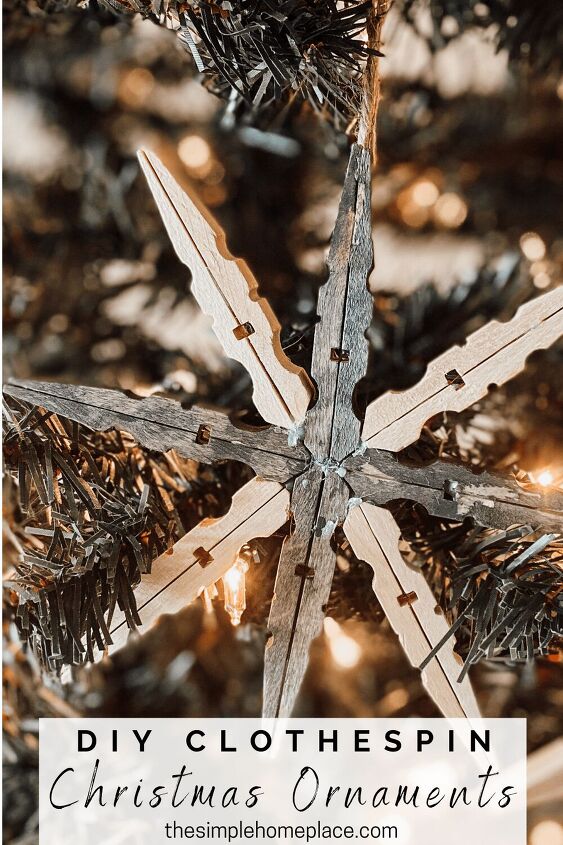
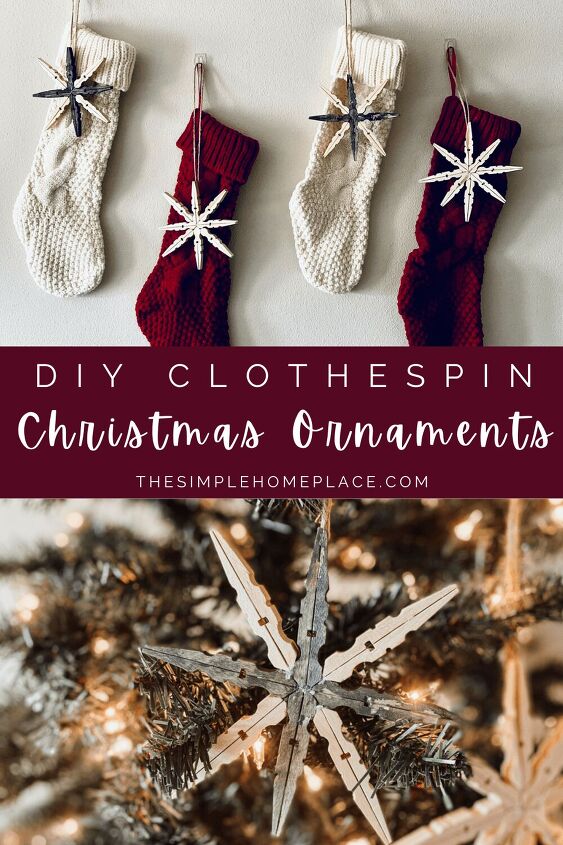
How to Make DIY Clothespin Snowflakes
Inexpensive and so easy to make, these DIY clothespin snowflakes are beautiful and make the perfect addition to your holiday decor.
During the holiday season is when I feel most crafty. There’s just something about homemade Christmas and holiday decor that is special. It’s something you can look back on and remember when you made that special piece and who you were with. Every year, my mom and I get together and have a day where we have a girls weekend, as we call it, where we make yummy desserts, delicious food and a Christmas craft. Now, that tradition has continued with my daughters. It’s a special time when three generations can get together and spend quality time together. It’s really such a special time.
One of the easiest and inexpensive Christmas crafts you can make are ornaments. There are so many different variations of an ornament. Depending on what theme you like your decor to have, whether it be rustic, modern or otherwise, is easy to translate into an ornament. I tend to lean toward the rustic, farmhouse, old-fashioned type look when it comes to my Christmas decor, so these DIY clothespin snowflakes fit perfectly into that theme. Let’s get into how to make these ornaments!
PIN FOR LATER!
TOOLS YOU MAY NEED
- Hot glue gun and glue sticks
- Acrylic paint and paint brush
- Optional: Old rag or paper towel
MATERIALS YOU MAY NEED
- 8 clothespins (per snowflake)
- String, yarn or twine
- Scissors
HOW TO MAKE DIY CLOTHESPIN SNOWFLAKES
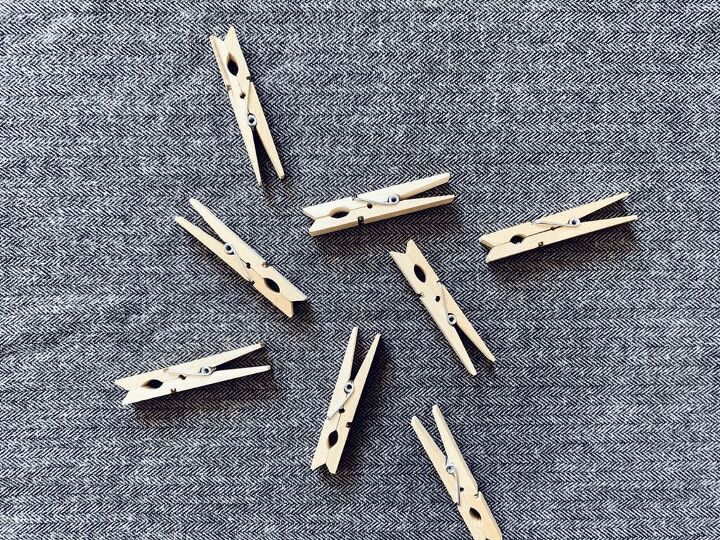
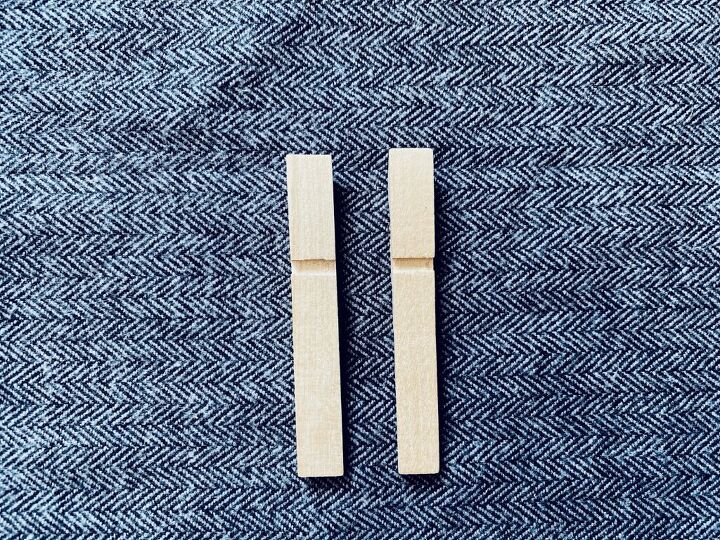
Start with eight regular sized clothespins. I got a package of 32 at the Dollar Tree for a dollar, but you can find clothespins for cheap at places like Target and Walmart as well!
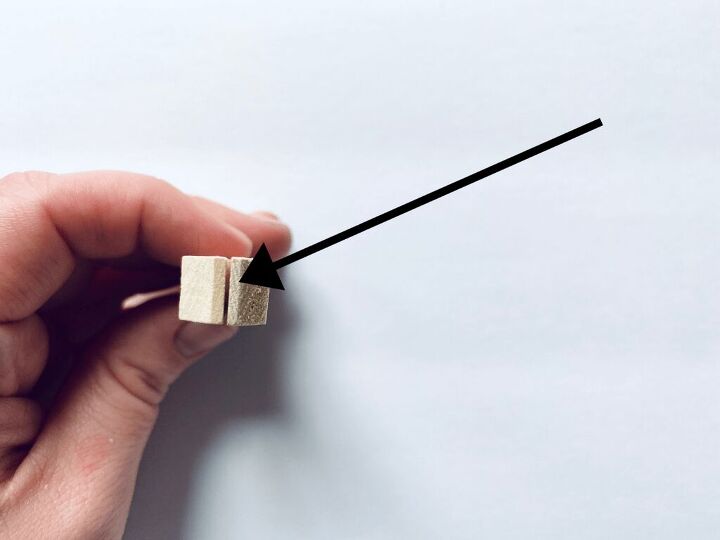
Take each side of the clothespin and twist until the wood pieces are separated from the metal piece. There’s really no rhyme or reason on how to do this, but they should come apart fairly easily.
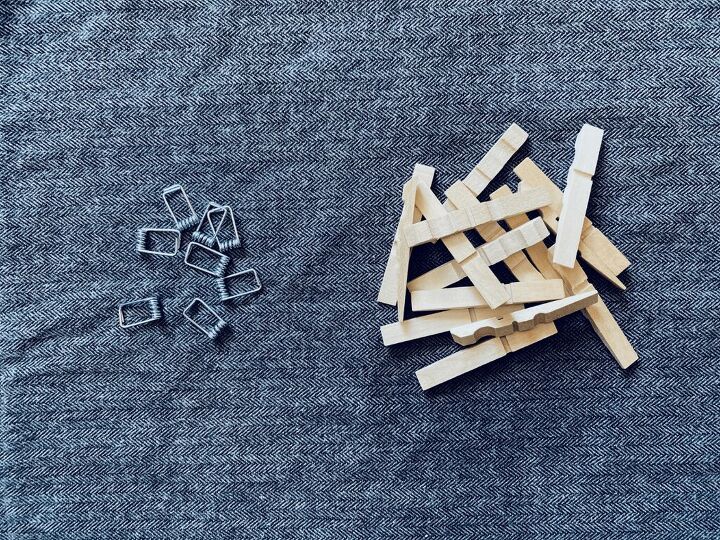
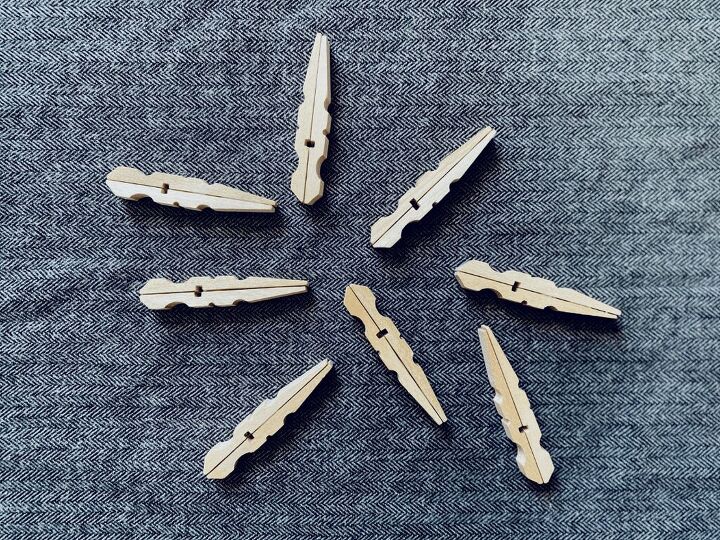
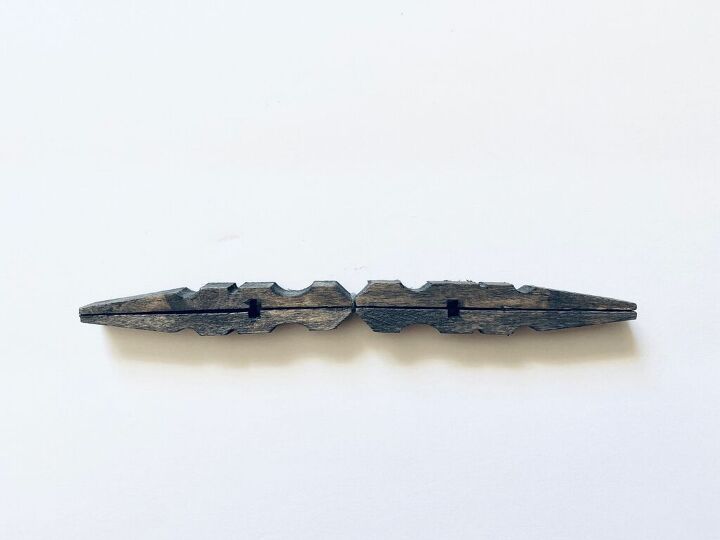
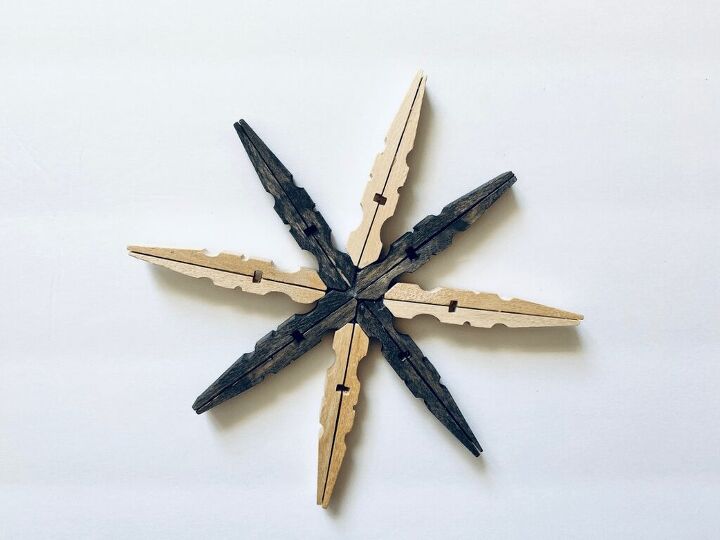
Once the clothespins are separated, take the two halves, place a bead of hot glue on the flat side of one and attach the other half to it, flat sides together. Do this to create eight total pieces. You can start to see the snowflake coming together already!
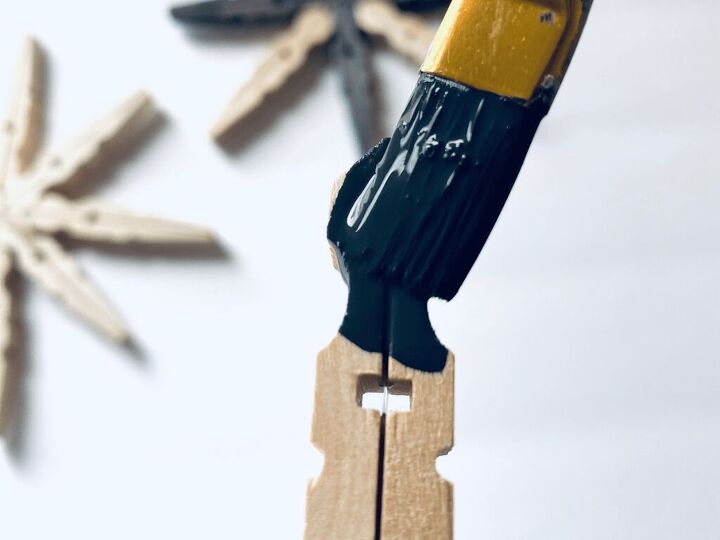
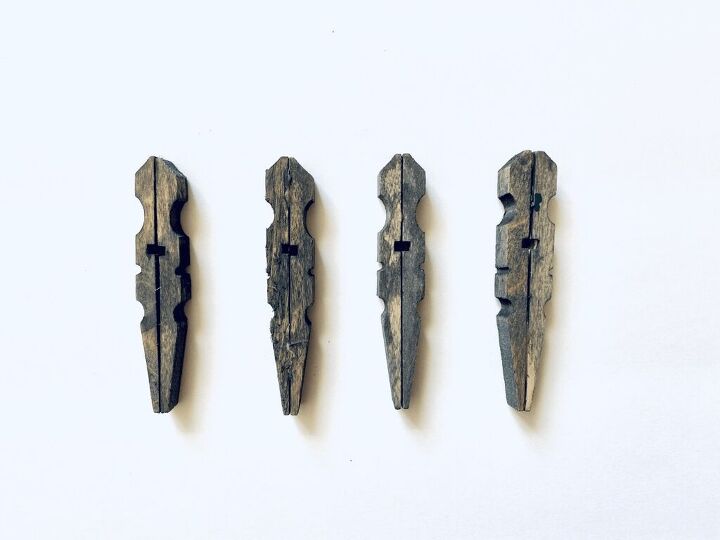
At this point, you can choose to leave the wood in its natural state, or you can paint or stain the pieces. I chose to stain some of the pieces by mixing together a 2:1 ratio of acrylic paint and water. Using a paint brush, paint one side at a time, wiping the layer of paint off immediately after to give it a stained look. You could also use actual wood stain or fully paint each piece. The options are really endless and you can customize these to fit your style.
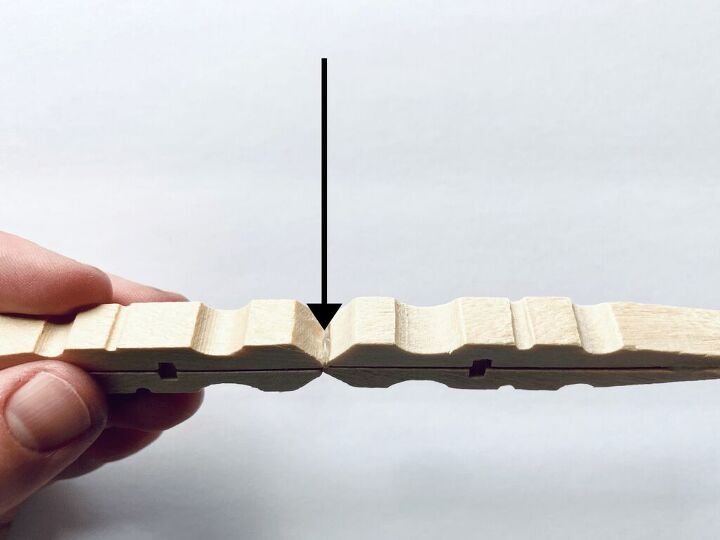
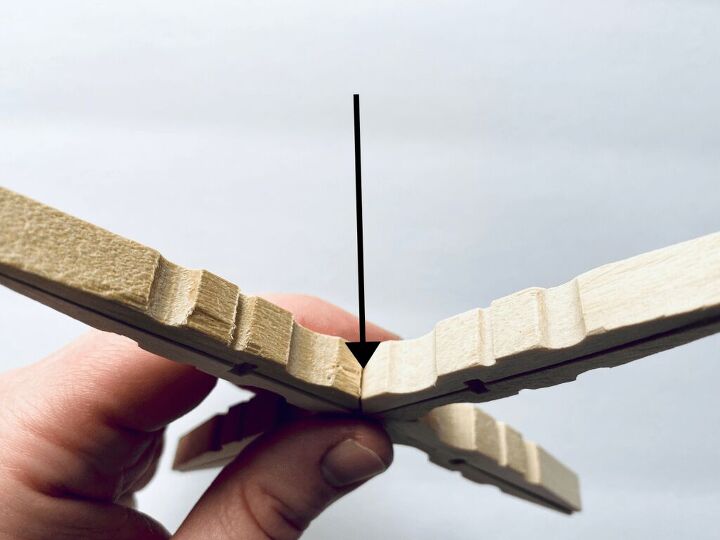
Now you can start gluing. Start with two pieces and glue them together at the point shown below to create the horizontal piece.
Next, attach one piece on top and one on the bottom, placing hot glue in the area shown below, to create the vertical line of the snowflake.
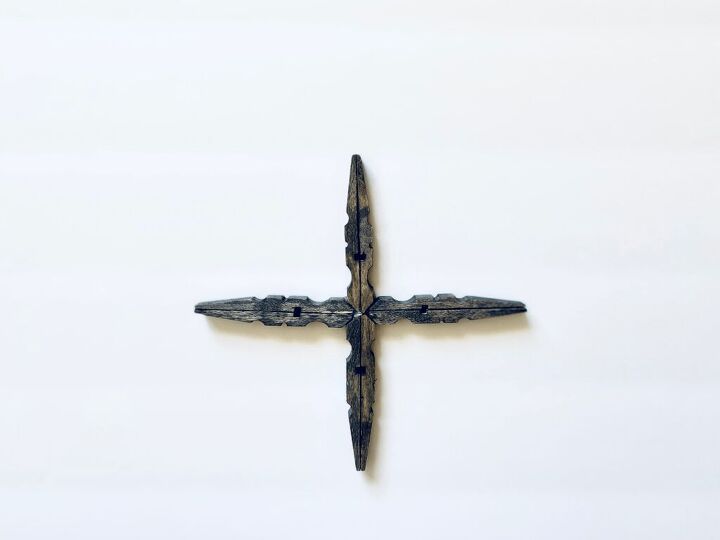
Lastly, attach the final four pieces, one in each of the four quadrants, and glue where shown below.
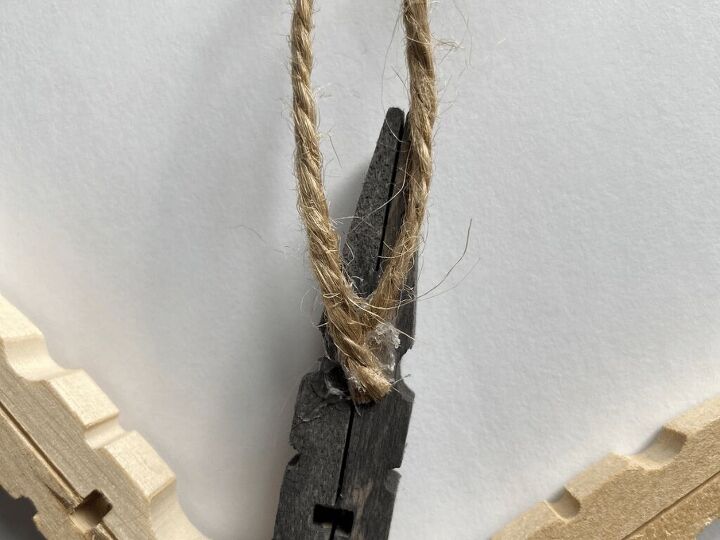
Glue some twine, yarn or string on the back so you can hang it on the your Christmas tree or on the wall!
These DIY clothespin snowflakes are so simple, so easy to make and add a beautiful touch to your holiday decor.

NOTES
- Try using mini clothespins to make little ornaments for your Christmas tree.
- Let your kids go crazy with these and add glitter (ahh, I know, I know), neon paint, buttons, whatever they want!
- Stack a mini snowflake on top of one of the larger ones to create more dimension.
- Try adding names to each snowflake to use as a stocking marker.
- To get a cleaner look, you could also use superglue.
Materials
- 8 clothespins (per snowflake)
- String, yarn or twine
- Scissors
Tools
- Hot glue gun
- Glue sticks
- Acrylic paint
- Paint brush
- Paper towel
Instructions
- Start with eight regular sized clothespins.
- Take each side of the clothespin and twist until the wood pieces are separated from the metal piece.
- Once the clothespins are separated, take the two halves, place a bead of hot glue on the flat side of one and attach the other half to it, flat sides together. Do this to create eight total pieces.
- Optional: Stain or paint the pieces of the snowflake. To stain with paint, mix together a 2:1 ratio of acrylic paint and water. Using a paint brush, paint one side at a time, wiping the layer of paint off immediately after and repeat. You could also use actual wood stain or fully paint each piece. Allow the pieces to dry and move on to step five.
- Start by gluing two of the pieces together at their widest point to create a horizontal piece.
- Next, attach one piece on top and one on the bottom, at the widest points, to create the vertical line of the snowflake.
- Lastly, attach the final four pieces, one in each of the four quadrants.
- Glue some twine, yarn or string on the back to create a loop so you can hang it.
Notes
- Try using mini clothespins to make little ornaments for your Christmas tree.
- Let your kids go crazy with these and add glitter (ahh, I know, I know), neon paint, buttons, whatever they want!
- Stack a mini snowflake on top of one of the larger ones to create more dimension.
- Try adding names to each snowflake to use as a stocking marker.
- To get a cleaner look, you could also use superglue.
CHECK OUT MORE OF MY HOMEMADE/DIY PROJECTS?
Looking for more homemade/DIY projects like these DIY clothespin snowflakes? Check these out:
- Crochet Hot Pad
- Reusable Rice Heating Pad
- Reusable DIY Bread Bag
- Homemade Rustic Christmas Ornaments
Did you make these DIY clothespin snowflakes? If you did, I’d really appreciate if you came back and gave them a five star rating! Tag me on Instagram (@thesimplehomeplace) to show me your own recreation!

Comments
Join the conversation
-
I love these! Thanks for sharing!
-
I love these. I like the rustic look and they are more winter than Christmas so you can leave them up longer. Well done.


Frequently asked questions
Have a question about this project?