


How to Easily Make a Warm & Cozy DIY Faux Fall Tree
Head outside and grab a fallen branch for this beautiful fall decor idea. Today, I'll show you how to create a DIY fall tree that proves that using trees in home decor is not only reserved for Christmas. Let's get autumnal with this fun and easy faux fall tree project!
This post was transcribed by a member of the Hometalk editorial team from the original HometalkTV episode.
Tools and materials:
- Branch
- Cloth leaves
- Paint in fall colors
- Mister
- Garden pot
- Foam
- Scissors
- Burlap ribbon
- Moss or bark trimmings
- Hot glue gun
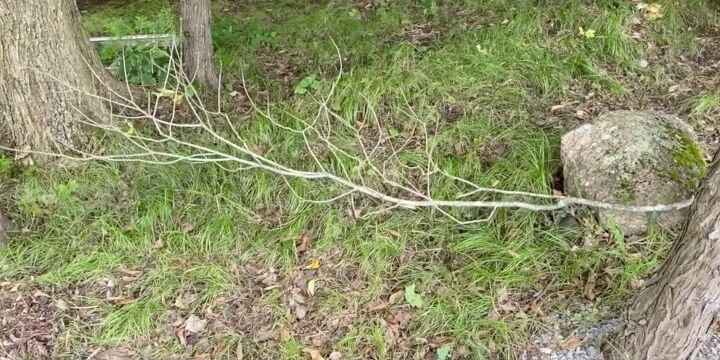
I found this branch when I was outside and thought it would be perfect to make a fall tree.
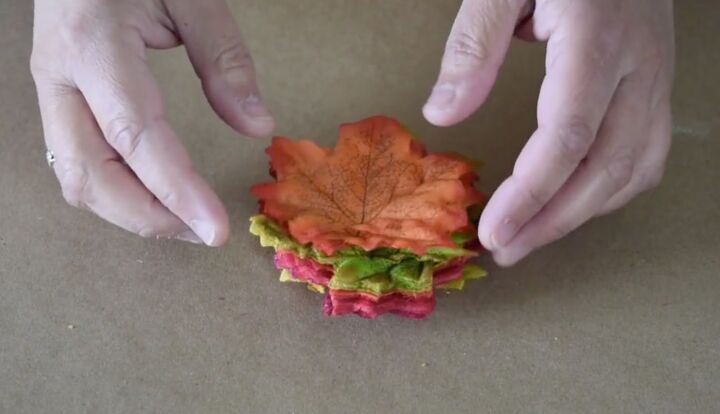
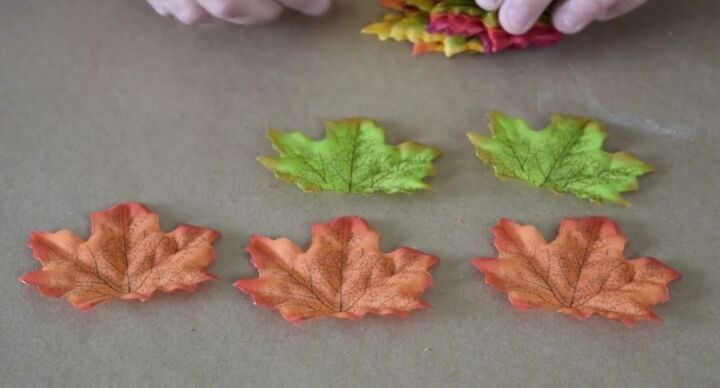
To make the leaves from my faux fall tree, I've gone ahead and picked up some of these cloth leaves. These are available at craft stores and online.
1. Paint the leaves
I find the colors just a little bit too vibrant though for what I have in my house so I'm going to use some paint to mute these and make them a little softer feeling.
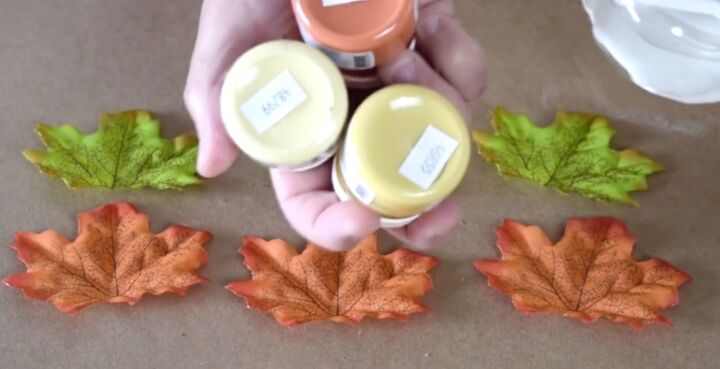
To create a softer look, I mixed some white paint and some fall colors.
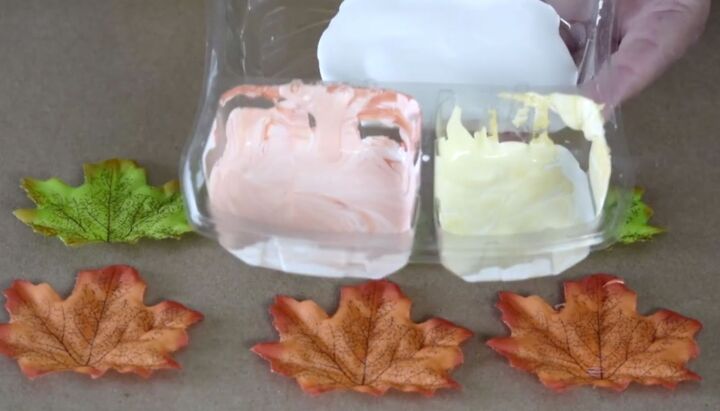
I wanted to make more pastel colors so added just a little of the colored paint to the white.
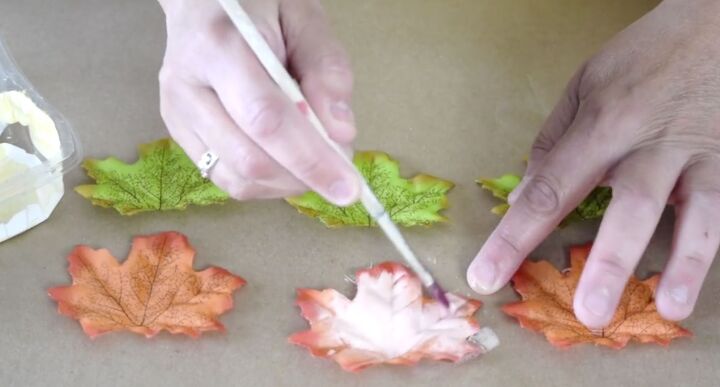
Once the paint was ready, it was time to brush it on. I like to use a nice flat brush to do this.
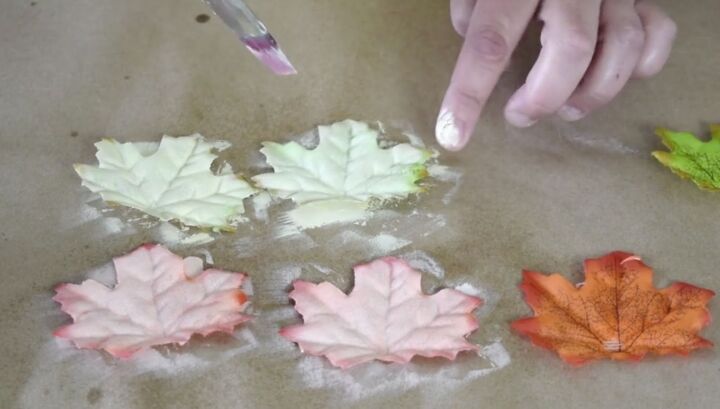
2. Mist the leaves
After I have a bit of paint on them, I want to take a mister and put a little bit of mist on them. That water is going to help the paint spread and really soak into the fabric leaves.
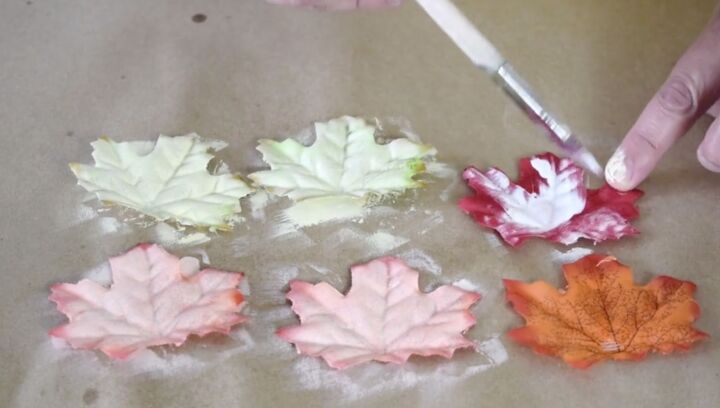
For the red ones, I wanted to soften them up a little bit but not turn them pink. I didn't want to add red paint to the white because it will make it pink. Instead, I just took a little bit of white and brushed it on.
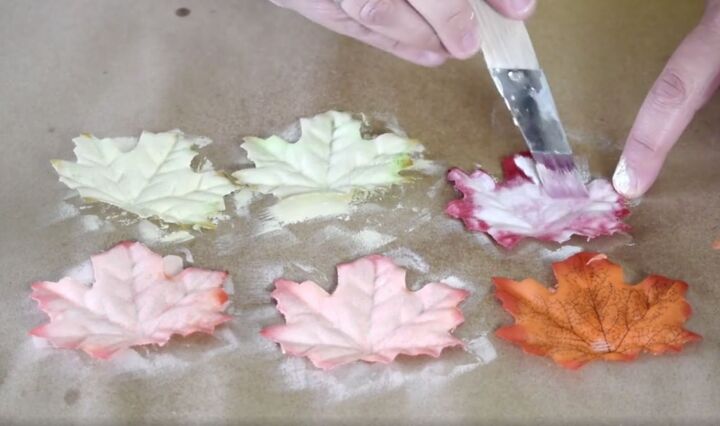
Then I did the same thing with my mister just to add that little bit of water and spread that out. Then when it dries, it's going to have a softer, muted tone to it.
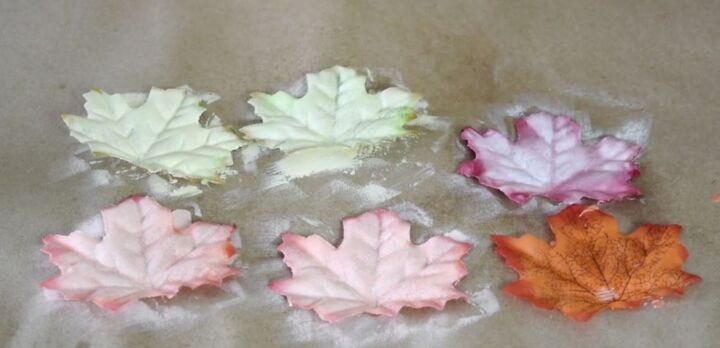
You can see the original colors here and how nice the softer ones are going to be.
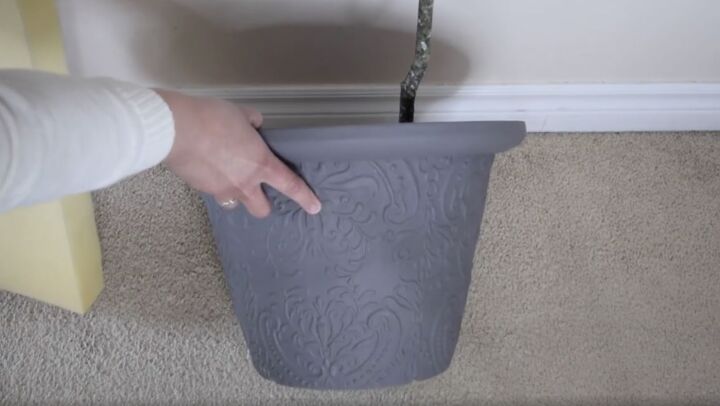
3. Prep the garden pot
While the leaves were drying, it was time to get the tree ready and positioned in the pot so that I can add the leaves. I've gone ahead and grabbed a garden pot that I no longer need that's the right size, and I need to position the branch inside the pot.
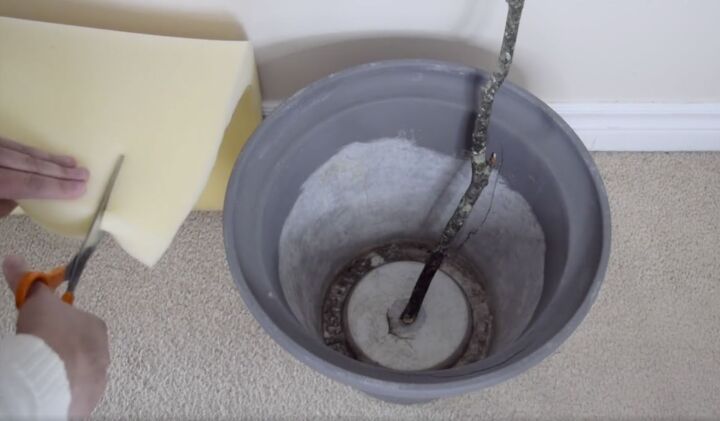
I prefer to be able to take it apart and move it around so I like to use foam to hold the branch inside the pot. To get the foam ready to hold the branch in place, I went ahead and cut it up with a pair of scissors. You can also do this with an electric knife; whatever you find easiest.
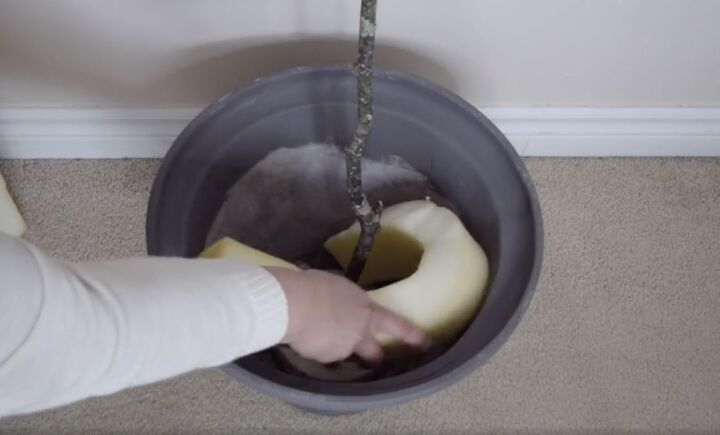
Once I have small strips cut off, I start building them up around my twig or my branch to keep it in place.
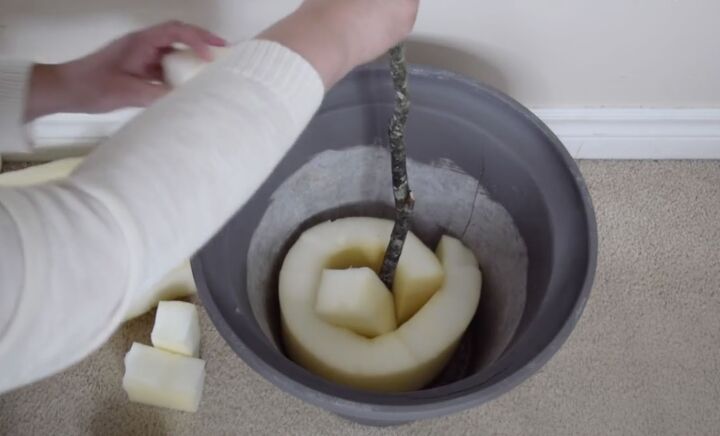
4. Secure the branch
Keep doing that until you fill the pot with foam and the branch is securely in place.
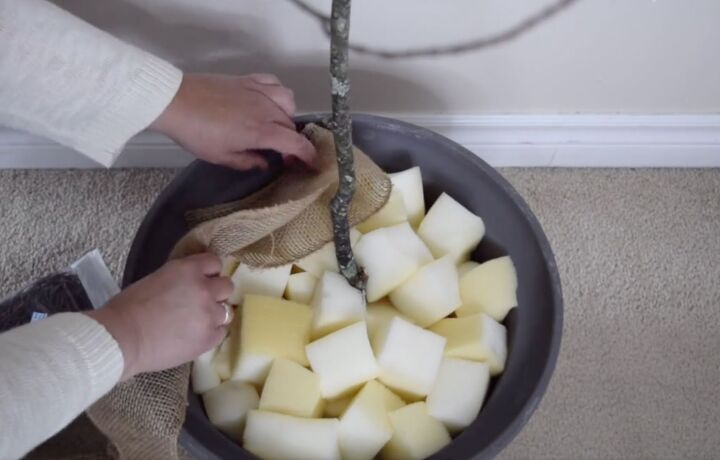
5. Add burlap ribbon
Once I had my tree in place, I used some burlap to cover up all the foam. I used burlap ribbon. You can use anything you like to cover up your foam.
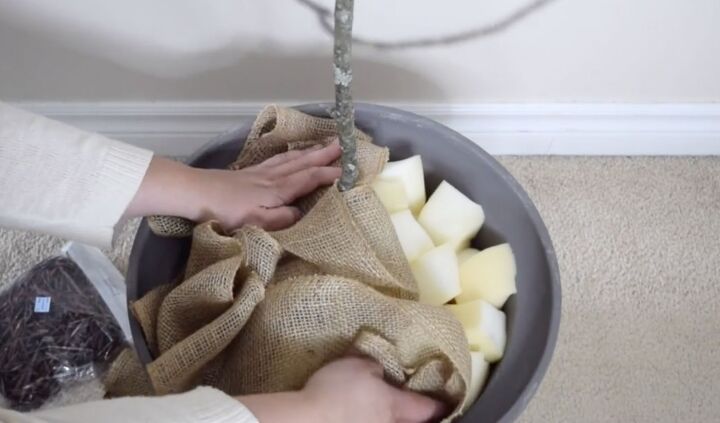
Be sure to tuck it all in around the foam so that you can’t see it.
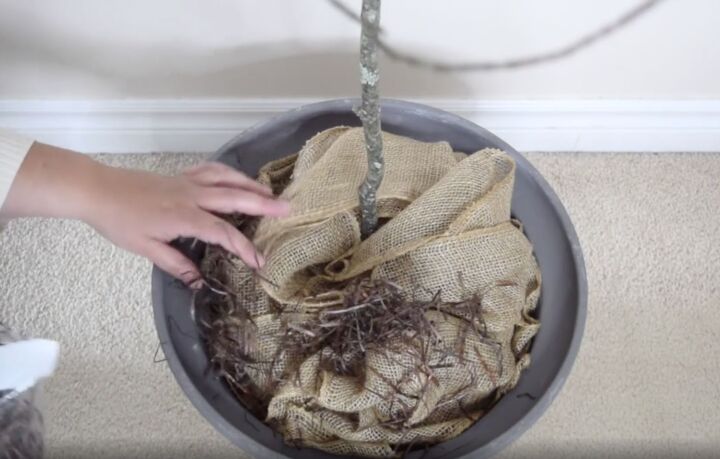
6. Cover the burlap with moss or bark trimmings
The last thing I like to do to get the pot ready is to just use some sort of moss or bark trimmings to cover up the burlap and give it a little more natural look.
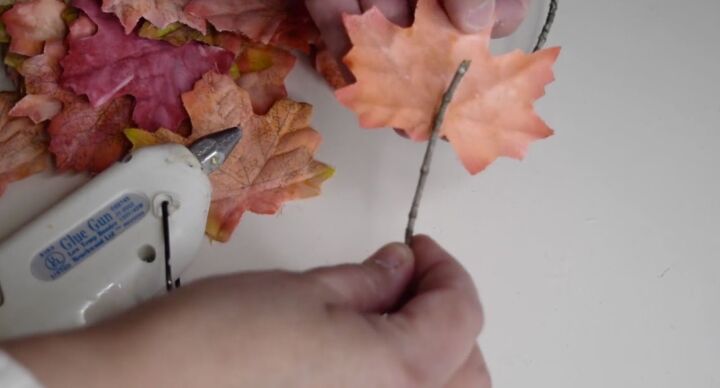
7. Attach the leaves
Now it was time to add the leaves and finish off the tree. You can attach the leaves in two different ways. First, you can take little sticks that you've collected outside and glue the leaf to the end of the stick so it creates a stem for your leaf.
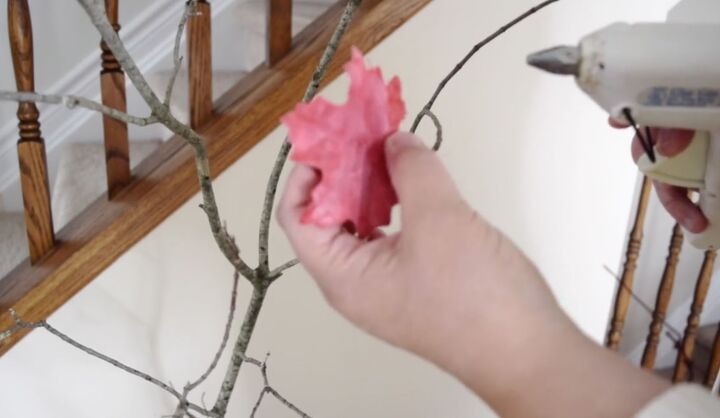
The second way and the one I did, was to attach the leaves directly to the branches of the tree piece I used. I used hot glue to attach them.
If you choose to attach your leaves directly to the little twigs that are left on your piece of wood that you found, you can go ahead, add some hot glue to the back of your leaf, and then just attach it right to the little branches.
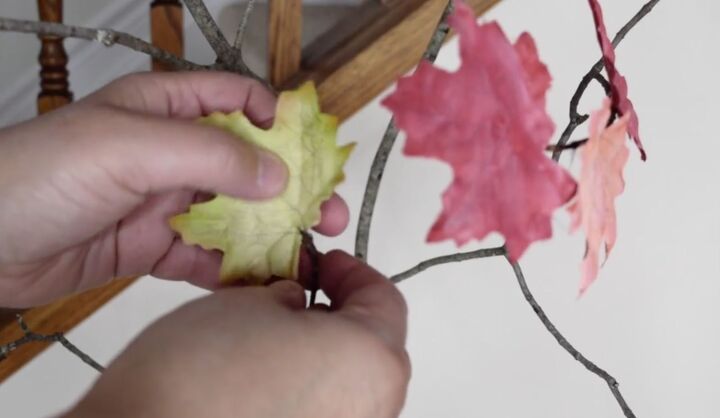
You can place them over the twigs however you'd like until you have them arranged all over the tree.
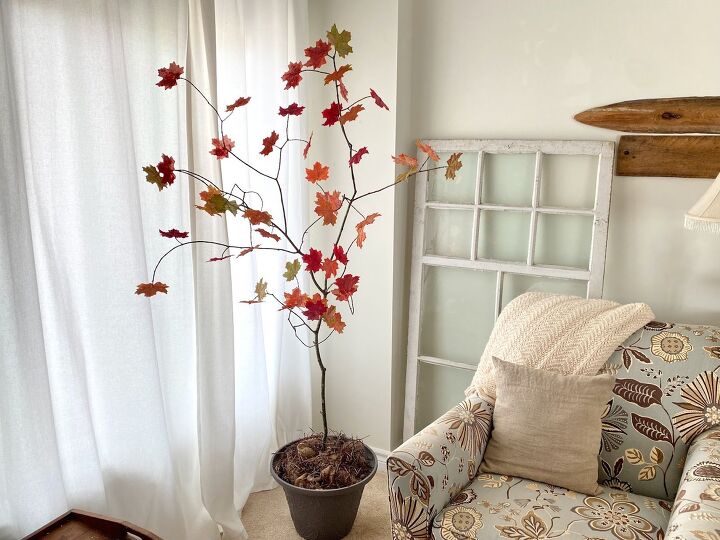
Faux fall tree
This faux fall tree was so fun and easy to make from a branch from outside and some cloth leaves, that was about all I needed. It was really inexpensive, and it makes the room look so pretty and ready for fall.
I hope you'll give this DIY fall decor project a try the next time you want to spruce up a corner of your house. Let me know your thoughts in the comments below.
Check out more rustic fall and upcycling projects here...
Unique DIY fall project ideas


Comments
Join the conversation
-
Did i miss a step? How do you secure the branch in the pot before the foam is added?
-
Very nice. Looks real!


Frequently asked questions
Have a question about this project?
How did you determine there were no bugs being brought in?
Can you purchase branches at crafts stores if we don't have any in the city??