


DIY Boxwood Wreath
I love the simple elegance of a classic boxwood wreath. It is also incredibly simple to make {and only cost me $2 — bonus!} Here's how:

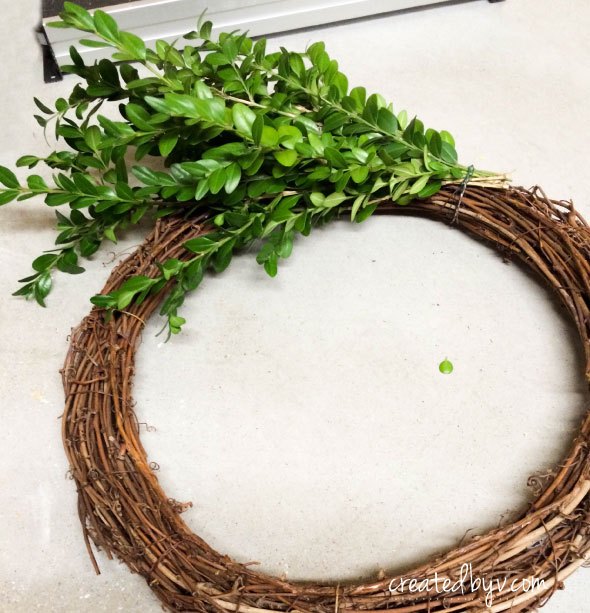
{step 1} Start with a base.
I think grapevine looks the best and gives the wreath some depth, however a wire wreath frame or coat hanger will work fine, too. My wreath started out like this:

It was a thrift store find for $2. It was probably quite cute at one time, but the eggs have certainly seen better days. The grapevine wreath, however, was perfectly intact and so it served as my base.
{step 2} Bundle boxwood clippings.
I have three Korean boxwood bushes in my front yard that are in need of trim. If you don't have a shrub of your own, perhaps you can offer to give a friend or neighbor's shrub a cut. Tell them you'll make them a wreath, too.
Tie the boxwood clippings together in little bundles with floral wire. I prefer a more windblown, wild look so my bundles were long. If you want a more uniform look, clip them shorter. The bundles will make securing the boxwood clippings to the grapevine easier and will make the wreath fuller.

{step 3} Secure boxwood bundles to wreath.
Tie your first boxwood bundle on with floral wire. Tie the next bundle in the same direction so that it covers the stems of the previous bundle.
Continue tying bundles in the same fashion — ensuring branches flow in the same direction — all the way around the wreath.

Fill the thinner spots with more bundles. Trim for a rounder, tailored look.
{step 4} Hang and enjoy!
Embellish with festive ribbon and a few berries. It's also quite striking on its own.

DIY crafts are one of my favorite things to do! If you love them, too, I invite you to visit the blog and join the newsletter for a little creative inspiration sent directly to your inbox.

Want more details about this and other DIY projects? Check out my blog post!


Frequently asked questions
Have a question about this project?