Brighten Up Your Front Door With This DIY Ladybug Wreath

Looking to add a little luck to your life? Make it happen with this easy peasy ladybug wreath. It’s been said that ladybugs bring luck, so why not create your own luck by creating your own ladybugs. Using some leftover craft materials I’ve created cute little ladybugs that you can use as decor throughout your home. In this tutorial I’ll show you not only how to create these ladybugs, but also show you how I used mine in a stunning ladybug wreath. Get started with my step-by-step tutorial below! I would love to have you stop by my blog , Celebrate & Decorate for the full tutorial as well as sign up for my latest creations, posts, recipes, exclusives, and more...
Tools and Materials:
- Styrofoam Easter eggs
- Sharp knife
- Skewers
- Paintbrush
- Pencil
- Red paint
- Black paint
- Thin Sharpie
- Straw wreath
- Burlap ribbon
- Scissors
- S-pins
- Steel pick machine
- Ladybug ribbons
- Pipe cleaners
- Faux flowers and greenery
- Hot glue gun
- Hot glue
I started off by cutting the eggs in half. Make sure that you are using styrofoam eggs, and plastic eggs won’t work for this project.
Then I stuck a skewer into them. This makes it easy to paint the entire ladybug red without getting fingerprints on them.
I painted the outer portion of the egg with a glossy red paint. Let them dry for a bit before moving onto the wings and head.
Once they had dried enough for me to pick them up without messing up the red paint, I moved on to adding the head and wings. Using a paintbrush I added a little black head on one end and then I added some black between where the wings sit.
Using the eraser end of a pencil, I painted on some polka dots. Make sure that they are symmetrical.
I let the ladybugs dry completely before adding the antennae. I used a thin Sharpie to add a few curlicues that looked just like antennae.
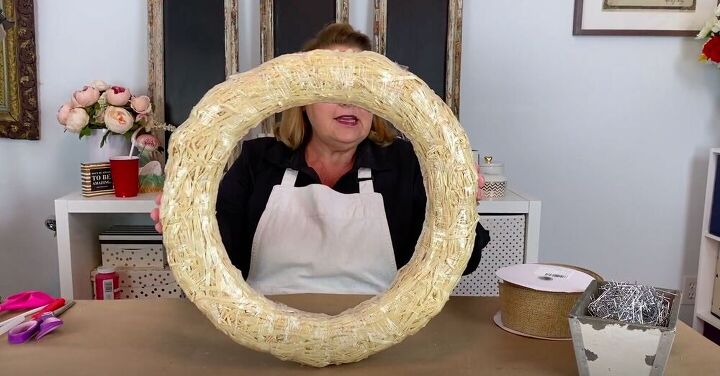
For my wreath I used a straw wreath rather than a metal one. I wrapped the entire wreath with some burlap ribbon to create the aesthetic I was going for. Make sure to overlap the edges so that none of the straw peeks out from behind.
I wrapped the entire wreath and then secured the ends with two s-pins.
Because the wreath is round there are bound to be a few spots where the ribbon buckles or is uneven. Just go ahead and secure these spots with s-pins to make sure they don’t show any of the straw wreath underneath.
Using two cute ladybug ribbons I created a big, bright bow. I layered the ribbons with the thinner one on top of the thicker ribbon.
Tip:
When making a bow with more than one ribbon, make sure to twist the ribbons when you create a loop to keep the same color on the outside.
Once I was happy with the size of my bow I secured it tightly with a pipe cleaner.
Then I fluffed my bow, pulling the layers apart, taking it from four loops on each side to eight loops on each side.
I attached a few extra pipe cleaners to the existing piper cleaner to make it long enough to fit all the way around my wreath. I will also be using these pipe cleaners to hang the wreath.
I cut off the excess before twisting them together to create a nice circle to hang on my door.
Faux flowers are lovely to work with, but the plastic ends aren’t strong enough to poke through the ribbon. I add a steel pick to the end of mine using a steel pick machine. This makes it easy to just poke them through the ribbon and into the straw wreath underneath.
I used mostly white flowers to allow my bright red ladybugs to stand out amongst the flowers. I think that red and yellow flowers would look lovely as well.
I also added a bit of greenery to help the smaller white flowers stand out.
I continued adding flowers and greenery until I was happy with how my wreath looked.
As these ladybugs are made of styrofoam, make sure to use a low temperature on your glue gun so as not to accidentally burn a hole in them.
I added a generous amount of hot glue onto the bottom of the ladybug and then held it in place until the glue dried a bit. Make sure to evenly space them throughout the wreath, with some standing out on top and some peeking out from behind flowers and greenery.
For some finishing touches I cut the ends of the ribbon tails at an angle, creating a V.
And now it’s ready to be hung on my front door! Wouldn’t you love to invite your guest in with such a bright and happy wreath? I know I do! How would you customize your wreath? Let me know in the comments below!
Enjoyed the project?
Resources for this project:
See all materials














Frequently asked questions
Have a question about this project?
This is really cute!! Have you done anything with honey bees??
You mention "S" pins. Are they the same as greening pins?