


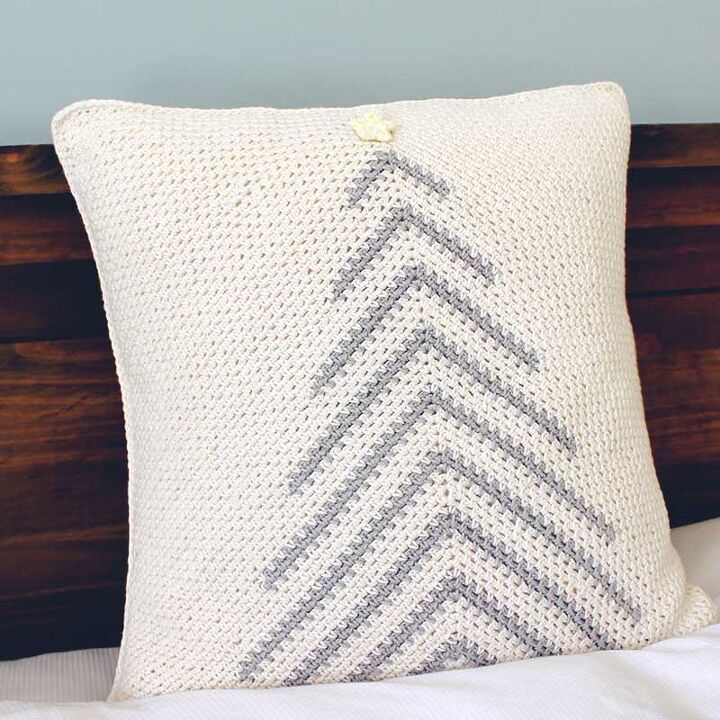
Crochet Christmas Tree Pillow

With this pillow, I really wanted to create something that I could have in my home year after year, even with changing decor.
So, the look I was going for was stylish, classic, timeless. I’m thrilled with how my pillow turned out – I love how the simple moss stitch pattern worked on the diagonal has a sort of woven look to it.
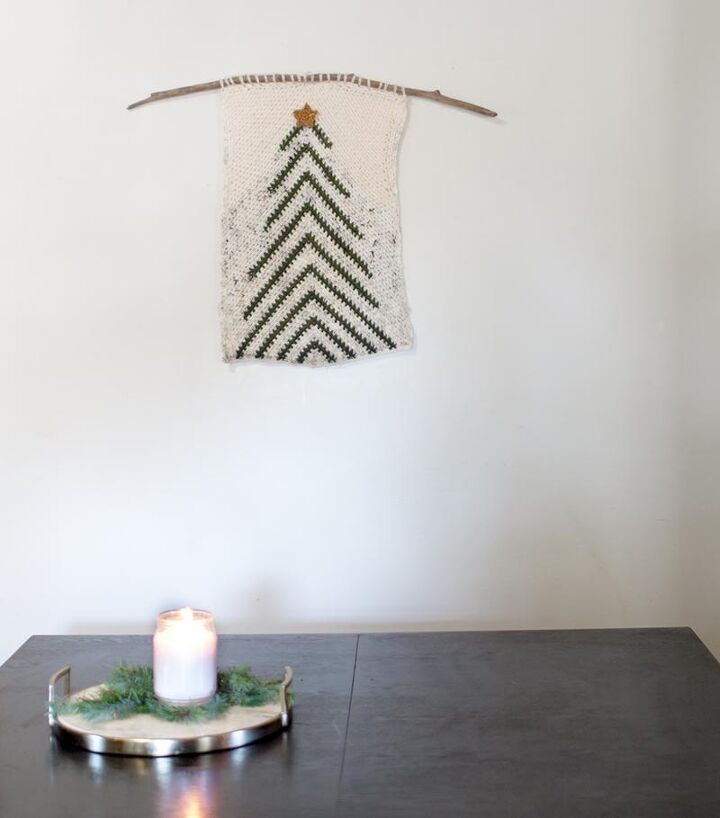
This pattern also creates a gorgeous wall-hanging if you don’t feel called to make a pillow While I don’t have instructions for the wall-hanging bit, if you need some inspiration, you can see some photos below taken by my amazingly creative testers.
You can find all the details and the full pattern here: https://nedandmimi.com/modern-christmas-tree-free-crochet-pattern/

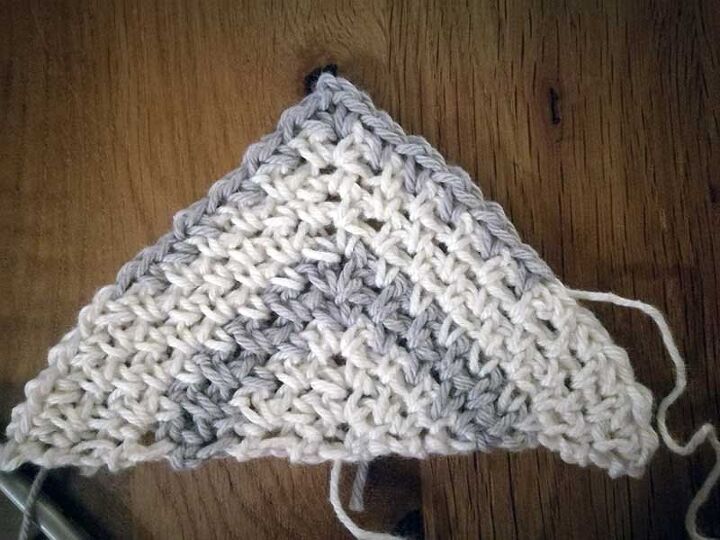
- The pillow cover is crocheted from the bottom up, starting with a small triangle shape which then increases in size as you add rows.
- Once the required width is reached stop increasing at the sides.
- Once the required height is reached, you stop increasing at the top, and the fill in the 2 corners to create a square.
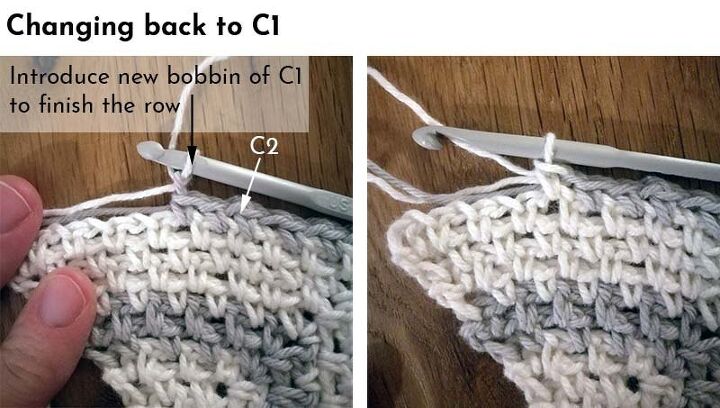
- When changing color for a full row, switch to the new color on the last yarn over at the end of the previous row.
- When changing color mid-row, always make the change on the ‘ch 1’ part of the moss stitch pattern (Please see pattern below for pictures on how to do this).
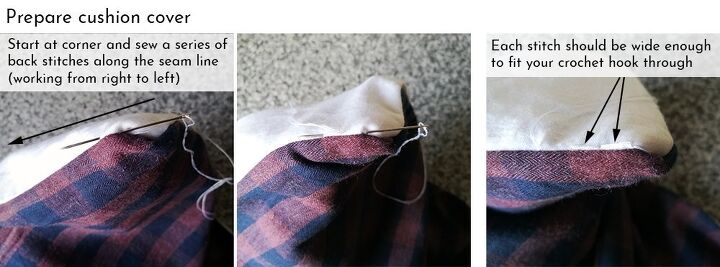
Prepare the pillow cover so that you can easily attach the crochet panel to it.
- Thread a needle with any thread that will blend easily with your pillow cover and crochet panel.
- Start at any corner of the pillow cover and work from left to right.
- Work a series of back stitches along the seam line (where the front and back panels of the pillow cover meet).
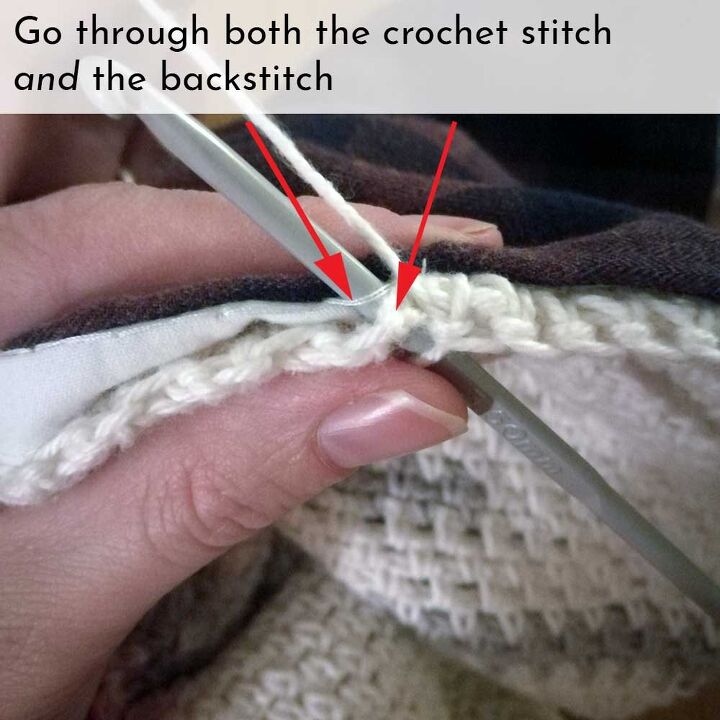
Single crochet along the edge of the crochet panel, all the time picking up your sewn stitches to attach your crochet and pillow cover together.
Once you have completed the joining round, cut yarn and fasten off.
Place your pillow insert into the pillow cover.
Resources for this project:
See all materials


Frequently asked questions
Have a question about this project?