


DIY Christmas Candle Jars

Hey guys! So I was walking around in Canadian Tire the other day, surrounded by aisles and aisles of Christmas. I love Canadian Tire’s Christmas stuff. They have great taste but their amazing taste really hurts my wallet and if I am being completely honest with you, I feel like some of the prices are a bit much.
What I like about Canadian Tire, though? They are a great place to go to get inspiration. I find that a lot of their Christmas products can easily be DIY’d.
Like these for example:

They are $25.99 each I just couldn’t justify it because while I was looking at it, I thought, I have a Cricut Maker! I could easily go to Dollar Tree, grab a clear vase and make that myself.
So that’s what I did! I changed it a little bit because I thought I could expand on their product and make it just that much better. So here’s what I did.
Disclosure: This post is sponsored by Cricut. All opinions are my own. Also, this post contains affiliate links – should you choose to purchase through these links I make a small commission at no cost to you.
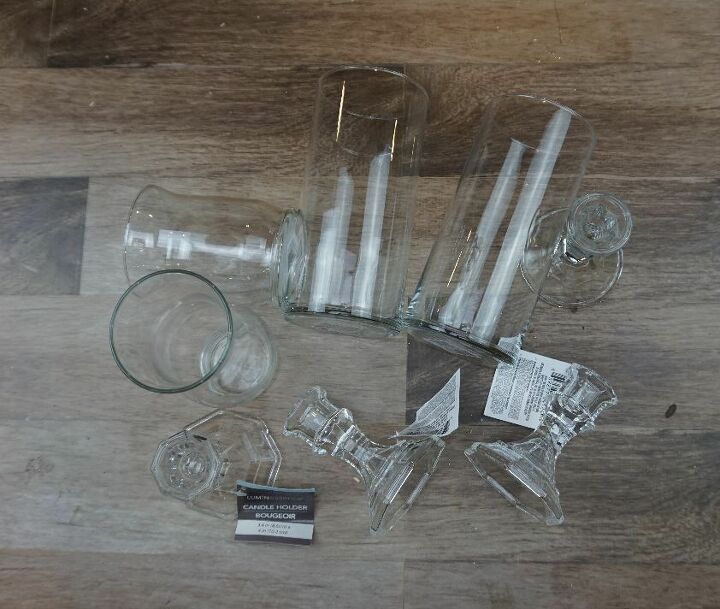
I went to my closest Dollar Tree and picked up a bunch of vases as well as some clear candlestick holders.
I decided that I wanted to do something a little different with the candlestick holders. I went through a couple different processes before coming up with something really cool.
First, I thought I would paint them gold for a nice touch of shine and richness but I didn’t end up liking it and I thought the gold would be too contrasting with the white design I was going to put on the vase.
Next, I tried silver. Nope. Still didn’t like it — then I remembered this Snow-Tex stuff that I received from DecoArt.
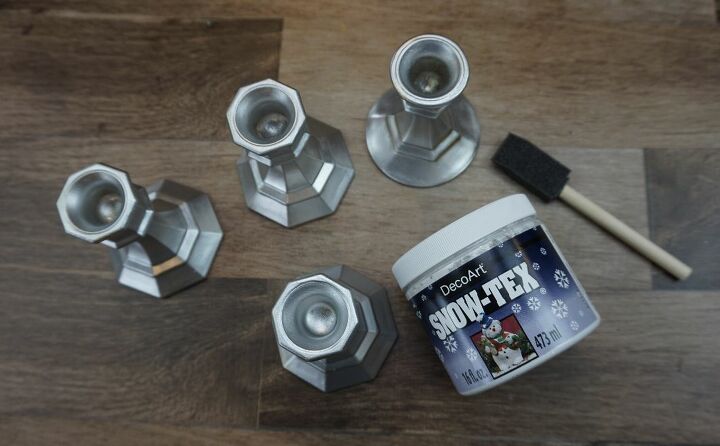
This stuff is beyond cool. I can’t believe that I didn’t know about it before. Seriously, I wasn’t even halfway done putting it on and I was already thinking about what I was going to make next with it.
Let’s get back to the project at hand, though.
Snow-Tex is incredibly easy to apply and I was also surprised at how fast it dries, too.
It looks a little like feta cheese and has a really weird consistency.
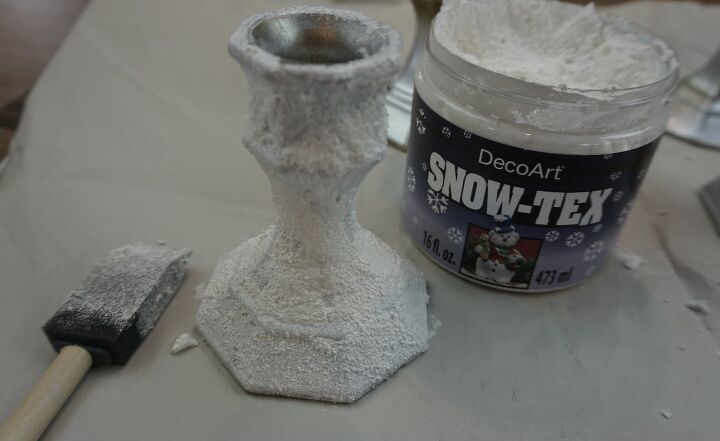
Patting it on was super easy. I used a foam brush.
I patted on a little thicker in some areas. I didn’t want it to be completely even because I wanted to give the illusion of real snow. I am very happy with how these turned out.
I set my candlestick holders aside and got to work on my vases.
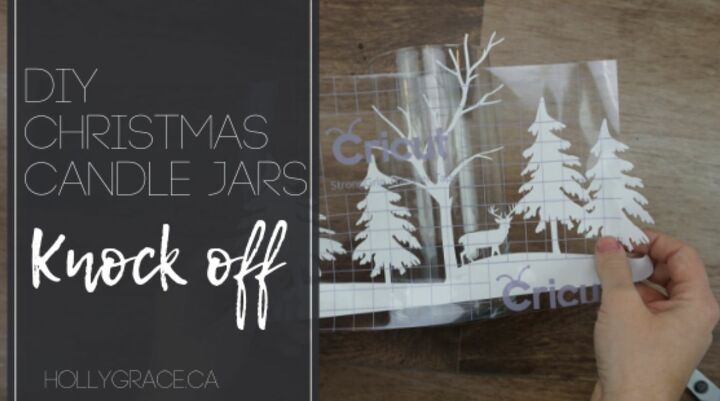
Enter the Cricut Maker. You want to up your crafting game — get a Cricut Maker. This project was so easy thanks to this machine.
I designed an image that would wrap around my vase.
I have this cut file for free on my website so after you're done reading this post you can head there and download it so that you can recreate this project.
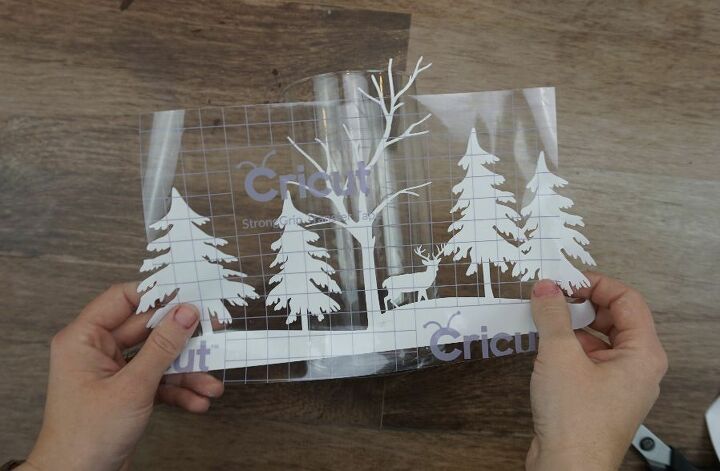
All I needed to make the vases, was the vases themselves, my Cricut Maker and some white vinyl.
To apply the vinyl to the vase, I used my scraping tool and some Cricut Transfer Tape.
To attach the vases to my candlestick holders, I used E6000.
When you use E6000, you have to make sure you apply the glue of both pieces that are to be glued together. This ensures the best seal.
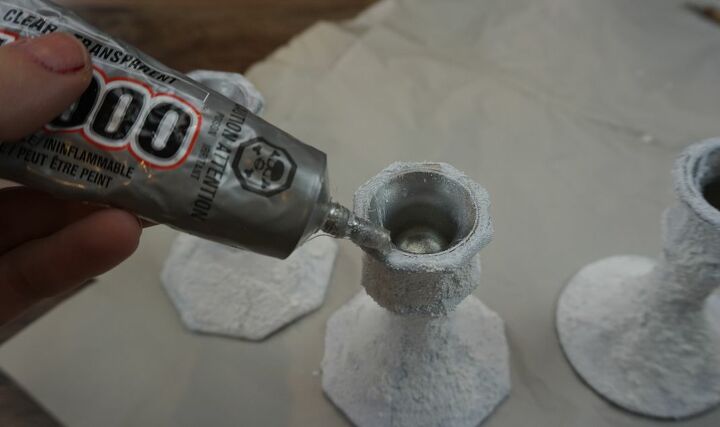
Always make sure you let the glue set for at least 12 hours before moving your project.
And without further ado — here they are!
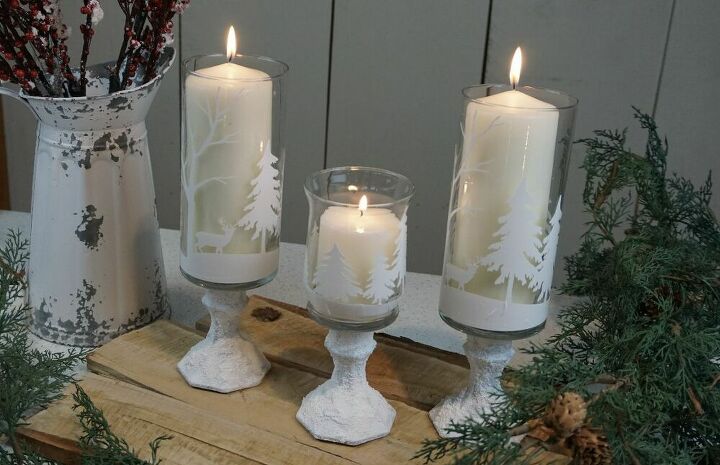
What do you guys think!? Let me know by commenting below.
These would make a great addition to any Christmas table or Christmas mantle and this project was made easy with the Cricut Maker.
If you don't have a Cricut Maker, you could check out your local craft store for Christmas stickers or decals.
Resources for this project:
See all materials


Comments
Join the conversation
-
Beautiful!
-
Absolutely gorgeous! So beautiful. Can't wait to try this myself. Thnxs for sharing.💗


Frequently asked questions
Have a question about this project?
I have a cricut explore II, would that work?