


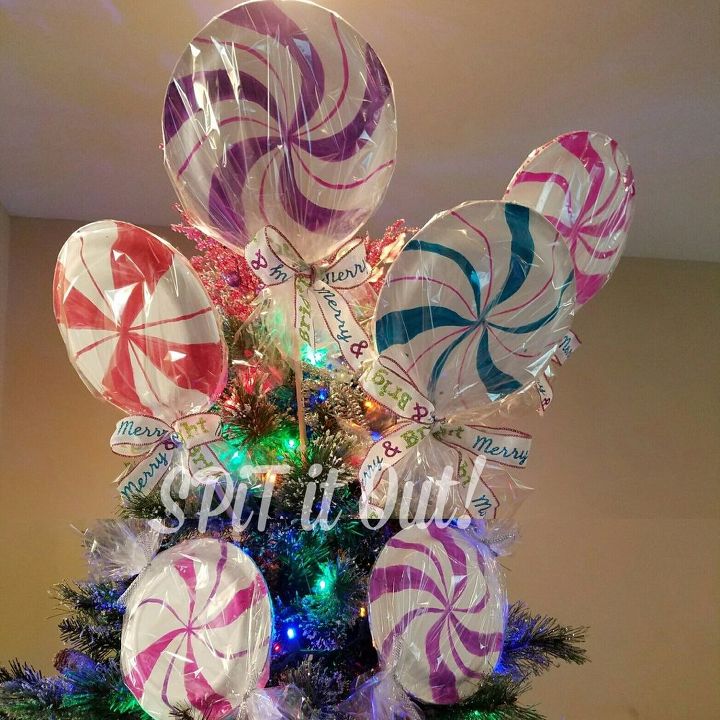
Unicorn SPiT Lollipops/Wrapped Candy/Peppermint Decor or Tree Toppers!

I love Sugarplum, Candyland, Peppermint, etc themed Christmas decorations! Sadly my budget rarely allows me to buy the fun things I want to decorate with, like big bright Lollipops for my front yard or maybe for my stairway entry inside or even as tree toppers! I've seen where you can use styrofoam and colored celephane but I wanted more of a peppermint or ribbon candy stripe look and I wanted it to be inexpensive. After scouring my craft supplies finding nothing, I grew hungry using all of that energy and needed a snack. It dawned on me then that paper plates could totally do the trick!
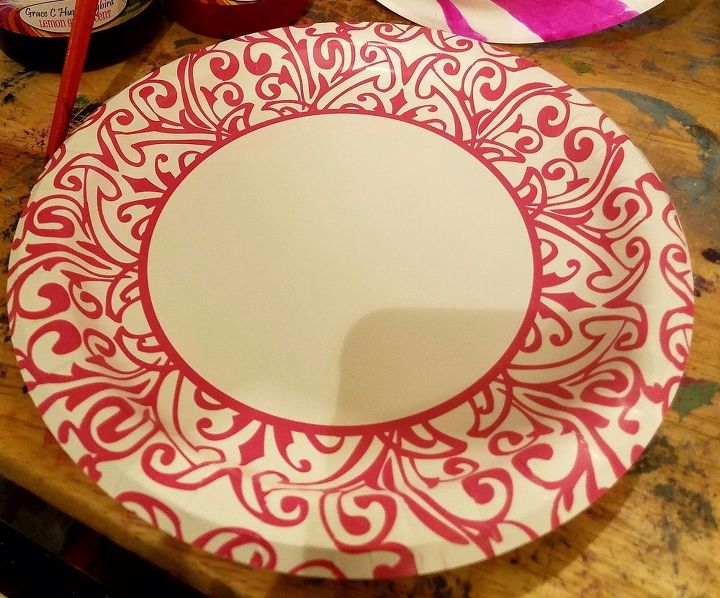
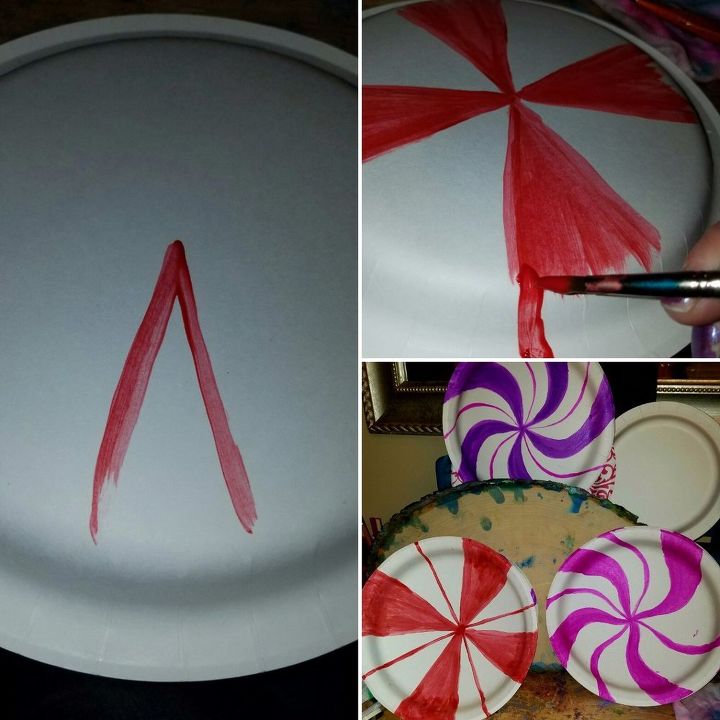
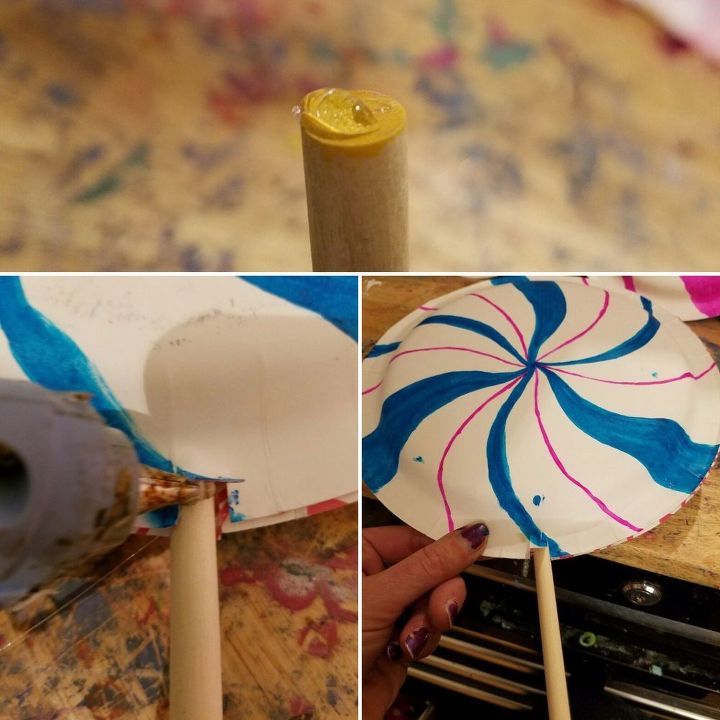
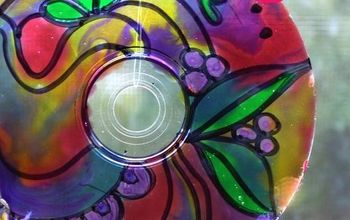
The first thing I did was grab some plates I had in the house. I used 8.75 inch for the lollipops and small snack sized plates for the wrapped candies. You could also buy the larger size plates, but I wanted to keep this as inexpensive as possible. All the supplies I either had already or picked up at the Dollar store. Next I flipped my paper plate over. I somehow even managed to do this without breaking a sweat.😉 Then I grabbed a paint brush and my favorite medium ever, Unicorn SPiT Vibrantly Colored Stain and Glaze in one. It's non-toxic and even smells like Jasmine! It can be used in so many ways it truly is some magical stuff and I knew it would work great for my project. There are so many different easy techniques and ways to apply the stain, but I chose to use just a simple paint brush for these. I'm thinking this could be fun for my kids to finger paint on though! I think we'll be trying that out soon! The color I used for this simple tutorial was Molly Red Pepper. Her name says it all, she's a spicy little red thing that is sweet enough for a peppermint. 😉

Next I looked for the middle of the plate and started painting a triangle down to the edge of the plate. I did this until I had 4 of them around the plate and it looked sort of like a plus sign. I filled those in and painted it down the edge of the plate. I then went around in the four empty spaces and painted a narrow line from the center down to the end of the plate. After that I just went back over the edges of my triangles and straightened out my lines the best I could. I also wanted to do some that were swirly sweet ones in jewel toned colors. My best tip for those are to make sure your curves are all going in the same direction. I found out that apparently my hand has a mind of its own while painting. 😉 Another tip is to just make sure your lines towards the center should stay narrow and gradually get wider towards the edge and down the sides. I'm no candy striper but they are perfectly fine for me and once finished you don't even notice my excellent eye for the center of things. 😊 For each of my lollipops and wrapped candies, I did a front and back plate. If the back of yours won't be seen, you can just use one plate for each.
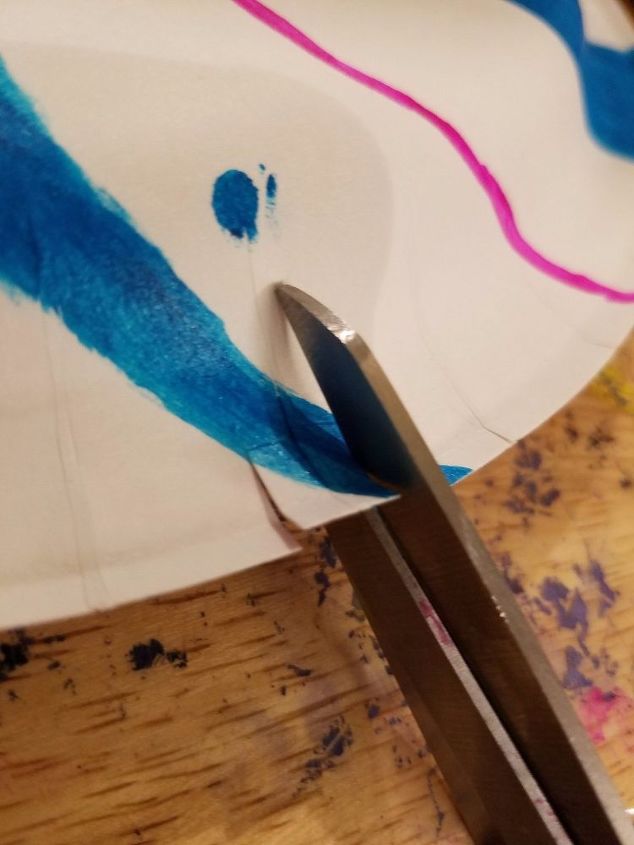
Now we need a spot for our stick. After they dried which only took a few minutes, I cut two slits on each plate. They were about 1/4 inch wide or so, just enough to slide the dowel rod through it.
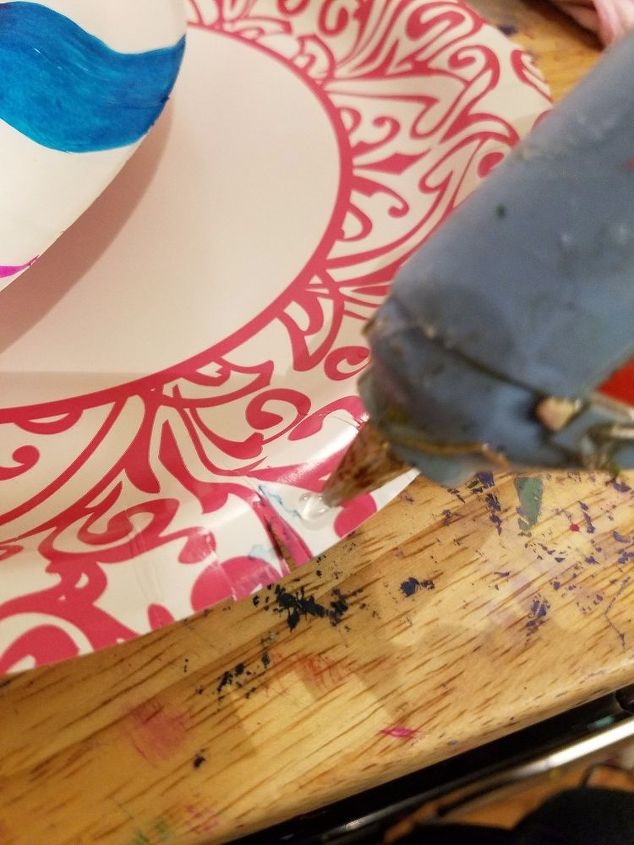
Once all my slits were cut, I used my hot glue around the inside rim to glue my paired plates together. Making sure the slits were lined up and to not glue the openings I just cut.
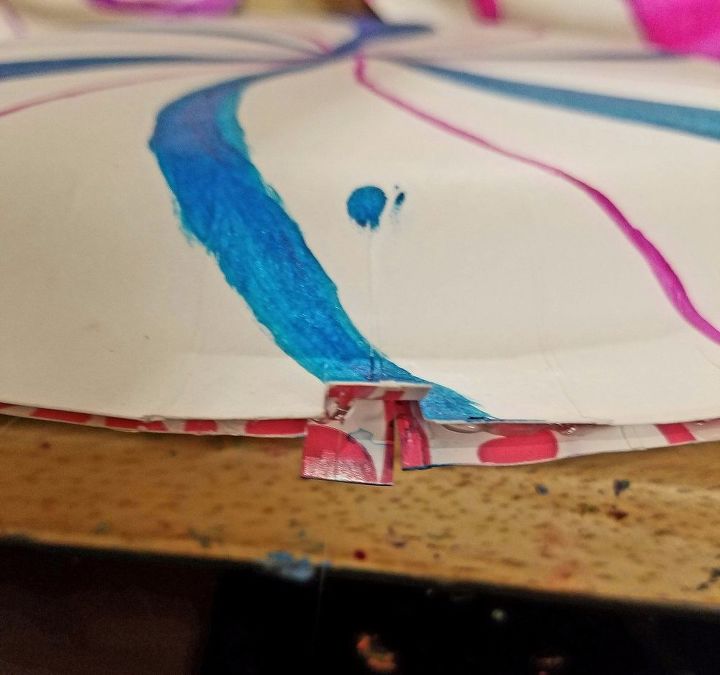
Next I took a dowel rod and put a small dab of the glue on the tip, just enough for extra support. You're going to slowly push the stick through the opening until it stops at the top inside the plates. I added some glue under the flaps by the opening and secured them in more.
Last but not least is wrapping up all this sweetness. I laid my celephane down and unrolled it some. I put a lollipop on top of it and pulled it over to measure and cut. There was probably about 3 inches of cellophane below the end of the plate. Next I bunched each side of the cellophane together and tied it with ribbon I had from last year. You can also use a twist ties, string or even a premade bow.
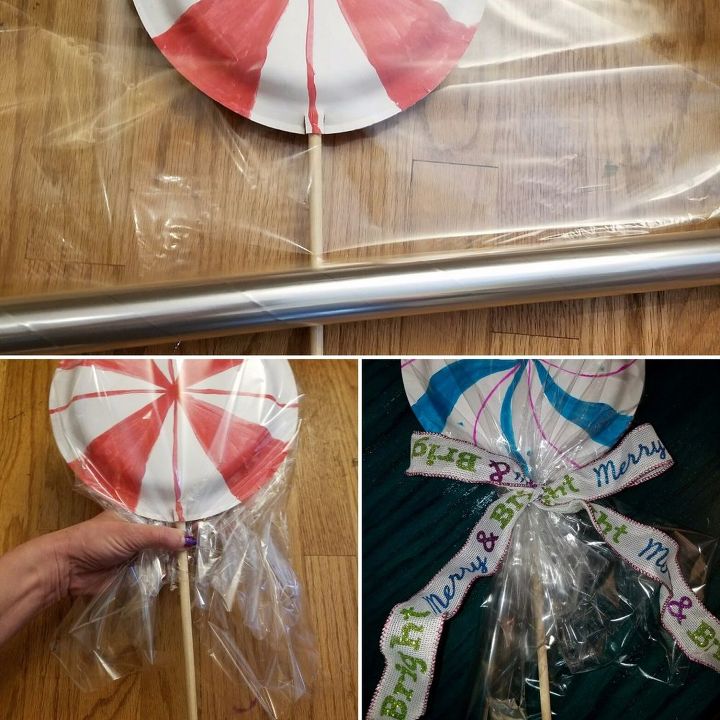
I made the snack sized plates into wrapped candies the same way. I waited until I had all my lollipops wrapped with cellophane and then used what was left for the candy. I cut two pieces the same size, put my candy plate in between and tied each end together.
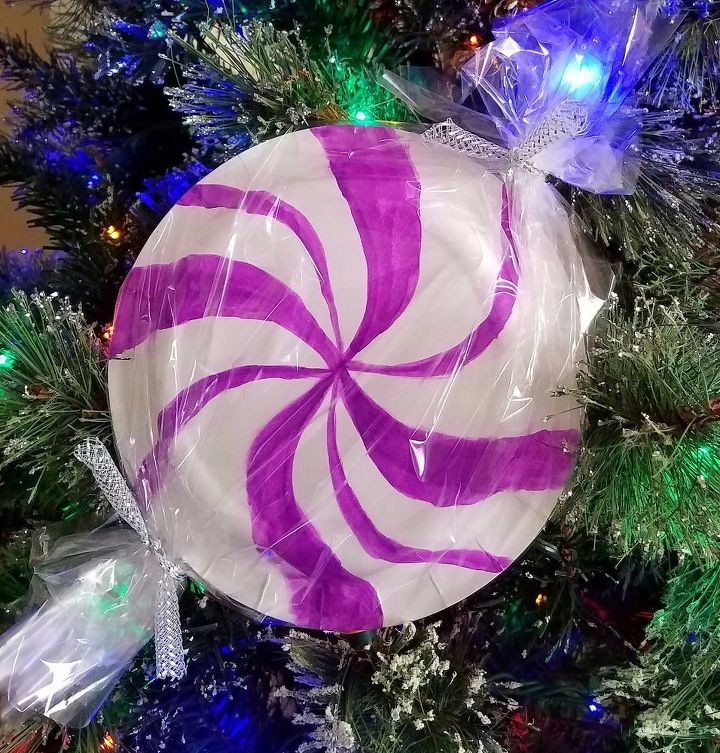
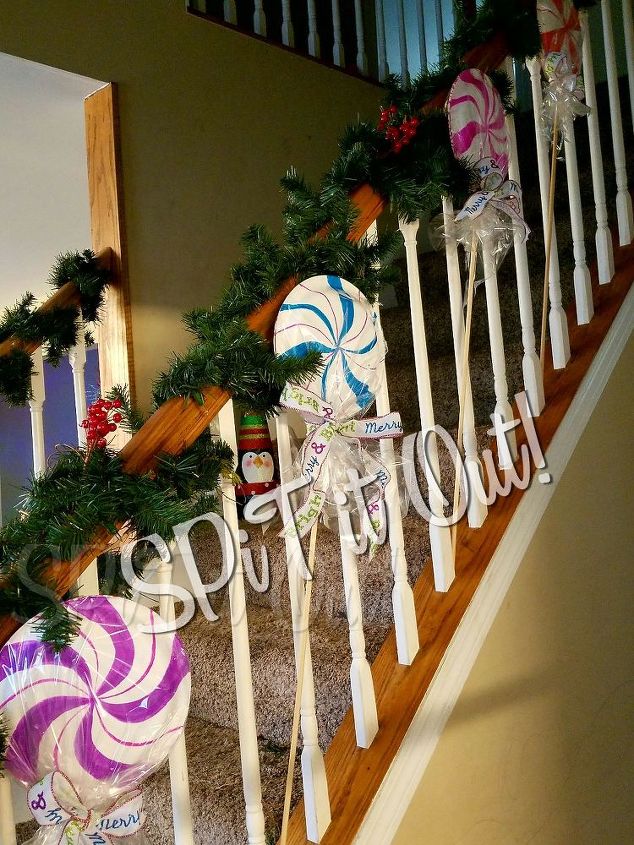
Once I had some finished I couldn't wait to see where I could put them to use because they were so cute!! So many possibilities! Christmas tree decor or toppers, stairway to Candyland, 4 seasons room or even outside if you don't get blizzards where you live. 😉 These are so easy to do and so cheap! My home is going to be filled with dancing Sugarplum sweetness in no time! I hope yours will too now! 😊
Well that's a wrap! I hope you enjoyed this project as much as I have. If you'd like to see more functional art I've created, you can find me at SPiT it Out art on Facebook or instagram. https://www.facebook.com/SPiTitoutart/ Thanks for looking! 😊 For more information and to see more projects done with Unicorn SPiT Vibrantly Colored Stain, check out their site here. https://www.unicornspit.com/
DIY Christmas Decorations
Resources for this project:
See all materials


Comments
Join the conversation
-
2 ideas - 1. If You can find the colored wrap like they have at Easter it's faster. 2. Get the "foam" plates they already come in red and green. Can then add the spirals.
-
Nice idea. Looks so much better than a wound up pool noodle to me. Yours look like the candy. I think for indoors I’d wrap with twists on both ends, like the classic candy we all receive this time of year. I don’t know if it would work, I’d buy sample pots of exterior paint for outdoors, spray with polycrylic then wrap for outdoors. I think they would last the season. And I think I’d twist both ends like the starlight mints (and homemade candy) and make a garland. Actually to many ideas now. Thanks for idea and inspiration


Frequently asked questions
Have a question about this project?
Have you thought how great this project would be for outside decoration for cheep, cheep, cheep. I love this idea!
I would use the small snack plates for the tree . These are so cute
I realize that, I was just wondering if you could use regular paint as well??