


How to Decorate a Skinny Tree With Ribbon Like a Pro
If you’ve ever considered a skinny tree, but were hesitant because you weren’t sure how to decorate it, today’s your lucky day!
I created the most detailed recap of how I decorated our skinny tree in this post and the best part?
It was so easy!! Let's get to it!
Pre-Decorating Tips
There are a couple of things to consider before you dive into decorating your tree.
First things first, you want to pick a Christmas color scheme.
This will help you create a cohesive look, even if it’s just for one room of your home.
You also may want to consider a specific theme for your tree, too.
This is where your creativity can really come to life.
Remember their are no rules for a Christmas tree theme, so go wild!
What to Buy to Decorate your Skinny Tree
Once you’ve decided on colors and a possible theme, it’s time to gather all your goodies.
Here is the list of items to look for to get your skinny tree decorating game ready to rock.
- Pre-Lit Skinny Christmas Tree
- Tree Collar or Skirt
- Large Tree Topper
- Garland (optional)
- Ribbon
- One at least 2″ wide with wire edges
- Stems and/or Florals
- Unique Elements
- At Least Two Different Sized Ball Ornaments
- Other Ornaments
- Scissors
- Extra Ornament Hooks
- Extension cords
- Smart plug
How to Decorate a Skinny Christmas Tree
Once you have all your items, it’s time to get to decoratin’!
Here is the step by step tutorial of how I decorated this skinny tree in our living room.
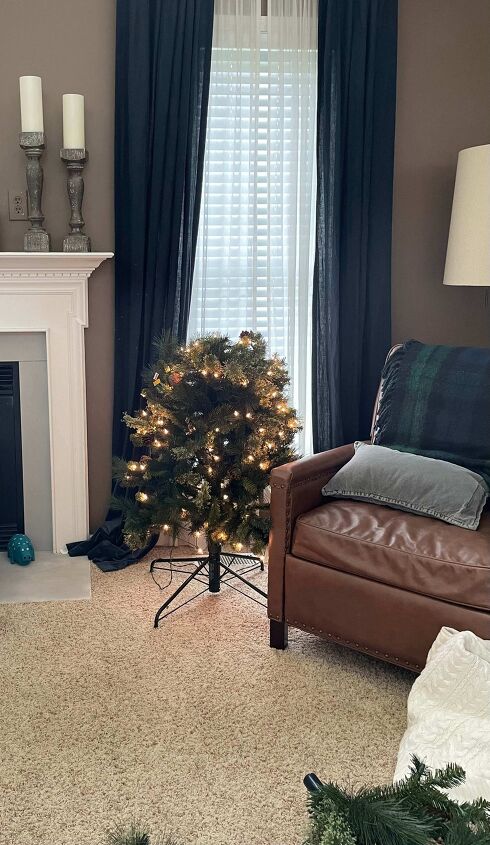
Assemble your Skinny Tree
Start by setting up your smart plug so you can control the tree from your phone or smart home device.
Next you want to get your stand and tree collar setup, if you’re using a tree collar.
If you’re using a tree skirt, you can do this at any time, but I like to get it setup whenever the tree is in the place it’s going to stay.
Next assemble your tree.
I highly recommend pre-lit trees because it is insanely convenient, but if you don’t have a pre-lit tree, now would be the time to add your lights.
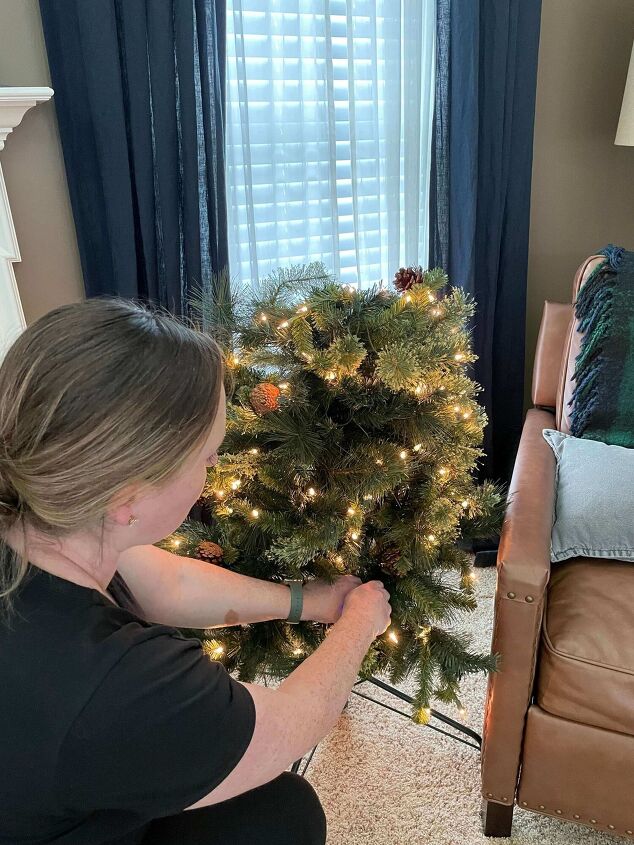
Fluff all the Branches
Next, you want to work on fluffing all the branches.
The best way to fluff is to just get in there and start spreading the branches up and down and side to side.
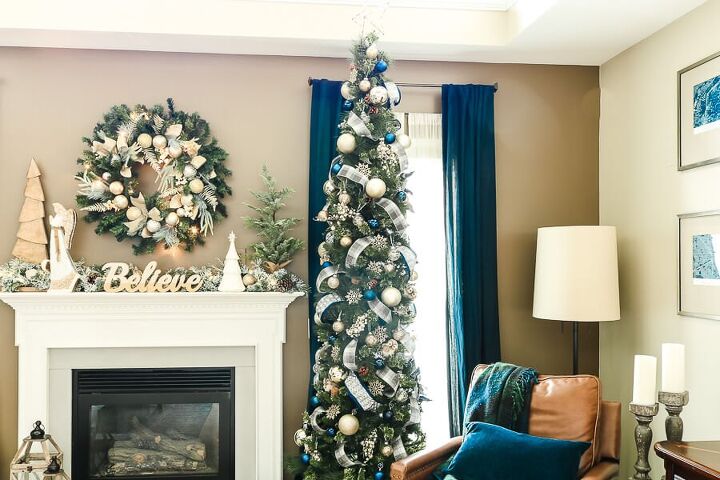
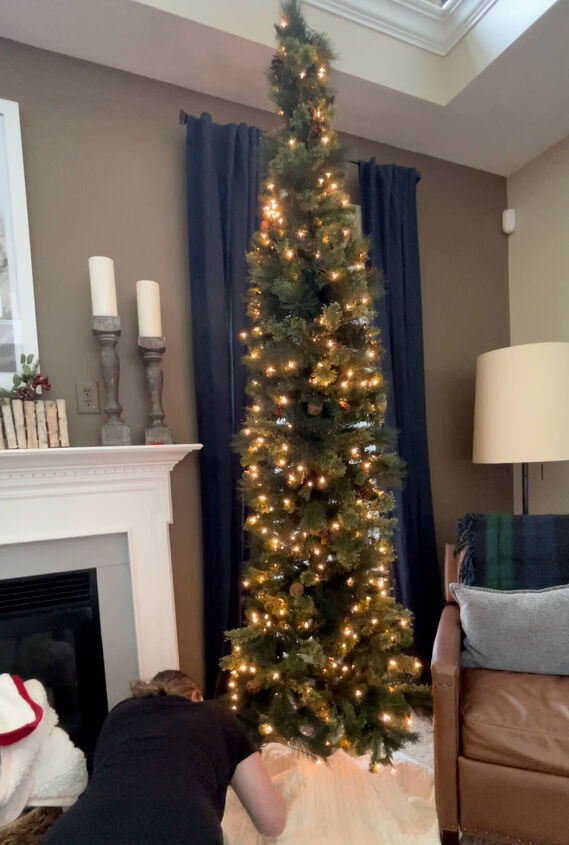
Add the Tree Topper
You might notice the tree is way more decorated here, but that’s because I waited to put the tree topper on until after I decorated most of it.
Don’t do that.
It's much easier to hide the cord before you start to decorate
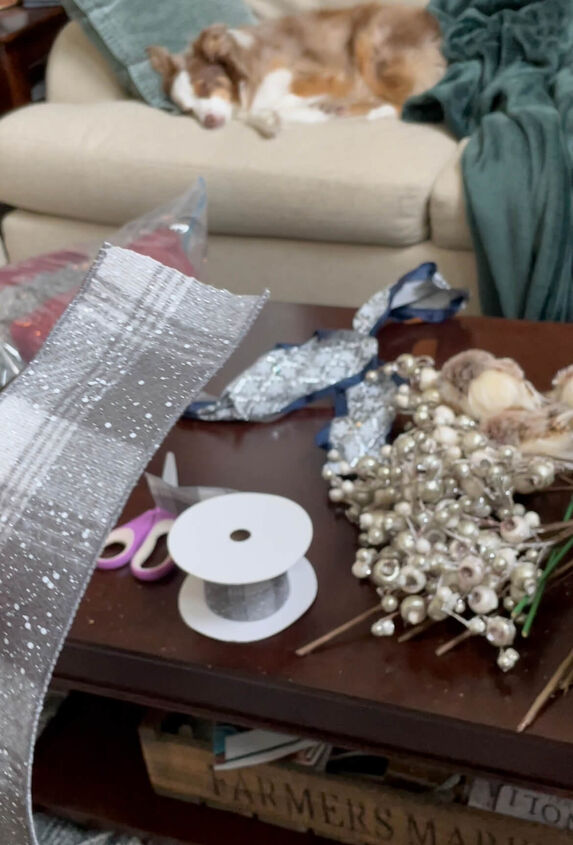
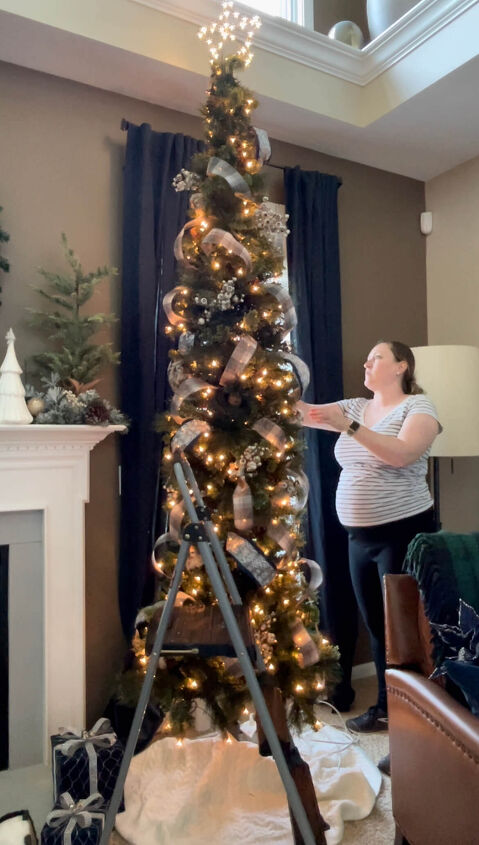
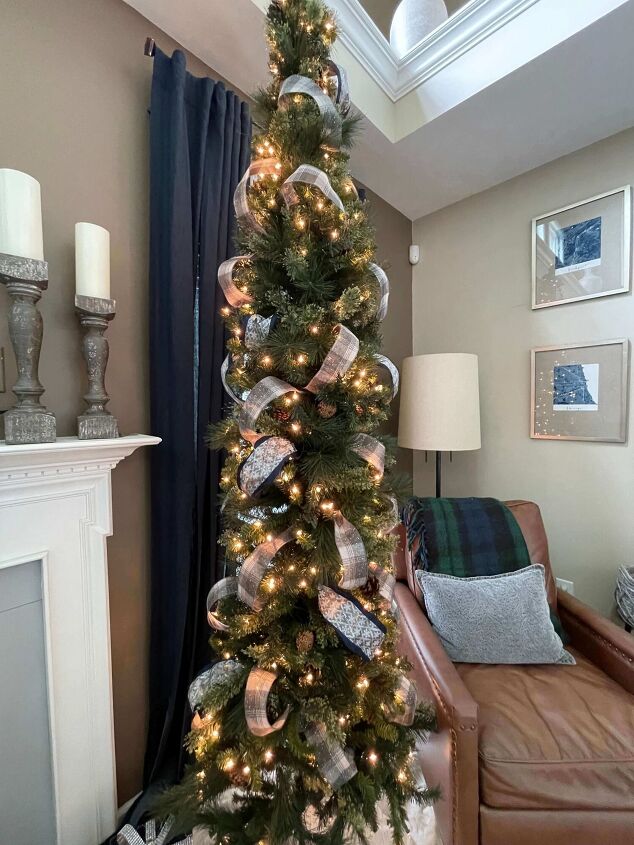
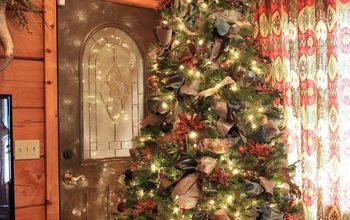
Add First Round of ribbon
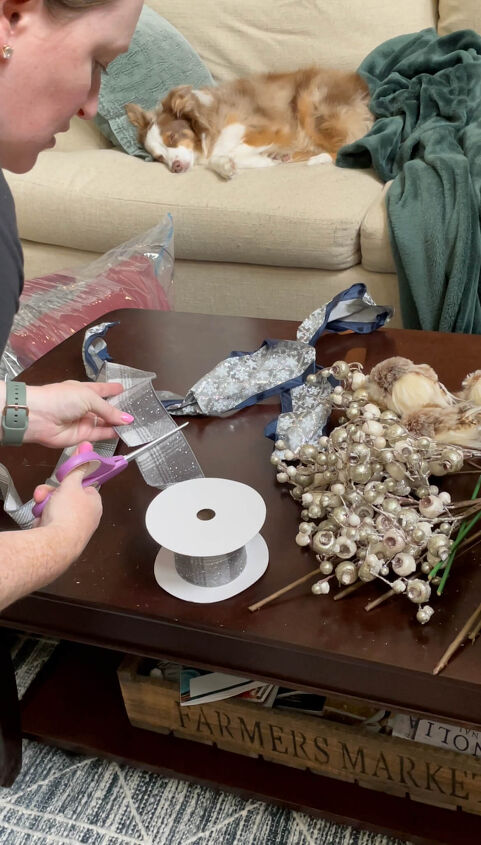
I started by cutting pieces of 2-2.5″ wire ribbon into 3 foot pieces.
I read a few tutorials and the best technique I found went like this…
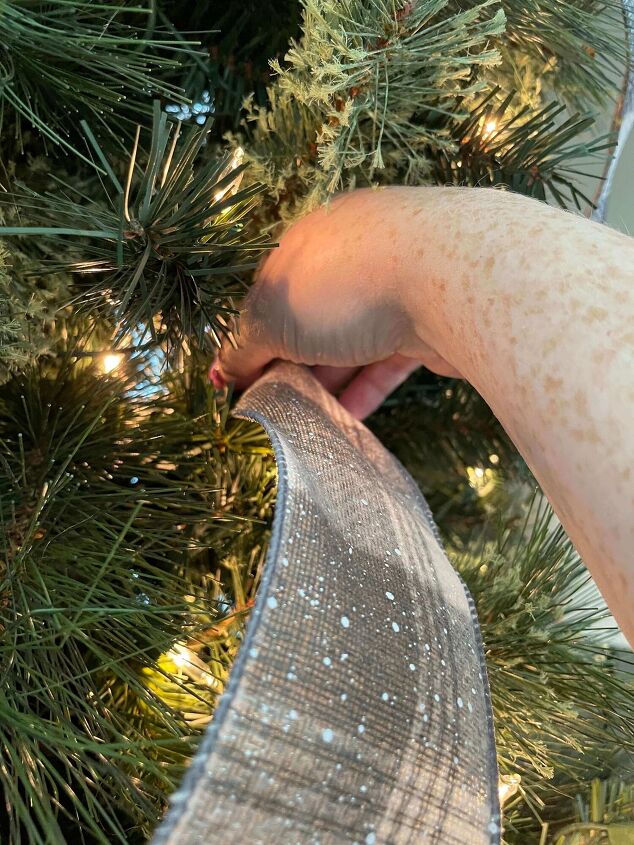

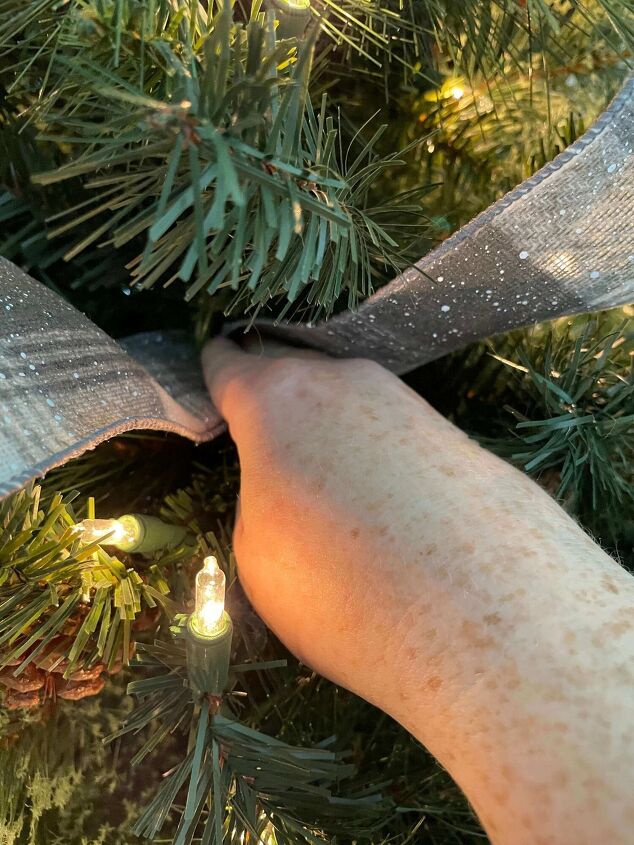
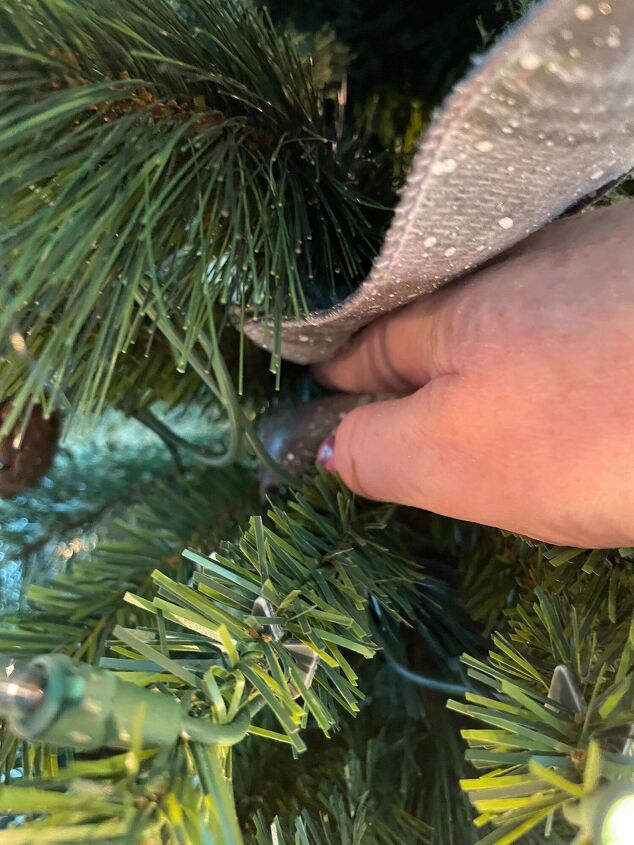
The key is to start in the middle of the tree and add the ribbon on the diagonal.
Continue to do this all around the tree keeping your loops at the diagonal.
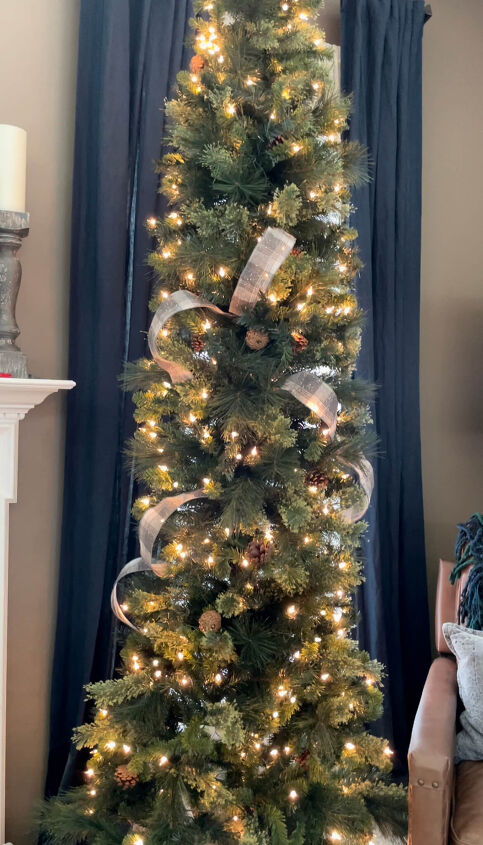
Add a Second Round of Ribbon (optional)
After you’ve added one set of ribbon, consider adding a second round of ribbon.

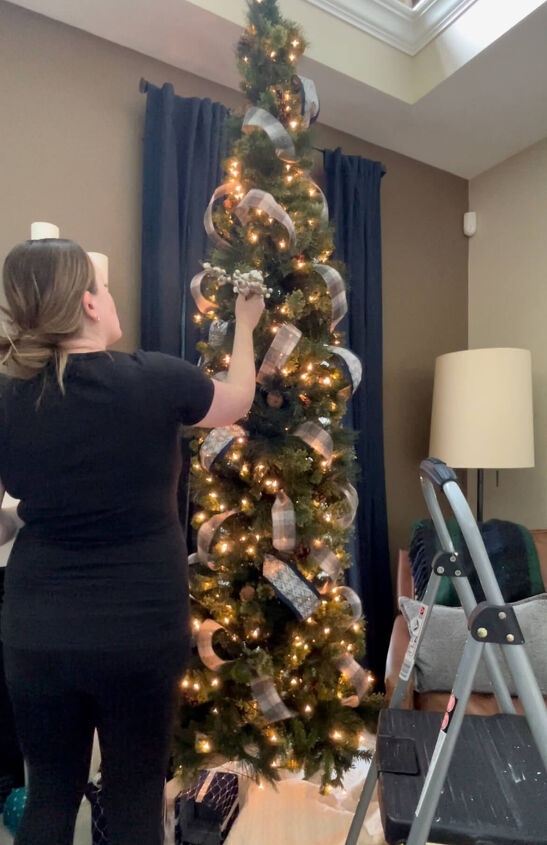
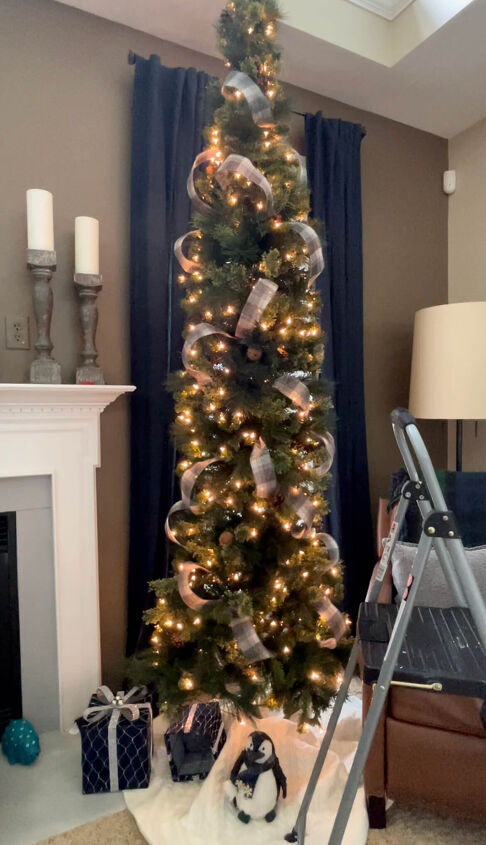
Add Stems and/or Florals and/or Unique Elements
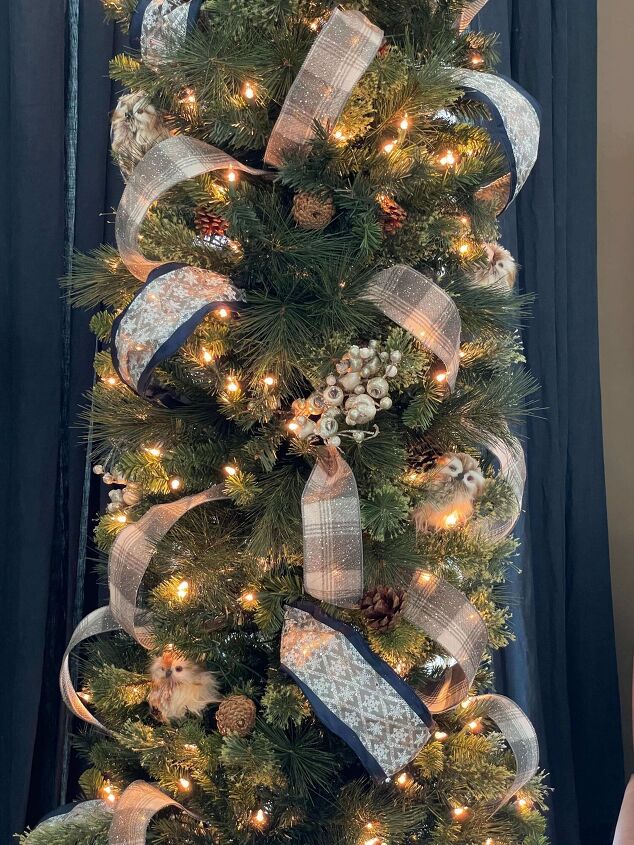
Once you feel good about the ribbon placement, it’s time for the stems and/or florals.
Disperse them in any gaps around the ribbon or to hide certain awkward parts of the ribbon.
Once you get your stems/florals in place, add in your unique elements.
My unique elements for this tree were owl figurines.
You can get my full source list and more detail here.
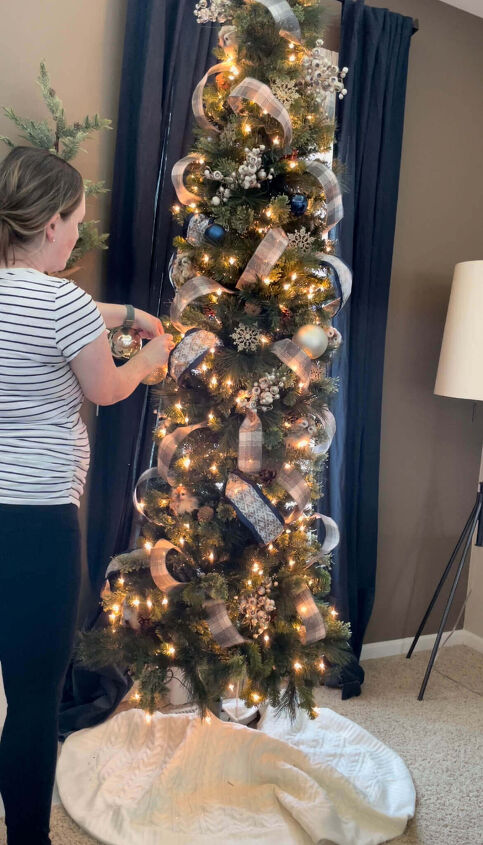
Add Varying Sizes and Colors of Ornaments

The last step of the process is to add your ball ornaments, sometimes referred to as baubles.
Some advice I read in my research is to put the larger balls on first in a Z pattern.
Then go back with your smaller ones and cluster them in groups of three.
I added glittery gold snowflakes to bring the sparkle as my additional ornaments.
Head over to the full post to checkout all the after shots and close-ups of the tree completed!
Happy Decorating and Merry Christmas!
Video tutorial available too!

Comments
Join the conversation
-
I have a skinny pre-lit tree and have always wanted to add ribbon. But I have been so afraid that I would knock off ornaments and break them. The ornaments are all Swarovski limited edition crystal snowflakes. I never thought about doing the ribbon first, as I have always seen people adding it after. Who would have thought to do it first!!! I don't think I would be able to add as much as you did, my tree is much shorter, about 6.5 feet, with lots of space needed for ornaments. But I am going to try this when I put up my tree on Dec 1st. What a great way to fill in the inevitable holes between the branches that are there no matter how much you fluff! Thank you, thank you, thank you 😘
-
Absolutely!! I’m so glad I could help! Can’t wait to see the pictures!


Frequently asked questions
Have a question about this project?