


How to Make Your Own Christmas Village
Do you love the beautiful Christmas Villages you see decorating people’s homes during the holiday season? They are so pretty but can be very expensive! I collected the Department 56 North Pole Series, and I love it. But, this year I wanted something more simple, that would match my Holiday decor in the Living Room. Would you like to know how to make your own Christmas Village that matches your holiday decor? Well, come on friends, and let me show you how I made a beautiful, budget-friendly version!

What's your Inspiration?
The first step I take to decorate for Christmas is to find an inspiration piece, or decide on the colors I want to use!
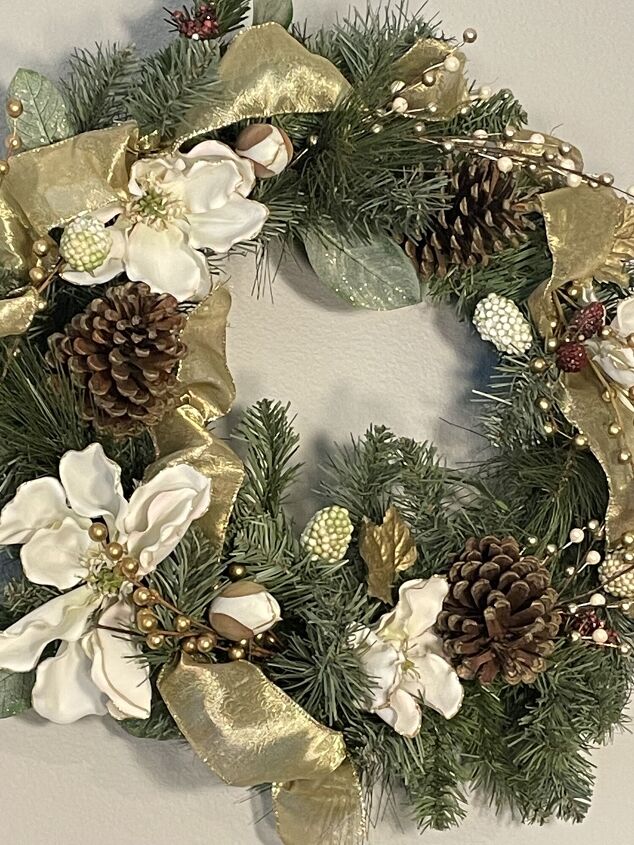
The inspiration for my living room holiday decor is an old wreath I've had for many years! It's got a gold ribbon, white flowers, and brown pine cones.
The pine cones are important because I brought 3 tubs of them to Florida. I've been saving pinecones for years and telling Rich not to throw them out because I was going to make something with them! Somehow, I never found the time. But, I'm excited because that's about to change!
Determine your Color Scheme
If you don't have an inspiration piece to start with, decide what colors you want to use to decorate the space.
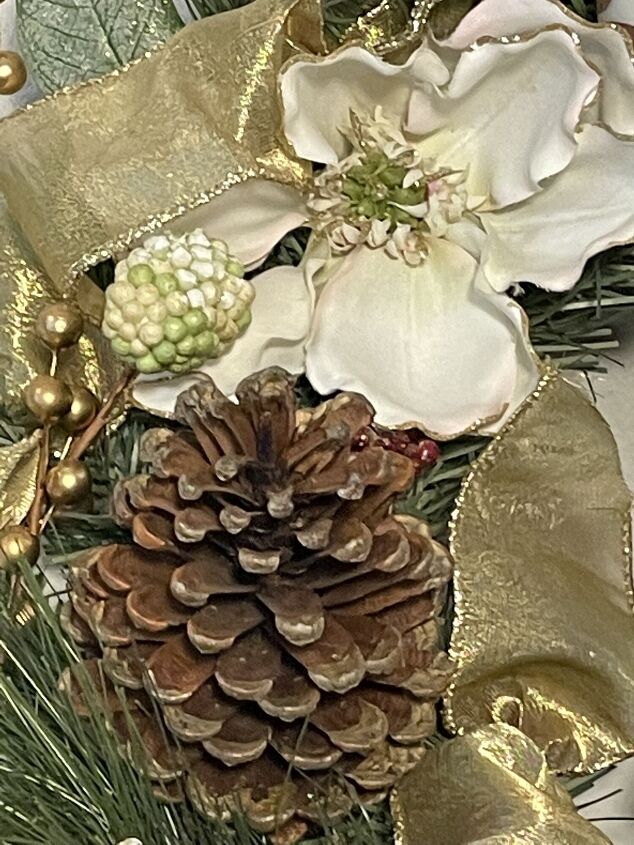
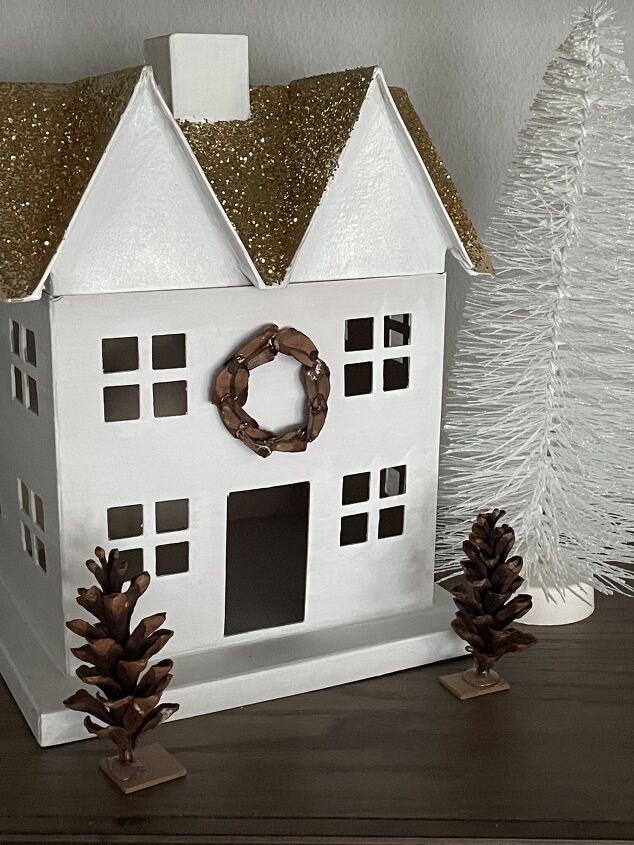
As you know, my color scheme is white, gold, and brown. I know brown is not a color one would typically use in Christmas decor, but I think using the natural pine cones will make it work!!
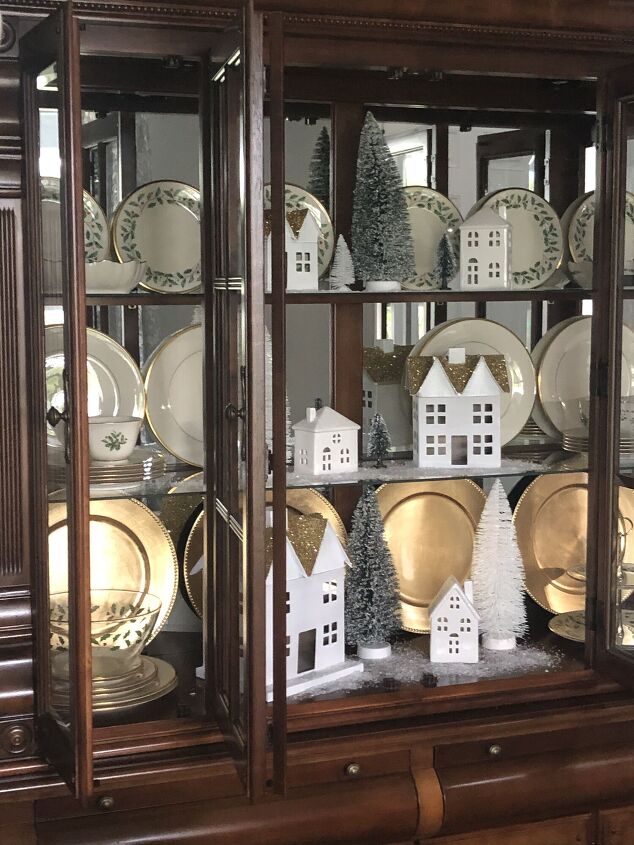
I made three of these houses last year to put inside my China cabinet. Since they are white with gold roofs they will be perfect for my living room. I just need more of them so it looks like a village! Here we go, let's start crafting!!
Gather items for your Christmas Village
Before you can start this project, you need to gather all of the supplies on the list below!
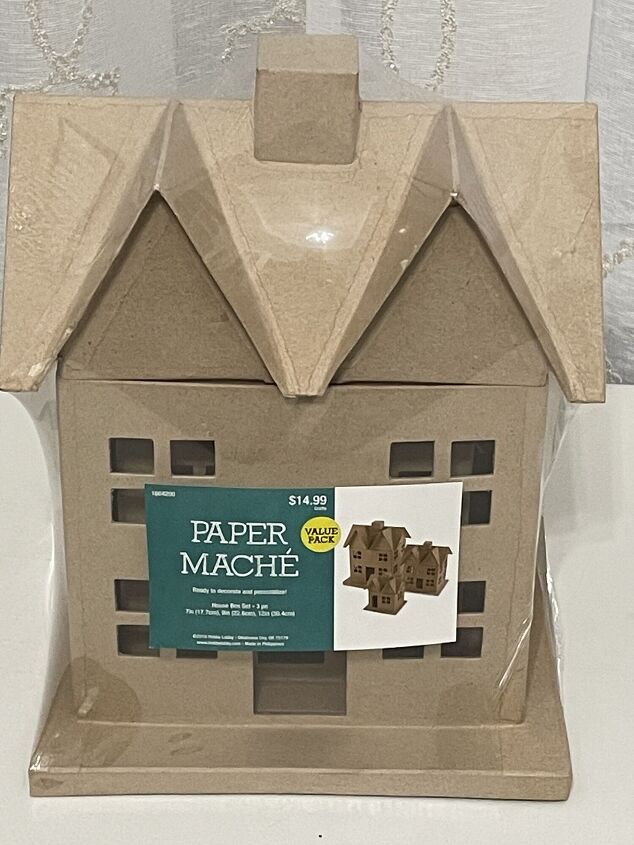
- Paper mache houses- I purchased the houses from Hobby Lobby. When I bought the first set of houses last year, I used a 40% off coupon. Unfortunately, Hobby Lobby does not have the 40% off coupon anymore, and the cashier told me the paper mache products never go on sale. Even so, this village is very inexpensive to make compared to the cost of buying one!
- Chalk paint-I used Waverly in White
- Paintbrush
- Spray adhesive-I used Elmer's Craft Bond
- Glitter-I used gold glitter
- 2 baking pans
- Aluminum foil
Paint Houses
I am going to make all of my houses look the same but, you can paint your houses different colors if you would like. Choose colors that match the decor of the room you're going to put them in!
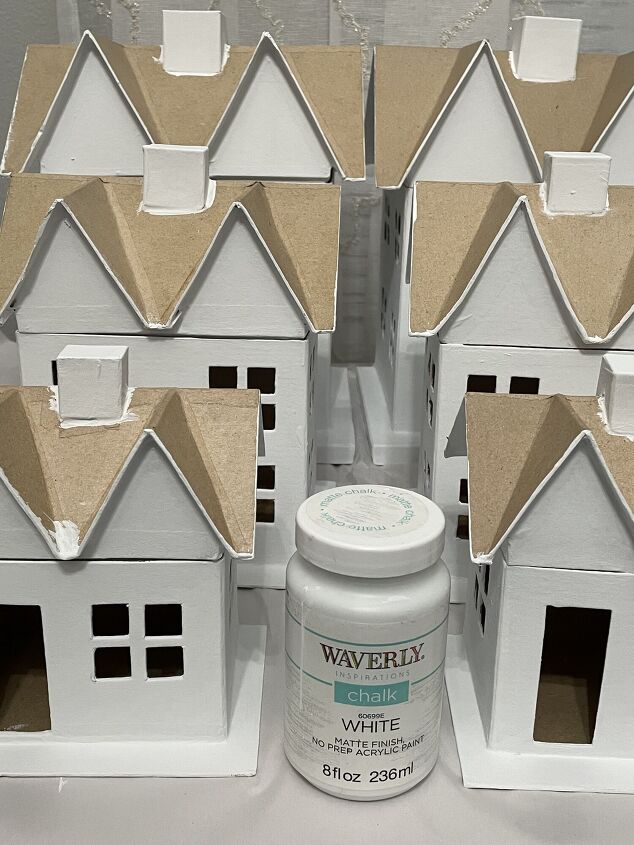
- Paint each house, but leave the roof alone. I did paint the chimneys.
- Let dry.
- Paint a second coat.
- Let dry.
Cover the Roofs
I chose to use glitter for my roofs because I wanted them to match my china and gold chargers. The truth is, glitter can be very messy, so you may want to paint your roofs instead. If you decide to use glitter, I have a great technique that helps keep the mess away, and does not waste glitter!
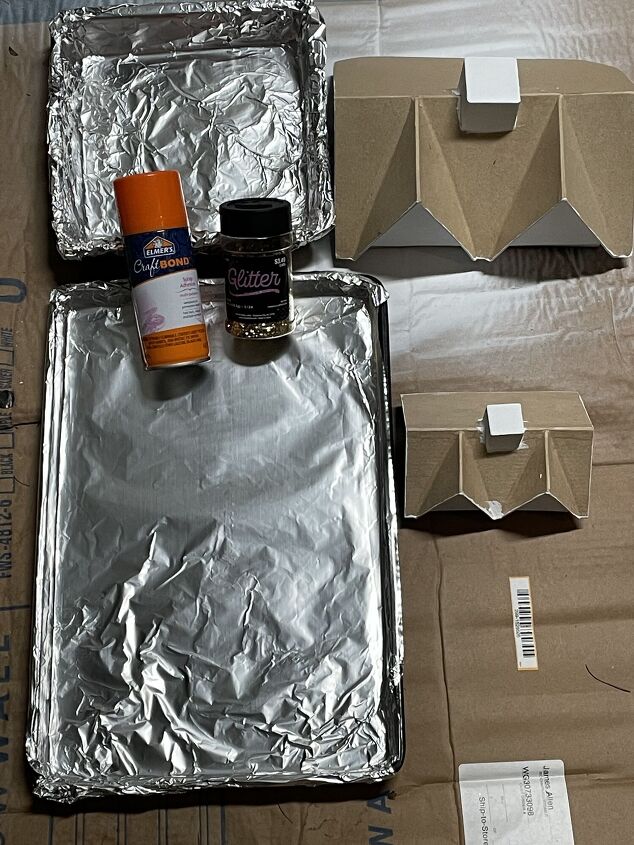
Cover two baking pans with aluminum foil. Make sure the largest roof will fit on one of the baking pans. The other pan can be smaller.
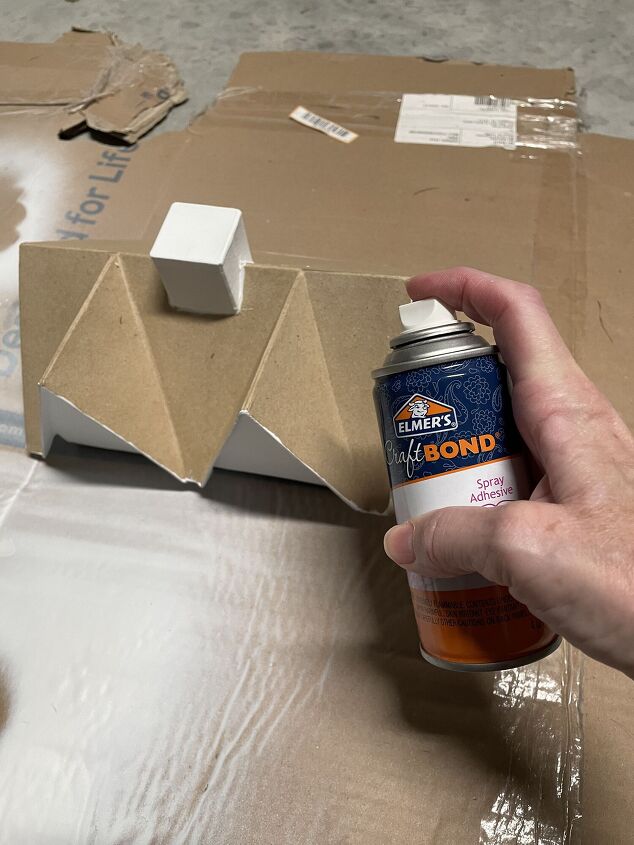
Spray the roof with the adhesive. Be careful, and don't spray the chimney.
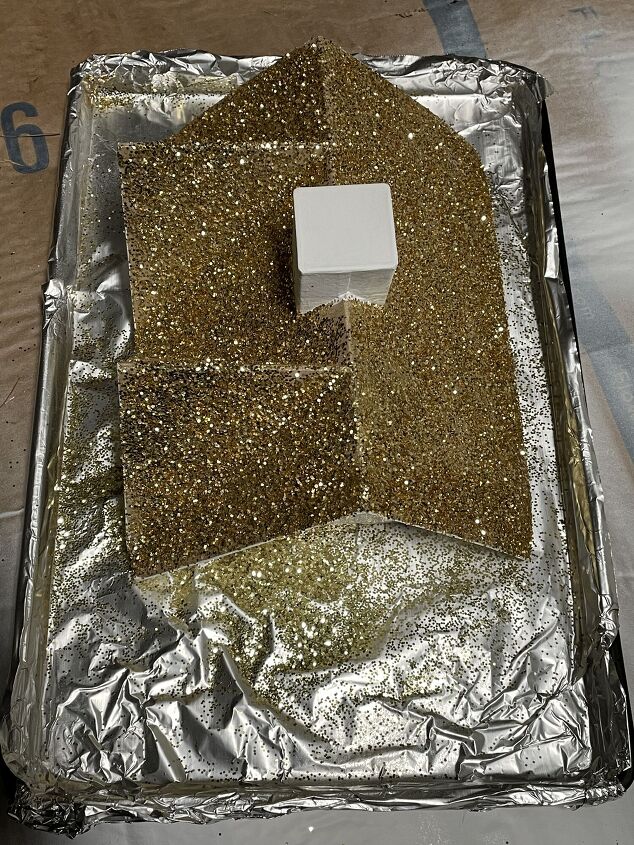
Lay the largest roof on the baking sheet. Sprinkle the glitter on the roof.
TIP- do not spray the adhesive over the pan or the glitter will stick to it and you won't be able to reuse it!

Dump the excess glitter into the smaller pan.
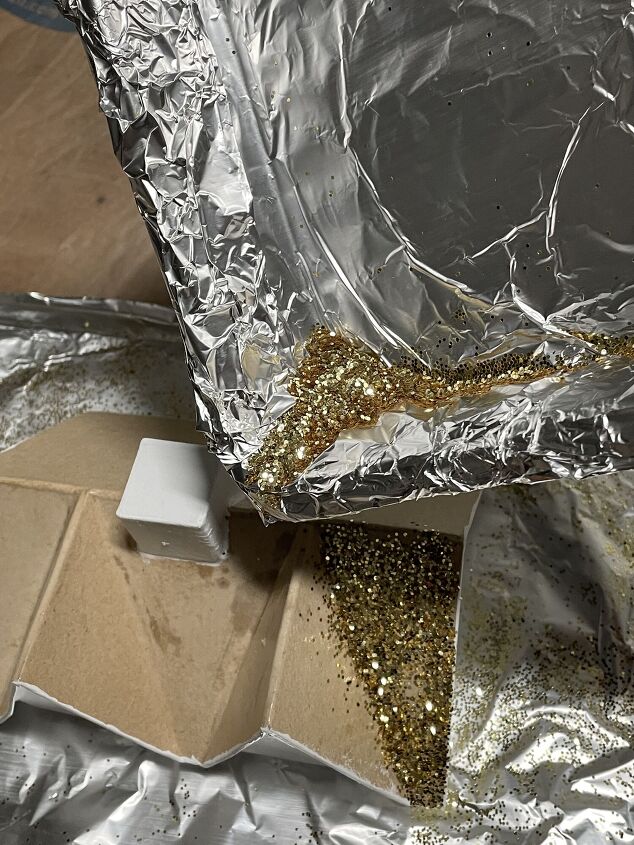
Repeat the steps with the medium roof, but use the excess glitter from the small pan. This technique saves the glitter so you can reuse it! Repeat the steps for the smallest roof!
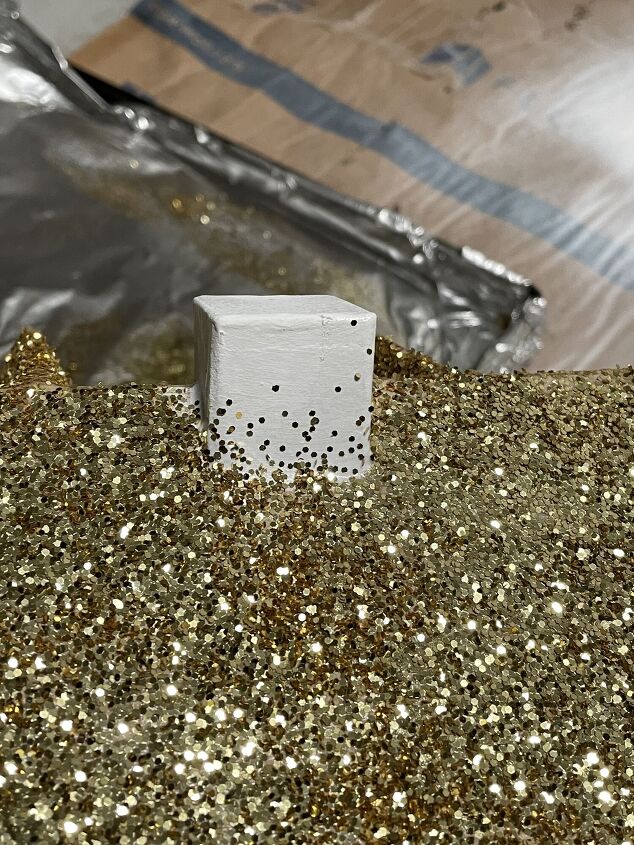
You might get a few pieces of glitter on the chimney. If you don't like that, scrap the excess glitter off before the adhesive dries.
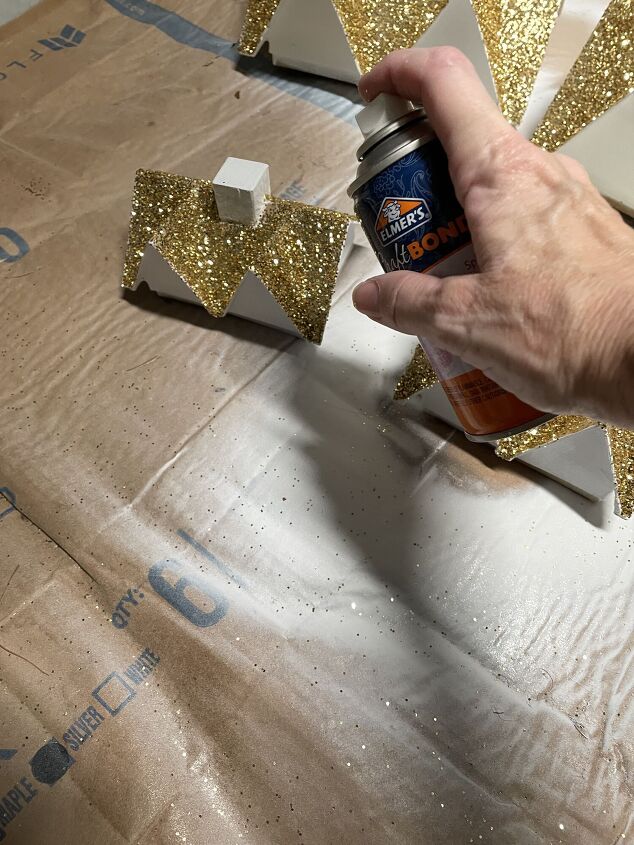
When all of your roofs have sufficient glitter on them, spray each one with a coat of adhesive, so the glitter will stay put!
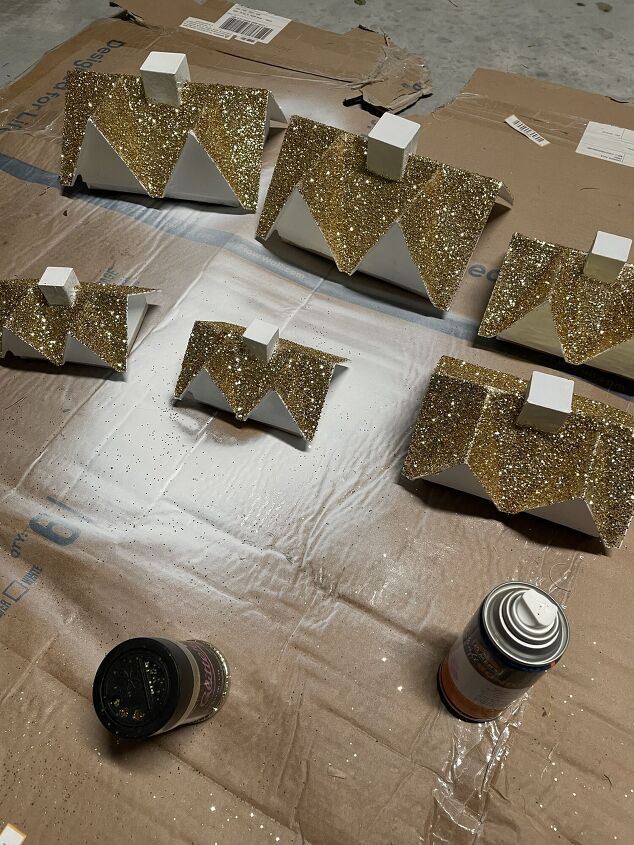
The roofs are done, don't they look amazing!
Embellish your Christmas Village
There are so many ways you can embellish your houses: you could add mini wreaths, hang tiny lights, use miniature figures of people or animals, or use small trees and shrubs.
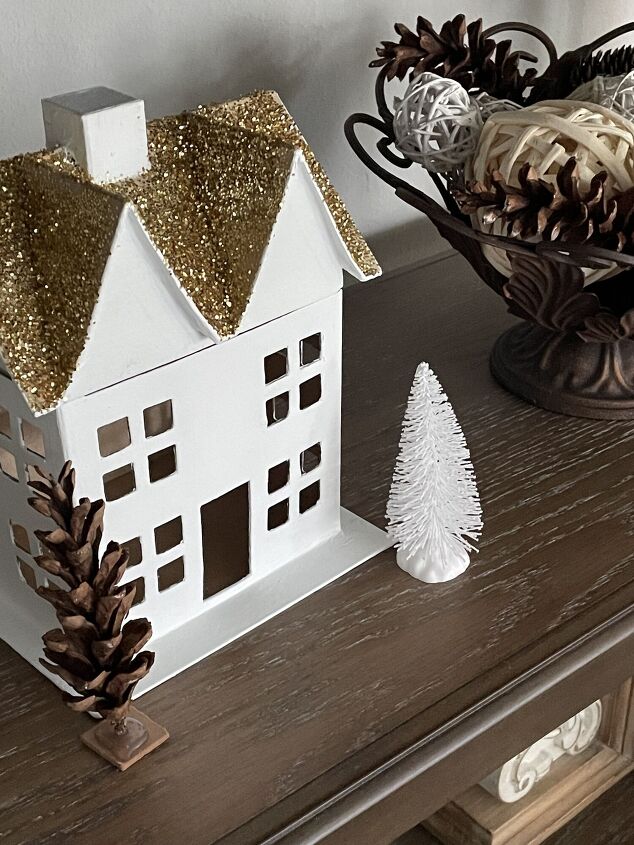
I wanted to incorporate brown, so I decided to embellish them with wreaths made from pine cone pieces.
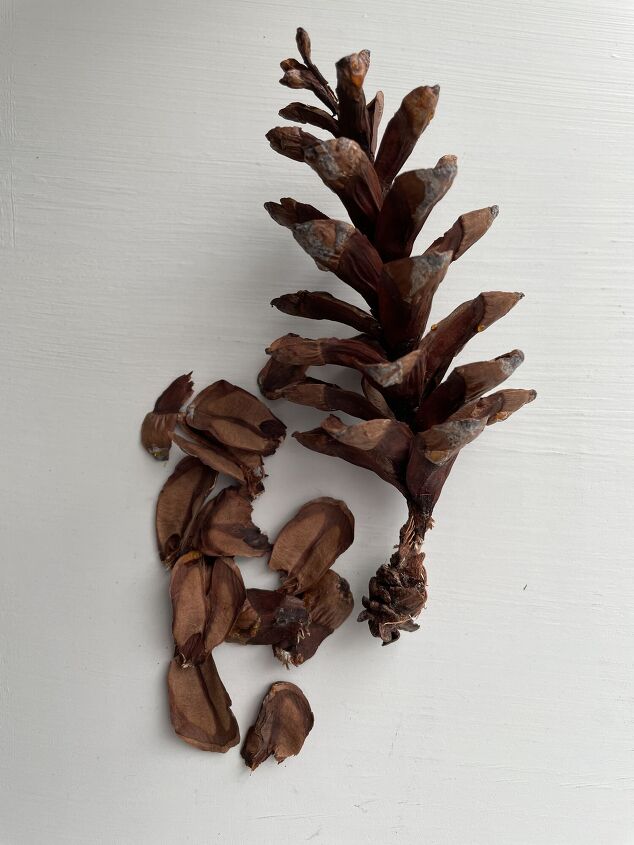
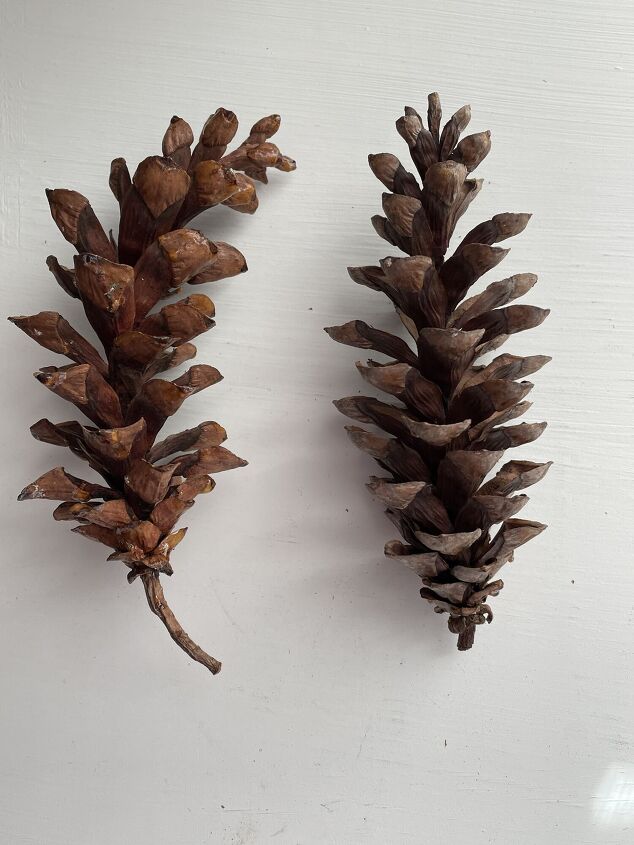
As I was breaking off pieces of a pine cone, it occurred to me that the pine cones might make cute trees.
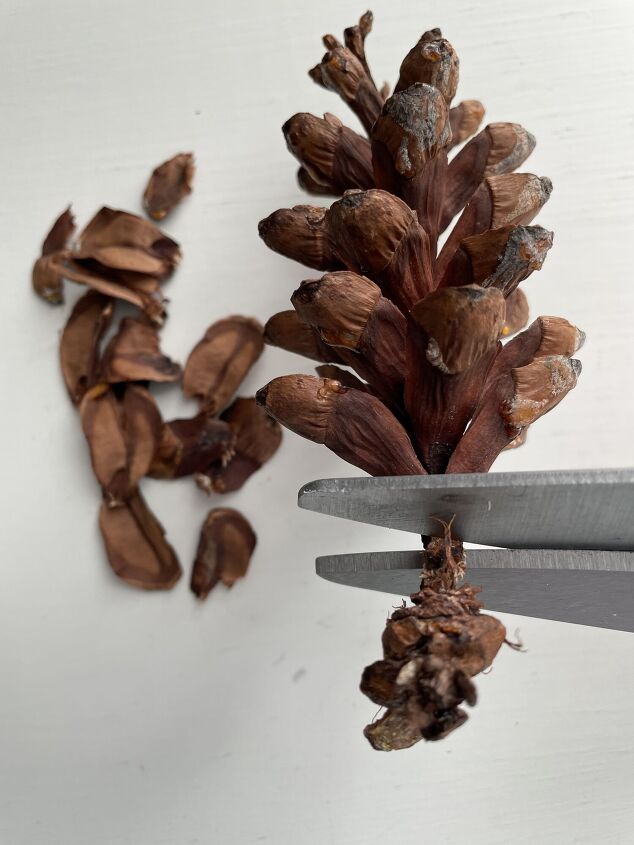
I decided to experiment and cut the end off of the pine cone.
Call me crazy, but I saved these little squares thinking I could use them for a project someday, and guess what...that day has finally come!
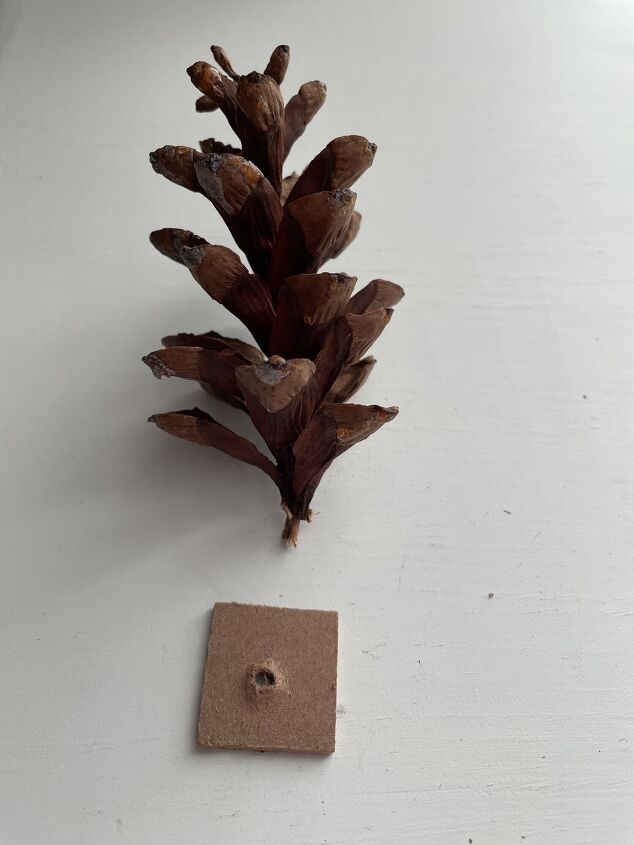
I held the pine cone up until the glue dried.
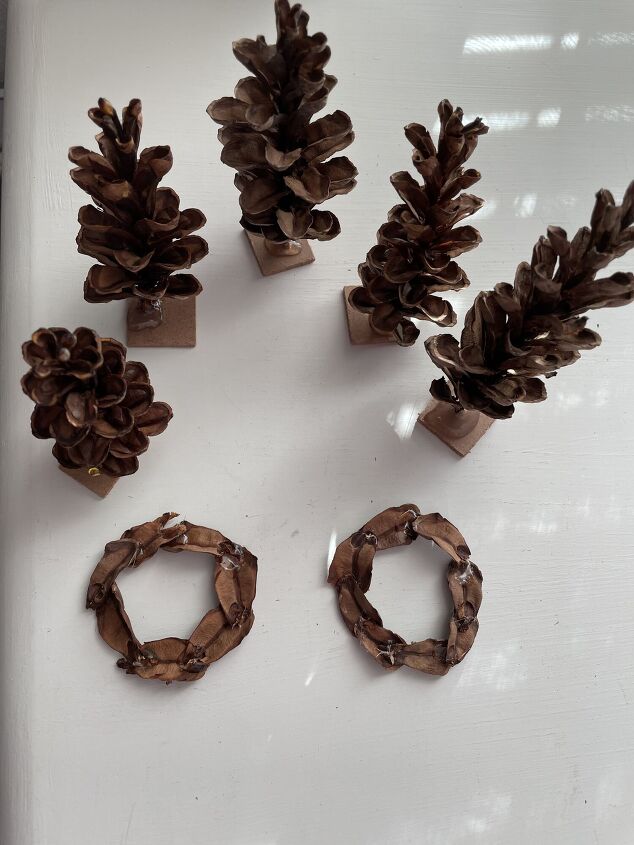
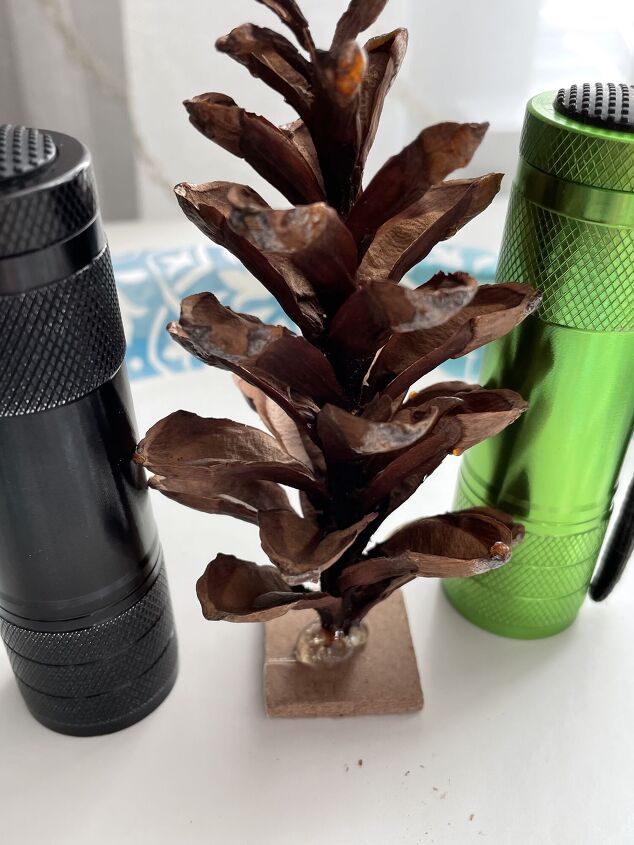
Wow! Look at my cute little wreaths and trees! I think they're a perfect way to blend the brown color and add pine cones to my village! I'm so excited because the living room is going to look so cohesive!
TIP-If you decide to use pinecones to make trees, be sure to pick the straightest ones you can find, or you'll end up with leaning trees that look like they've been through a storm lol!!
Style Your Christmas Village
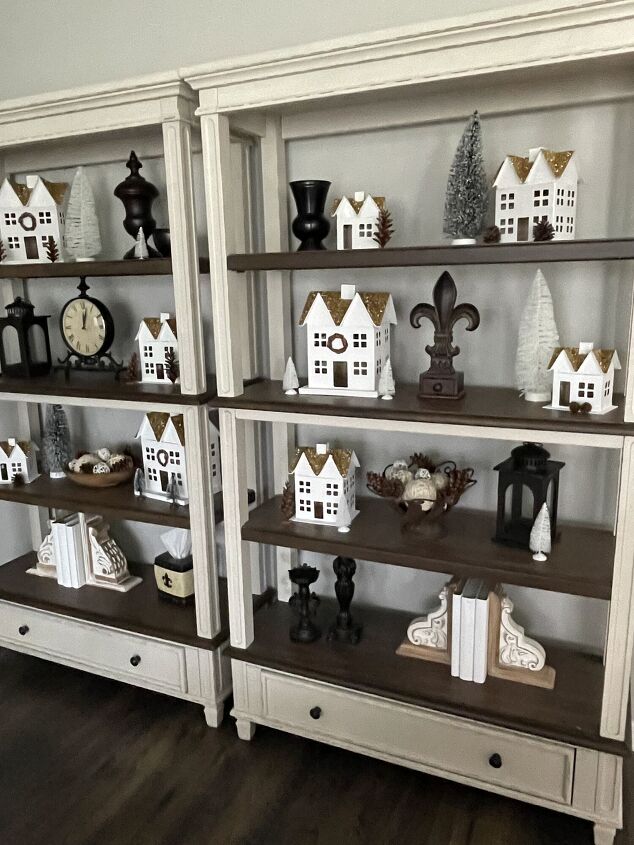
I put my houses on the shelves in the living room. I styled them with bottle brush trees and brown decor items.

I hope you found this tutorial helpful and it has inspired you to make a Christmas Village that matches your home's Christmas decor! This is such a simple but fun project! Let me know in the comments below if you would like to try this simple DIY!
Blessings, Donna and Rich
For more DIY Inspiration from simple crafts to whole room makeovers click HERE!
If you enjoyed our post consider signing up for our email HERE so you don't miss our latest DIY posts!
Resources for this project:
See all materials


Comments
Join the conversation
-
Would love to know where you got those bookshelves
-
Love love your little wreaths snd trees!


Frequently asked questions
Have a question about this project?
Love your shelves, where did you buy them?