Hang Art or Mirrors With Two Key Holes on the Back

by
Porch Daydreamer
(IC: blogger)
9 Materials
$5
30 Minutes
Easy
Follow my simple process to avoid messing up your walls, hanging it crooked, or off-center! Hang a mirror or piece of art that is heavy using painter's tape as your guide.
In most instances, since the item is heavy, you will have to hang it with anchors and screws which is what I am demonstrating here. The same method can be used for heavy weight picture hanging hooks as well!
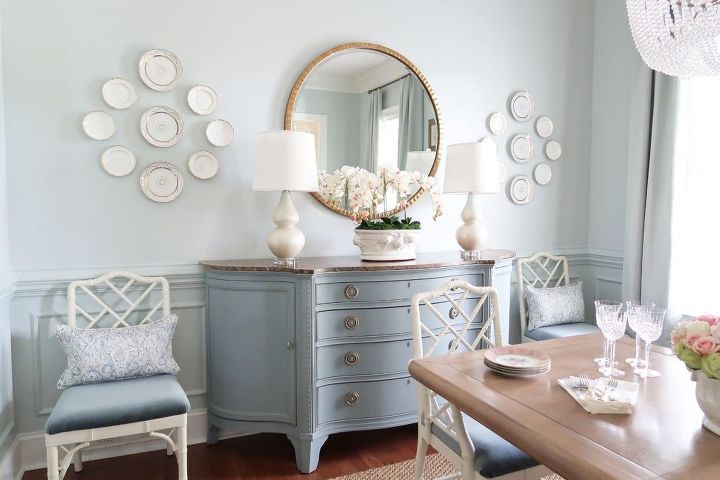
So you have a visual, here is the 40 inch round mirror that I am hanging in this tutorial. LONG story, but the mirror was out of the frame as I took pictures of the instructions making it much easier to show you my method.
If you are interested in the story, CLICK HERE
Step 1:
Place a strip of frog tape between the holes and end to end on the frame.
Step 2:
Poke through tape to expose holes on either side. I used a letter opener, but you can use a pencil too!
This is what it looks like with the holes punched through.
Step 3:
Measure the total distance from the bottom of the frame to the holes.
Step 4:
Record distance to hole and add the number of inches you want the frame or mirror to hang above a couch or table. This will be the height the screws are placed on the wall.
TIP: Add between 8 inches and 10 inches for the perfect height above an object. Mine will hang 9 inches above the credenza to allow for taller accessories and to balance with two lamps. 36 inches + 9 inches = 45 inches.
Step 5:
Mark the center of where you want the mirror to hang on the wall and mark the center between the two holes on the tape.
Place tape on the wall and align those two marks (I did mine in pencil, but to show you made them bold in editing).
Step 6:
Level tape on the wall. I found it helpful to draw a level line with my pencil on the wall, so I could line up the tape. MAKE SURE your two center lines are still lined up!
Step 7:
Drill 1/16" pilot holes to see if you are hanging on drywall or if there is a wood stud. If it is just drywall, you MUST use drywall anchors.
NOTE: Make sure you are drilling at the top part of the "keyhole" because that is where it will hang off of the screws.
Step 8:
Using your hammer, making sure the anchor is level GENTLY pound just the tip of the anchors into the wall on each side. Where my fingers are is how far you tap them into place.
Then SLOWLY screw them into wall so they are flush.
Step 9:
Peel off tape and screw in screws to the anchors. Leave about 1/4 inch of the threads exposed, so you have enough clearance to hang the mirror.
You will hear a little "pop" as the anchor expands to hold it into the wall.
Step 10:
Hang the mirror! Do you see why it's nice the mirror isn't in place, so you can actually see how it's hanging :)
Once I had the mirror back in the frame, I had a friend help me hang it because it was really heavy! Safety first please - ask for help with heavy objects 

Please check out my website for more helpful projects, home improvement, and design ideas!
Enjoyed the project?
Resources for this project:
See all materials
Any price and availability information displayed on [relevant Amazon Site(s), as applicable] at the time of purchase will apply to the purchase of this product.
Hometalk may collect a small share of sales from the links on this page.More info

Want more details about this and other DIY projects? Check out my blog post!
Published June 27th, 2018 2:12 PM
Comments
Join the conversation
2 of 25 comments












Frequently asked questions
Have a question about this project?
Beautiful room, love the credenza! Is your wainscoting light blue? All looks very welcoming.
Your whole room looks great! Would you mind sharing the two colors on your wall, and the color on your sideboard. They are lovely!