


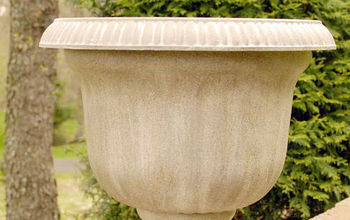
How to Make an Easy & Elegant DIY Foam Planter
I’ll walk you through the process of crafting a beautiful DIY foam planter that I have painted black for a touch of elegance. Using a few simple materials and a dash of creativity, we'll transform foam rings into stunning planters with a textured, blackened finish. Let's dive into this easy and exciting DIY planter project!
Materials and tools
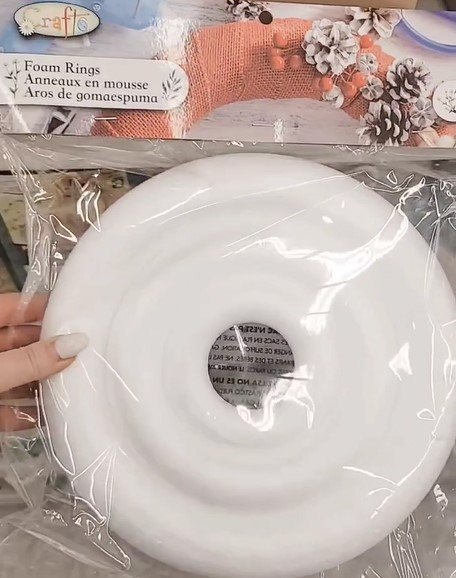
- Foam rings (available at craft stores or online)
- Hot glue gun and glue sticks
- Black spray paint
- Baking soda
- Artificial plants or real plants (if you prefer)
- Protective gloves
- Drop cloth or newspapers
- Optional: Painter's tape for masking
Steps
1. Gather your materials
Before we begin, make sure you have all the necessary materials at hand. Lay down a drop cloth or newspaper to protect your workspace from any potential mess.

2. Assemble the foam rings
Take the foam rings and arrange them in a stack. The number of rings you use will determine the height of your planter. With your hot glue gun heated and ready, apply a generous amount of hot glue between each foam ring to securely attach them together. Hold them in place for a moment to allow the glue to set.
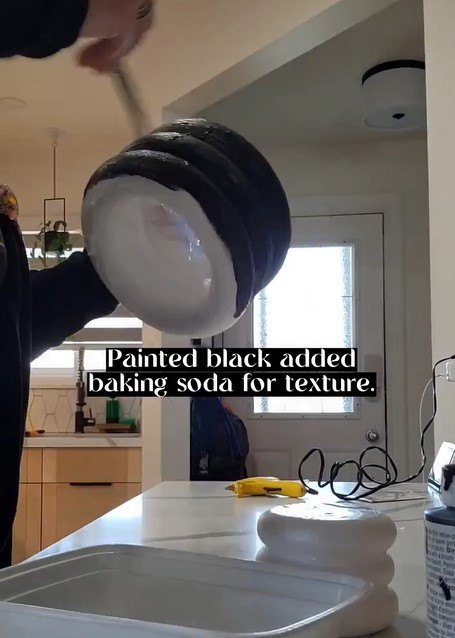
3. Painting the base
Now that your foam rings are stacked and glued, it's time to give them a base coat of black. Take them outdoors or to a well-ventilated area.
Holding the spray paint about 6-8 inches away, evenly coat the foam rings with black paint. Be sure to cover all sides and angles for a uniform finish.
Allow the paint to dry according to the manufacturer's instructions. This usually takes around 1 to 2 hours.
4. Adding texture with baking soda
Once the base coat is dry, let's create a stunning textured effect using baking soda. Put on your protective gloves to avoid direct contact with the paint and baking soda.
Sprinkle a thin, even layer of baking soda over the painted foam rings while the paint is still slightly tacky. The baking soda will adhere to the surface, creating a unique texture. Gently press down on the baking soda to ensure it sticks to the paint. Allow the textured surface to dry completely.
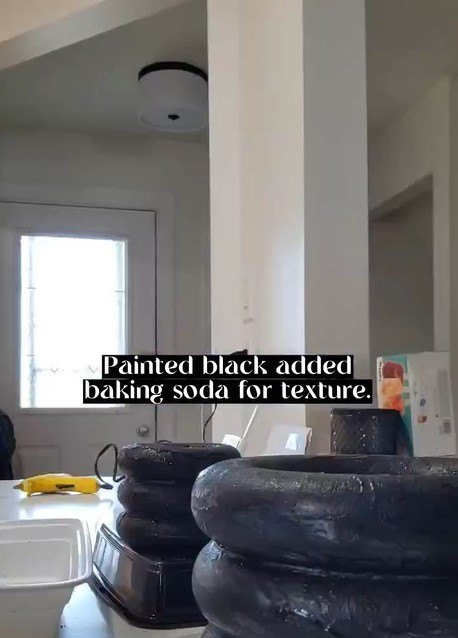
5. Final touches
Shake off any excess baking soda from the foam rings. You'll notice a beautiful, matte, textured finish emerging.
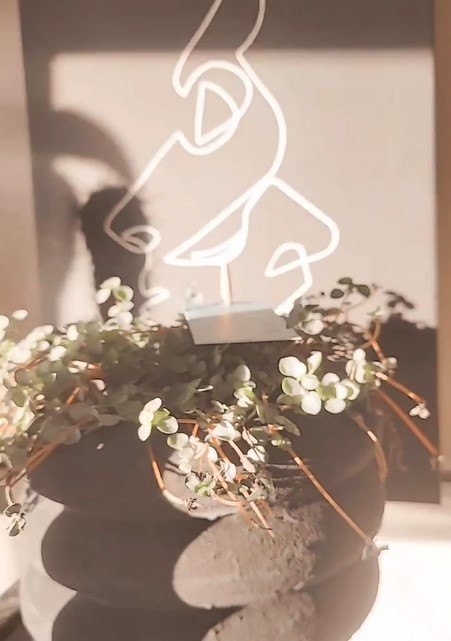
If you're using artificial plants, arrange them inside the planter. If using real plants, ensure the planter is lined to prevent water leakage.
Carefully place your chosen plants into the planter. Adjust the positioning until you're happy with how they look.
DIY foam planter tutorial
Step back and enjoy the visual masterpiece you've created. Let me know if you have as much fun creating this DIY foam planter as I did! Feel free to experiment with different textures, colors, and plants to suit your aesthetic preferences.
Follow @createdbyfarran on Instagram for more DIY ideas.


Frequently asked questions
Have a question about this project?