


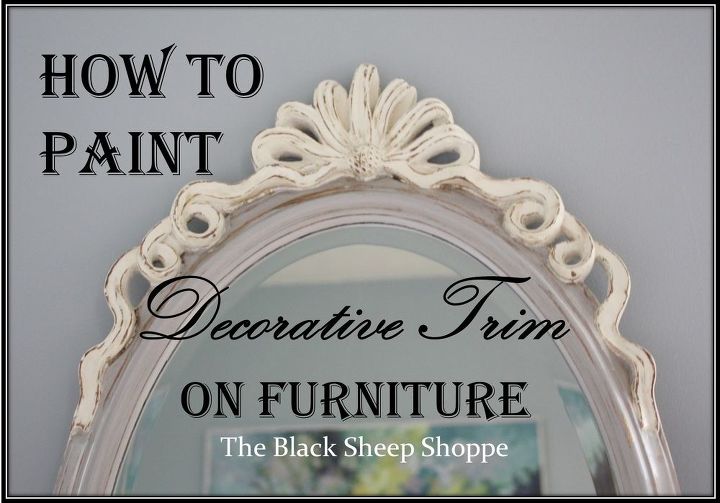
How to Paint Decorative Trim on Furniture

by
Patricia
Medium
I've had a few people ask about how I paint decorative trim on furniture. So today I'm sharing a project I recently completed of an oval mirror frame with a decorative bow. This is a summary of my recent blog post, but it should give you the information you will need. If you are interested in more details I would love to have you visit my blog (link at end of post).
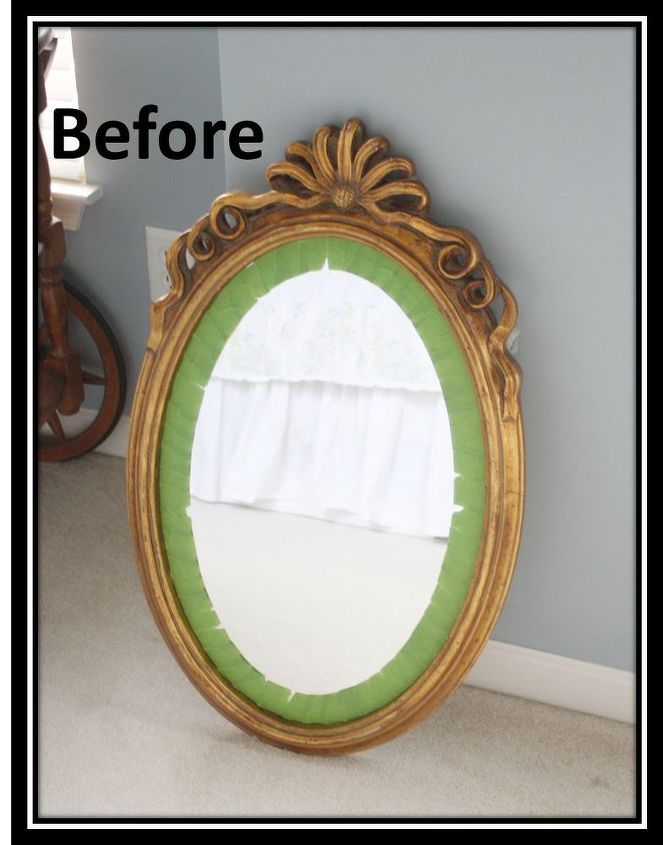
The photo below shows the "before". I already got started by taping off the mirror. You could skip this step and instead use a razor blade to scrap off any paint that gets on the mirror; however, I find that step too messy. I timed myself and it took less than 3 minutes to tape it off.
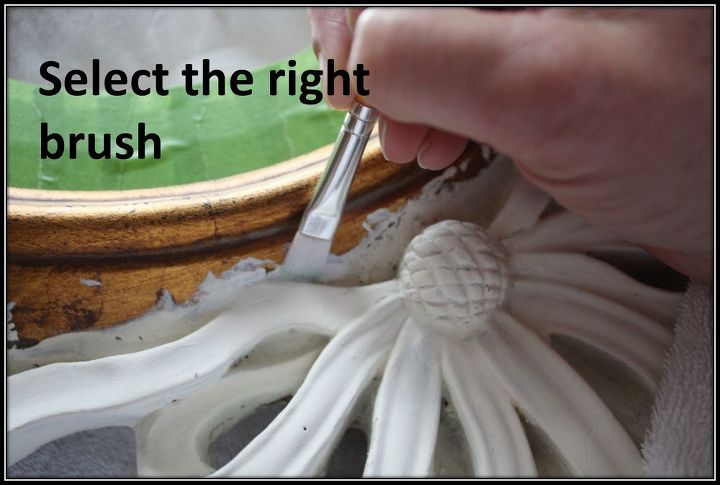
Each project can present it's own challenges, so it is important to first evaluate the project and come up with a game plan. I use a dry paint brushes (no paint) and determine which brushes to use and also decide whether to paint the base or the trim first.
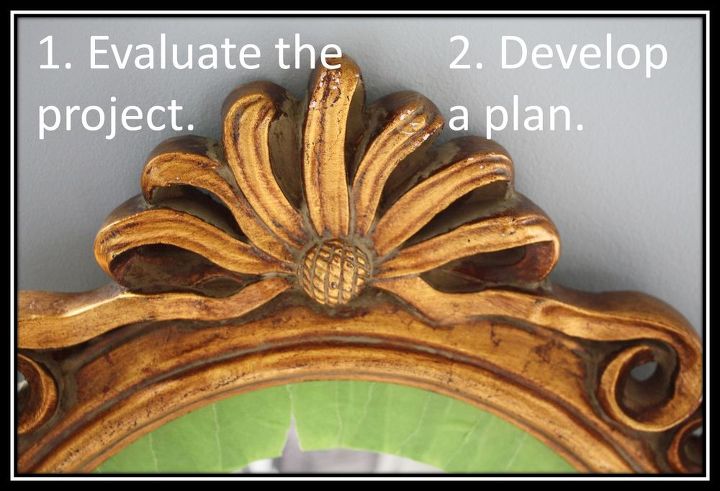
The surface on both the bow and frame were slightly bumpy and there were some sharp angles where the bow met the frame. So for this project I determined that painting the trim first would be the best approach. While painting the bow I allowed a small area of paint to overlap onto the frame. After the white paint was completely dry I once again "dry brushed" to select the best brushes for applying the second color.
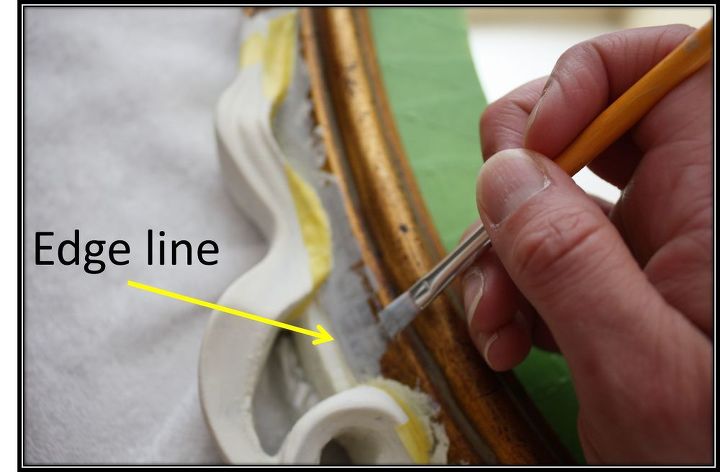
Next I loaded my brush with a small amount of paint. I placed the brush just below the edge line. Then I pushed it carefully forward to the edge line and then brushed backwards away from the edge line. Finally I went back and smoothed out any of the paint lines. Of course the easiest way to get a crisp line is to use tape. But due to the curves and angles this was not possible for the entire project. Also as I mentioned the surface wasn't smooth, so that could lead to paint seeping under the tape. For areas with tape there was a little more room for error, but to avoid paint bleeding under the tape I continued in a careful manner.
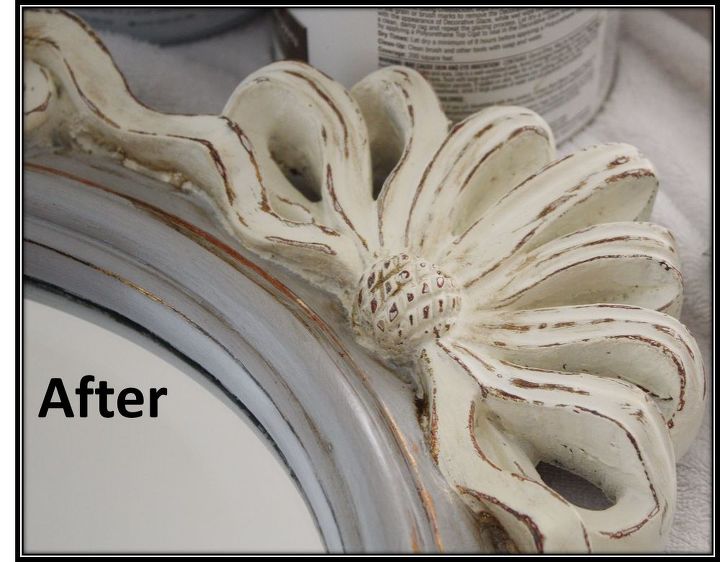
Here is a close up of the "after". Once the paint was dried I lightly distressed the bow and frame and then applied soft wax and small amounts of dark glaze.
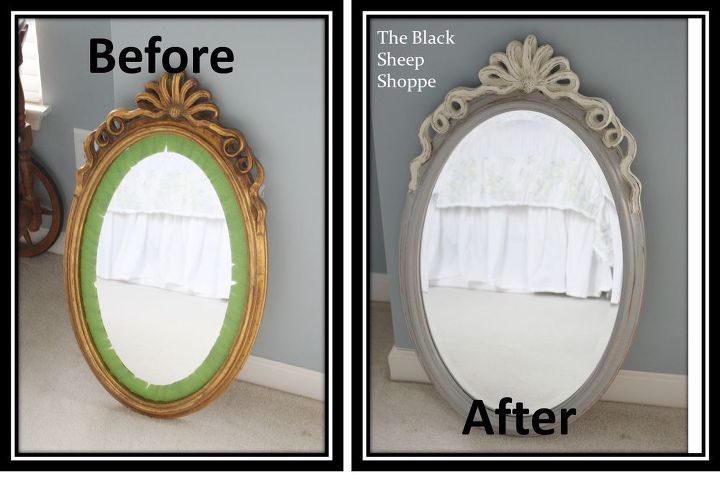
Here is a side-by-side of the before and after.
I hope you found this information helpful. Don't be afraid to experiment and practice. I find that my skills improve with each project and yours will, too!
Want more details about this and other DIY projects? Check out my blog post!
Comments
Join the conversation
4 comments
-
Gorgeous after! <3
-
Lovely! I have a 100+ Year old mirror that blends into the wall. The frame is 3-dimensionally carved wood and painted a soft gold and silver and black. It looks And is Antiqued! The colors Have always been muted and dul. I’ve only damp cleaned it. Suggestions?


Frequently asked questions
Have a question about this project?
Do you need to sand the frame a little before you put th chalk paint on? I have a piece of framed artwork and I don’t like the gold frame. I believe it is a plastic frame. I want the gold to be more of a brown stain look.