


Make Your Own Full Size Leaning Mirror the Affordable Way!

by
Golden Poise
5 Materials
$42
12 Hours
Easy
I have been looking to buy a full size mirror for my room for such a long time. However, every time I find the one that I am exited about, the price and I don't seem to agree with each other
 So as a Do It Yourself person I decided to make one for myself with a fraction of the store price. Here is how I did it... No power tools necessary, if you can glue then you CAN do this DIY! see it for yourself...
So as a Do It Yourself person I decided to make one for myself with a fraction of the store price. Here is how I did it... No power tools necessary, if you can glue then you CAN do this DIY! see it for yourself...Materials You will need
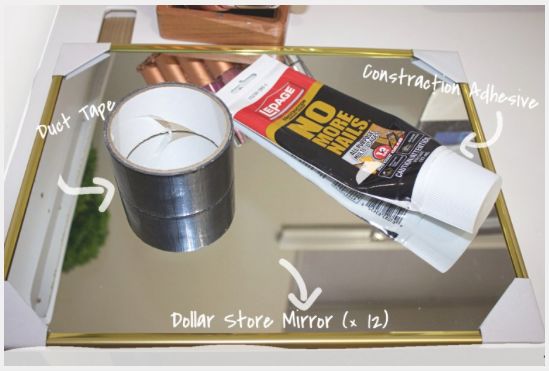
Here is what you need
Measurements to note:
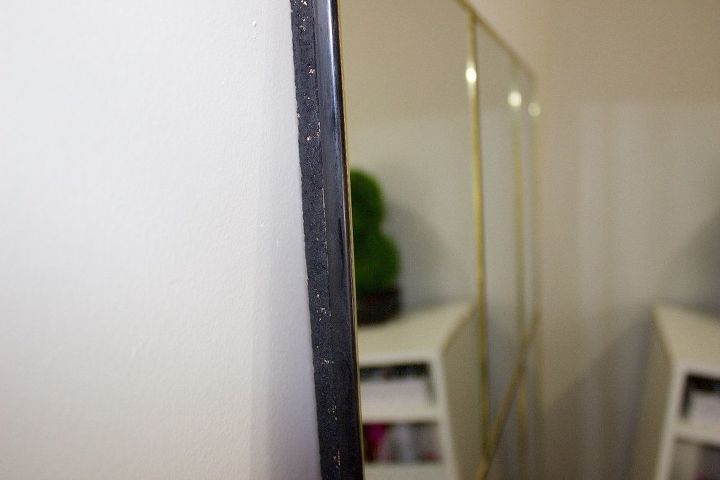
- The 12 mirrors that I got from Dollar Tree are 14" by 11" . 14 Inches length wise and almost 11 inches wide. Also make sure to get the same colour trim mirrors. I will tell you why in a bit...
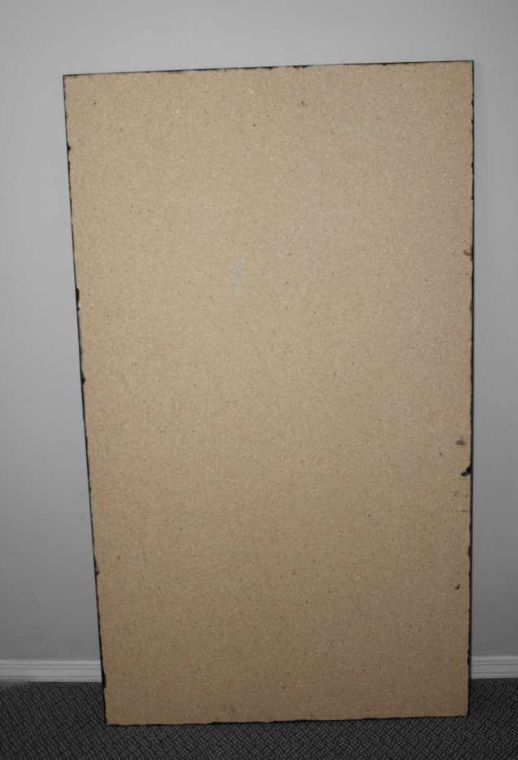
- The wood panel used, I got it cut to the size that I wanted at Home Depot which is 56" Length by 32.5" Width by 0.5 thickness.
Tip: Buying larger size wood panel and getting it cut will save you a whole lot of money VS buying already cut once. You can also use the left over wood for another project, which is what I tend to do.
{
"id": "4015172",
"alt": "Here is a Video Tutorial",
"title": "Here is a Video Tutorial",
"video_link": "https://www.youtube.com/embed/G9ZO-JH957Y",
"youtube_video_id": "G9ZO-JH957Y"
}
{
"width": 634,
"height": 357,
"showRelated": true
}
If you learn better by seeing, here is a video tutorial; but I will also list a step by Step tutorial for those that prefer this methood. It is easy to follow anyway, so lets get a crack at it shall we ...
...
...STEP 1:
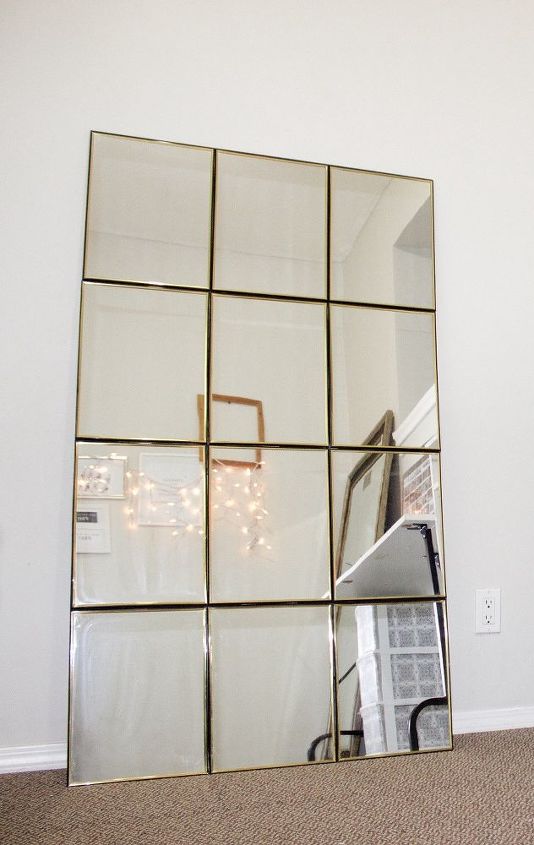
- Take the 12 Dollar Tree mirrors and lay the front of the mirrors to the ground, the back side facing you. Put 4 rows of 3 of the mirrors side by side and that will add up to a total of 12 mirrors.
Make sure the edges of the mirrors are the same colour. In this case I have all gold with black edge mirrors. It is for a simple reason of making it look as a unit and well put together.
STEP 2:
- Take the black duct tape and tape the back of the mirrors length and width wise just at where each of them meet, to keep them in place and to make it easier for the next step.
I used black duct tape just to cover up any cracks that may be showing in between the mirrors afterwards. Trust me it came in handy in the end
STEP 3:
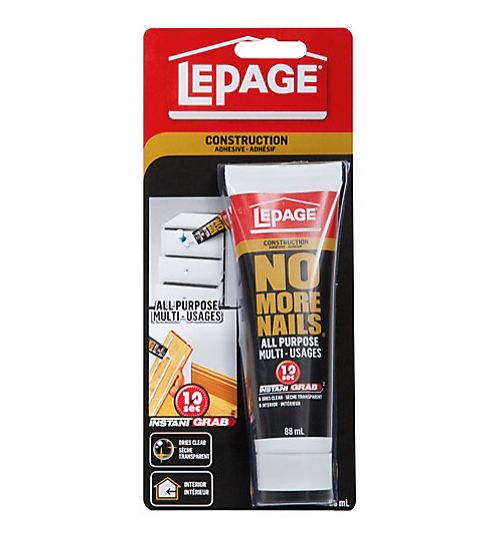
- Use "Lepage No more Nails" Construction adhesive and apply it on the back of the mirror and on the wood panel if needed.
STEP 4:
- Attach one side of the hardboard wood to the back of the mirrors. Since they are attached with the duct tape earlier, it should be easy to place it on top without the mirrors moving.
STEP 5:
- Use the acrylic paint to paint the side of the wood to match the mirror. You can use dishwashing sponge or cotton ball to apply the paint.
LAST STEP:
- Let your brand new body length mirror dry completely over night or as needed before making it stand up right. Add extra weight (i.e books) on it for the adhesive to stick even better as it dries.
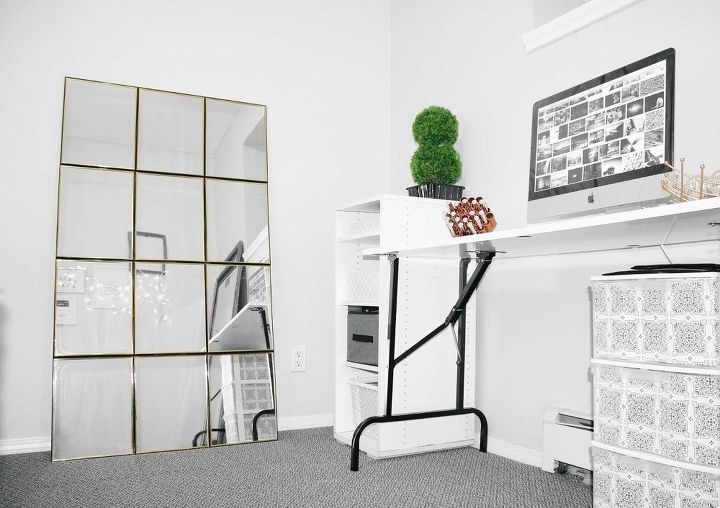
Once your done it will look like this! Now you can take as many outfit pictures of yourself and improve your home decor look at the same time!
In case you are wondering, after I made this diy, a friend of a friend was moving out and gave me their full size mirror that you see on the other side of the room. So now I am blessed with two, but they say a girl can never have too many mirrors right...
- If you are interested in more easy DIY projects, come check out my YouTube Channel https://www.youtube.com/watch?v=z6p2uiFYiIc
- My Blog site : http://thewaysabastyles.com/category/diy/
Thank you so much for checking out this post! I appreciate you!
Comments
Join the conversation
2 of 25 comments
-
Beautiful, that gives me an idea for my wall.
-
Thank you I am glad it does!


Frequently asked questions
Have a question about this project?
Did you know that you can order Dollar Tree items on-line? I ordered the mirrors with gold frames and plan to do this project.
Have there been any issues over time with the mirrors falling off?
I tried this mines didn’t stick it’s been drying for 3 days now I use heavy duty liquid nails and no more nails . What do u suggest