


DIY Rustic Pumpkin Stand

Here’s the amazing thing about this post.
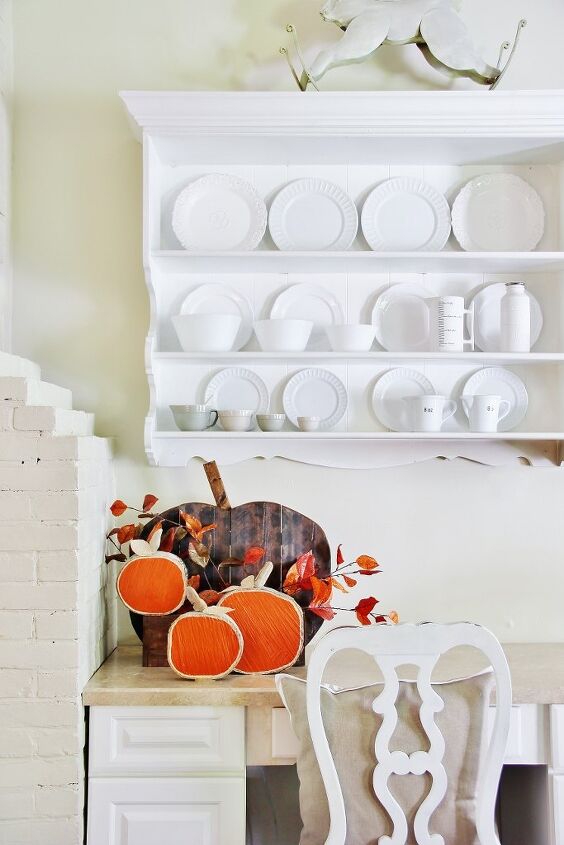
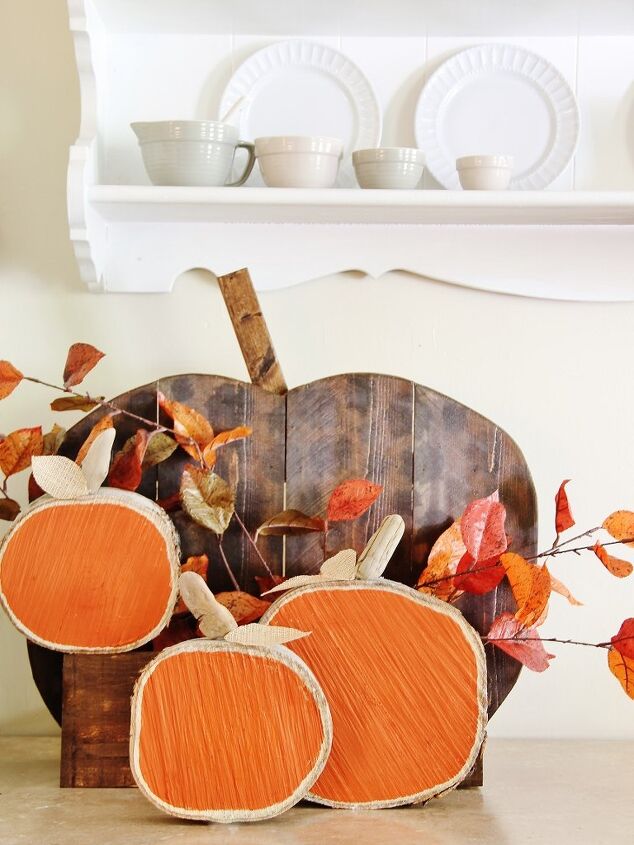
See that rustic pumpkin stand perched over there on the edge of the counter?
It’s calling your name.
I’m going to show you step-by-step how we built ours.
So easy and perfect for fall.
I know….right?
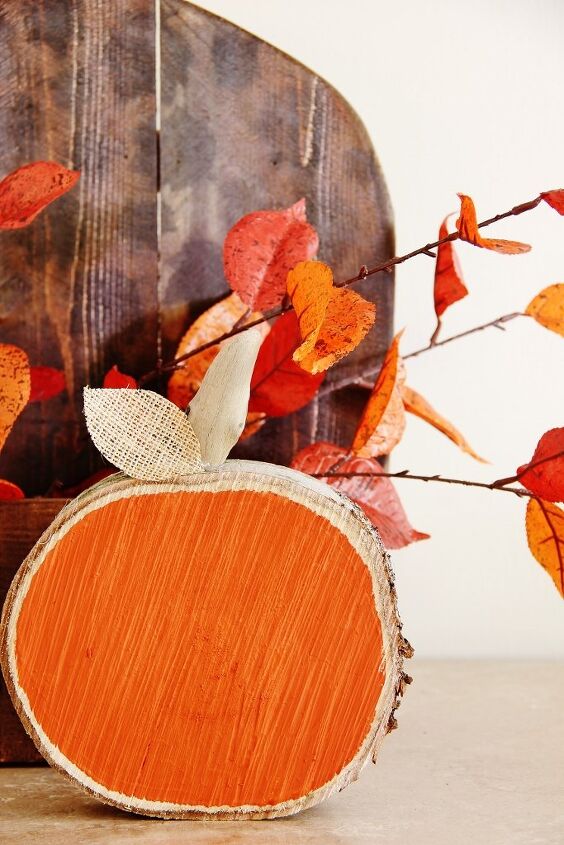
I decorated mine with a few leaves and these wood slice pumpkins.
Ready to embark on your pumpkin-making journey?
Let’s get started.
DIY Rustic Pumpkin Stand
MATERIALS
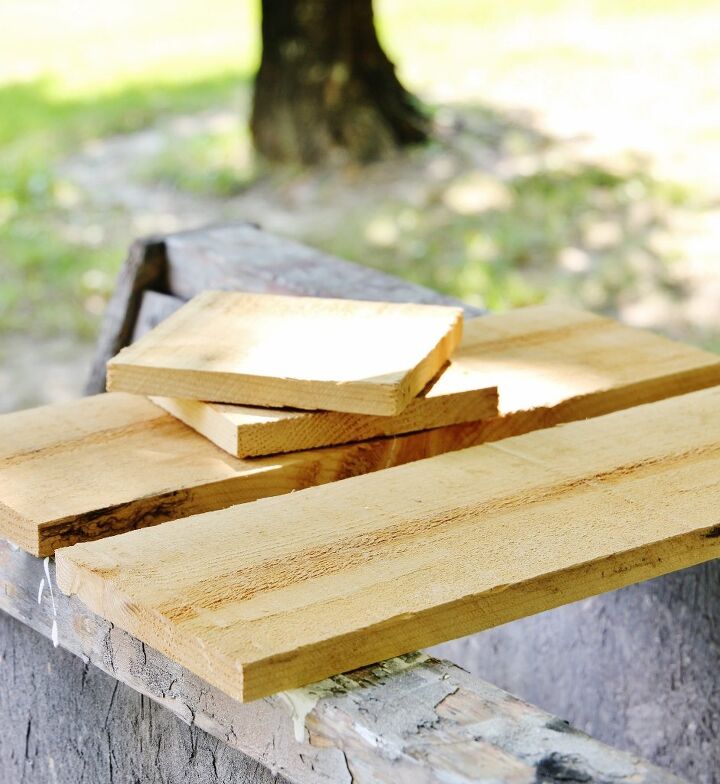
• 2 – 72″ x 5-1/2″ Cedar fence pickets, square-edged preferred
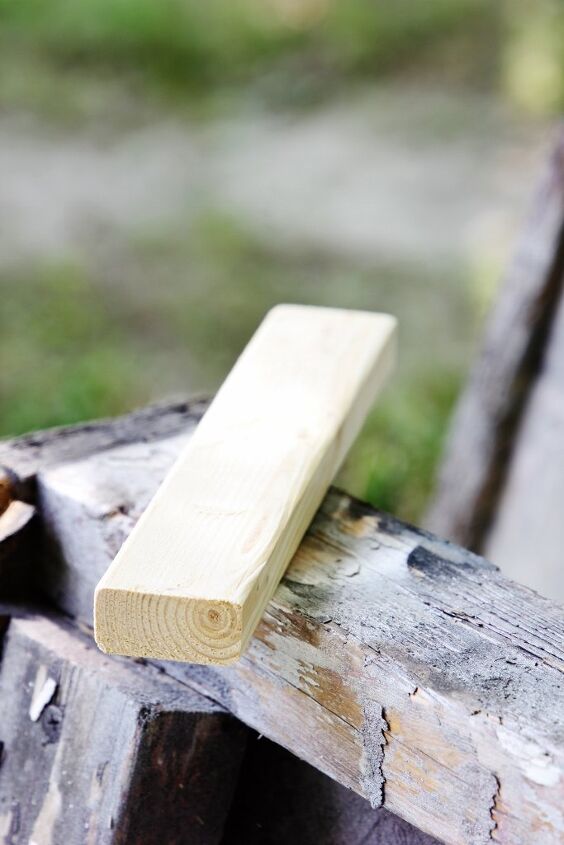
• 1 – 1×2 x 4 feet long (can cut an 8 foot long 1×2 in half for use
on two projects)
• 1″ staples
• Exterior wood glue
TOOLS
• Measuring tape
• Circular saw or miter saw
• Jigs saw
• Ryobi Airstrike Crown Stapler
• Clamps
• Solid work surface
• Carpenter’s pencil
PUMPKIN
• 4 – Cedar fence pickets cut into 18″ long pieces (length
can be flexible to accommodate all four cuts on a single
cedar fence picket)
• 2 – 1×2 @ 20″ long
• 1 – 1×2 @ 8″ long (length can be flexible to use up
scrap wood)
FRONT BOX
• 1 – Cedar fence picket @17″ long
• 2 – Cedar fence pickets @ 5-1/2″ long
• 1 – Cedar fence picket @ 16″ long
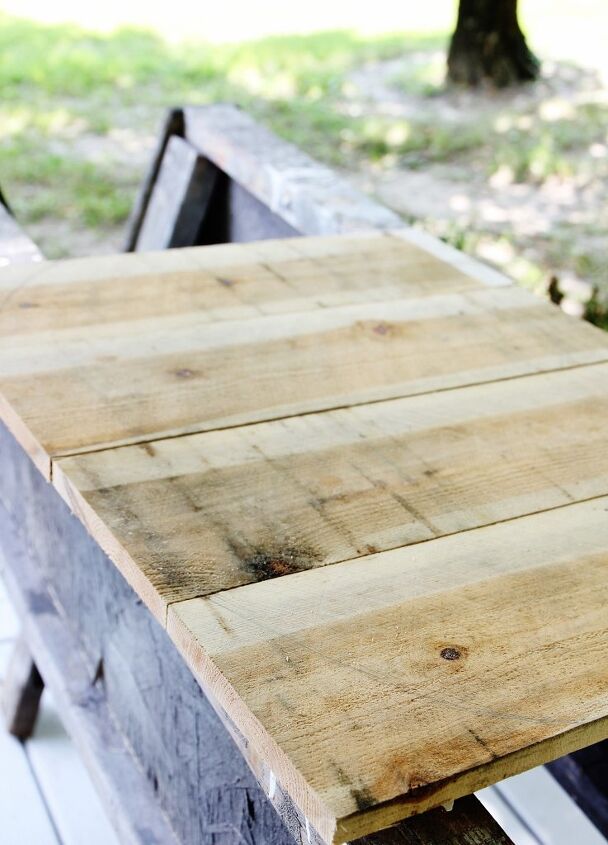
Step 1: Cut all of your boards according to the cut list. For the pieces on the pumpkin, there is flexibility to cut slightly shorter to accommodate all of the pieces per given materials list. For the box pieces, it is important to cut straight and accurate to the cut list. The easiest saw to cut these pieces with is a miter saw, but a circular saw can be used as well.

Step 2: Lay the four fence pickets on the work surface, so overall width is about 23″. Place 20″ long 1x2s on top, with about 1-1/2″ gap on either end. TIP: Use the stem (stem is 1-1/2″ in width) as a guide. Use wood glue and two 1″staples per overlap of 1×2 and each cedar fence picket to secure 1x2s to the fence pickets. Flip the project over. Add additional two staples per overlap of fence picket and 1×2 to secure fence pickets from front to 1×2 supports. Do not staple within 1″ of the edges, as there is no 1×2 backing here.
TIP: Use the step piece as a guide.
Step 3: Starting 3″ out at the bottom edges, draw a pumpkin shape on the front of the cedar boards. Avoid drawing so that the 1×2 supports will be crossed. Keep the shape organic and unique. Pumpkins generally are “bottom heavy” so consider a smaller rounding on the bottom and larger rounding on top. Position project so area to be cut out overhangs work surface to allow jigsaw blade to cut freely. Secure the project to the work surface with two clamps. Test to make sure project is secure. Cut out following pumpkin shape with jigsaw. Remove clamps and reposition and re-clamp to cut full pumpkin shape out.
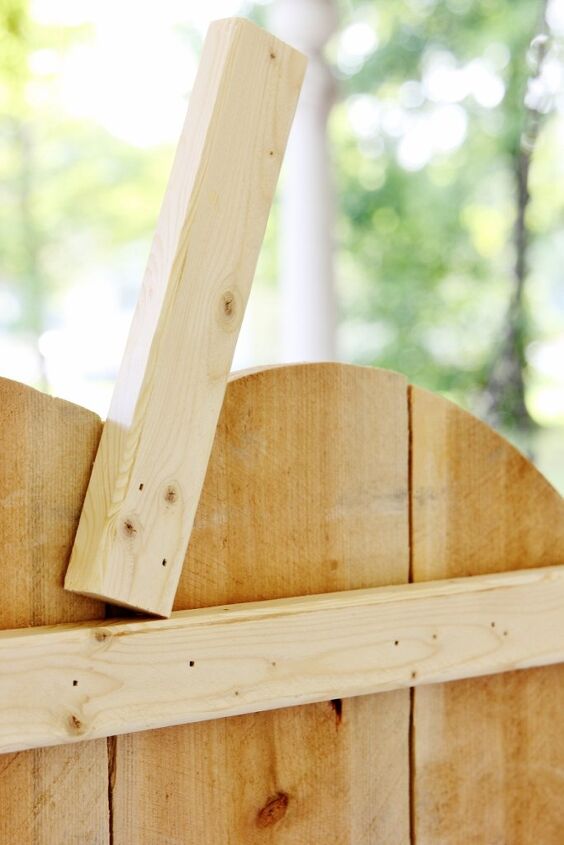
Step 4: Place stem in center of pumpkin and attach with glue and 2″ staples.
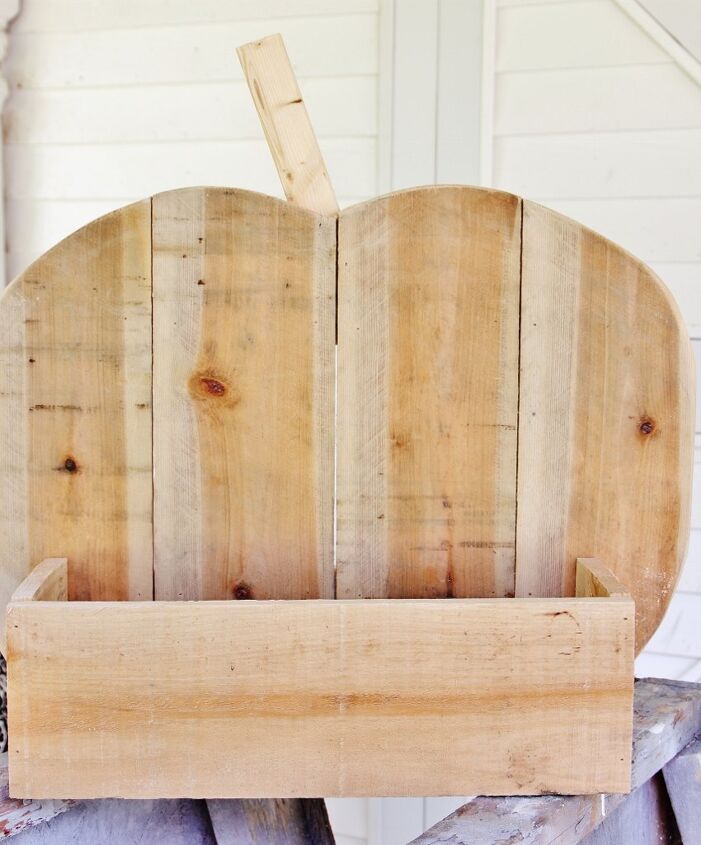
Step 5: Use glue and 1″ staples to attach the front of the box to the sides of the box. Apply glue along three edges of the bottom of the box. Place the bottom of box inside front and sides. Staple in place alongside and front edges with 1″ staples.
Step 6: Place box open side up on work surface. Apply glue along top edges. Place pumpkin on top, aligning bottom edge, and the start of the pumpkin-shaped cut with the outside corners of the box. Use 1″ staples to secure the bottom of the pumpkin to the bottom of the box. Use a straight edge to guide you when stapling the pumpkin to the sides of the box.
Resources for this project:
See all materials


Comments
Join the conversation
-
Attractive. What is it about fall that inspires us to make beautiful fall elements out of rustic items reimagined, many of which are found objects. Nice job
-
Love it!


Frequently asked questions
Have a question about this project?