


DIY Warty Pumpkins

Warty pumpkins and gourds are so cool. Right? Something about the texture and the imperfections that make them desirable to buy. But... they can be expensive. A lot more expensive than a regular old pumpkin. So, I did some experimenting with a few different techniques and came up a with a really easy and fun way to make your own warty pumpkins. The kids can help too... they will love it. For detailed instructions check out my blog post here: https://www.prettypurpledoor.com/diy-warty-pumpkin-tutorial/
Ready? Let's do this!
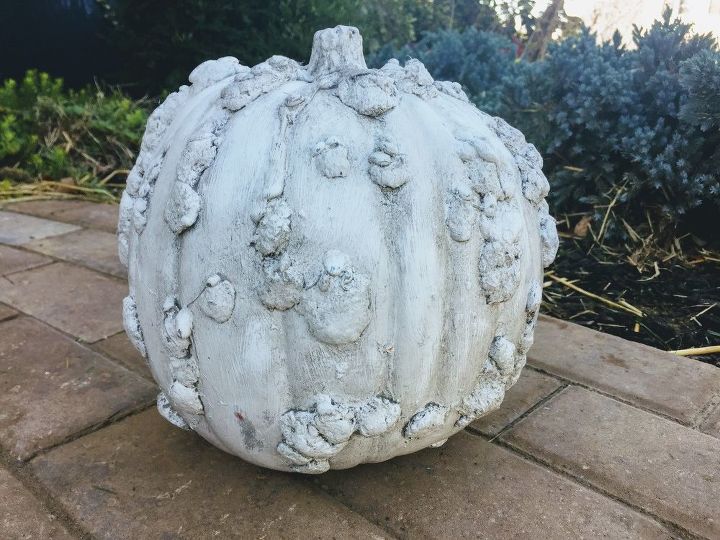
Today I'm going to show you how to make this super cool and warty pumpkin with just a few supplies!
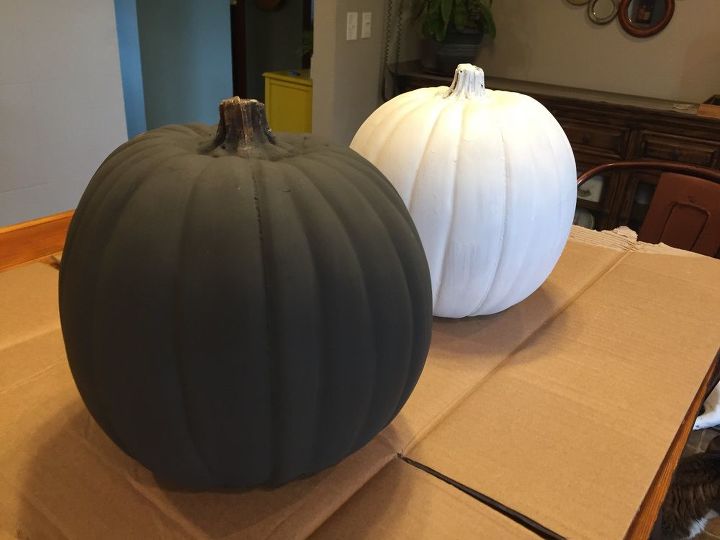
First, you need to paint your pumpkin the color you want it to be when it’s finished. It will be easier if you paint it now so that you don’t have to get into all the nooks and crannies later when you add the warts to it. Let the paint dry completely. If you want the pumpkin to be orange, you can probably skip this step.
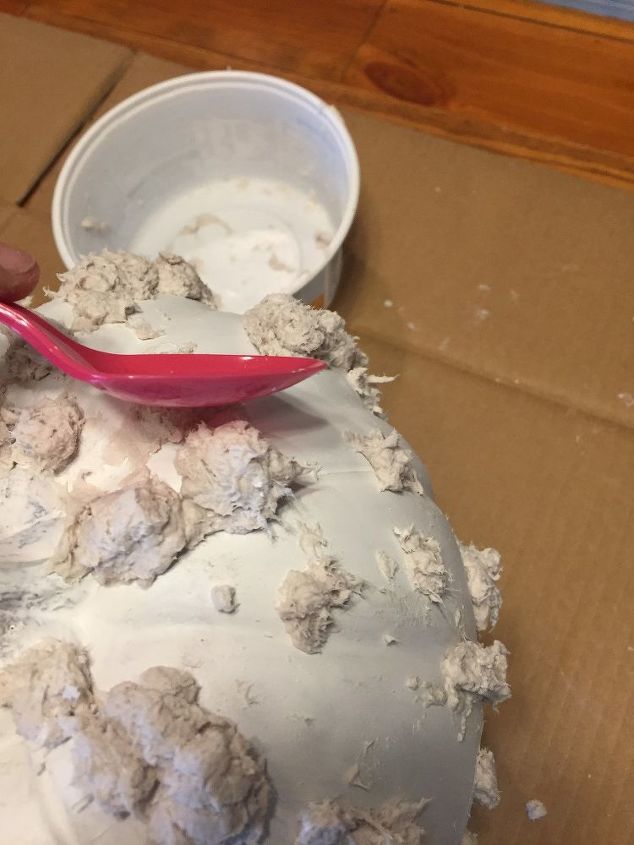
Next, you’re going to need a cool product called "Fast Mache". Which is basically paper mache that you can mold like clay. Mix up your mache and get to work. Use the “medium consistency” recipe on the box (3 parts mache to 1 part water). The first time around I added too much water and the mache was really stringy. I just rolled the mache in my hands to make balls and logs and stuck them on my pumpkin. If you have children to help you this is the time. They will love to play in this stuff and help you to roll the mache. And, it’s all paper and water so when you are done the wash-up is pretty easy. It does dry out your hands a bit though.
Once I got enough warts on my pumpkin, I started to take little pieces of the mache and plopped smaller balls/warts onto the other warts I already put on. It adds depth and makes it look more real if you do this.

Some techniques to make the warts look more real
- Plastic spoon: Use the back of a plastic spoon dipped in water to form nicer warts (lol). I used the edge of the spoon to break some of the warts into separate pieces, too.
- Damp paper towel: Take a damp paper towel and press on all the warts to make sure they will stick. This also helps to make them smoother and less stringy/wild.
- Back of pencil: Another technique you can try is using the back of a pencil wrapped in a damp paper towel to make some divets and depressions in the warts.
Let the mache dry completely. This depends on your water/mache mix. It may be a few hours or even a day or two.
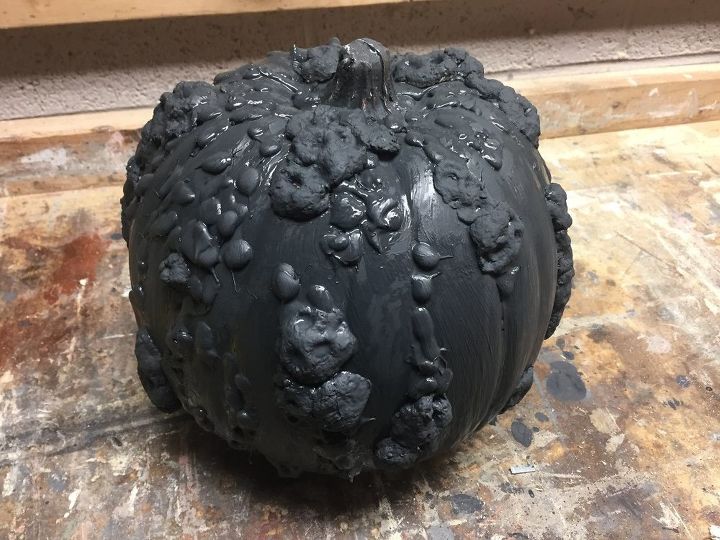
After the mache is dry, paint your warty pumpkin with the base color making sure you cover up all the mache and anything you missed the first time around.
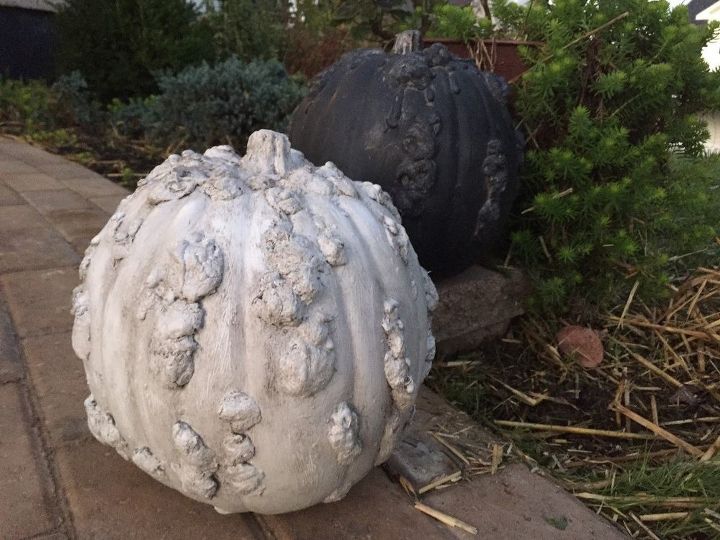
Since I used chalk paint, I applied Annie Sloan clear and black wax… and a really cool product called “Dust of Ages” by Amy Howard. I put the wax and dust of ages into all the nooks and crannies and along the edges of the warts to add more depth and dimension. This step is optional.
If you don’t use chalk paint or want to use what you have on hand, you can also mix up a slightly darker color of paint and add it to the nooks and crannies of your pumpkin and warts. You can also get creative and paint your warts all different colors!
Comments
Join the conversation
-
What a cool idea! Love this


Frequently asked questions
Have a question about this project?