


Easy Fall Twine Pumpkins
I have been going through my fall bins and realized I could use a couple more fall things to fill in some gaps in my decor. Last year I made some artificial (and real) marbled pumpkins with nail polish. Check them out HERE. I wanted something just as simple to make so I decided to make fall twine pumpkins.
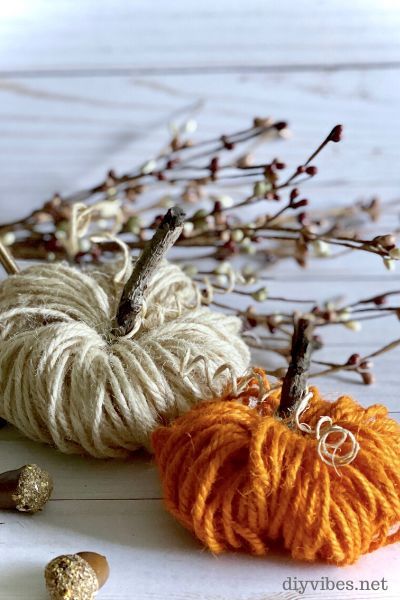
I have seen a couple different ways of making DIY twine pumpkins online, but I found what I think is the easiest way to make them. I also came up with the idea to dye my twine to get a beautiful orange that would be the perfect pop of color for my fall decor.
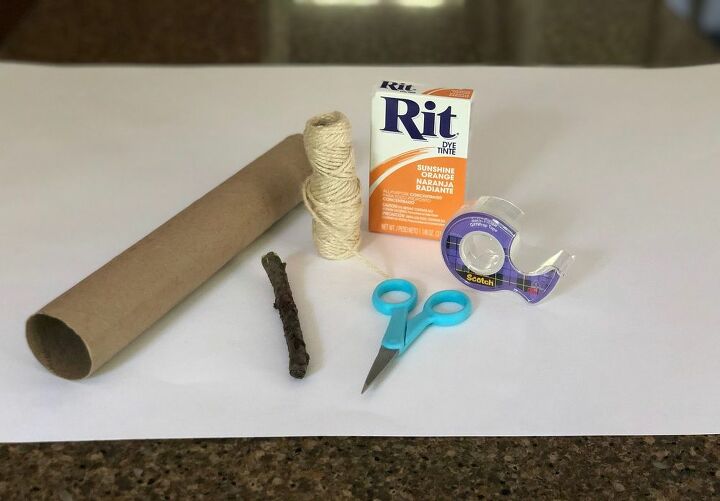
Here is what you'll need:
-Paper towel roll
-twine
-scissors
-tape
-sticks from your yard
--If you want to make an orange pumpkin–Orange Rit
--For the "vine"-a pencil and glue (not pictured)
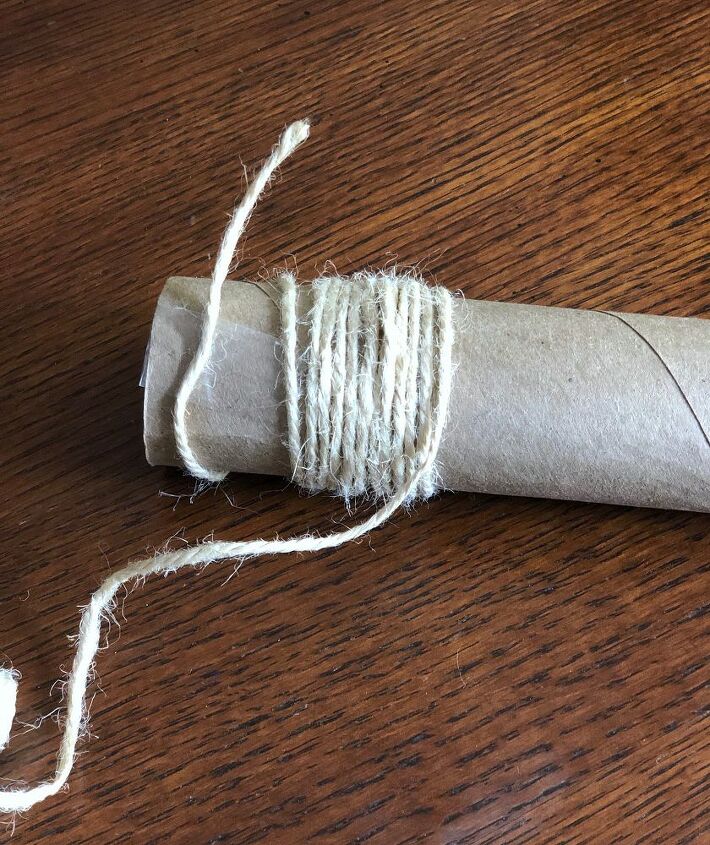
To make your fall twine pumpkins, take a paper towel roll and tape one end of twine to the end of the roll. Next, start wrapping the twine around the roll–securely but not too tight (you want to be able to slide it off the roll easily). I wound mine about ten times and then I bunched it together and kept repeating that pattern until I got near the end of the roll.
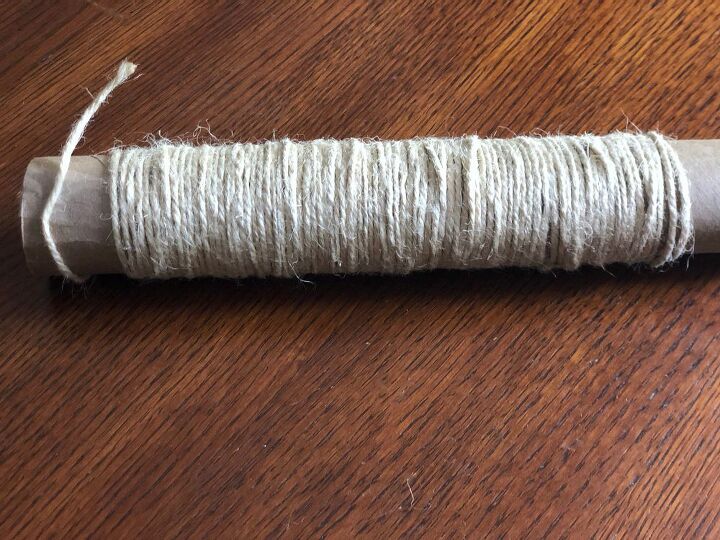
Here is what it’ll look like.
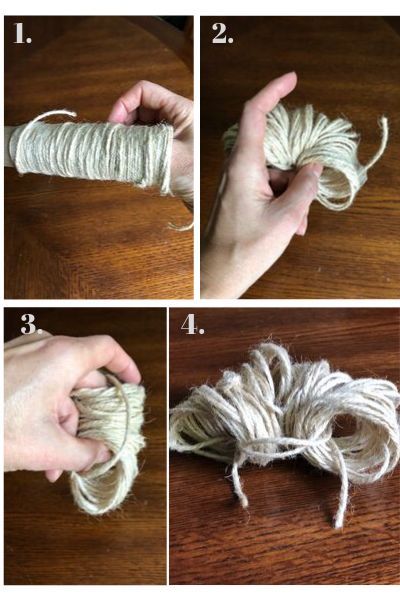
- Stick your thumb into the center of the paper towel roll and start to slide the twine towards your hand (Figure 1). Use your middle finger to catch the other end so you are holding it between your middle finger and thumb. (Figure 2). If you found you wound it too tight around the paper towel roll (this MAY have happened to me, hee hee), put the roll in between your knees to get some resistance.
- With your free hand, take one loose end of the twine and feed it through the hole of the opposite end (Figure 3) until it pokes through, then do the same with the other loose end–feeding it through its opposite end (Figure 4).
- Pull securely to make a knot from the ends, but don’t over tighten, you need room for your stick to fit down the middle of the circle you are making.
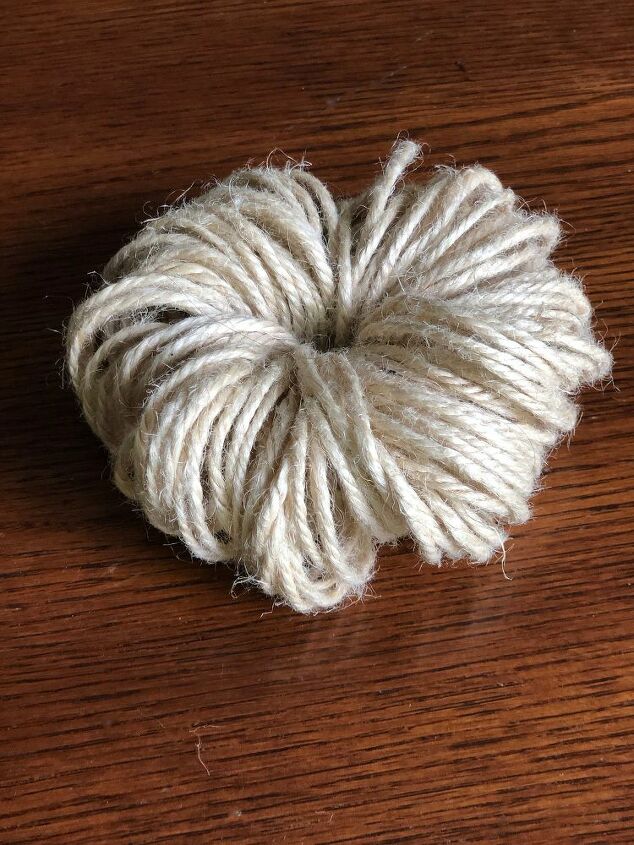
Fluff out the twine so it takes shape of a circle with no gaps.
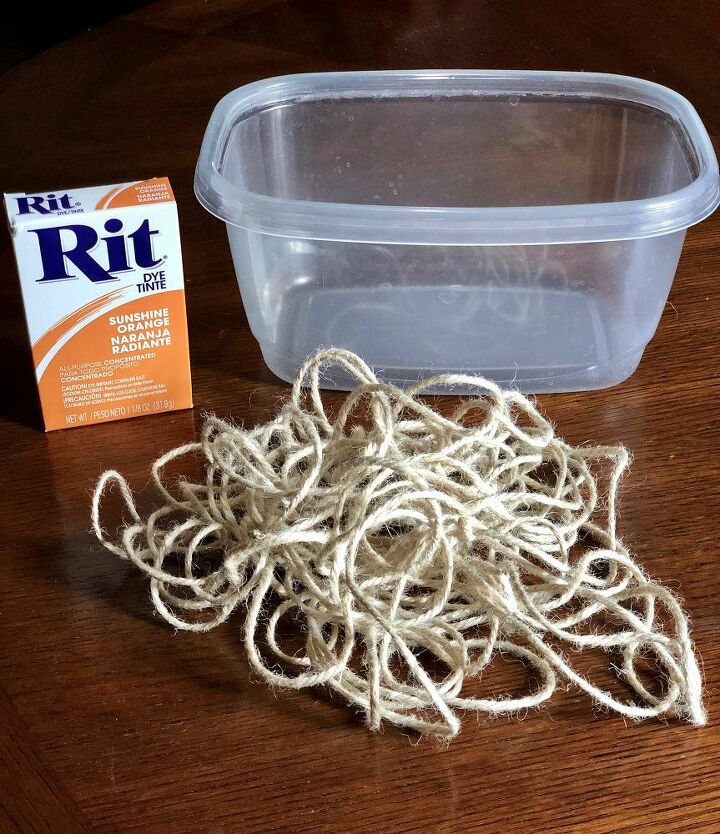
For my orange pumpkin, I had to dye my twine. I mixed a tablespoon of orange Rit dye (or try another color!) and 4-5 cups of water in a disposable container. I cut about 50-60 feet of twine and soaked it in there for about 5 minutes. I used rubber gloves and took the twine out and gave it a squeeze.
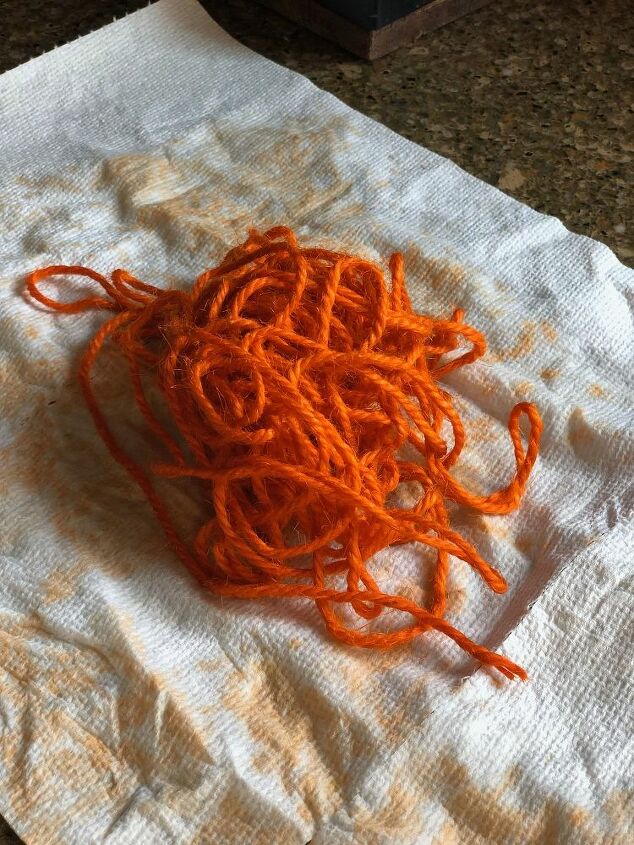
I LOVE how the color turned out! I wrapped the twine in a paper towel and gave another squeeze to get all the water out and let it completely dry. Then I used the same technique as above. I also made a pumpkin out of black twine I bought at Michaels.
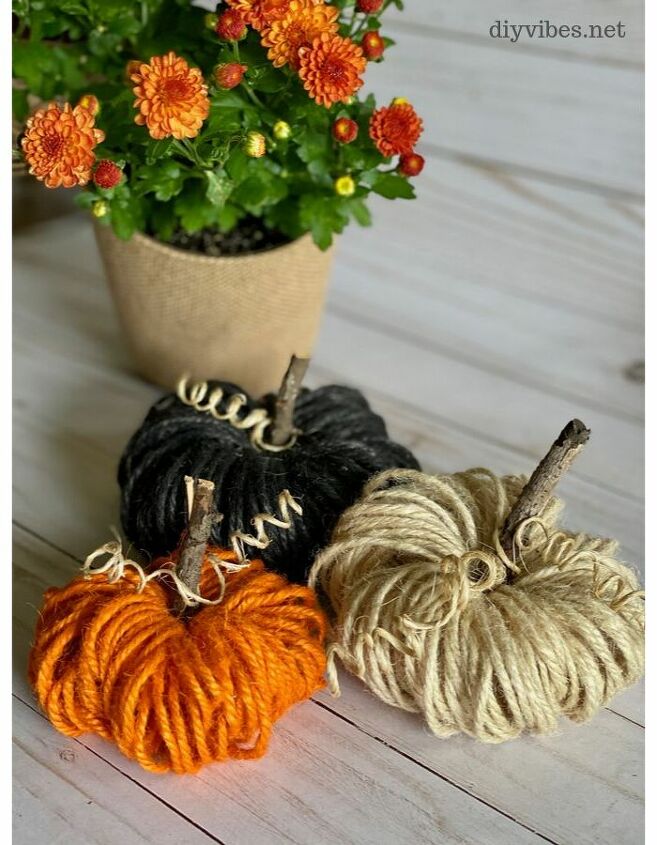
Lastly, I added the sticks to the middle of the pumpkins and added my curly “vines”. Here are my DIY fall twine pumpkins in all three colors. If you need more fall inspiration check out my DIY Fall Wood Bead Garland .
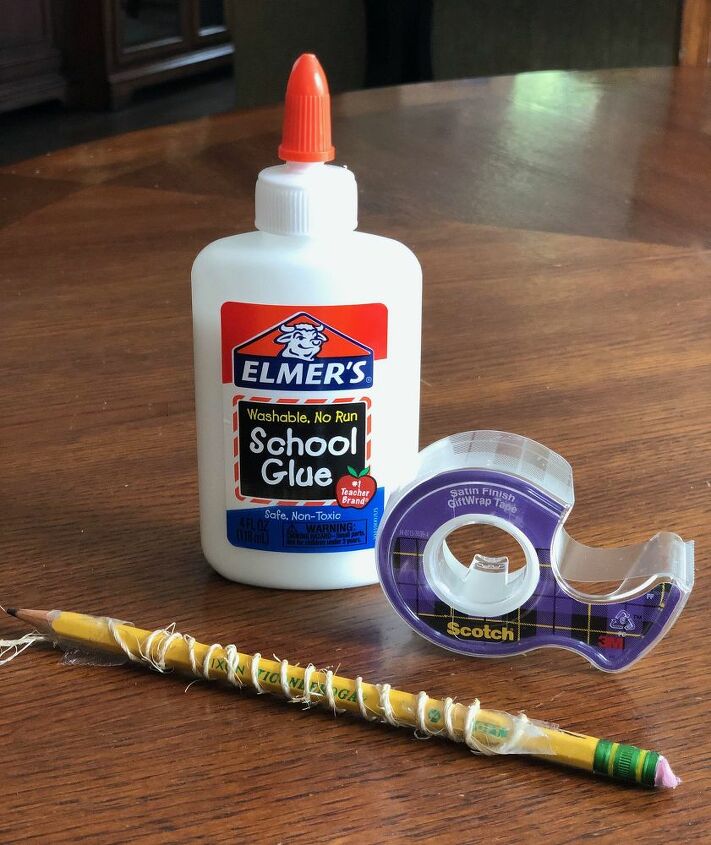
For the spirals, I put glue on my finger and thumb, then grabbed a piece of twine, about a foot long, and smeared the glue down the whole piece. I taped one end of the twine onto a pencil and wrapped it down the whole pencil, then taped the bottom end. I let it dry completely, slid it off the pencil and cut to size.


Frequently asked questions
Have a question about this project?