DIY Burlap Banner - Easy & Affordable | Dollar Store DIY

by
Jill's Creative Lifestyle
(IC: vlogger)
6 Materials
$7
30 Minutes
Easy
Simple steps to creating an affordable and versatile burlap banner - good for any occasion! All product purchased at the dollar store!
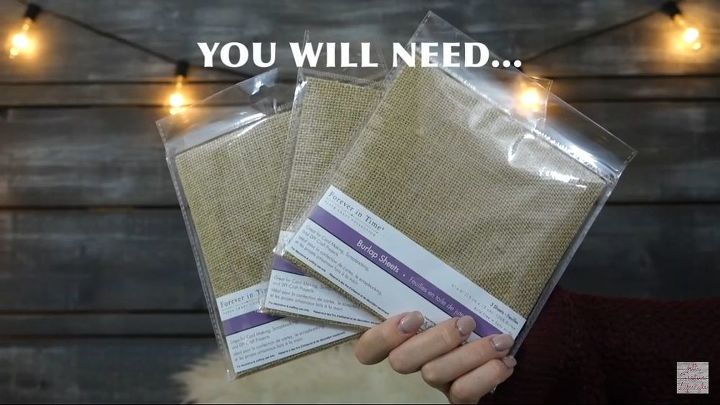
You will need 8 sheets of burlap for this project. I purchased mine from the Dollar Tree. They are sold in packs of 3.
Cut your burlap into even triangles. You can free hand or use a guide.
You will want 8 triangles for the "Hand Made" banner.
Using white acrylic paint you can free hand each letter or use a stencil of your choosing. One letter to each triangle.
When paint is dry you then want to hot glue the back of each triangle along the top.
Lay the twine in the hot glue immediately after applying it. Be careful - it's hot.
Make sure you have 2 strands of twine - one for "HAND" and one for "MADE".
****make sure to glue the letters in the right order so when you flip the banner around it's not spelt backwards****
That is it for this DIY - remember you can use many different sentiments, colours, designs and themes for this project so it is great for any occasion.
{
"id": "3908116",
"alt": "",
"title": "",
"video_link": "https://www.youtube.com/embed/NRcOsUMsOj4",
"youtube_video_id": "NRcOsUMsOj4"
}
{
"width": 634,
"height": 357,
"showRelated": true
}
Enjoyed the project?
Suggested materials:
- Burlap Sheets (Dollar Tree)
- Scissors
- Hot Glue Gun
- Twine (Dollar Tree)
- White Acrylic Paint (Dollar Tree)
- Paint Brush
Published June 22nd, 2017 3:37 PM
Comments
Join the conversation
2 of 15 comments










Frequently asked questions
Have a question about this project?
I have tried many Dollar Tree Stores to find these do you know if the still carry them?