


DIY Faux Crock - Trash to Treasure

I just LOVE upcycling thrift store finds. This metal vessel from a discarded ice cream maker is the perfect shape for a DIY faux crock vase. Trash to Treasure. Let's transform it into something useful and beautiful!
I just love turning something that has no perceived value into something super special. The rusted metal canister will serve as a beautiful vase with just a few simple steps.
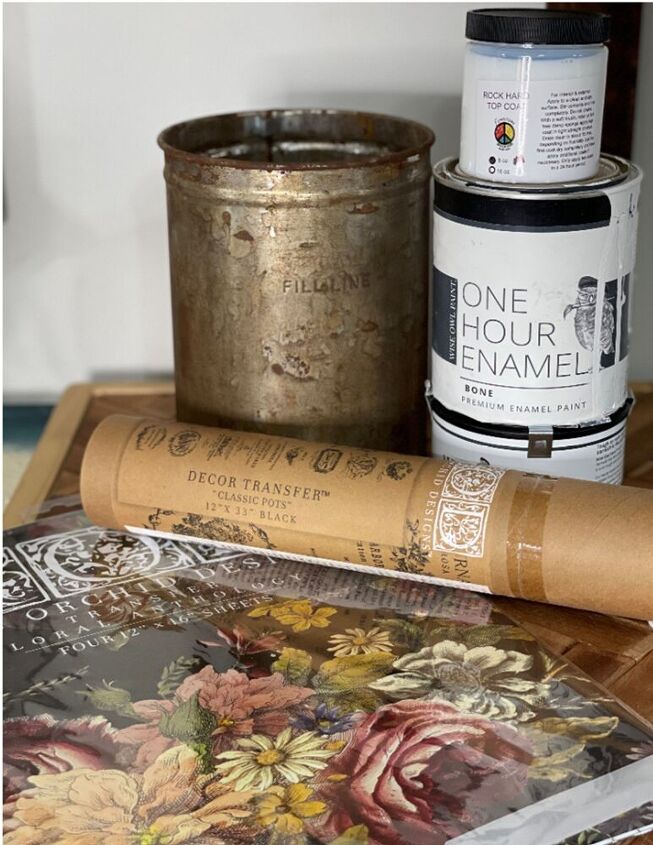
Gather your supplies:
- Any metal vessel. I’m using the inside of an old ice cream maker, but you can substitute any old can or bucket.
- Wise Owl's Stain Blocking Primer
- Wise Owl’s One Hour Enamel Paint in Bone
- Funkiture DIY Rock Hard Topcoat
- Iron Orchid Design Classic Pots Transfer
- Iron Orchid Design Floral Anthology Transfer
- Wise Owl 1.5” Micro Angled Brush
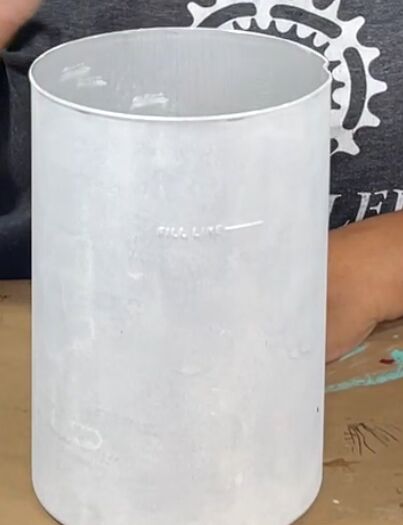
Step One
To ensure a smooth finish, roll your primer on using a sponge roller. If you use a brush you risk adding texture to your primer coat. This texture will show through your paint finish. A foam roller ensures a nice smooth foundation for your finish. The primer will ensure that your paint adheres well to the metal.
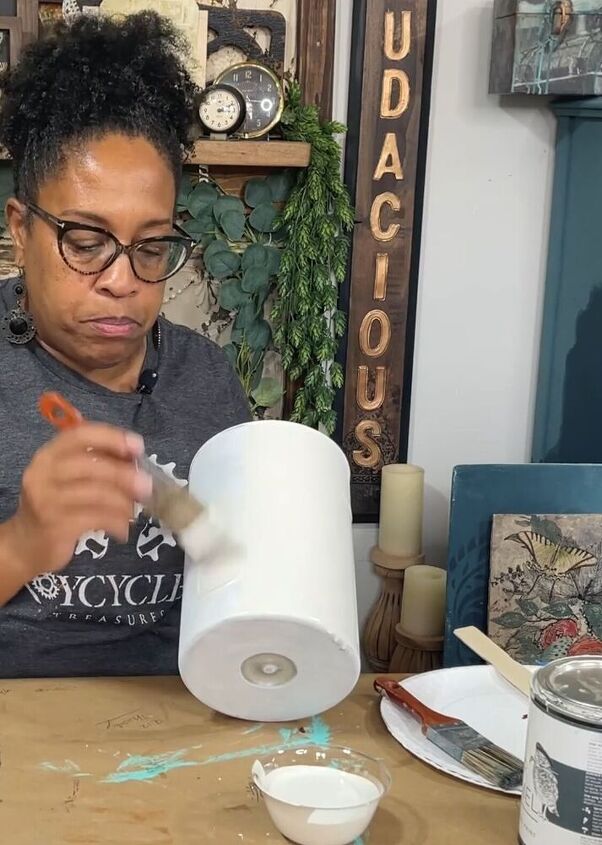
Step 2
Once your coat of primer dries, you can move on to paint. Wise Owl’s One Hour Enamel Paint is a specialized paint product. It is self-leveling and dries to a ceramic-like finish. This finish is perfect for replicating old ceramic crocks. The Wise Owl One Hour Enamel is thinner and moves quickly. The consistency helps the paint move and self-level. Start painting on the bottom of our vessel, and pull it up to the top. Be sure and keep an eye out for any drips, and smooth them out with your brush immediately. This paint was made to move, and boy does it. Repeat this step all the way around the vessel until it is covered completely. Allow your first coat to dry completely, about 45 minutes to an hour, and then add your second coat. You may find that you have to use a little more paint on your brush for the second coat. You want the paint to glide on smoothly. If your brush begins to drag or snag, just put more paint on your brush.
I also paint about three inches inside the rim to ensure the metal doesn’t peak out from my arrangement.
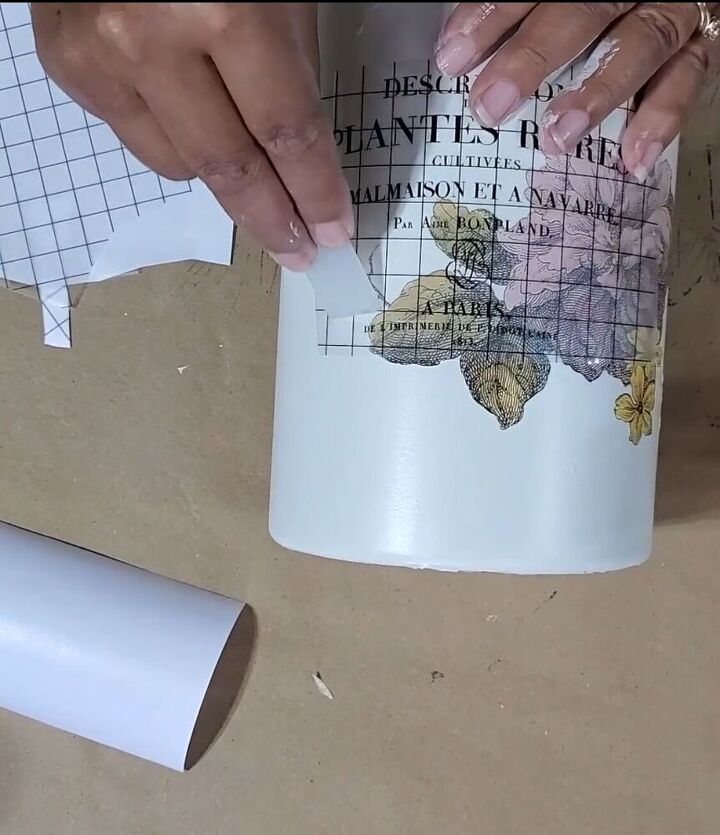
Step Three
After your second layer of paint has dried completely, you can adhere your transfer. Always wait until your surface is completely dry before applying transfers. Moisture can inhibit the transfer's ability to adhere properly. Iron Orchid Design transfers come with two sheets. One holds the transfer, and the other protects the adhesive on the transfers. Be sure and keep your sheets together until you are ready to use the transfer. Snip off the portion of the transfer you would like to use, being careful to keep the white backing paper attached. I found this beautiful blossom on the IOD Floral Anthology Transfer. This small bit was left over from another project. For the typography, I used IOD’s Classic Pots Transfer. Using the brayer included with the transfers, I rubbed each of them onto the vessel. Once the transfer is released, I use the clear paper to lightly rub the transfer. This helps ensure good contact between the can’s surface, and the transfer. This easy step helps ensure good adhesion.
Step four
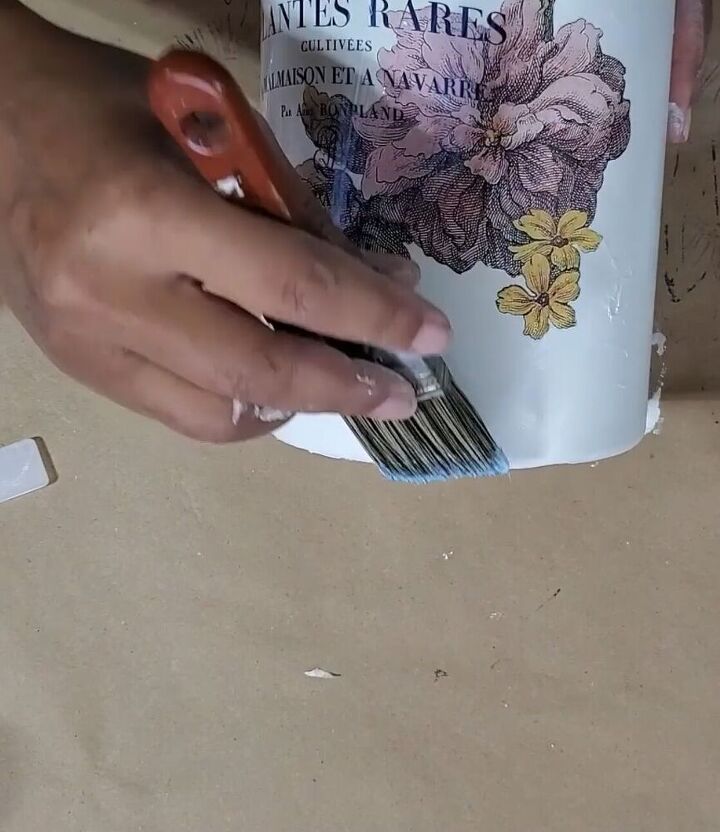
I’m using Funkiture DIY’s Rock-Hard Top Coat to seal this piece. It is a marine-grade sealer that will ensure a lasting finish. Even if someone uses water and real flowers in this vase. Apply the sealer using your paintbrush. Use even strokes applying a thin consistent layer over the entire can.
Step Five
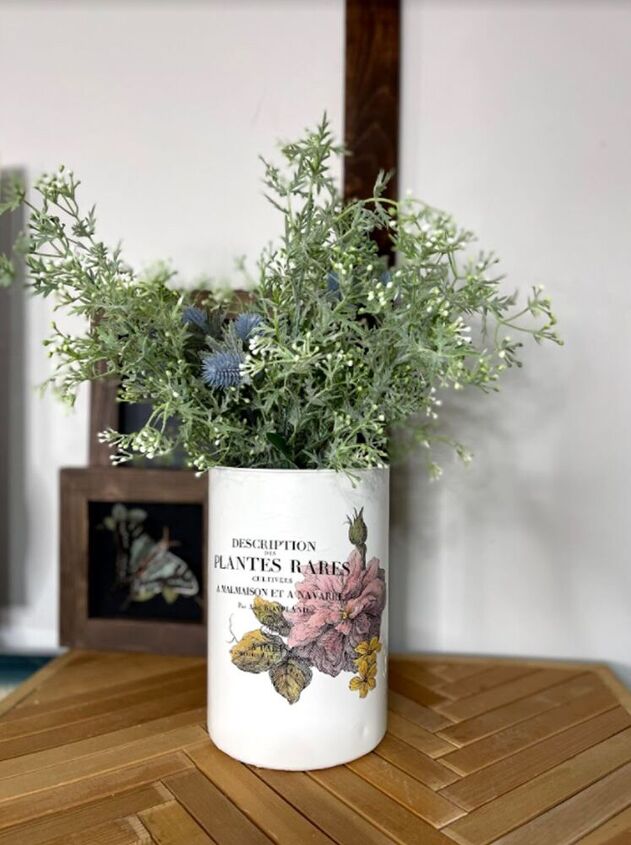
Fill your can or vessel with a beautiful floral arrangement and enjoy. No one will ever know you upcycled a thrift store find. 


Frequently asked questions
Have a question about this project?