


DIY Hydro Dipping Concrete Planters
DIY hydro dipping concrete planters is a great way to decorate your planters- and AMAZINGLY fun!
Have you heard about this DIY hydro dipping trend? It’s actually very inexpensive and amazingly simple to do.
This neat water immersion technique is a trend that allows for endless creativity.
I had first seen someone dip a guitar into resin using this same hydro dipping technique.
I didn’t know at the time that this hydro dipping technique could be done using acrylic paint. And now, I’m loving using this water immersion technique.
You can actually hydro dip anything! If it will take paint, it can be hydro dipped. Have fun!
DIY Hydro Dip Tutorial Video!
Materials Note:
For this project you will need to use a fully cured and dry concrete or cement planter. Remember that even though the piece has cured, it still retains some moisture.
My concrete planters were all made from Cement All which I had demolded the day before.
Waiting a day is safe if you use Cement All since it cures so quickly that the moisture will have dissipated by the following day.
If there is still moisture retained, even though the piece is cured, then you may experience peeling of the hydro dipped finish.
For concrete mixes that don’t cure quickly, I recommend waiting 3 days.
That gold spray paint I used, worked amazingly well for this. Somehow it’s just the right material to sit nicely on the water.
**For other great concrete and cement tutorials, check out my Concrete & Cement Crafts projects. 😉
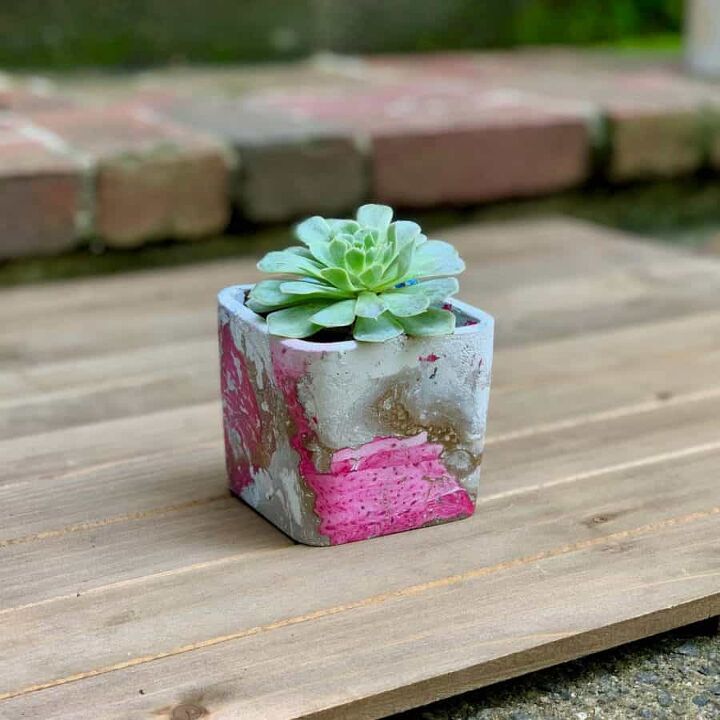
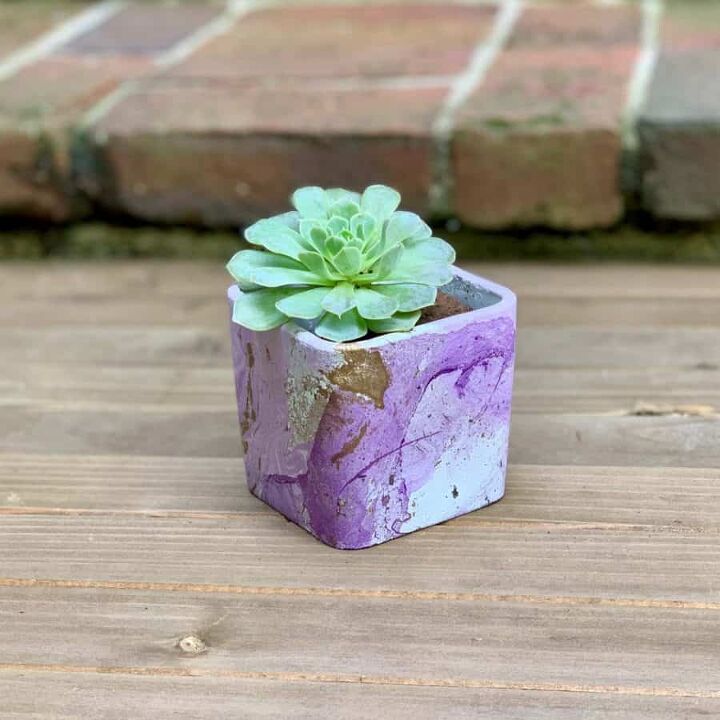
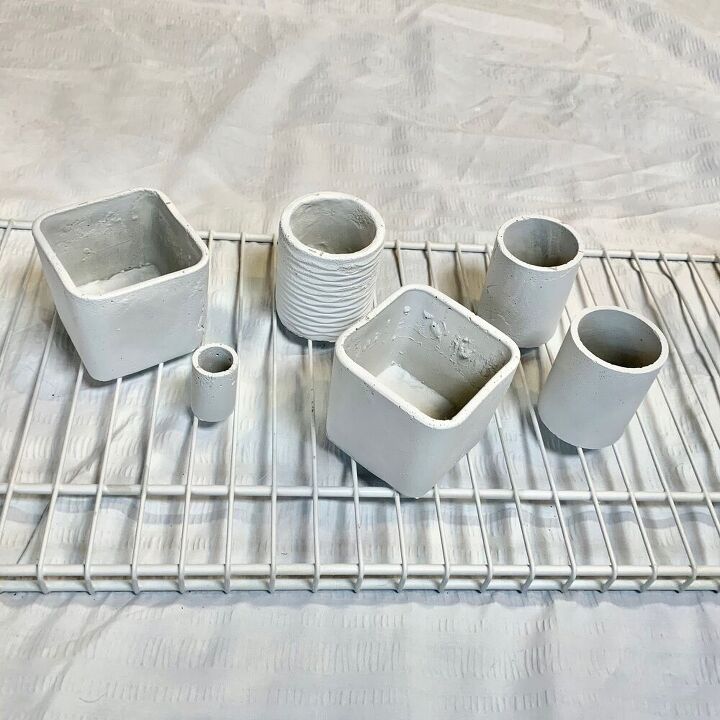
APPLY A BASE COAT TO THE RAW CONCRETE
Decide if you want a base coat, or if you want to keep the base the natural color of the concrete.
What this means is that any spot on your planter that isn’t touched by paint, will be raw.
You may prefer the look of the off-white cement or grey concrete next to the swirl of colors, but if not, then spray it white.
The only planter I didn’t apply a base coat to was this one.
First, be certain the cement is dry to ensure the paint fully adheres to it.
Assuming you want a white base, then give the planter a quick rinse and then wipe it down with a dry cloth.
Now spray paint a nice even base coat with a flat white.
Technically this will be dry to the touch in 20 minutes, but I recommend waiting at least an hour before moving to the hydro dip phase.
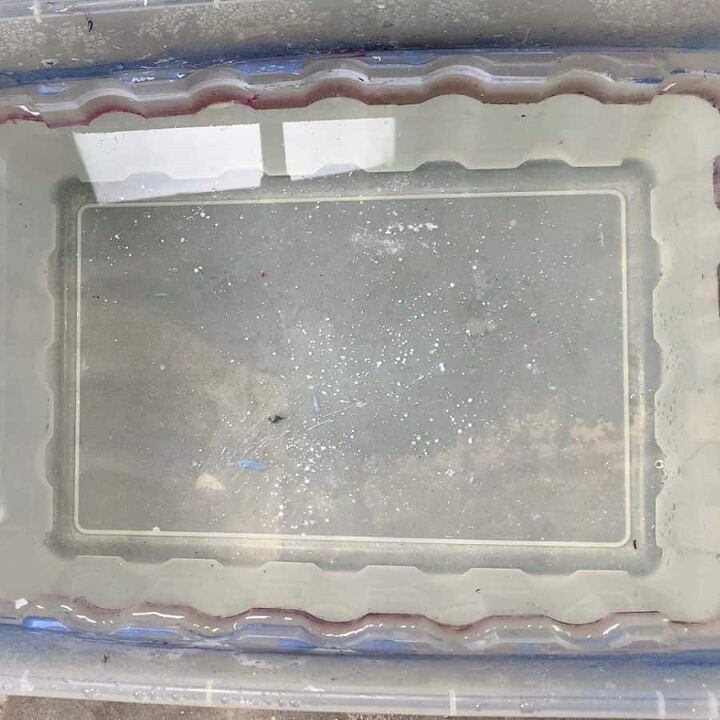
FILL THE BIN
Take a garden hose and fill the bin with water.
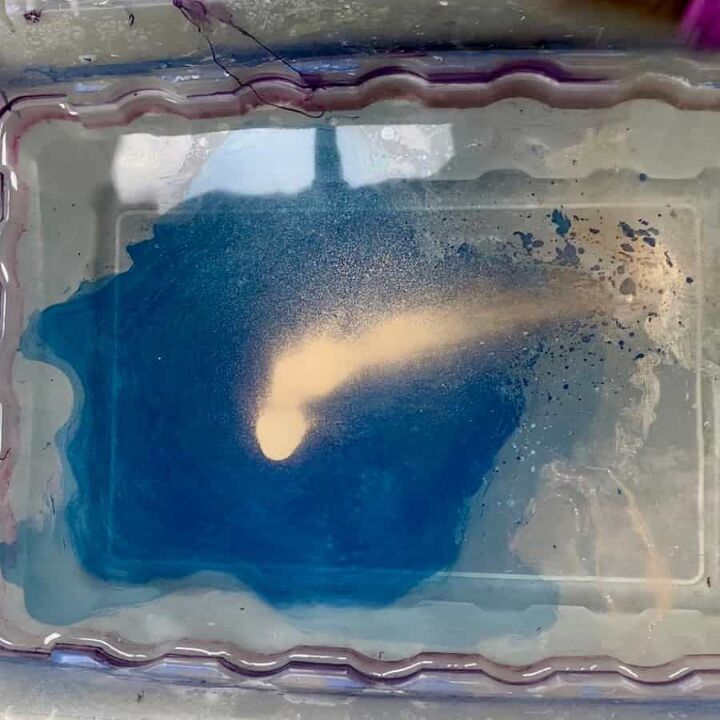
APPLY THE SPRAY PAINT TO THE WATER
Start spraying, but do it slowly. You can spray a color and then another color insides, or next to each other.
If you spray a color inside of another, you will end up with a little more swirl.
Please reference the different ways I did this in the video.
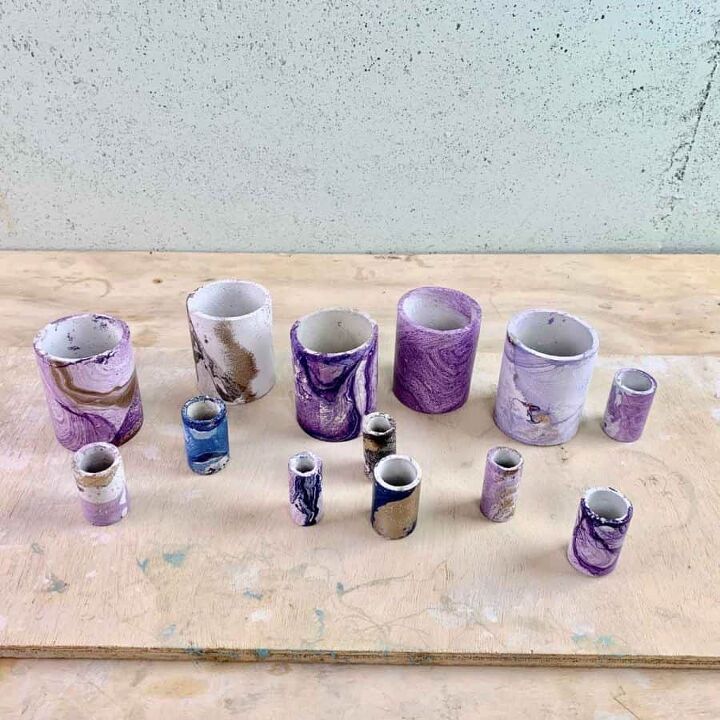
HYDRO DIP THE CONCRETE PLANTER
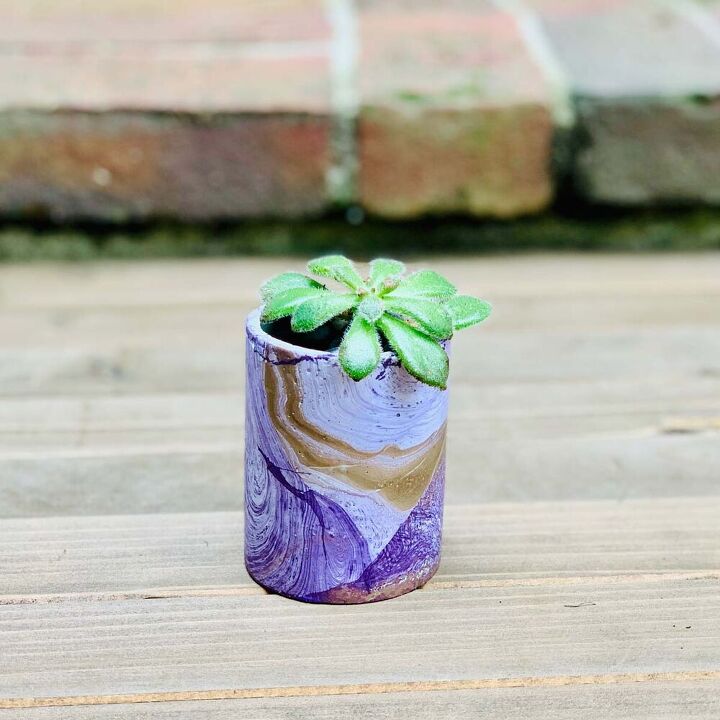
There’s lots of ways you can hydro dip concrete planters and the technique you use will affect the pattern you end up with.
You can dip this by swirling the concrete planter around on its side, or in a vertical direction so that it is facing up and down.
The angle and motion will create different patterns.
Spinning the planter while dipping will create more of a swirl, the up and down method is more of a blended look.
Straight up and down could produce vertical lines.
A good way to play with this before trying the hydro dipping on the concrete planter, is test out your technique on plastic water bottles first.
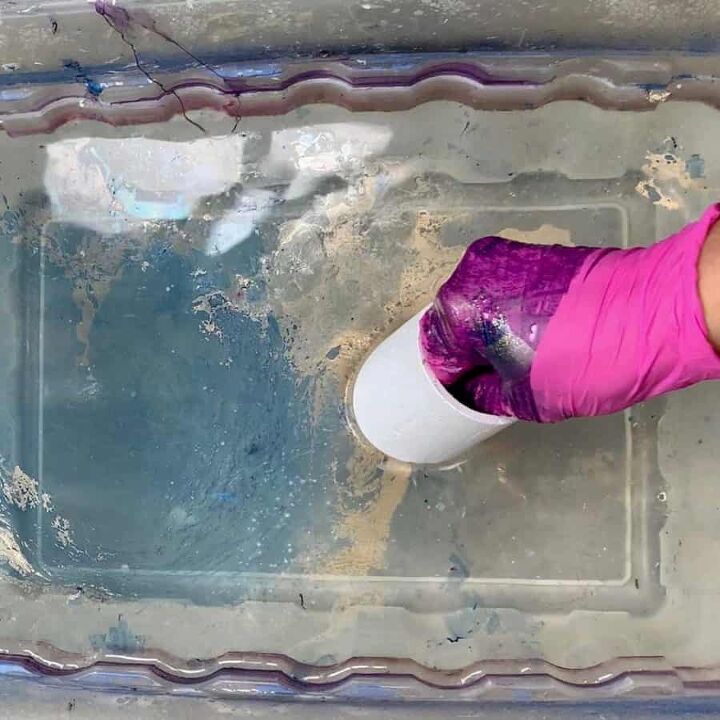
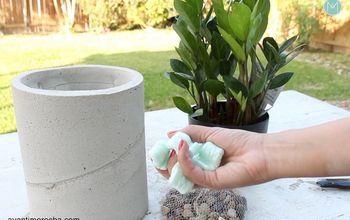
Here’s how to hydro dip the concrete planter (same as the water bottles). First, put on some gloves.
Now hold the planter firmly and if possible, hold it from inside of the planter so that your hands and fingers are out of the way.
Hint: If you are dipping more than a couple of planters, you will want to change out your water in between.
Little flecks of paint will break off and then stick to your planter when dipping.
You may also want to change out your gloves when changing the water since the paint pieces can come off of those too and contaminate the water.
Slowly dunk the panter into the water and while doing so, give it a twist. Keep twisting until the paint has been pulled onto the planter.
If you don’t want swirls, then do the same without twisting.
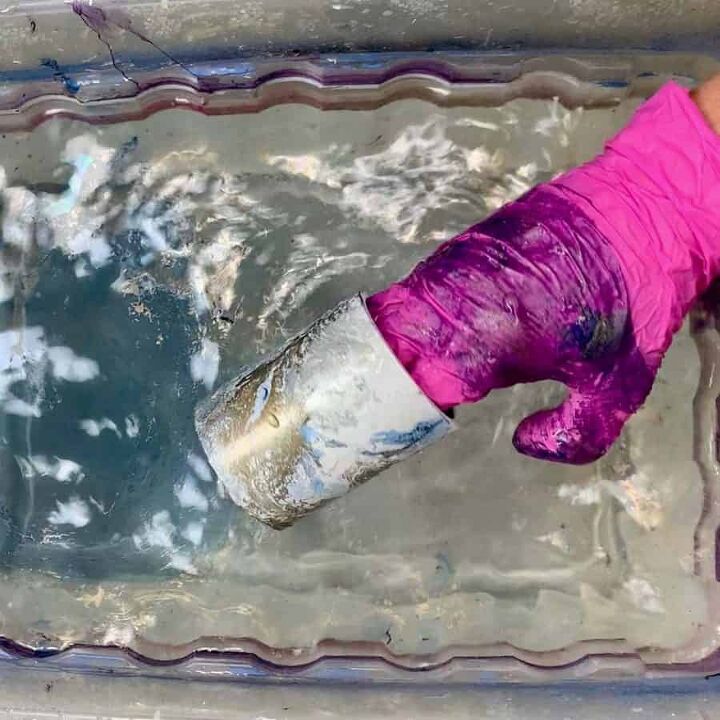
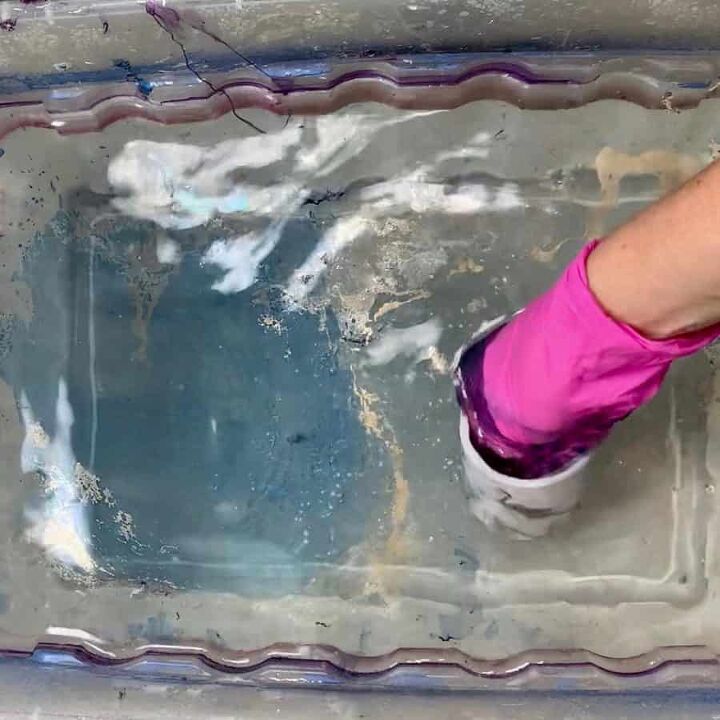
Once you’ve gotten the planter covered, continue pushing the planter downward, further under the water.
Then before pulling it back up, swish it a little so that the paint that is directly above it on the surface of the water, moves away to the sides.
You want to have clear water when you bring the concrete planter up to help avoid getting strings of paint or bits and pieces of it stuck to the planter.
FINAL STEP | SEAL THE HYDRO DIPPED PLANTERS
** For two other great marbled concrete planter tutorials, take a look at my DIY Magnetic Cement Planters.
Set the concrete planters out to dry. Once they are dry, use a foam brush to apply a coat of concrete sealer.
Resources for this project:
See all materials


Comments
Join the conversation
-
Beautiful. Now I have more craft plans for the spring!! Thank you!!!
-
Just beautiful.


Frequently asked questions
Have a question about this project?
Can you only do this on cement? I am thinking because it's porous. Can you do on plain plastic planters if you spray paint them white flat paint?