


DIY Olive Tree That Looks High-End
Learn how to make this easy DIY olive tree to look just like the real thing. And get my tips for a high-end faux look on a budget.

This post contains affiliate links. Please see my full disclosure policy for more details.
Olive trees have quickly become the “it” houseplant in home design. And since I have a well-known black thumb for killing practically every pretty green thing I bring into my house, the real deal is pretty much off the table for me.
I’ve had my heart set on a giant faux olive tree for years. Not exaggerating there. But have you seen the price tag on some of these trees?!
Way outta this mom’s budget! But I knew I wanted to incorporate one into our dining room design plan.
I really loved the look of this beauty from Crate and Barrel, but there’s just no way I can justify that purchase. And usually when I want something bad enough I come up with a way to get the look for far less.
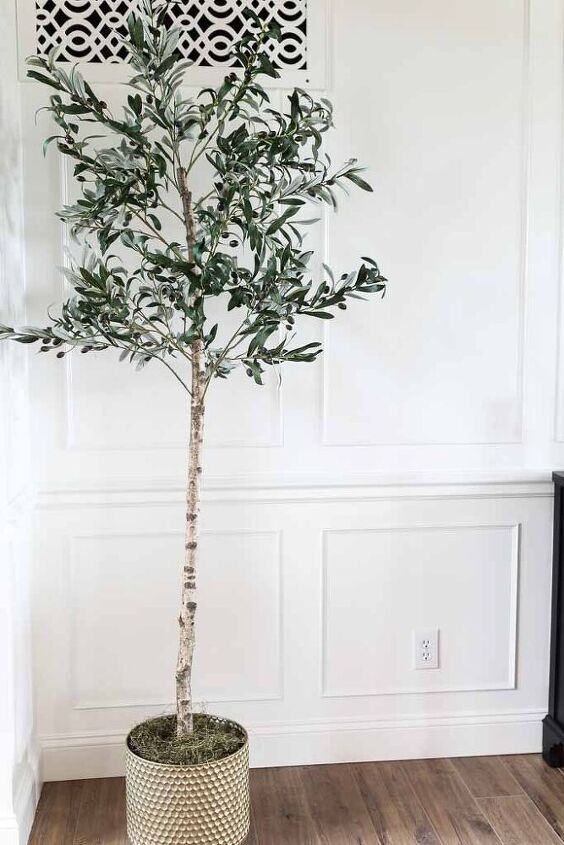
So I was determined to DIY my own faux olive tree on a budget! And isn’t it amazing?!
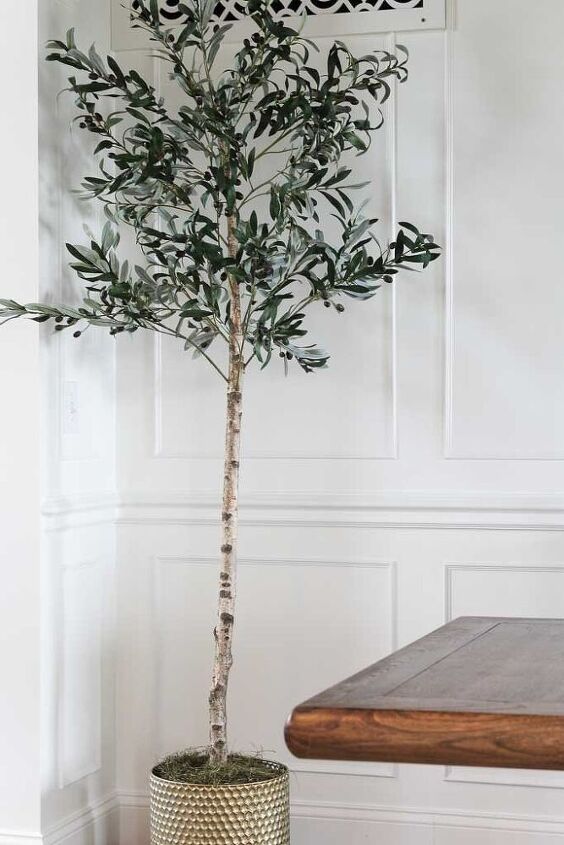
Personally, I love it more than any store bought version because I poured my heart into making it.
Curious about the cost?!
I’ll break down all of the materials and sources for you below, but the final cost came in at $65.
Much better than the $400 version I had my eye on. Even though there are cheaper faux olive trees out there, I was not impressed by their size or quality. I’d say my $65 version was well worth it.
So let’s break down what you need to get started DIYing your own olive tree!
DIY Olive Tree Materials & Supplies
- Large branch(es) for the trunk of your tree
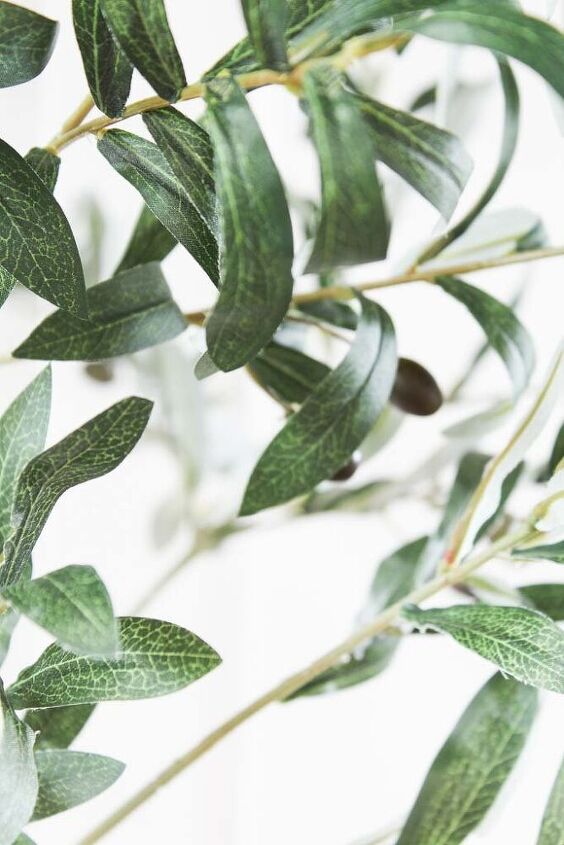
- 14 Faux olive branch stems
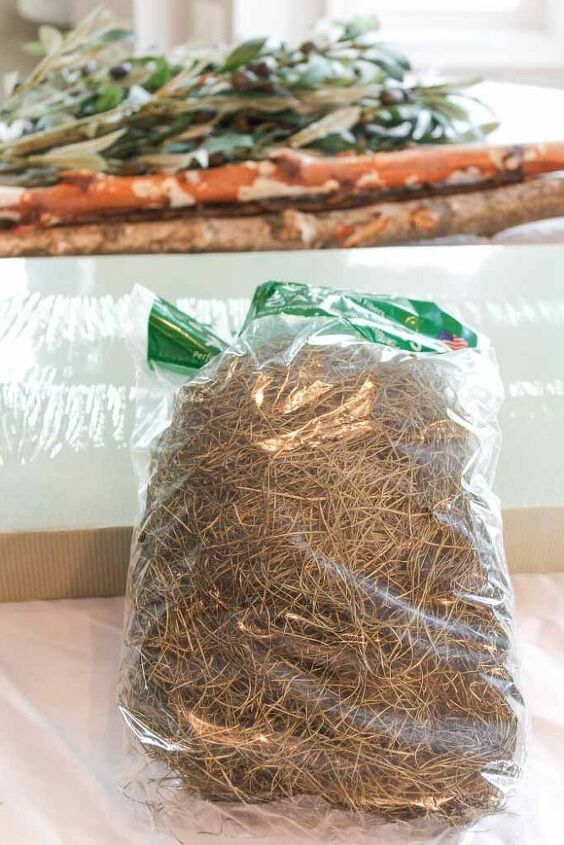
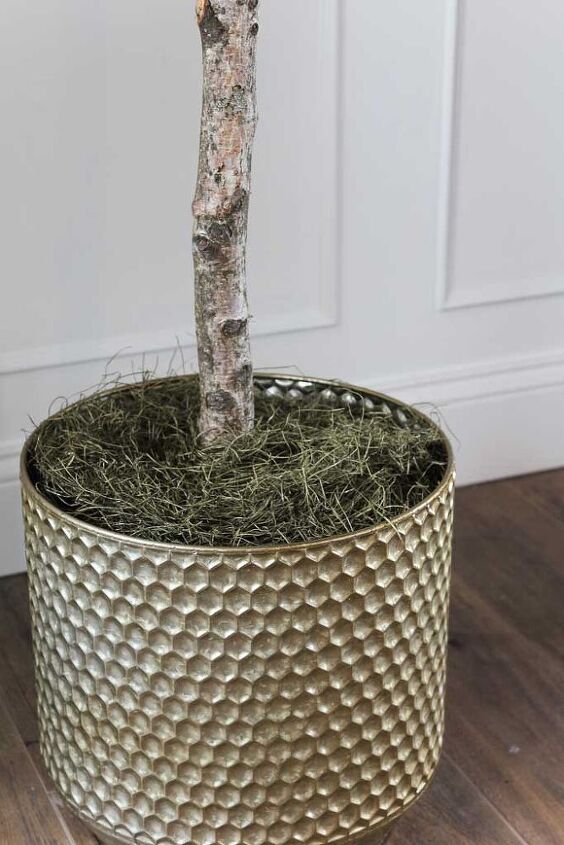
- Bag of Spanish moss
- Cement (optional, but highly recommended for stability)
- Hot glue gun and glue sticks
- Power drill and variety of drill bit sizes
- Floral wire cutters
- Decorative planter or basket
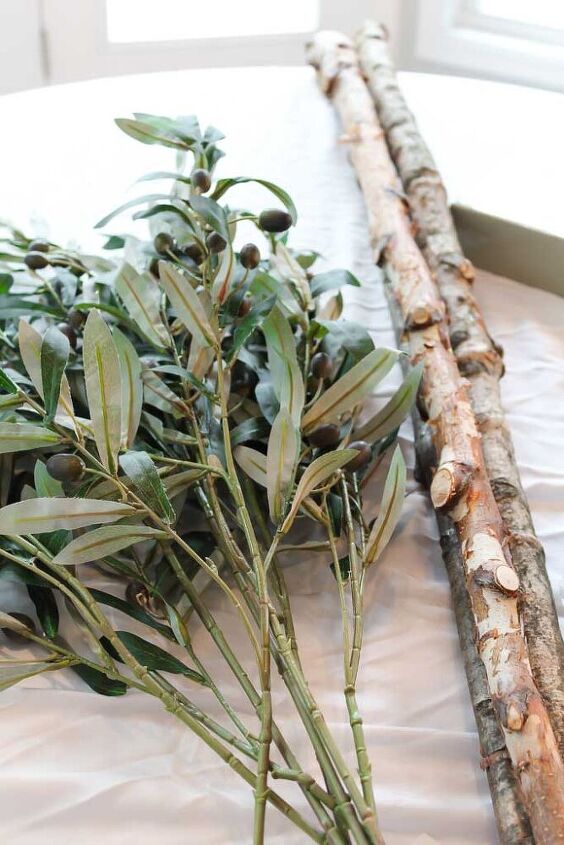
I know it might seem a little silly to purchase plain old branches that you can find in your own backyard. But at the time I was making this tree, we were in full cicada invasion here in the Midwest. So I was not about to go outside and fight through a swarm of giant insects to steal a tree branch.
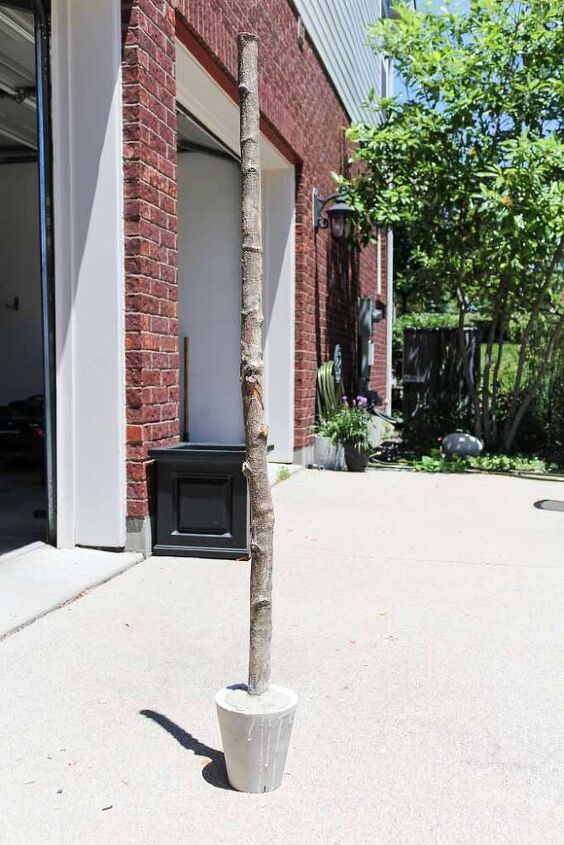
If you want to cut this out of your cost though you can definitely re-use a branch from your own backyard. I’d aim for one that’s about 6 feet in length.
How to Make a DIY Faux Olive Tree
So much of this project was really trial and error for me, so while I’ll tell you what I did to make this tree, I’ll also tell you what I’d do differently. K?
I really struggled with figuring out a sturdy base that would support the trunk of the tree, and hold up to small children messing with it at the same time.
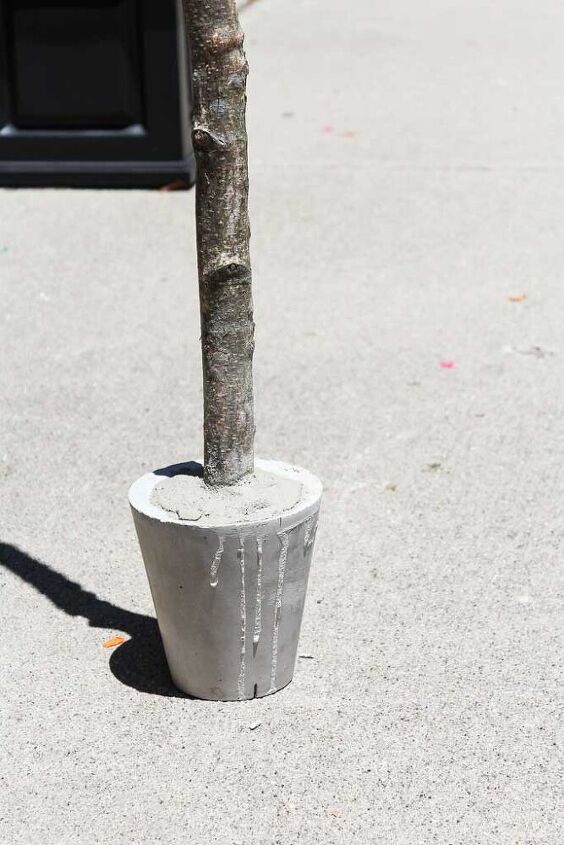
In the end, I decided a quick setting concrete was the best solution to create the base.
There are endless ways you can do this, and it doesn’t need to be super large for support.
I actually came across a mini concrete planter in my garage that I made last summer out of a small sand pail and spare concrete that needed to be disposed of. It ended up working perfectly for this project.
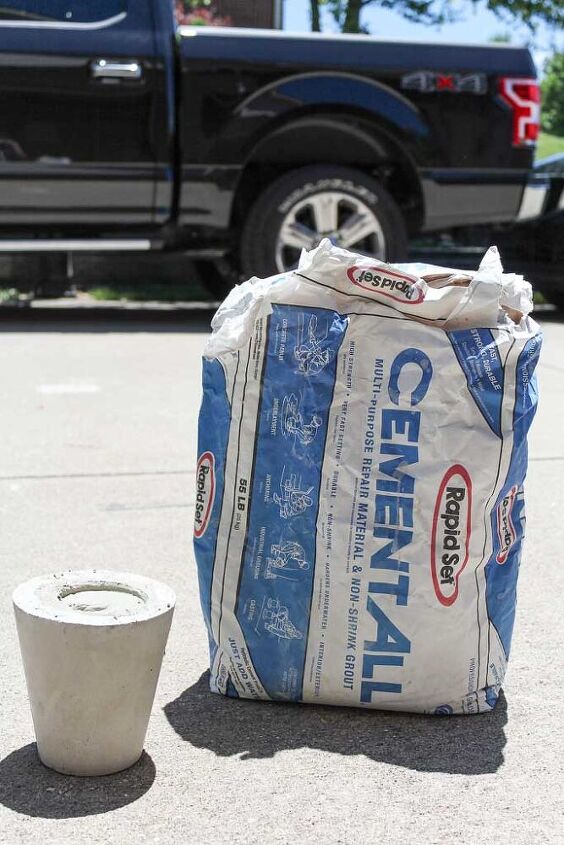
Here’s how you can create your own concrete base
- Step 1) Gather a small plastic pail or large plastic cup for your outer concrete mold and a disposable solo cup for your inner concrete mold
- Step 2) Mix your concrete and water according to instructions and fill your mold approximately 2/3 of the way full
- Step 3) Insert your solo cup into the center of your mold and press down gently forcing the concrete to fill up surrounding it.
- Step 4) Scrape off any excess dripping concrete from your mold and allow it to cure for 24 hours with the insert still in place. This creates a center hole for you to place your trunk later.
- Step 5) Remove your center insert and place your tree branch trunk inside.
- Step 6) Fill the trunk base with cement and support the branch upright allowing tit to dry and cure for about 2 hours.
*A special note… You can skip the majority of these steps and go straight to inserting your trunk into your concrete mold if you prefer. These additional steps were just necessary for me since I had originally created this base as a reusable concrete planter. But now you’ll know how to make one for your garden as well.

Prepare your olive branches
Although I didn’t photograph this step, it’s very self-explanatory. Many of the faux olive stems are about 24 inches long, so I used floral wire cutters to trim them down to about 18 inches.
This prevented them from sagging and drooping once I attached them to the trunk of the tree.
Insert the olive branches
Remember how I mentioned there was a lot of trial and error with this tree? That definitely includes drilling and attaching the branches.
My first instinct was to grab the largest drill bit to create a hole wide enough for me to insert the branches.
Well that proved to be much harder than I thought. It turned out that I needed to begin with a very small drill bit to create a starter hole. And then switch to a larger bit to widen it enough for the branches.
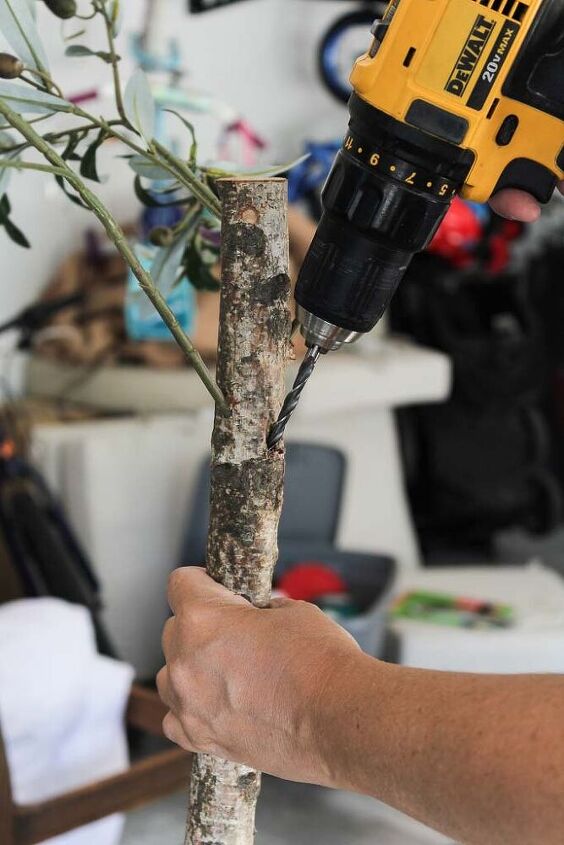
The trick is not to drill all the way through the tree trunk. I did this a few times, and really it was no big deal. I’m probably the only person who will notice it anyway. But if you can avoid doing that you’re better off.
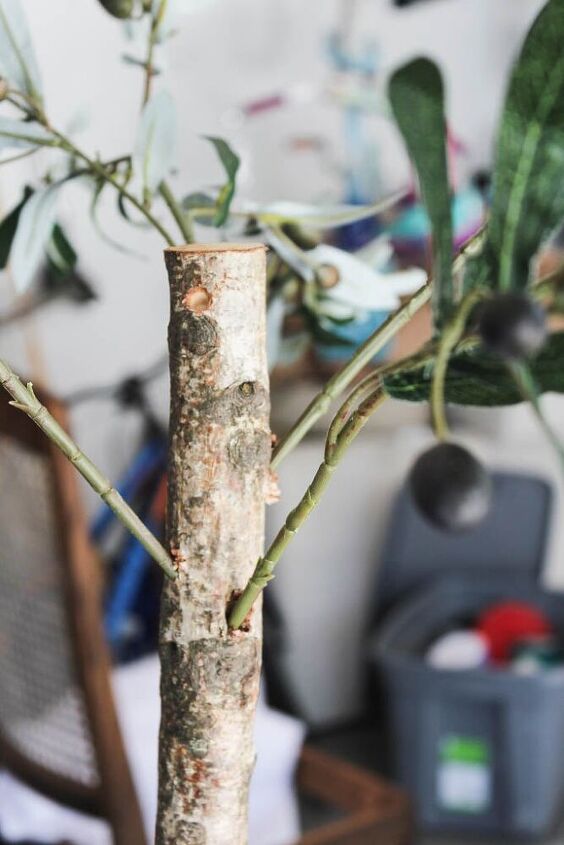
I inserted my branches as I went so that I could visualize how they would all appear together. It worked best when I staggered them a few inches apart in a diagonal like pattern going all the way up the tree.
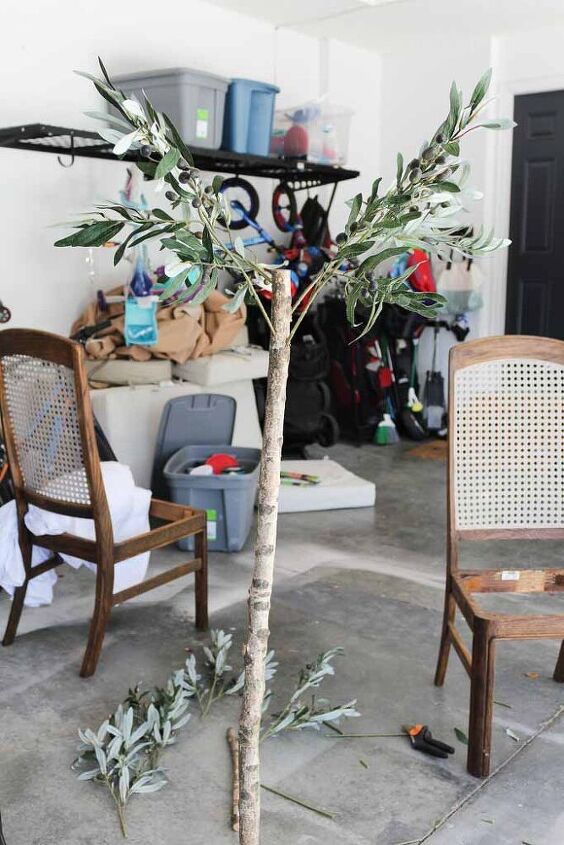

Then I removed them and added a bead of hot glue to the end of each stem before reinserting them to dry. This step went relatively fast, and the tree seemed to come together pretty quickly at this point.

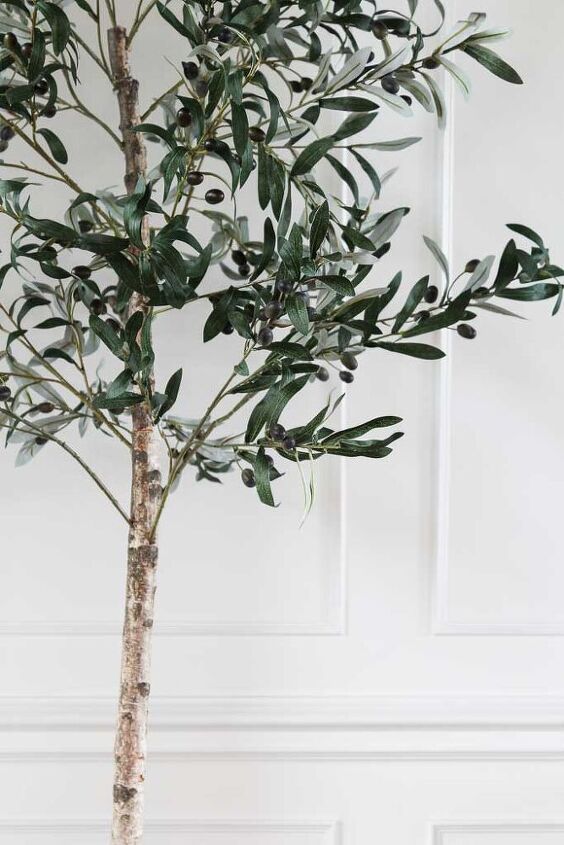
Style your new faux olive tree
So your tree is just about finished and all that’s left to do is find the perfect basket or planter to sit it in.
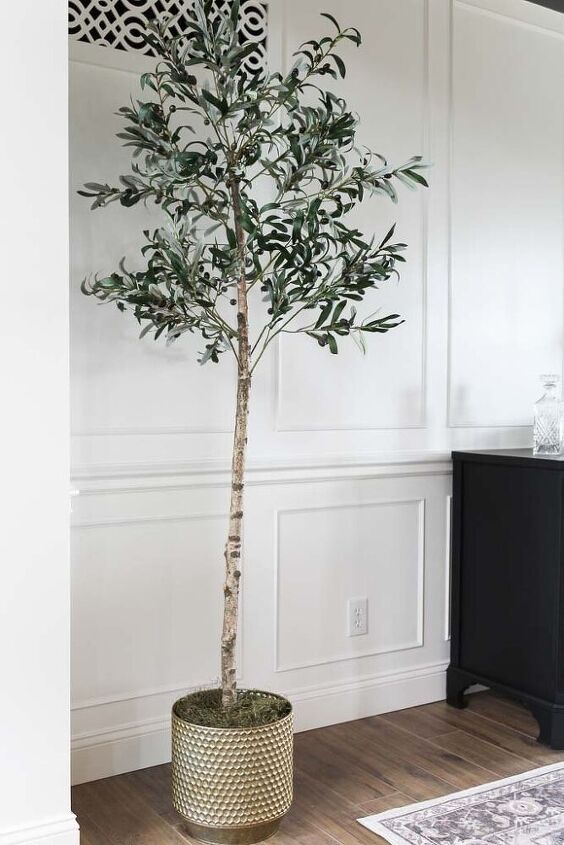
Don’t forget to add a bag of Spanish moss for a nice decorative touch and take some time to fluff out the branches to give them a fuller, more realistic look.
I’m so proud of this little tree, I only wished I hadn’t procrastinated so long on creating it. What do you think? Would you tackle this DIY? Drop me any comments or questions below.
I love hearing from you!


Resources for this project:
See all materials


Comments
Join the conversation
-
I’d like to do this with a bunch of palm fronds I’ve had for awhile. Can I get some ideas for the trunk? I’d really appreciate any ideas from anyone!😇
-
I love it!! Great job!


Frequently asked questions
Have a question about this project?
That planter is beautiful, love the gold color & design, where'd u get it, plz ? TY
Where did you buy the olive branches?
Hi Martina, since your post from August is now a new repost by Hometalk, I think the links have been dropped somehow. My question is the same as Amanada's, where you bought the olive branches. I have searched the entire post by there are no sources on this repost. My apologies for asking the same as Amanda did in August. The tree is beautiful!!!