


Brighten Your Home With DIY Tissue Paper Wisteria Room Decor

There's something so magical about hanging flowers in home decor. This DIY wisteria flower decoration is the perfect project for those who want to bring a little bit of magic to their space. Enjoy creating to your favorite music playlist with your children or by yourself for some precious "me" time!

Maybe it's the romantic in me that loves gorgeous displays of flowers and absolutely adores the aromas and colors of spring, or maybe it's just my pure joy of creating and making beautiful things, whatever it is, I'm happy that I feel inspired by this rich and vibrant world. There's so much to see, learn, and appreciate.
Hanging flowers are like a fairy-tale. They bring an energy of openness and liveliness that transforms a space into a home of inspiration, love, and positivity. I'm pretty sure that's why flowers are so common and loved by everyone.
I love making hanging paper flower decorations. Not only do I give way to those positive feelings that flowers and creating bring into my heart and my home, but I get to inspire my viewers to do and feel the same. Also, to me, paper crafts are a wonderful way for parents and children to enjoy fun quality time together being creative and playful!
And so, this paper wisteria decoration was the next project in a line of many other paper flower decorations on my YouTube channel - ArtDaniela. Head over there for more projects that are sure to inspire your creativity!
LET'S CREATE!
All you'll need for this DIY project is:
- tissue paper
- string
- scissors
- sewing needle
I used two colors of tissue paper for my wisteria, but you can choose to have more than two colors, even patterned tissue, if that's what you have available. I just like to save the tissue from any Christmas or birthday gifts I receive because I know I can always use it for my DIY's. For string, I opted for crochet cotton thread - I like that it's not too thick that it can't be threaded through a needle, and at the same time, it's quite durable.
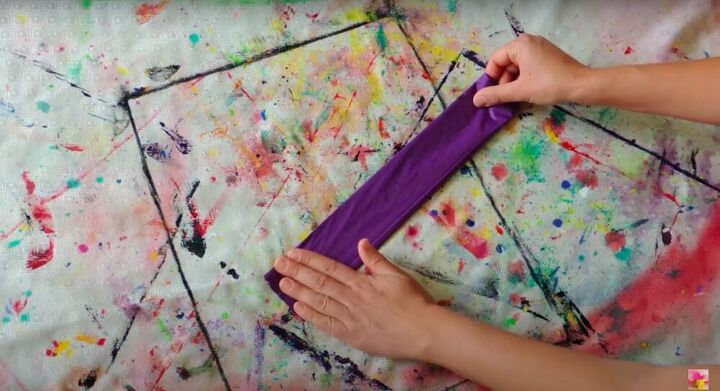
Firstly, take one sheet of tissue paper and fold it in half lengthwise. Continue folding until you make a rectangle with a width of approximately 2.5 - 3 inches.
Then, fold that rectangle into smaller rectangles, resembling the pattern of folding for a paper fan, like an accordion. The small rectangle should be around 2.5 inches wide and 3-4 inches long.
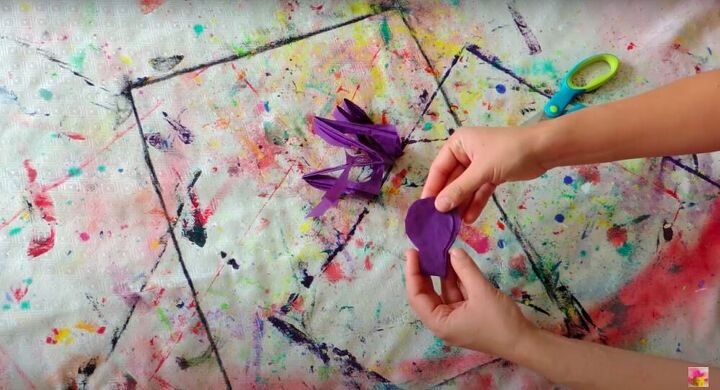
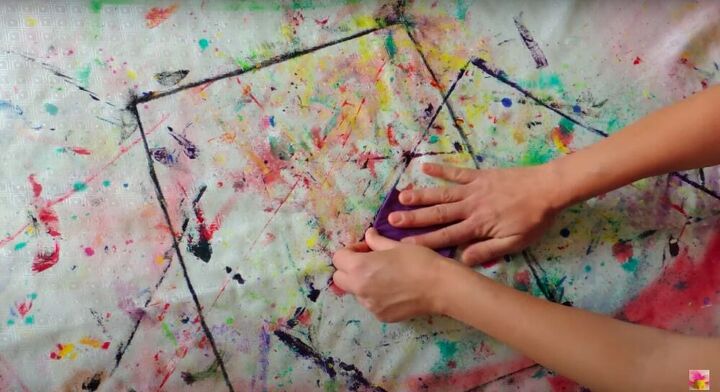
Next, cut out the shape of a balloon free-handed. Unfold and cut at the center producing multiple wisteria petals.
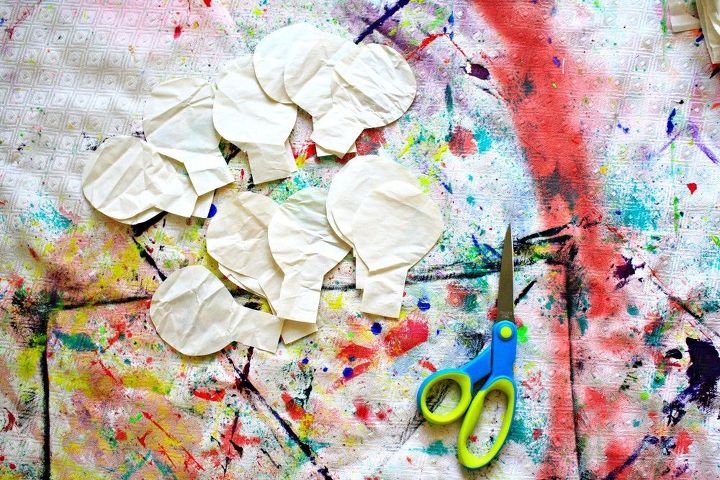
Do these steps for all of the tissue paper you want to use, depending on the size of your wisteria flowers. I quite like the look of high low wisteria hanging from my ceiling, so I made some of my wisteria longer than the rest, therefore, I made quite a lot of petals!

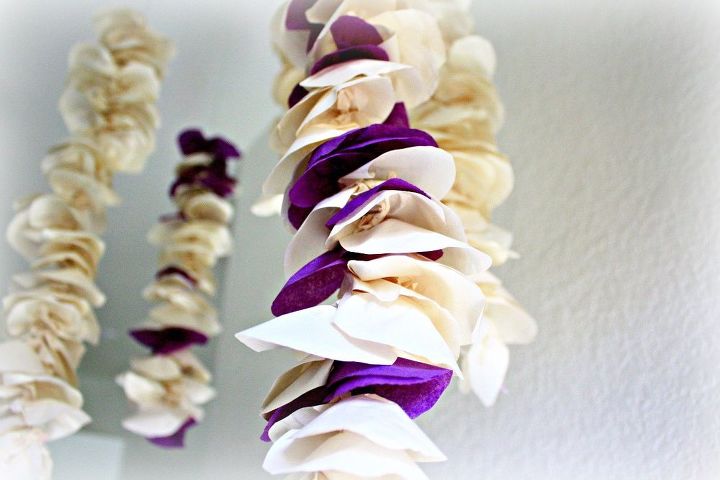
After you've made like a gazillion (just kidding...OK..maybe a 100 petals), it's time to make them actually look like flower petals. For this purpose, take one petal, and fold it lengthwise .
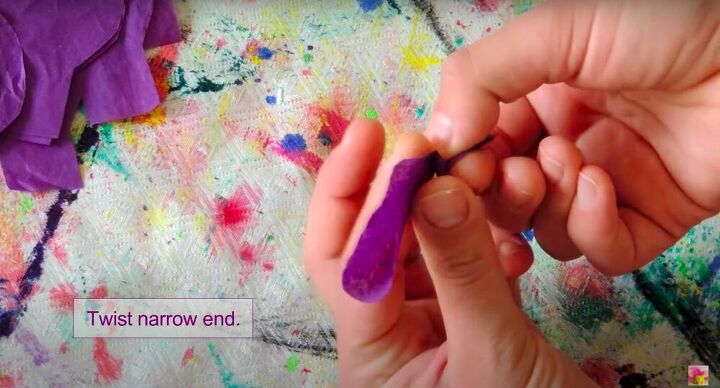
Then twist the narrow end.
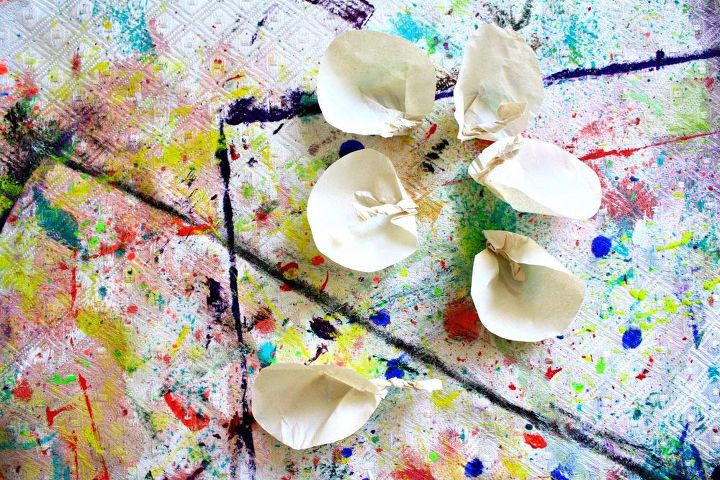
Fold the twisted end into the petal and pinch the petal. Your first wisteria petal is ready. Now, take a glass of water, play some of your favorite music, maybe get your children to help, and get started on twisting and pinching around 100 petals! It's fun! I promise!
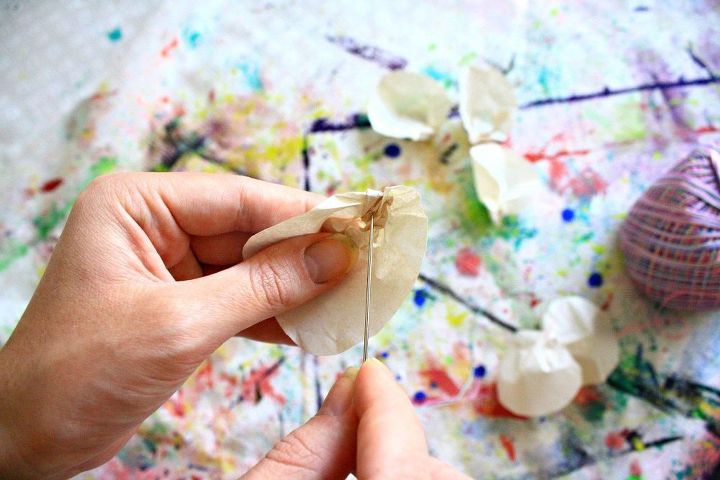
Now, you're ready to make your first wisteria flower. Thread your string of choice through a sewing needle. Then, pierce the needle through the narrow end of your first petal. And then the second, and third, and so on.
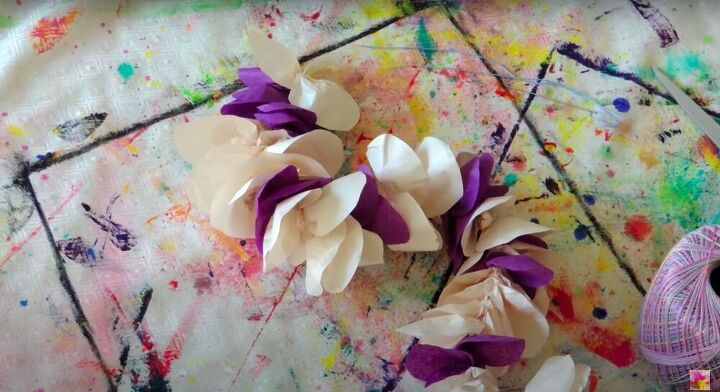
You may choose to make wisteria flowers of more than one color, so feel free to alternate colored petals. Just make these flowers a mirror of what you find beautiful, of what makes you feel happy!
Keep threading on petals until you reach your desired length. Remove the needle, cut excess string from the bottom, and tie a knot. Wisteria flower #1 is complete. Make as many wisteria flowers are you like to have hanging from your ceiling. I made five for my dining room.
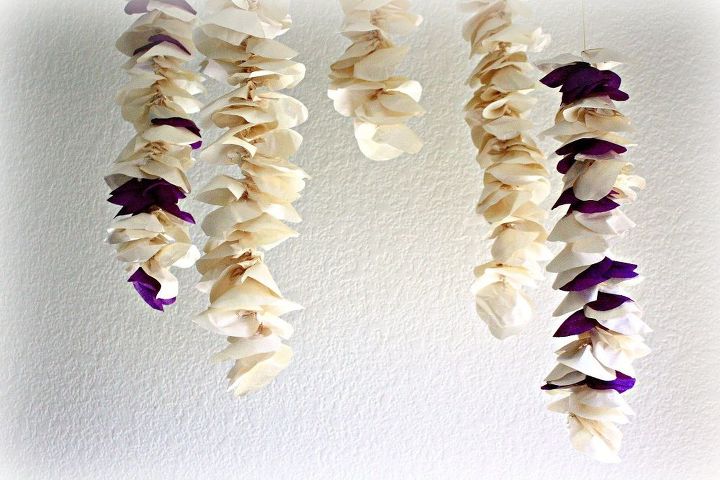
I used transparent pushpins to hang my flowers from the ceiling in my dining room, but you can literally use anything you find works for you.
I'm so happy with the outcome! It's like spring has blossomed into my home!
I live in the desert, so any "fake" flowers I can get my hands on or make myself are bound to stand the test of summer heat while making my space feel cozy, pretty, and personalized.
Every time I have guests over, they compliment my decor and ask where I bought it from. They're always super surprised to find out that my little display is a DIY tissue project! I love the expression on their faces when I say the word "DIY"!
So, don't wait any longer and start making these now! I hope you enjoyed this tutorial. I hope you find the time to spend more moments with your family making crafts and making your space feel like home! 
Comments
Join the conversation
-
Love this.. Cute idea to hang them from the ceiling!!
-
That's beautiful thank u


Frequently asked questions
Have a question about this project?