


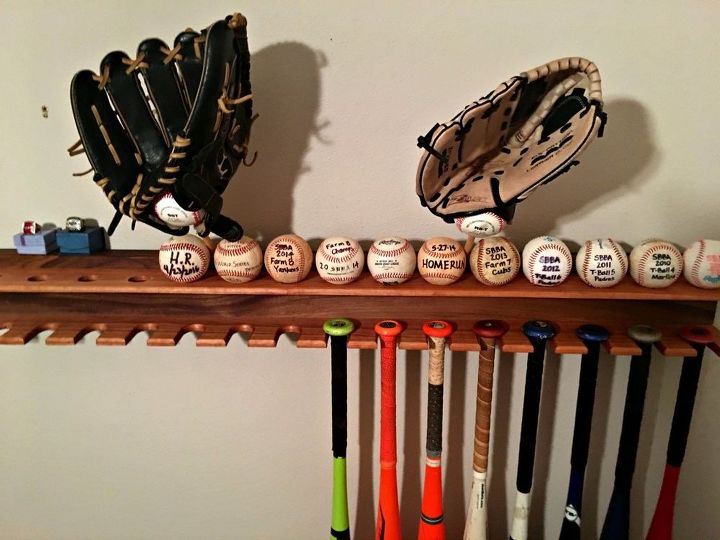
DIY Baseball Bat Display Rack
Are you a baseball/softball parent or player who has lots of old equipment cluttering your home? Or, do you need a perfect handmade gift for a friend or family member who loves baseball to display their cherished baseball gear?
In this Hometalk post, learn how to build a DIY baseball bat display rack to hold baseball bats, baseball gloves, and special baseballs.
I have coached my kids in Baseball since they started T-Ball at a very young age. My collection of old baseball equipment (bats, game balls, gloves) has increased year over year.
Furthermore, I do not like clutter and normally find a way to get rid of the stuff I don’t use or have a plan to use in the near future.
Each time I would see our old baseball equipment laying in a storage bin in our attic, I could not convince myself to get rid of it. The bat brought back memories of my son hitting the ball at a certain age. Each glove reminded me of the long hours we spent on the practice field catching grounders and pop flies. The game balls represented a special game I remember like it was yesterday and will remember forever.
Perhaps I am sentimental towards old baseball equipment because of my love for the game. Or, maybe it is the pure satisfaction I get watching my children play. Either way, I decided to create a DIY Baseball Bat Display Rack.
Ultimately, This DIY Baseball Bat Display Rack that hangs on a wall not only provides a place to store old baseball equipment, but it also serves as a piece of art that preserves memories. It can also be a great addition to a baseball-themed man cave.
Step 1: Gather Materials and Lumber Dimensions
First, let me start off by stating it is not necessary to use walnut & cherry wood to build this DIY Baseball Bat Display Rack wall. I had a few extra pieces of cherry and walnut laying around from a previous project and I thought they would look nice together. Plywood, pine, or any other wood you have at your disposal would work just fine for this project.
Additionally, the tools I used for this project are also not necessary. I listed an alternative tool below each tool.
I have a full list of material I used on my website, so be sure to visit my blog post listed at the bottom of this post if you are interested.
(L x W x Thickness)
Please note: ANY lumber can be used, just as long as the same dimensions can be achieved.
2 – 48″ x 6″ x 1″ of Cherry
48″ x 6″ x 2″ of Walnut
3/8″ maple dowel – 36″
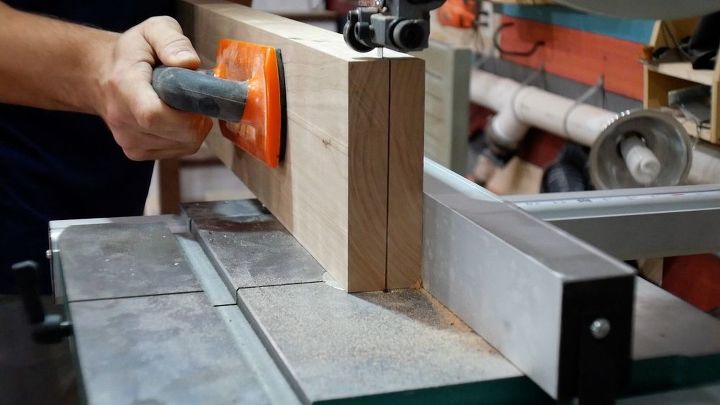
Step 2: Mill Lumber
First, I started this project by milling my lumber. Wood projects go much smoother when the lumber has 2 straight edges and 2 flat faces.
Instead of milling lumber (especially if you don't have tools), I recommend purchasing the lumber already at the dimensions you want or have your local hardwood dealer mill the lumber for you after purchase. Most hardwood dealers will gladly do this for a small fee.
If you are curious as to how I milled the lumber, keep reading this step. If not, move on to the next step.
I used my straight board jig with 2 dovetail clamps to get one straight side. Then, I put the straight side against the table saw fence, set my desired width and ran it through.
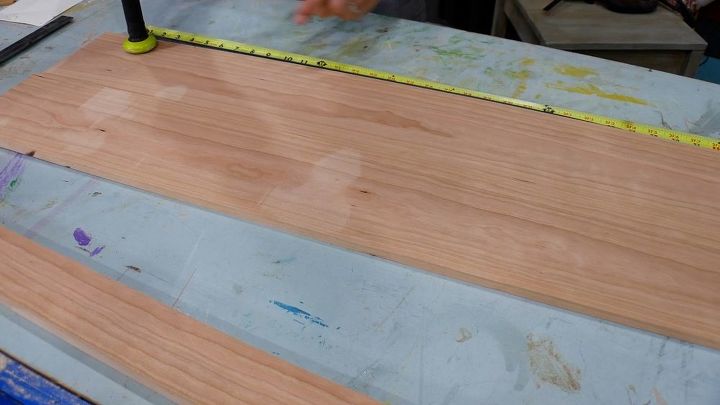
The piece of cherry was about 1.75″ thick. So, I used my bandsaw to resaw it so that I had about a 1″ piece.
Next, I resawed the 1″ piece of cherry again so that I had 2 pieces ~1/2″ each.
Afterwards, I ran the 2 pieces of cherry through the planer 2 times on each side to remove the imperfections from the resaw. I took roughly 1/32″ off on each pass.
Step 3: Baseball Bat Template
Next, I began making the template to hold the baseball bats.
The most important measurements are the width of the barrel, the width of the grip above the knob, and the width of the knob.
The width of the barrel ensures the bats do not touch each other while hanging from the rack, the number of bats the Baseball Bat Display Rack could hold, & the distance the hole needs to be from the front.
The measurement of the grip and knob determine the width the hole needs to be in order to securely hold the bats in place.
First, I used my combination square and double-sided pencil to draw a reference line horizontally across the piece of cherry. This reference line marked the center of the hole I needed to drill.
Next, I used my combination square to draw vertical lines which intersect with the horizontal line I drew in the previous step. This center of each cross is where the center of the hole needed to be.
Then, I determined I needed the width of the handle to be approximately 1.25″ wide because the actual width of the handle was 1″.
I used my automatic center punch tool to punch a small indentation. This will help stabilize the forstner bit.
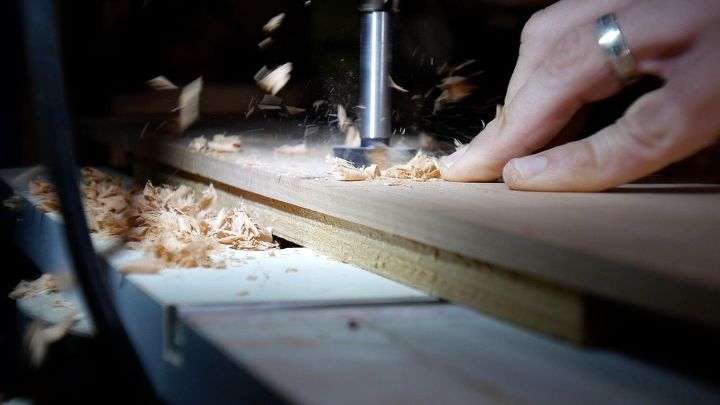
Step 4: Drill Holes for Baseball Balls
You can do this with a drill if you don't have a drill press.
I took the piece of cherry to the drill press and drilled 15 evenly spaced holes with a 1.25″ forstner bit.
Then, I used a scrap piece of wood below the piece of cherry to reduce tear out.

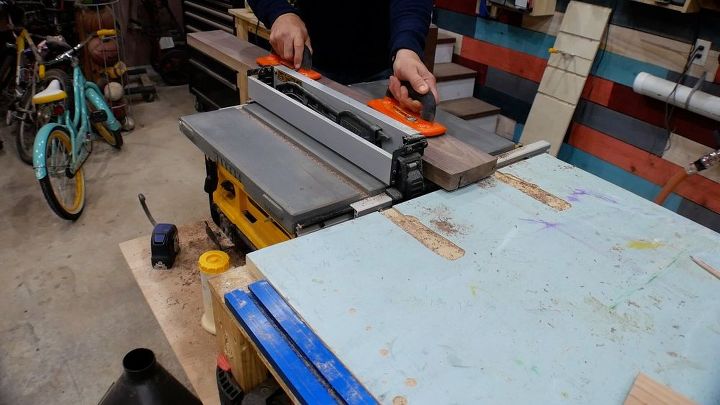
Step 5: Back Piece
I repeated the same process I explained earlier in order to get straight edges & faces on the piece of Walnut. Then, I ran it through the planer the same way as well.
I marked 2 horizontal lines on the piece of Walnut as the starting point for the dados. One line was 1″ from the top and the next line was 1″ from the bottom.
Step 6: Cut Dados
The thickness of each piece of cherry was about 3/8″. First, I set my table saw to cut 1″ high and aligned the fence to cut at 1″ (on the horizontal line I drew in the previous step).
Next, I made one slow pass at 1″ and 4 more passes after moving the fence 1/16″ after each pass. I repeated this process for the other line.
Then, I tested each piece of cherry to make sure it fit securely. I wanted the pieces of Cherry to barely fit in the dados; otherwise, it would not be secure. Luckily, it fit the first time.
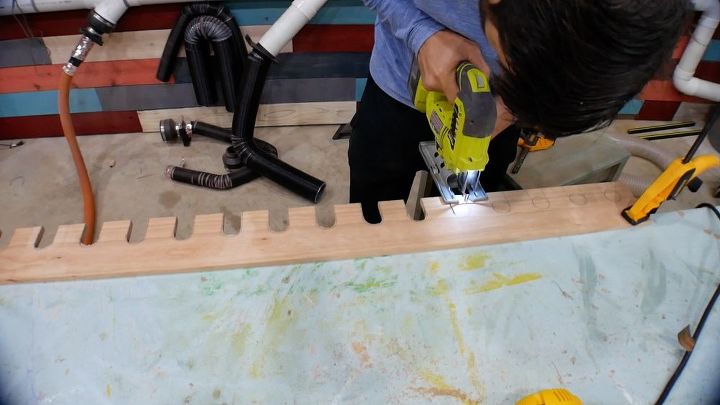
Step 7: Cut Bat Template
The bat template is the same as the ball template; however, the circle is cut out.
I used my jig saw and it did the job perfectly. This piece of Cherry holds the bats & the other piece with the holes will hold Baseballs.
This piece of Cherry holds the bats & the other piece with the holes will hold Baseballs.
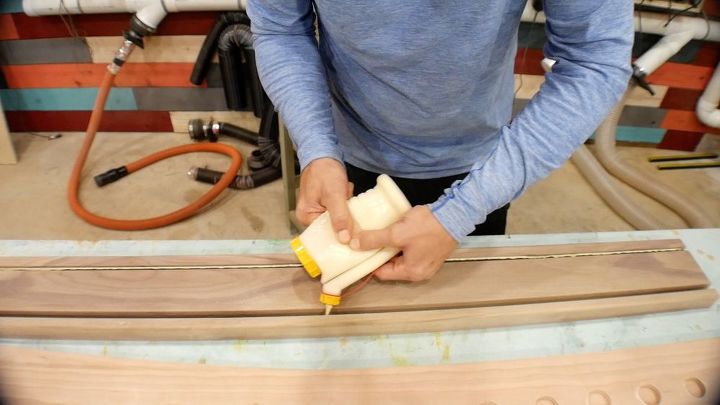
Step 8: Attach Bat and Ball Holder to Back
The special tip on my glue dispenser came in handy to make a fine bead of glue on the bottom and each side of the dados.
I placed each piece of cherry into the dados (bat rack on bottom and ball holder on top).
Next, I lightly clamped them down with F-Clamps while the glue set.
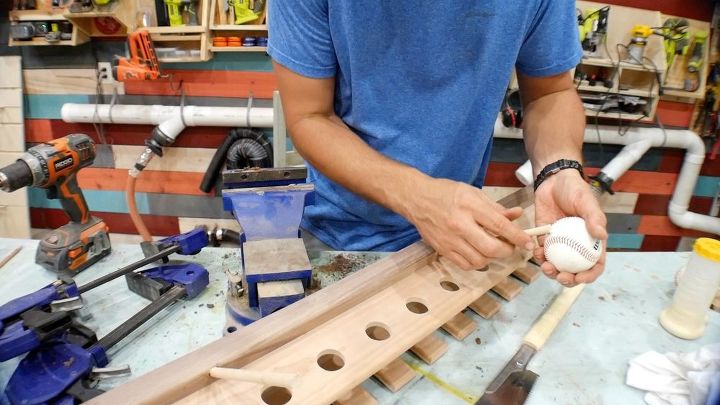
Step 9: Mount Dowel and Ball
I needed to figure out a way to hang 2 old gloves on this DIY Baseball Bat Display Rack.
Next, I decided to drill 2 – 3/8″ holes at a 45 degree angle.
I inserted the maple dowels into the holes to test the fit and needed to widen the holes a bit, so I grabbed my drill with a 3/8″ bit.
Then, I put glue on the maple dowels, inserted them into the holes, and used my Japanese trim saw to cut off the excess from the back.
I placed 2 baseballs in my bench vise and drilled a 3/8″ hole about half way into the baseball.
Next, I put the baseballs on the end of each dowel, but chose to not use any glue because the fit was really snug. Plus, I may want to change this one day.
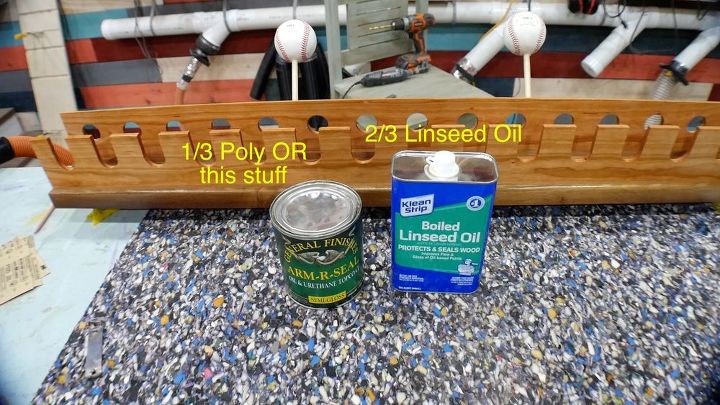
Step 10: Apply Finish
First,, I used a mixture of 1/3 oil/urethane & 2/3 Linseed oil. I used the oil/urethane because I didn’t have any poly. It worked the same and I didn’t notice a difference.
Next, I applied the finish with a lint free cloth and put on 2 thin coats.
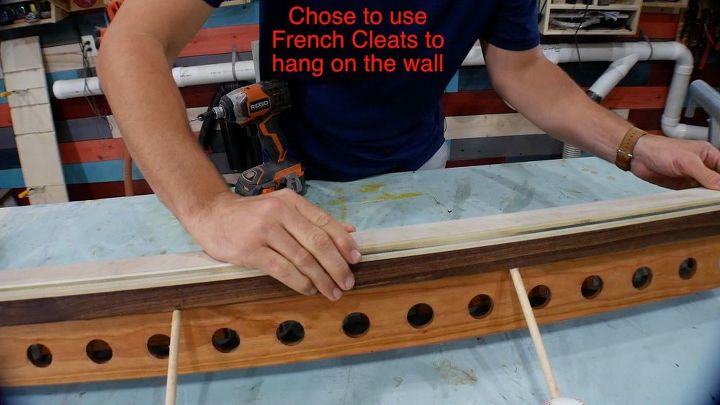
Step 11: French Cleat System
I decided to use a french cleat system as a wall mount to hang the DIY Baseball Bat Display Rack on the wall. French cleats are easy to move around and it can hold a significant amount of weight.
I also used 2 pieces for the french cleat design because I simply did not have enough plywood to use 1 piece for the back and 1 piece for the wall.
The french cleat is the exact same length/width of the Walnut minus 1/8th of an inch in length and width on all sides. Additionally, this helps to hide the french cleat from view while standing in front of the Baseball Bat Display Rack
I stained the french cleat with an Ebony stain, which made it invisible behind the dark walnut wood.
Conclusion
I hope you learned something from this project and it provided you with value. Visit my blog for a full list of materials and tools I used.
Feel free to contact me anytime if you have any questions. I'm happy to help! Please subscribe to my YouTube channel for more DIY projects.

Comments
Join the conversation
-
When ya NEED something to take care of storage, ya try and make it. You did a great job! The whole project is pretty nifty!


Frequently asked questions
Have a question about this project?