


How to Make a DIY Wall Sconce: Easy, Affordable, Stylish!

Looking for a stylish and affordable lighting idea? Why not try out this renter-friendly wall sconce that is so easy to make and requires no wiring at all?
This fun and easy DIY wall sconce tutorial is perfect for beginners. And the best part is that you end up with an expensive looking, chic, unique, and super useful wall lamp!
This post was transcribed by a member of the Hometalk editorial team from the original HometalkTV episode.
My DIY sconce light is made with just a few Dollar Tree supplies, such as a napkin holder, a wire basket, and a leather placemat. Follow along to create a beautiful homemade wall sconce that will brighten up any space in your home.
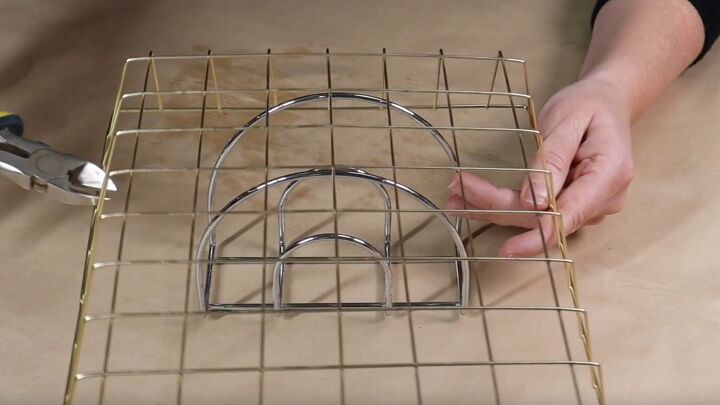
1. Prep the Wire Basket
To create your DIY wall sconce, start by placing the rectangular wire basket over the rounded metal napkin holder. This combination will form the frame for your sconce.
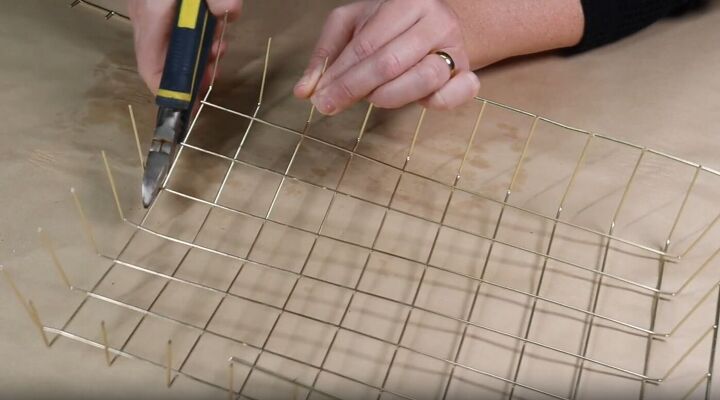
Use wire cutters to remove the rim of the wire basket, this will make it easier to bend and mold around the napkin holder.
Once the rim is removed, you can begin shaping the wire basket to the napkin holder.
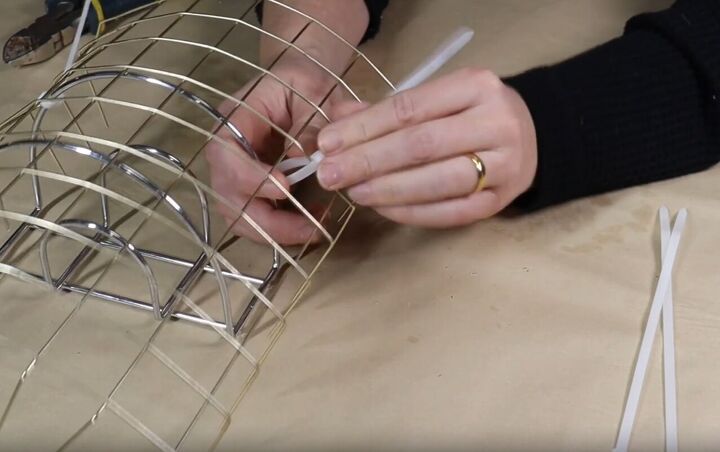
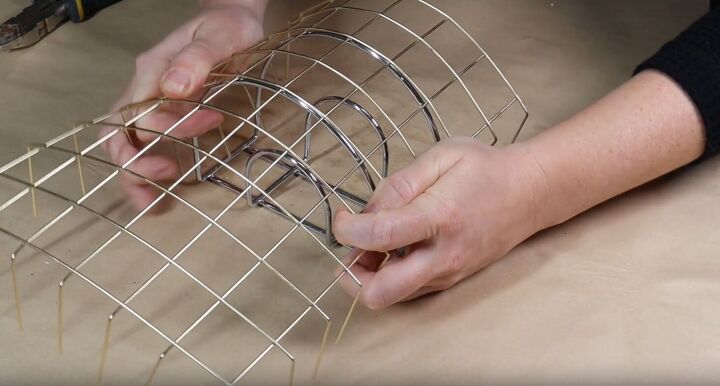
2. Attach the Napkin Holder
Using plastic zip ties, attach the wire basket to the metal napkin holder at four points on each side. Double-check that the frame is properly aligned and symmetrical before tightening the zip ties.
Pull the zip ties tightly to form the desired shape of the sconce and ensure that the basket is securely fastened to the napkin holder so that it does not wobble or come loose when hanging.
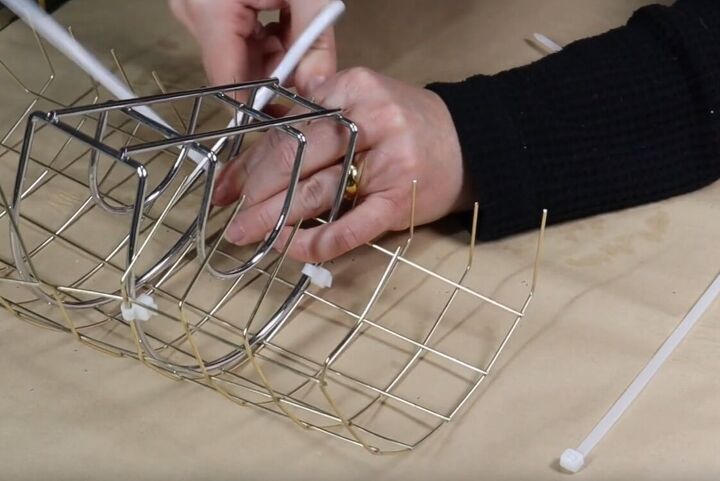
Remember to cut off any excess plastic from the zip ties for a neat and polished finish.
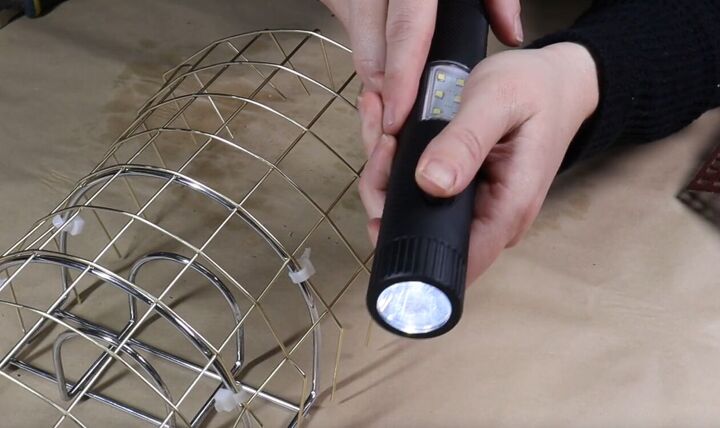
3. Add the Remote Controlled Flashlight
To turn your DIY home decor piece into a functional wall lamp, attach the battery-operated flashlight to the sconce using the zip ties.
The flashlight I used for this project has two functions: a side light and a top light. I suggest using the same to give your space plenty of light.
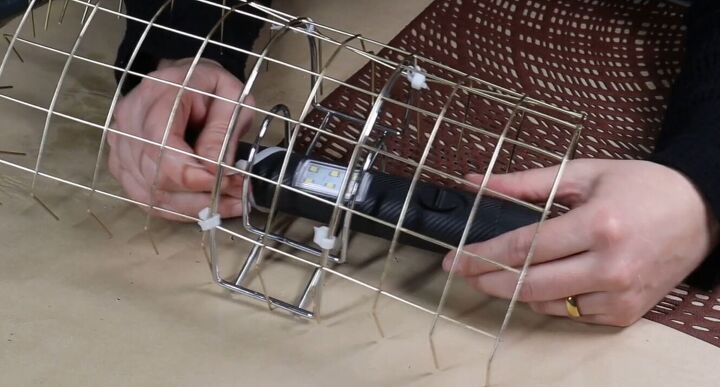
When attaching the flashlight, make sure it is securely fastened and facing in the desired direction.
With this easy step completed, your upcycled Dollar Store items are now transformed into a functional wall lamp. Now we need to add some style!
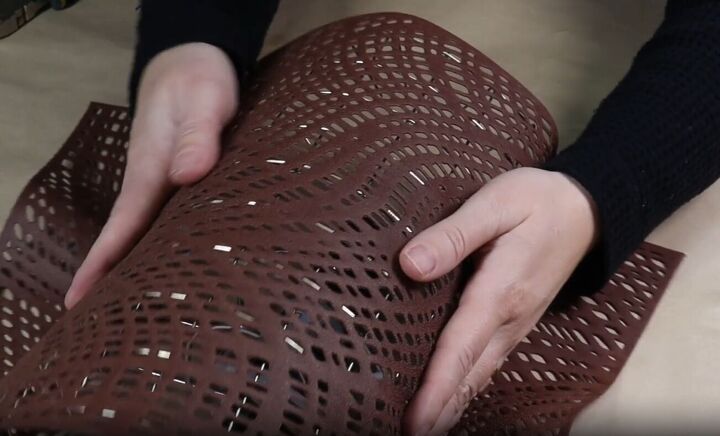
4. Wrap the Leather Place Mat
Place the leather placemat on the front of the wire basket and wrap it around the back. Use the plastic zip ties to secure it to the wire basket. This will ensure that the leather stays in place and doesn't slip or sag over time.

Start by threading the zip tie through one of the holes in the wire basket and then through a corresponding hole in the leather. Pull the zip tie tight so that the leather is snug against the wire basket.
Repeat this process with a few more zip ties, spacing them out evenly around the basket. I used four zip ties, but you may want to use some extra along the top and bottom edges of the leather to make sure it is securely attached.
Once you have attached all of the zip ties, go back and trim off any excess plastic with a pair of scissors.
5. Hang the Sconce
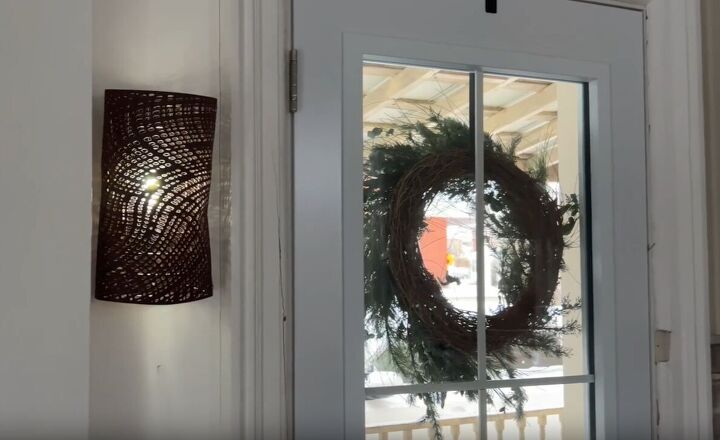
My wall lamp is complete and ready to hang. I am using this piece as an entryway wall sconce because the area by my front door is darker and needs a little light.
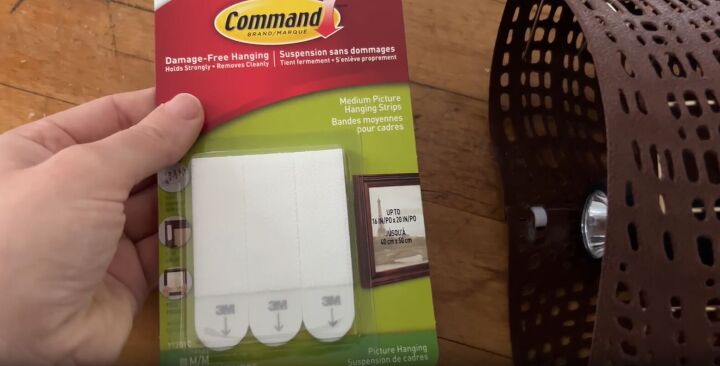
The sconce is lightweight, so you can use a few 3M Command picture hanging strips to install it. These strips are very easy to use since they're just Velcro with a sticky side on each.
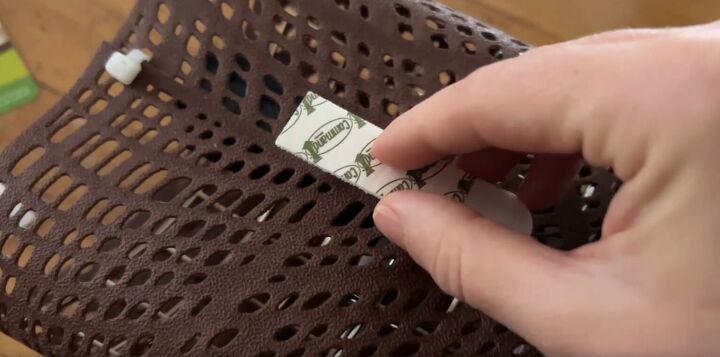
All I need to do is attach one side to the DIY light fixture and the other side to the wall. Then, I'll follow the hanging instructions on the back of the package to hang up the wall sconce.
More DIY Decor
Dollar Store sconce tutorial
This DIY wall sconce is an affordable lighting idea to brighten a dark space in your home without the need for wiring. It's perfect for illuminating your front door area or any spot in need of a little extra light.
So, head to your nearest dollar store and grab everything you need to create your own unique, handmade lighting piece. No one will ever guess that your stunning lighting fixture was made using budget-friendly supplies.
Share your DIY wall sconce with me in the comments below and let me know how you customized it to suit your space.
Comments
Join the conversation
-
Love it,such a great idea
-
Definitely


Frequently asked questions
Have a question about this project?
Cannot find whereTO PURCHASE a remot controlled flashlight.
How do you turn the lights on and off
What kind of flashlight with the remote control did you use in this video? Where did you purchase it!