


Easy Painted Rock Magnets for Kids

Rock painting has become a new crafty trend that is quite a lot of fun - and a great activity for the kids to join in on.
After I decided to get a set of rock paint markers, the kids and I had fun drawing all over them - rocks of all sizes mind you. When we were done, we had a lovely pile of decorated rocks - that I had no idea what to do with. I put many of them back out in my flower garden to add a bit more color. But I thought that if we used flat, round rocks, we could easily turn our creations into fridge magnets. That way our rock artwork can be used to hold up other school artwork or other school work that deserves to be shown off!
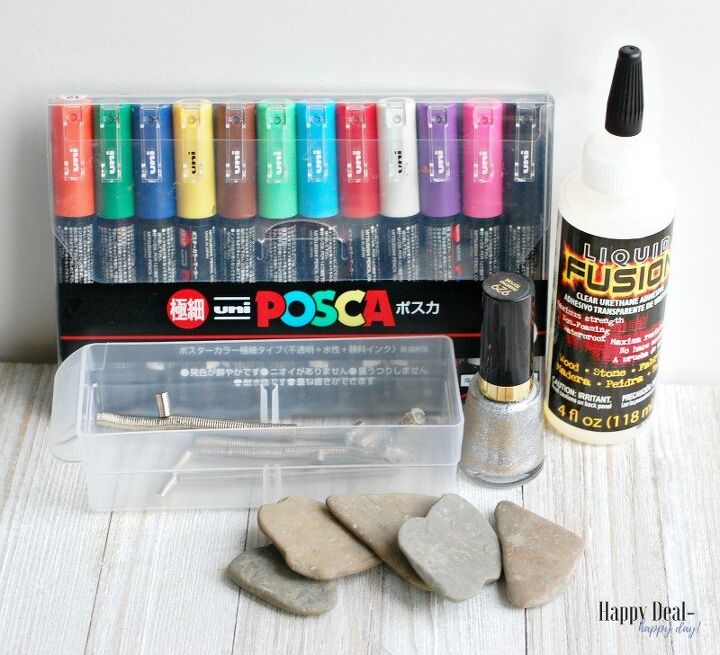
Supplies needed for painted rock magnets:
- I did a little bit of research on what were the best paint markers used to paint rocks - and found a review on these Posca markers. I ended up getting the Extra Fine 12 Count set - and love them because of the small detail you can add to your rock designs.
- Then you need to find some rocks you want to paint! For this particular project, I found 1-2 inch in diameter rocks that were flat. That is a size and shape that can be easily used as a refrigerator magnet. Since I live in the finger lakes region of NY, it was easy to hit up some lake beaches to find the perfect rocks.
- Glitter nailpolish (optional)
- Small Rare earth magnets
- Liquid Fusion Clear Urethane Adhesive
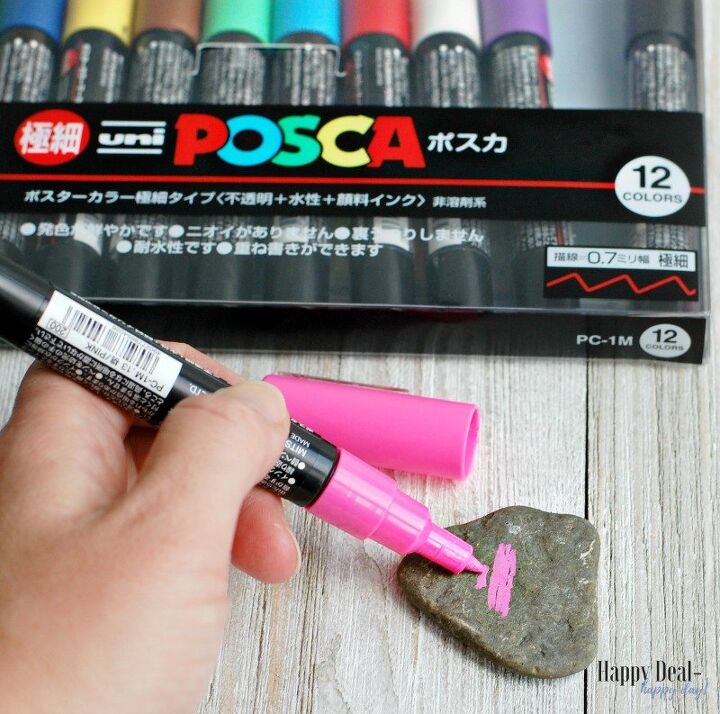
Before I ordered these Posca markers, I was a bit skeptical that they would turn out as bright and vibrant as some pictures I saw online. Especially since these are not cheap dollar store markers, I really wanted them to be worth the cost! Turns out they surpassed my expectations and are worth every penny! If you are wanting an easy way to put some detailed color on rocks, and make some nice, small pieces of art you can hang on your refrigerator, then this is worth the investment!
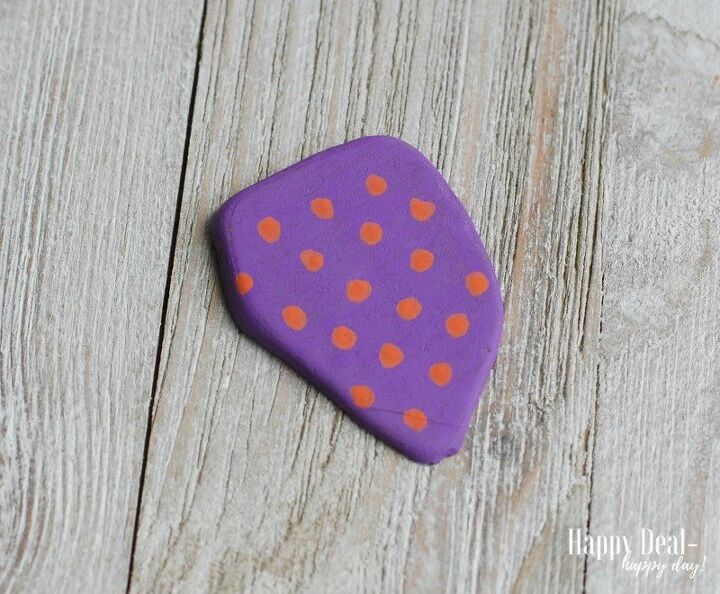
I wanted to come up with a general geometric pattern that my kids could follow to make a fun design. First start out by coloring the entire rock, front, back, and sides, all one solid color. The front of the rock you may need to color twice so that the color is nice and solid and bold. For the rock above, I used a purple background, and then added orange dots to it in a sort of checkered pattern.

The fun part in my opinion, is adding the tiny small white dots that add in the extra cool detail that makes these unique and fun. Barely dab on your fine tipped white Posca marker and add a circle of white dots around the larger orange dots.
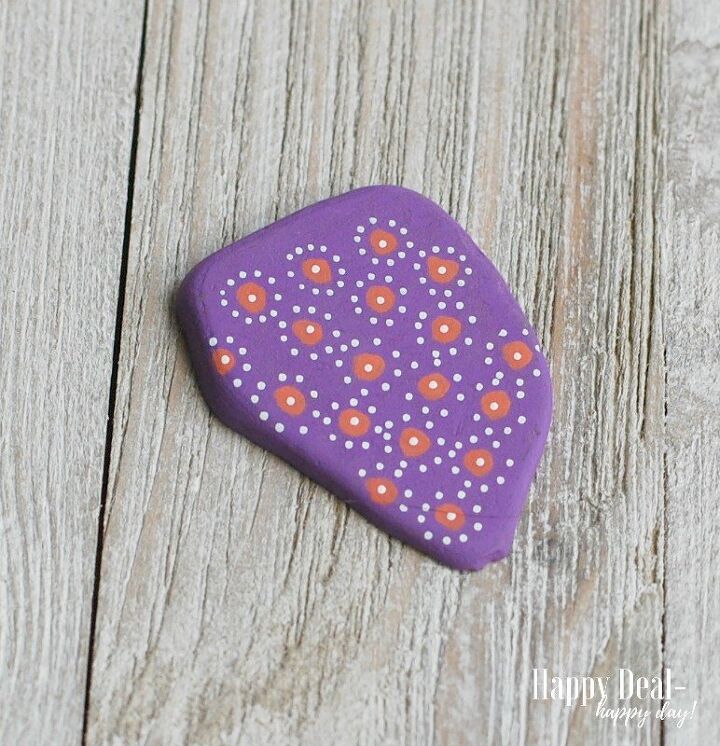
Finish it up by adding just one more small, white dot in the very center.
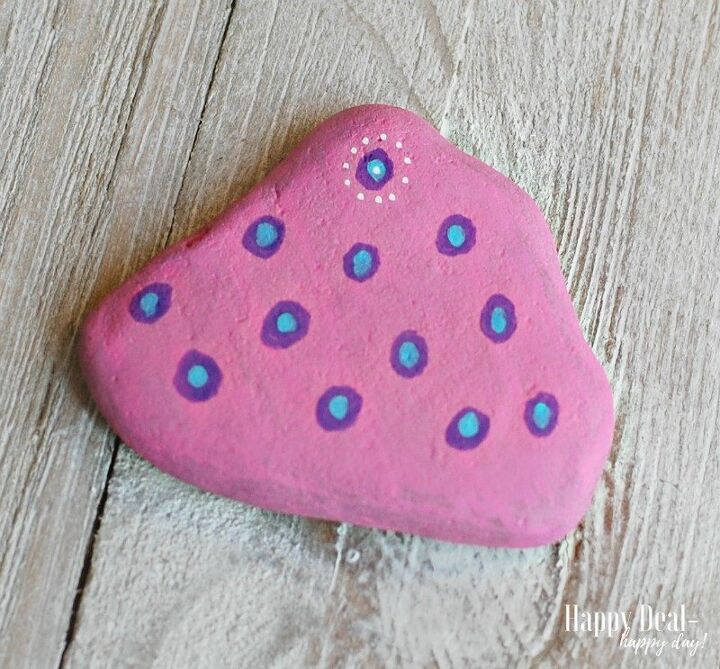
You could also create a tri colored dot - in the case above, put purple dots on the pink rock. Then fill in the purple dots with smaller light blue dots, followed by the smallest white dots.
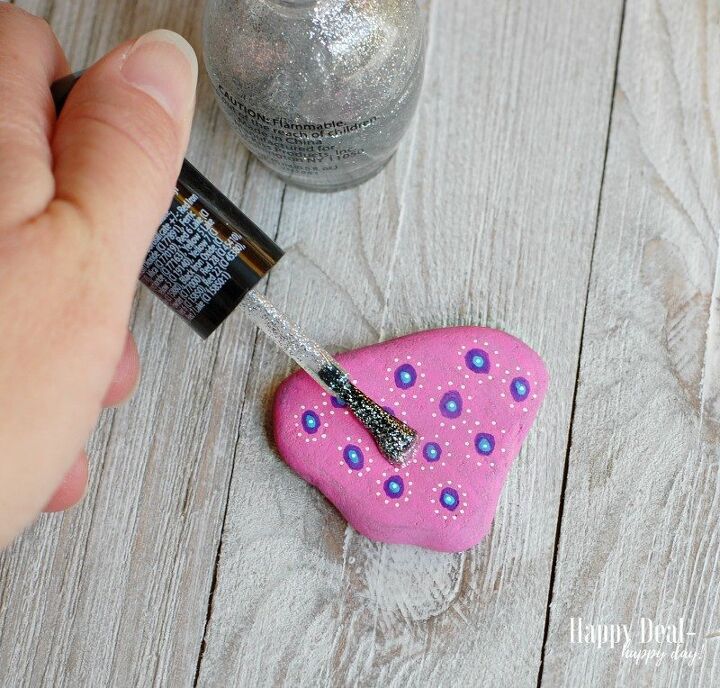
My girls and I also had fun creating a "protective" layer on top of the rock using glitter nail polish. It's a great way to protect the paint on the rock from wearing or rubbing off, and creates some bling that my household of girls just loves! ;)
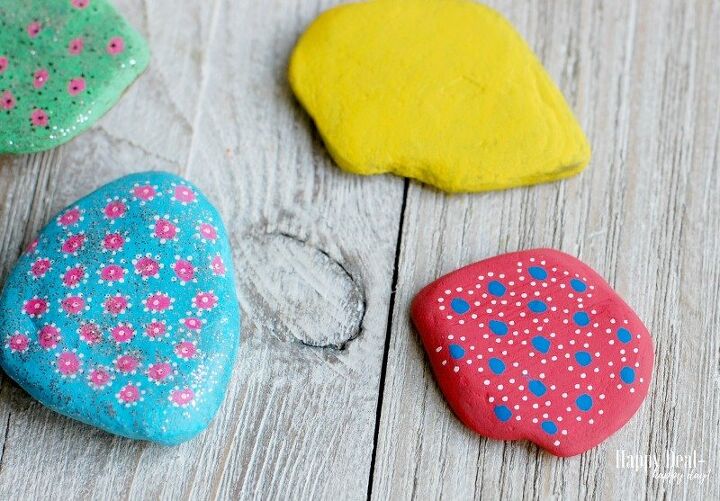
Adding a variety of color is fun. It's even more fun when the kids get their hands on these and the create their own color patterns. You can experiment with shapes, colors, and different glitter nail polishes to create a beautiful set of refrigerator magnets! This would be a fun gift idea for the kids to make for their teachers or grandparents - and you could personalize these even more with written messages to the recipients on the back!
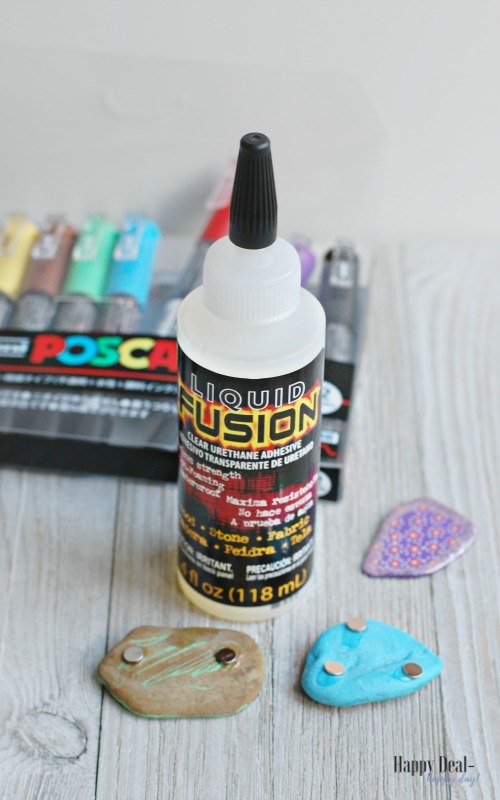
After the artwork is complete, its time to turn these into magnets. My favorite adhesive I use to glue on rare earth magnets to the rocks is Liquid Fusion. It works on wood, glass, and stone! You just need a little dab for each of the small magnets. I would put at least 2 or 3 magnets on the back of the rocks to be sure they are nice and strong, and that each point of the rock will be touching the fridge. I highly recommend these smaller rare earth magnets. They may look small and harder to work with, but are much stronger than a traditional black magnet you normally find in craft stores.
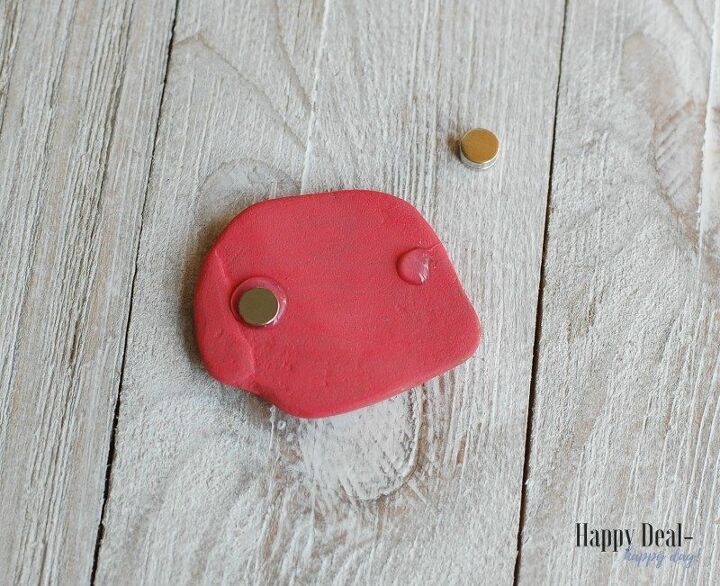
You only need a small dab of glue - and as it dries, the glue flattens and is transparent so it's hard to see.
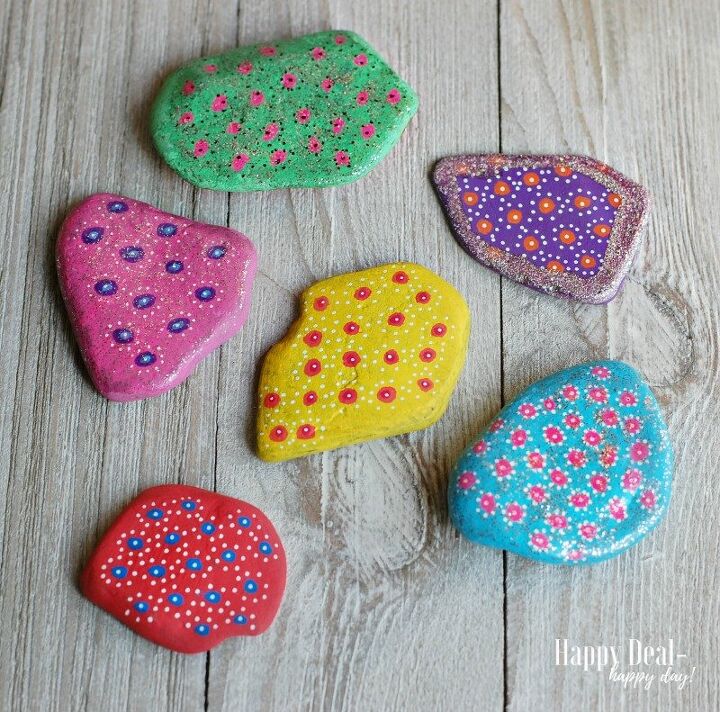
Look at this fun, colorful bunch of painted rock magnets that make my fridge extra special when it comes to holding precious pictures or artwork that my kids want to hang up! I hope you experiment with this yourself and add a splash of color to one of nature's canvases - a simple, small rock!
Resources for this project:
See all materials


Frequently asked questions
Have a question about this project?
How to decorate a apartment front porch with small potted plants