


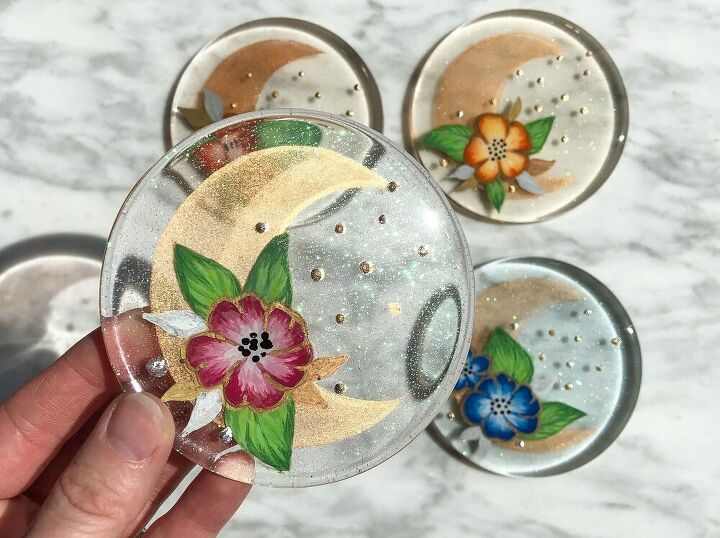
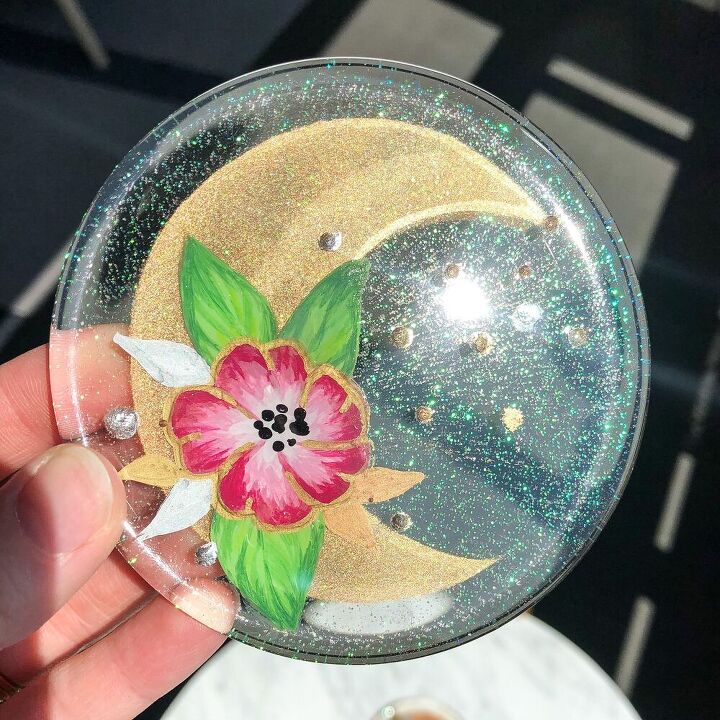
Moon & Flower Resin Coasters

Hello all, thanks for choosing to view my post!
Today's project is a bit different to what I would usually make, I really like painting and working in detail but I don't usually do this on top of resin. So I guess this was a little experiment for me and I had fun doing it.
As usual, I also made a YouTube video for this project which I've added more details about below including a direct link, so make sure you check that out if that's how you prefer to follow along.
WHAT YOU'LL NEED
- Resin - Click here for 10% off resin & free shipping - use code HANNAH
- Round silicone molds
- Fine sand paper
- Liquid latex or painters tape
- Bronze mica powder
- Acrylic Paints
- Gold/silver Leaf
- Glue or relief paste
- Metallic pens
Always follow the appropriate safety measures when handling resin
YOUTUBE TUTORIAL
As I mentioned above, here's the link to my YouTube video for this project. Just click the link above to view.
If you like this video then make sure you give it a 'thumbs up' and please consider subscribing to my channel too ☺️
STEP ONE - PREPARING THE BASES
So if you're not a YouTube tutorial kinda person then just keep reading and I'll walk you through the whole project step-by-step.
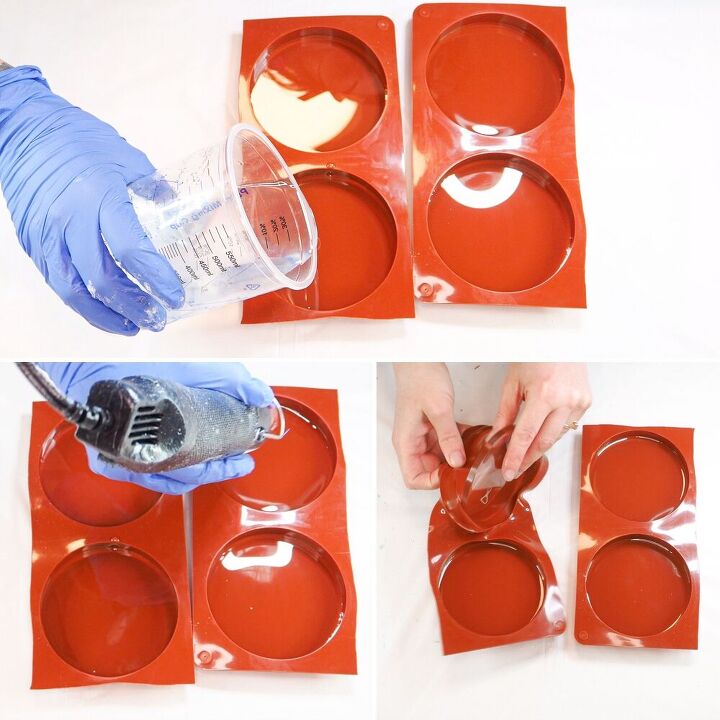
First, mix approx 200mls of resin (100mls of hardener and 100mls of epoxy resin) and divide this equally between 4 coaster molds.
Pop any little bubbles with a heat source. I use a heat gun and blow torch.
Leave the resin to fully cure.
STEP TWO - MAKING THE MOONS
Once the resin has fully cure, demold all 4 and then lightly sand the 'top' of each coaster base. For this project, the top side will be the side that doesn't have the little lip, so the flattest side.
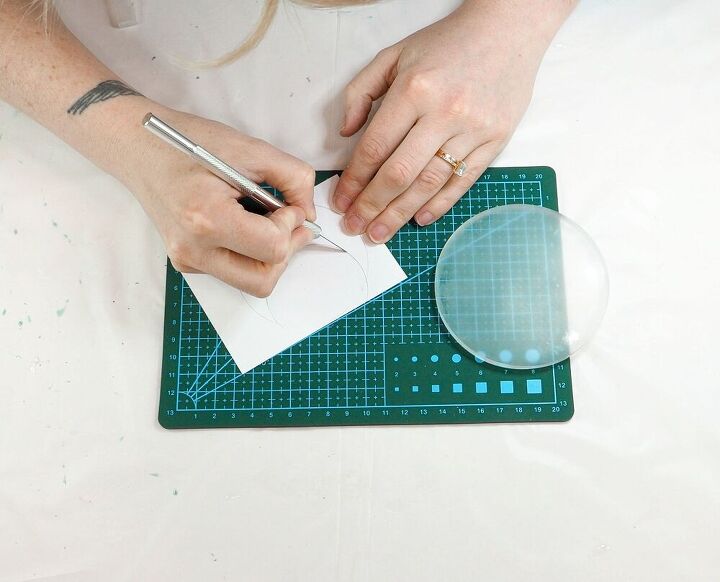
Cut out a Moon shape, or any shape you want, from card. Paper will also work, you may just have to be a bit more careful in the next step.
I make my moon shape with a compass so that my arches are nice and symmetrical. I cut the shape out with a craft knife on a mat but you can do this with scissors, it may just be a little more fiddly.
I only make one moon template and reuse this for all 4 bases.
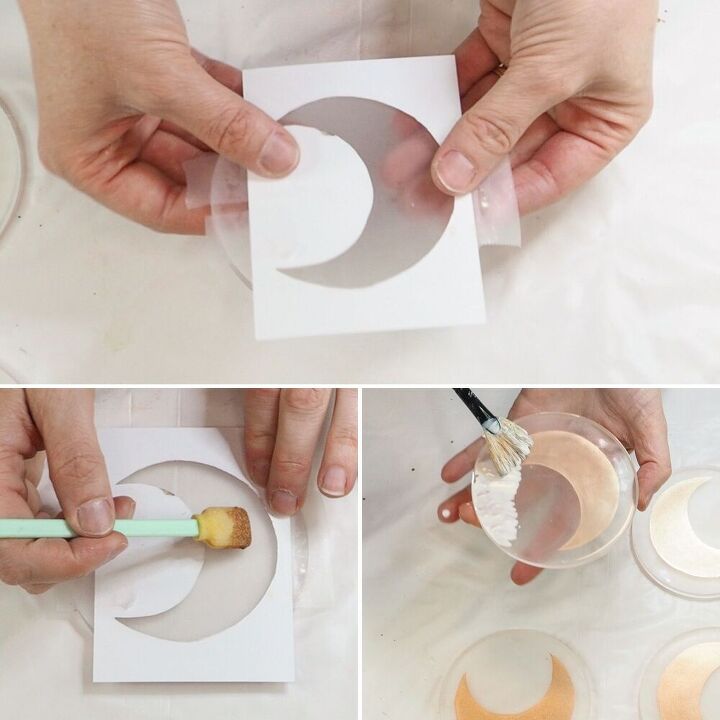
Tape your shape down onto the sanded side (top) of your first coaster so that it doesn't move around.
Once it's secure, dust on some shimmery mica powder so that when the card is removed, the shimmery moon shape will now be on your resin base. The sanded surface should allow the mica powder to stick.
If you don't have mica powder then you can paint a moon directly onto your resin with acrylic paints.
If your moon is a little frayed at the edges, just neaten them up with a paint brush and more powder. If you get mica powder somewhere you don't want it, rubbing alcohol will remove it with ease.
Repeat for all 4 coaster bases and then add liquid latex to the underside edges of each. If you don't have liquid latex then you can use painters tape. You're adding this to protect the bottoms from resin drips.
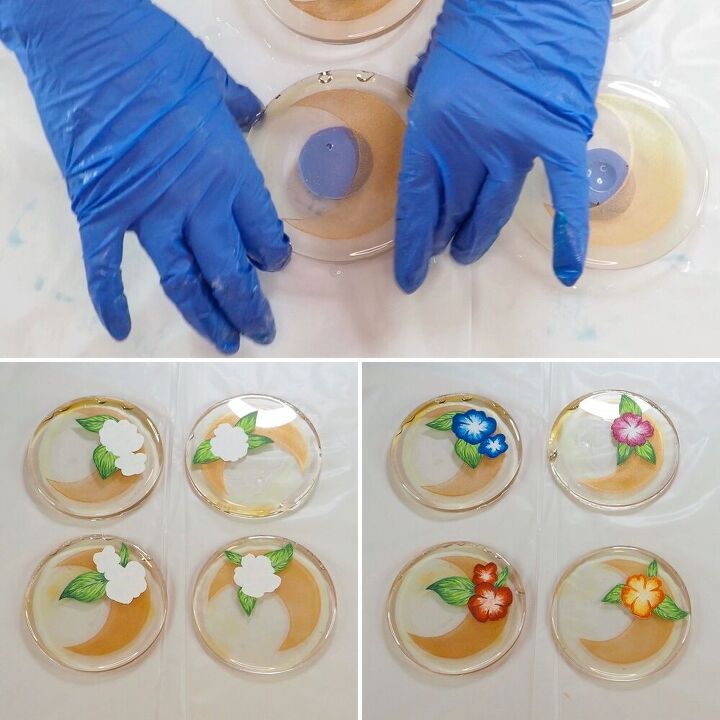
STEP THREE - PAINTING THE FLOWERS
Before painting the flowers though, you may want to add a thin coat of resin over the moons.
To do this, mix a very small amount of resin, approx 50-100mls, and pour this over the moons. You can skip this resin step if you want, I only added the resin because I wanted there to be a bit of depth to the painting.
Once the resin has cured, use acrylic paints to paint your flower designs. These can be any flowers you want. If you want to paint your flowers like mine, I have another video on my YouTube channel with more detail on how to do this.
I add a white base first so that my flower colour really pops. I then build up some simple acrylic paint layers from there.
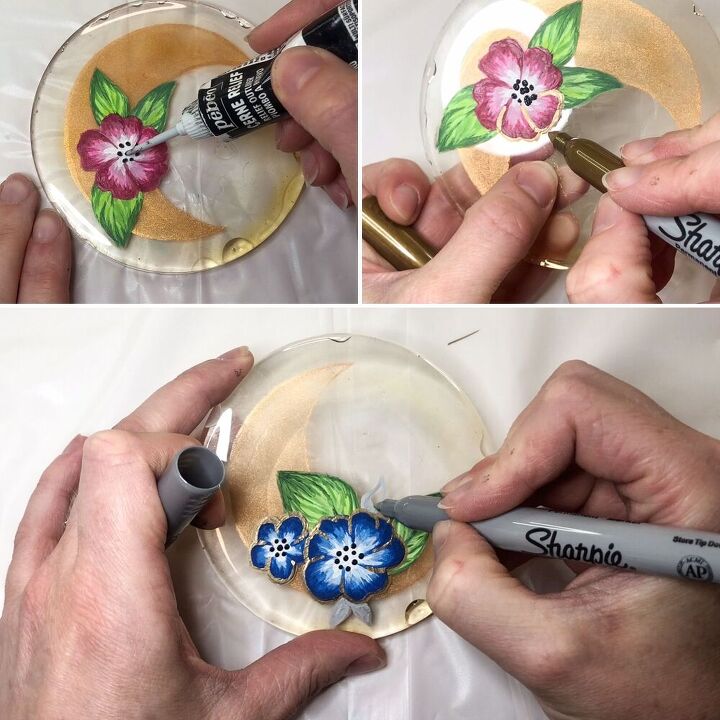
STEP FOUR - EXTRA DETAILS
I add some extra little details to my flowers after I painted them. I dot on some black relief paste in the middle of each so that the dots are slightly raised. If you don't have relief paste then you can just use black paint for a similar look.
I then use metallic sharpies to outline the petals and to draw on extra leaves.
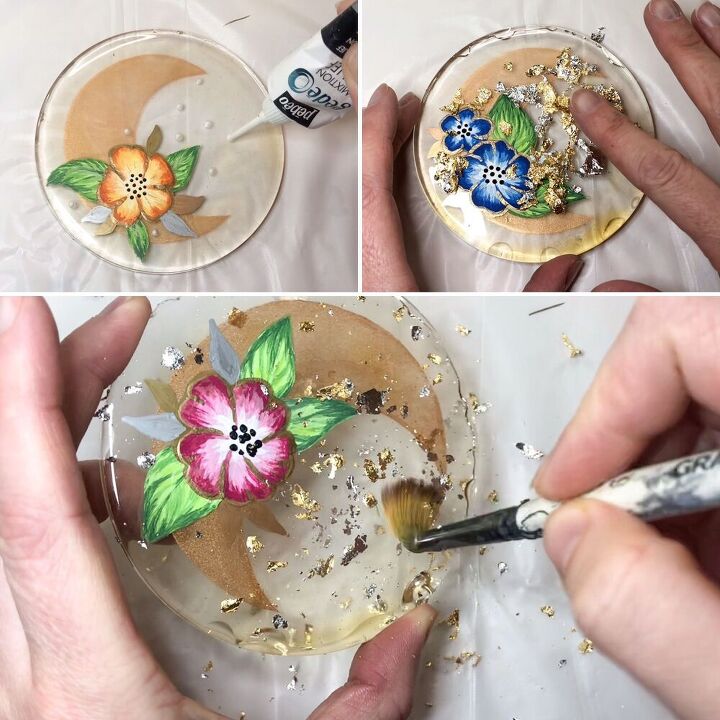
To add gold and silver dots like I have, use clear relief paste and then let that dry before adding foils. Then dust off the excess foil.
If you don't have relief paste then you could use glue to create the dots. Let the glue go tacky before adding the foils and then let the glue dry out fully before dusting off the excess foil.
After you've finished adding all your extra details, you'll need to encase your design in a coat of resin.
Mix approx 100mls of resin and give each coaster a good shiny top coat. Allow to fully cure.
STEP FIVE - OPTIONAL SPARKLE
Once your top coat has cured, removed the latex or painters tape from the bottom and pick off the little resin drips, they should come away easily.
If the underside edge is a little rough, lightly sand this until it's smooth.
And now, you have a fully completed set of coasters ready to go 👍🏻
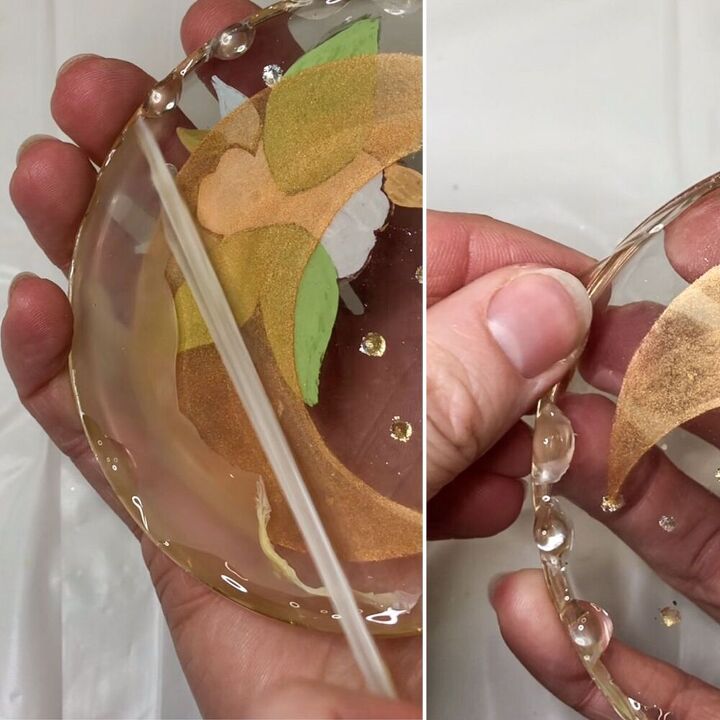
Want to add even more sparkle though?......
As I mentioned earlier, these coasters were a fun experiment for me so I went a little overboard with the extra details.
If you fancy joining me in this sea of sparkle, then there's just one more element to add.
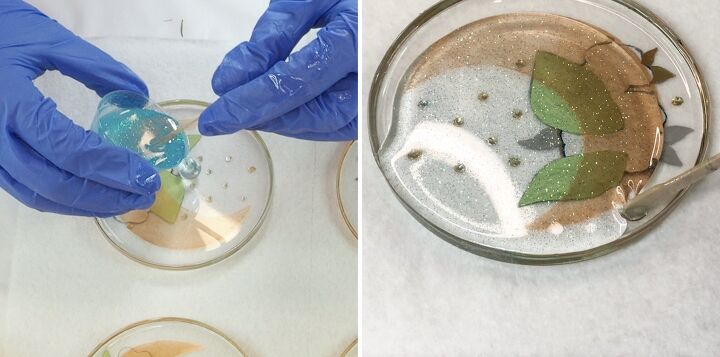
Turn your coasters upside down (make sure your work surface is nice and clean) and mix a small portion of resin, no more than 100mls.
You'll have noticed that my flowers are all different colours so I split my resin into 4 small cups and coloured each one with a matching coloured glitter.
Whilst the coasters are still upside down, carefully pour the glittery resin onto their bottoms.
Because this side has a small lip, you won't need to add latex or tape to the other side because there won't be any drips. Add a small amount of resin first and push it up to the edges. Add more if the lip can hold it but please don't add too much so that it spills over the edge. This will be a huge pain to try and remedy later!
Let the resin fully cure.
And that is how to make these detailed delights!
I hope you enjoyed this project, please feel free to drop any questions below and I'll be happy to get back to you.
This exact set of coasters is currently available in my Etsy store if you're interested in buying them. Click this link to be taken to my store.
Please do remember to check out my YouTube channel and consider subscribing too 🙏🏻👍🏻
Until next time, happy crafting!
💙


Frequently asked questions
Have a question about this project?