Mosaic Fish

by
Da.herrmann
(IC: homeowner)
5 Materials
$5-10
2 Days
Easy
Empty wine bottles, shards of a mirror and glass nuggets turned into a fish decoration for my backyard
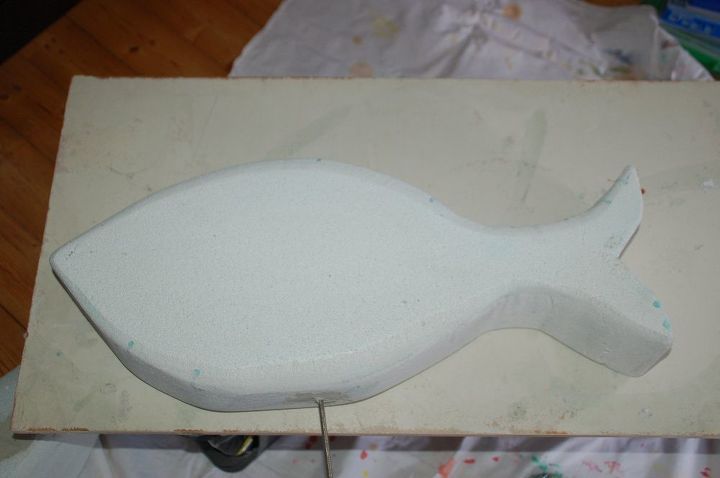
Colourful bottles were piling up in our cellar.....Lightweight concrete blocks can be shaped easily in form. You can use saws, graters and files. It is better to work outside, as it produces a lot of dust. Wear a mask for health reasons.
I drilled a hole and added an iron rod to stick it into the ground later. The stick is glued into the fish body by tile adhesive.
I started with the face and worked my way around the eye. If you like, you can draw the patterns first or just follow your intuition.
You need a lot of shards to go on. This is a standard German wine bottle in green. I smashed it either in a bag with a cloth around it or in a bucket full of water. Please make sure to wear eye protection.
This is a German prosecco bottle in a wonderful blue colour. Collect bottles, old vases, whatever colours you like.
Around the eyes I used samples from a tile market. They were glued onto a plastic shield. You can remove them from the shield by soaking them in luke warm water.
There are various types of pincers on the marked for breaking tiles or glass. The right one is the cheapest hardware store one and at the same time my favourite one, as it is strong and easy to handle. They help you to get the size of shards you want to use (wear eye protection).
For gluing the shards onto your object, you have to add water to your tile adhesive. It should have a texture of thick yoghurt. Of course, there are instructions on the package. The tiny spatula helps to apply the adhesive. You might also like to add the adhesive to your shard and stick it on the object then.
Here is the fish with all the shards glued onto it. I decided to finish one side first, before adding shards to the other side and added the grout on this side first before finishinig the other side.
Water has to be added to the grout (just like you have already done for the tile adhesive). The texture should be the same, thick yoghourt. A tiny spatula makes it easier to apply it. Just try to fill the gaps and sratch off the surplus grout mud.
When the grout has dried half-way, you can wipe off any surplus with an old cloth. The right point of time is easy to find: when too much of the grout disappears between the shards, it's too early. But don't wait too long, when it's getting hard it will be impossible to remove.
It took me two days, as I decided to let everyhing dry well before going on. The adhesive needs a day to become hard and durable, with the grout you can turn the fish over in a few hours.
A very easy and rather cheap project.
As I'm from Germany, I don't really know your products. But if you have any questions, please contact me.
The German tutorial can be found here:
https://www.die-kleine-perlenwerkstatt.com/blog/
Enjoyed the project?
Resources for this project:
See all materials
Any price and availability information displayed on [relevant Amazon Site(s), as applicable] at the time of purchase will apply to the purchase of this product.
Hometalk may collect a small share of sales from the links on this page.More info
Published May 11th, 2017 9:32 AM
Comments
Join the conversation
2 of 129 comments
-
 Linda kelley
on Jan 14, 2020
So beautiful, youre very talented!
-
-








Frequently asked questions
Have a question about this project?
I really love this whole idea and want to make several. I noticed the rod is very slender and short. I’m guessing it sits close to the ground. Any ideas on a longer rod out of? So that I might have them intermittent 2’ - 4’ above the ground? Thank you!
Where did she get the fish?
nice job! what is the approximate size of your finished fish please?