


Paper Maché Lampshade
I love well-designed, beautiful, and unique products. So, when my friend sent me an image of a gorgeous lampshade and asked me if I could make one for her, I happily agreed! The lampshade was for her nursery, but it took me a few months to collect enough egg cartons, so I totally missed the deadline. Now it's hanging happily in our playroom

YOU WILL NEED:
- Egg Cartons – lots and lots of them. I used about 30 large trays, but it all depends on the size of your lampshade.
- A packet of wallpaper glue powder
- 1 cup cold glue
- Yoga Ball
- Spray paint: I used matt black for the outside and dayglow yellow for the inside.
- Light cord and bulb

STEP 1:
Tear the egg cartons into smaller pieces and throw them in a bucket. Then cover them with water and let it soak for 24 hours.
STEP 2:
Use an electric mixer to beat the mixture to a pulp, roughly the consistency of sloppy oatmeal.
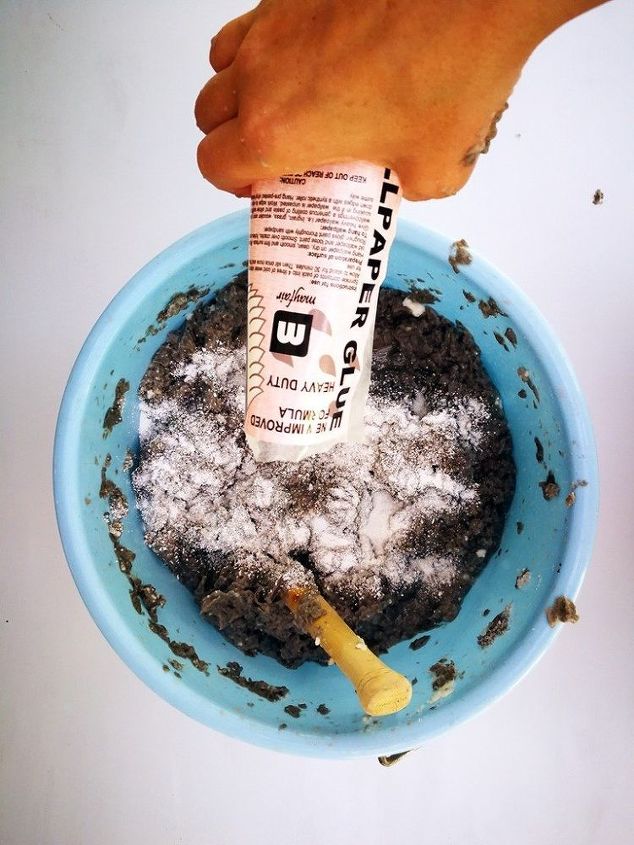
STEP 3:
This is where it gets awesome! Add the packet of wallpaper glue powder, and use your hands to mix it up. It feels wonderfully gooey! Or you can use a wooden spoon, but hands are much better 
STEP 4:
Let it rest for a while according to the instructions on the wallpaper glue manufacturer’s packaging. In the meantime, blow up the yoga ball and prepare your work surface: it’s going to get messy!
It's important to keep the yoga ball from rolling around, see how here.
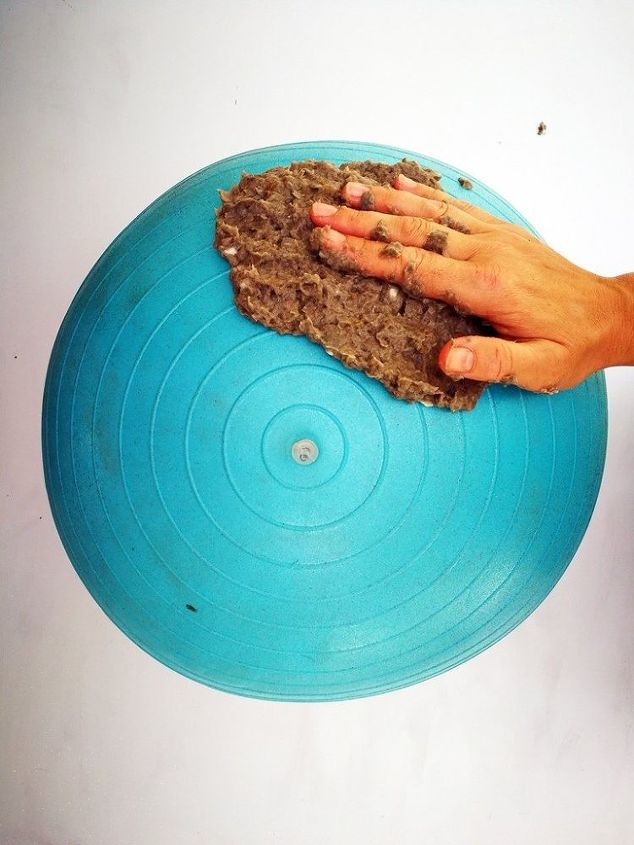
STEP 5:
When the mixture is ready, add the cold glue and mix well. Then start applying handfuls of the paper maché to the yoga ball. It sticks remarkably easy and really goes quick. Create your lampshade with one layer only, find out why here.
Make sure that you are happy with the thickness before letting it dry.
Remember to leave a small area open at the top where the electrical cord is going to be installed.
STEP 6:
Allow to dry. This could take anything from 24 hours to 5 days. My shade took 3 days, and when I took it off it was still wet on the inside and therefore very fragile. I placed it upside down inside a large bowl and left it for another 2 days.
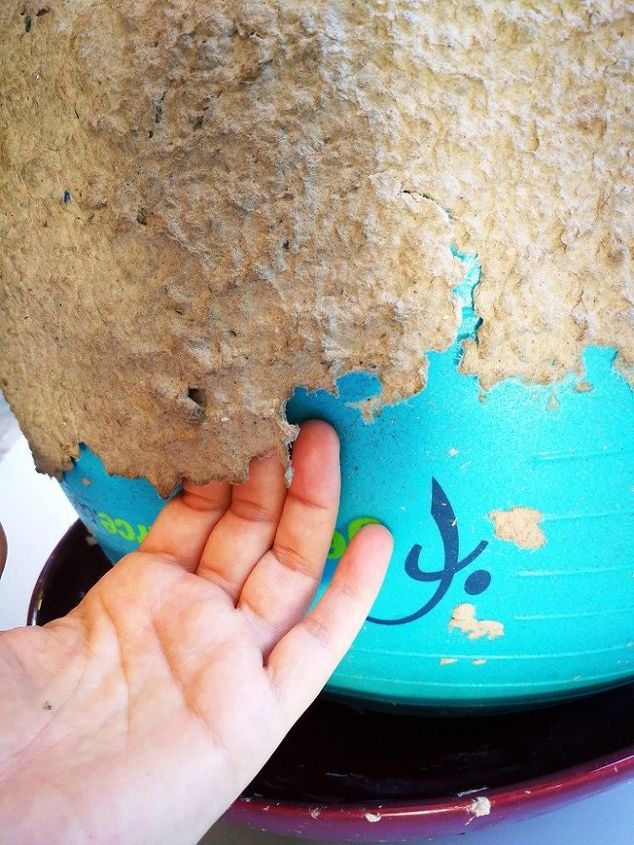
STEP 7:
Once the paper maché is thoroughly dry, deflate the ball just a little and use your hand to loosen the edges of the lampshade. Then slowly deflate the ball, ensuring that the lampshade doesn’t stick to it.
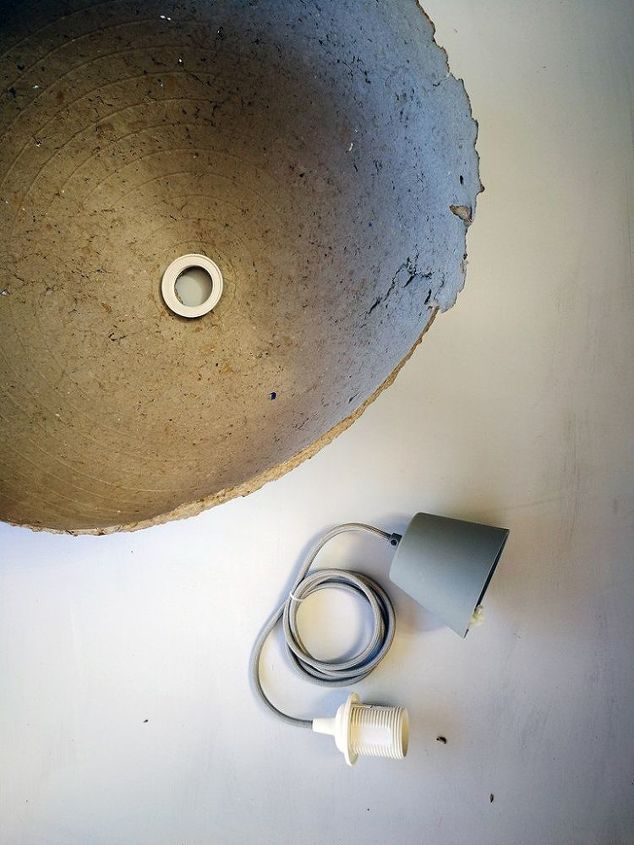
STEP 8:
Use the electrical fitting as a template to ensure that the hole left at the top is large enough.
STEP 9:
Spray the inside and outside of the lampshade in the colours of your choice.
STEP 10:
Attach the electrical light cord, get an electrician to install, and switch on!
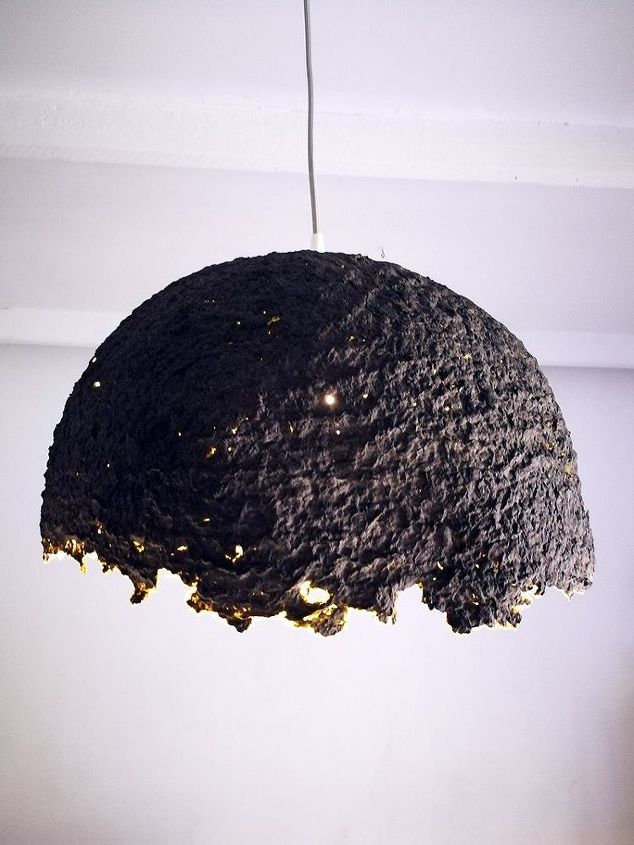
That's it! Enjoy your designer-esque handiwork!
Happy Lighting! 

DIY egg carton ideas
Resources for this project:
See all materials


Comments
Join the conversation
-
I see all kinds of designs that could be made into stamps from the egg cartons.
-
Never heard of cold glue. Thanks for the tip.


Frequently asked questions
Have a question about this project?
Thank You for the cold glue answer. 🌹🌼🌺 Now for more! In the "Resources for this project:" Box above the cold glue shown is a 4.2 oz product for $5.99 and I'm wondering if it's the same type of stuff you use since you call for a cup of the stuff?
Also, what is the packet size of the wallpaper glue powder and is that the same thing as wallpaper PASTE? Looking online all I see are tubs and buckets.
Sorry to be such a pest and pain! At 59+ years, I've never done mucha the home deco - craft stuff. Nature, environment, plants and animals are what I've spent my life learning and doing so I'm VERY ignorant of the Creation of these Beautiful Creations!
I really like this idea and wanna get it right.
Thanks Again, Barb
What a good idea, have you considered putting this on a wall, do you think it would come off easily, could you please try it for me so I can make an informed decision without the mess 😂 😂 😂
Made this project as a bowl. Came out great. I passed bred a design with water based craft paint. What should I use to seal it? Thank you