


What Can I Do With an Old Lamp Shade
Searching for what I can do with an old lamp shade? Here we give you an idea of how you can make over a stained lampshade.
Do you recall yesterday when I showed you how to paint a metal lamp for my mother? She decided to give me a lamp shade to "do something with"... lucky me! Then Mr. Vintage said to buy a new shade... just recounting how we came to making over a stained lamp shade. I am not sure why she had such faith in me, or what she was planning to do with it, but here we are.
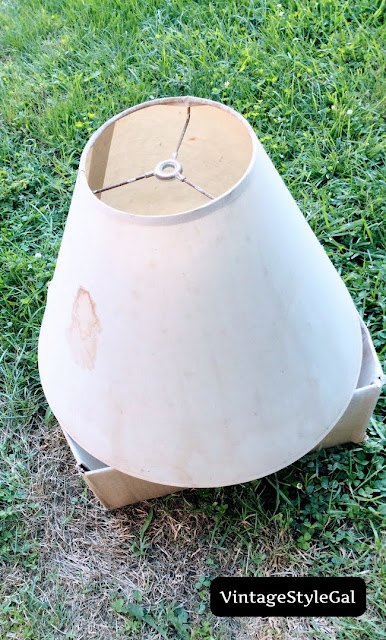
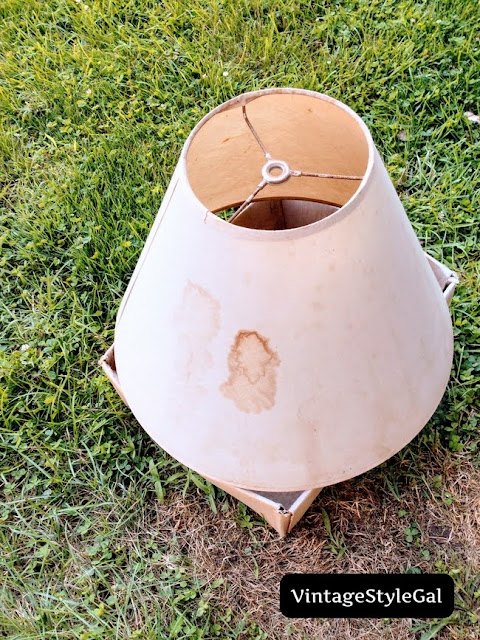
I decided to take this old stained lamp shade under my wing, and make it my next project. If you use a little creativity and elbow grease, you can make over about anything and keep them out of landfills.
I decided to accept the challenge of this little ole' lampshade. I thought to myself what did I agree to on this thing? I got our vacuum out and ran the hose over it to get all of the dust off of it.
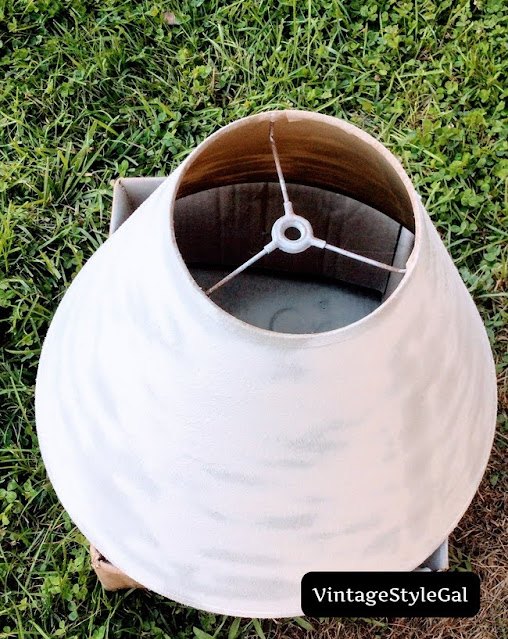
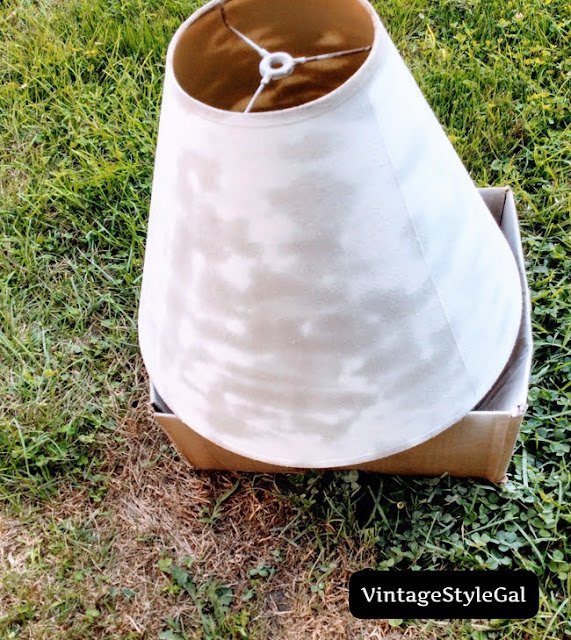
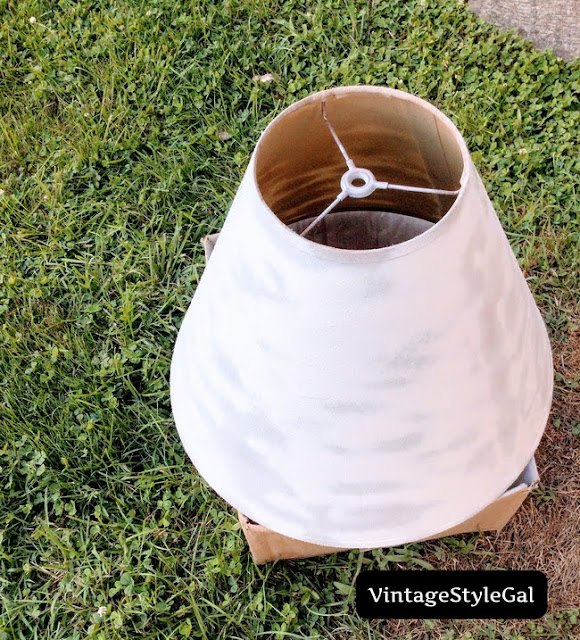
Then I took it outside and decided to use the Rust-Oleum paint I used on the lamp itself. I spray painted the shade white. I put two coats on the shade and decided I would hope for the best. As you can see, the paint was spotty.
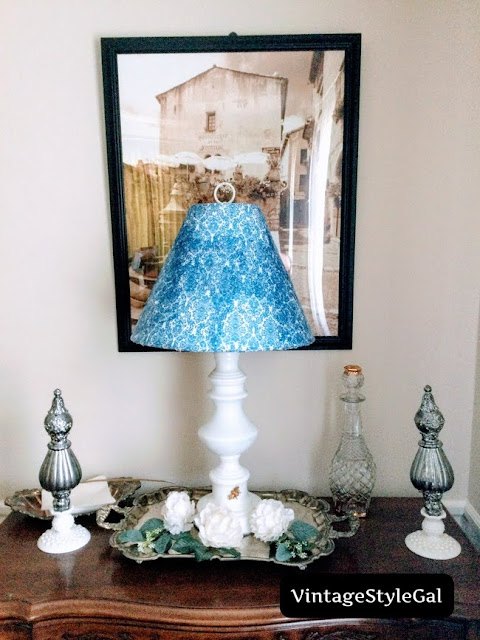
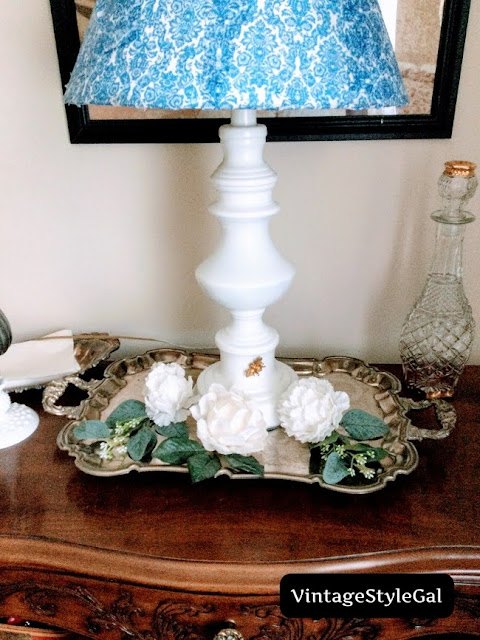
I brought the shade in with me and used an old round laundry basket as a way to prop the shade so I could work on it. I mentioned before mom loves blue and white, and it just so happened I had blue and white damask napkins on hand.
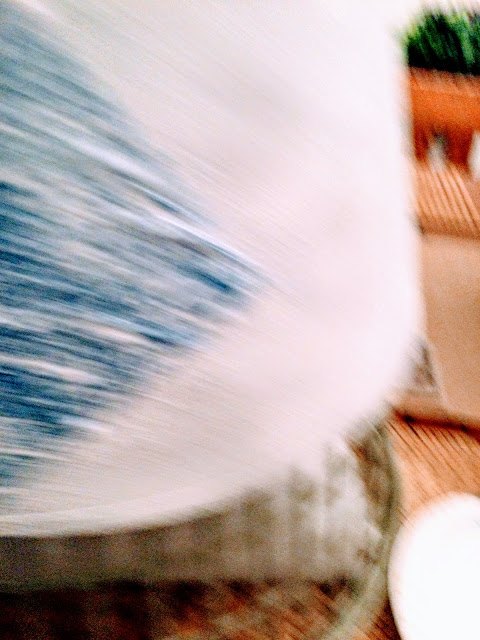
I started by removing the second ply on several of the napkins I planned to use and then set them aside. I then began brushing the lamp shade with a sponge brush full of Mod Podge. Next I applied the napkin to the shade where I had just applied the Mod Podge. I brushed more Mod Podge over the napkin. I continued to add more Mod Podge and napkins until the entire lamp shade was covered.
AND... here is the first picture I took... when I am into a project, sometimes I forget to take pics, and the one I did take did not turn out! Can you believe it? I should have looked before I moved on, but I guess I learned my lesson. Rookie mistake...
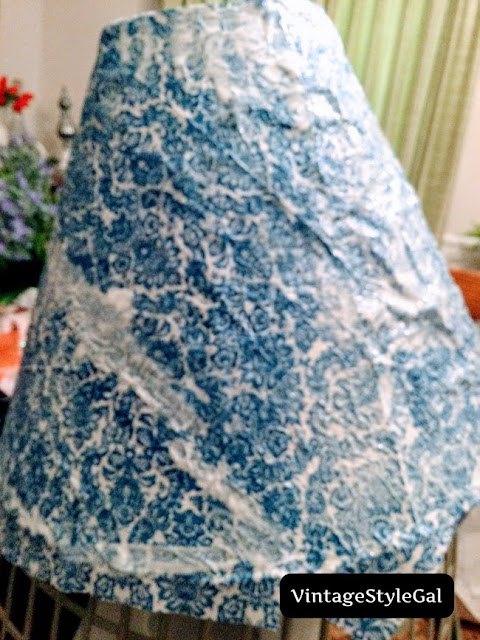
Do you see how drenched in glue this lamp shade is? I laid it on thick because for some reason the napkins were not sticking like they have on our other projects. I am not sure if it was because the shade was painted or because it was fabric, or maybe it was a combination of both.
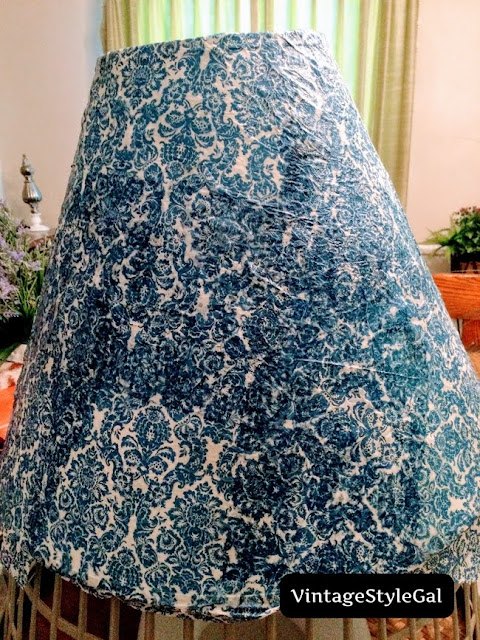
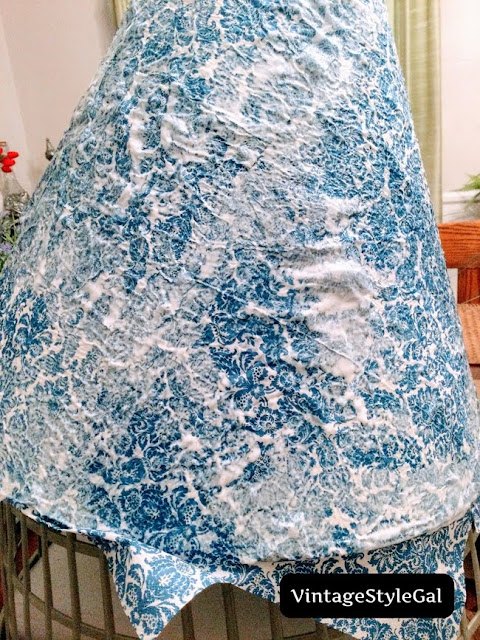
I let it dry over night to see what it looked like the next morning and decided it did not look too bad. At least I would only be out glue and napkins if it did not work the way I thought it would. The napkins ended up sticking, thankfully! I left the edges raw so I could trim them later.
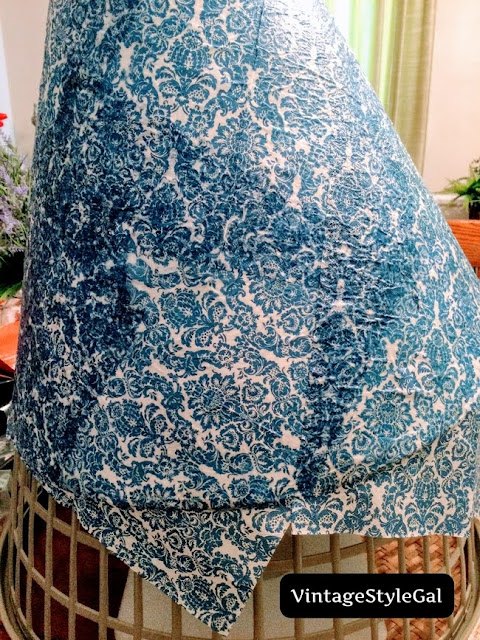
After I trimmed the excess, I used my trusty glue gun and placed a bead of glue along the inside bottom of the shade. Then I turned the napkin under all the way around to give it a finished look.

I overlapped napkins when covering the shade so there are some spots that are darker and lighter. I thought it kind of gave it a quilted look. I kept thinking of it as a quilt as I worked on it Sunday night.
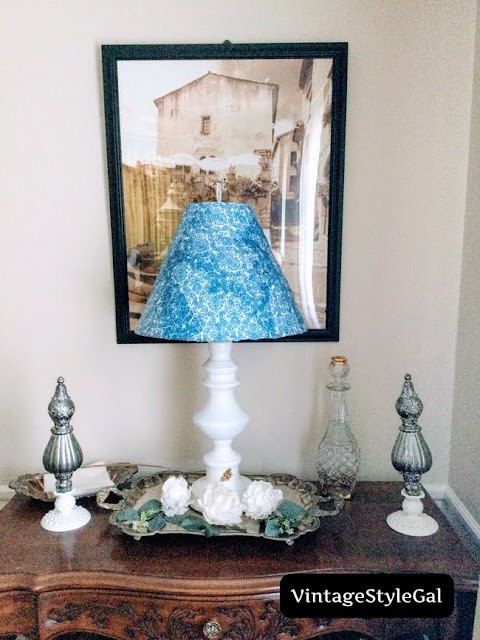
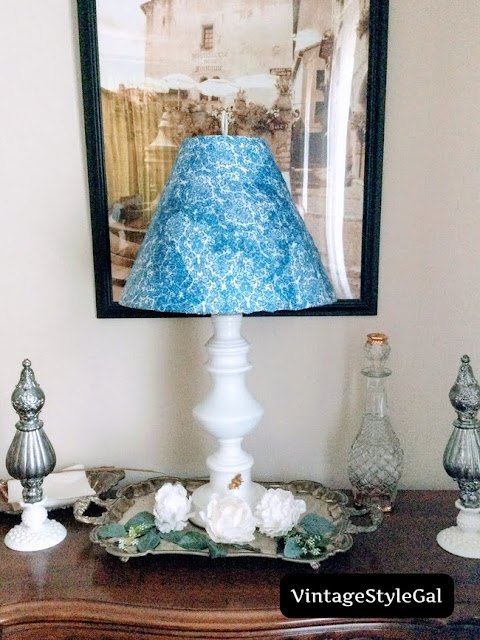
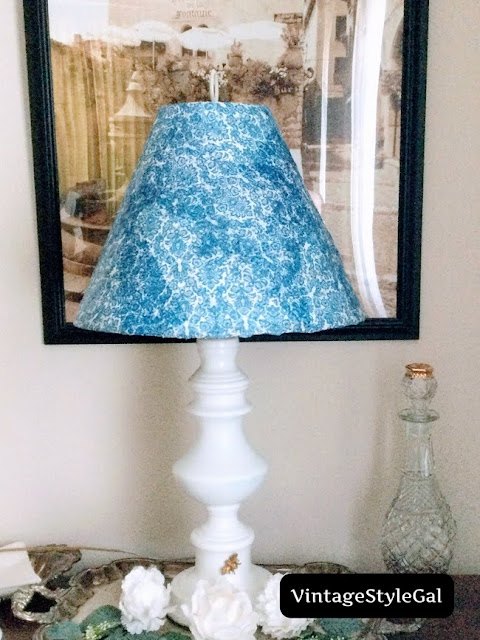
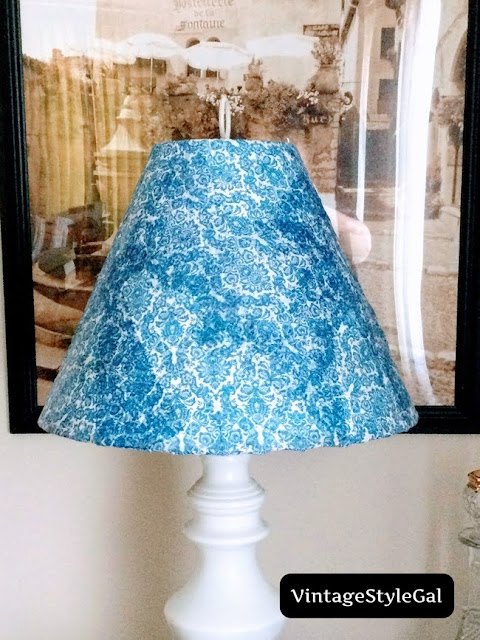
Do you remember the bees from our medicine cabinet make over? I added one to the lamp for a bit of whimsy. Mom has a bee candle and a beehive candle with bees on the table this lamp will find it's forever home on. So, I thought why not? It is pretty cute, lol! Now that I see the shade with the lamp, I’m glad I went with an all white lamp base.
What do you think? Do you have an old lampshade you are unsure what to do with? Give it a make over, my most favorite kinds of projects to do! Anyone can make something new look good, but when you are working with something with a bit of age, stains, and has just plain seen better days, it is a bit of a challenge. I love feeling challenged and I am pretty happy with the way this entire project turned out. Reusing items saves you money, and if you are anything like me, you enjoy putting your own spin on touches around your home!
I had all of the materials for this project on hand so it was free for me, but have listed what I used to do this project and the cost.
Interested in seeing more make over's? Join us over on our blog at https://www.vintagestylegal.com/ where we tend to have a lot of fun. You can also read stories about our mischievous pup we call peanut.
Resources for this project:
See all materials


Comments
Join the conversation
-
Thank you. Spray painted. Did not prime.
It showed up only when lit.
-
Looks great! Love this, I am going to try this for a guess bedroom.


Frequently asked questions
Have a question about this project?
Would this work on a pleated shade?
I have two lamps by my bed, one lampshade got torn in the last move we made. How can I repair it so I can hopefully do what you did here?
When the lamp is on, does it smell from the heated up decoupage?