


Easy Wire Storage Baskets

7 Materials
$10
3 Hours
Medium
Sometimes I need to get my life in order. I saw these great wire bins for sale at a couple of various high end stores for a pretty penny and thought... eh ... I can make that. With that in mind I headed to the hardware store and bought some hardware cloth. These wire storage bins are a quick and easy way to make a fun storage option. You can hang these on the wall, or place them on a shelf, or even use them under the sink to help keep things in place!
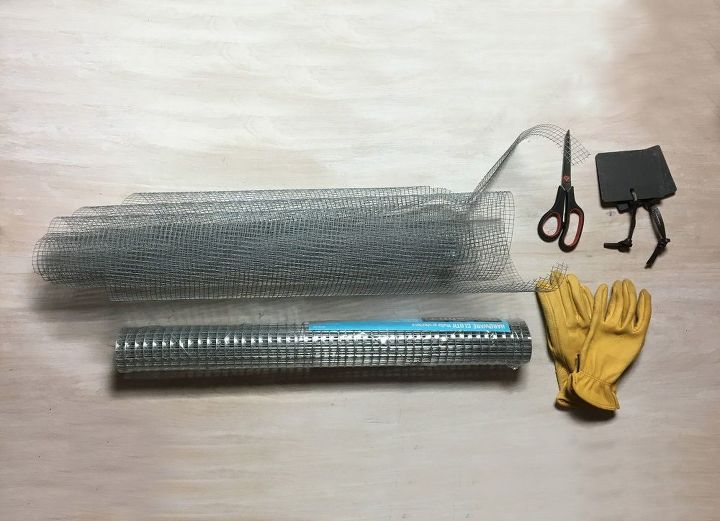
SUPPLIES: -Hardware Cloth ( I had the smaller grid one on hand and thought I might as well use that for one bin and then bought the larger grid for some additional bins) -Scissors / Wire Cutters -Gloves -Slate Label Tags
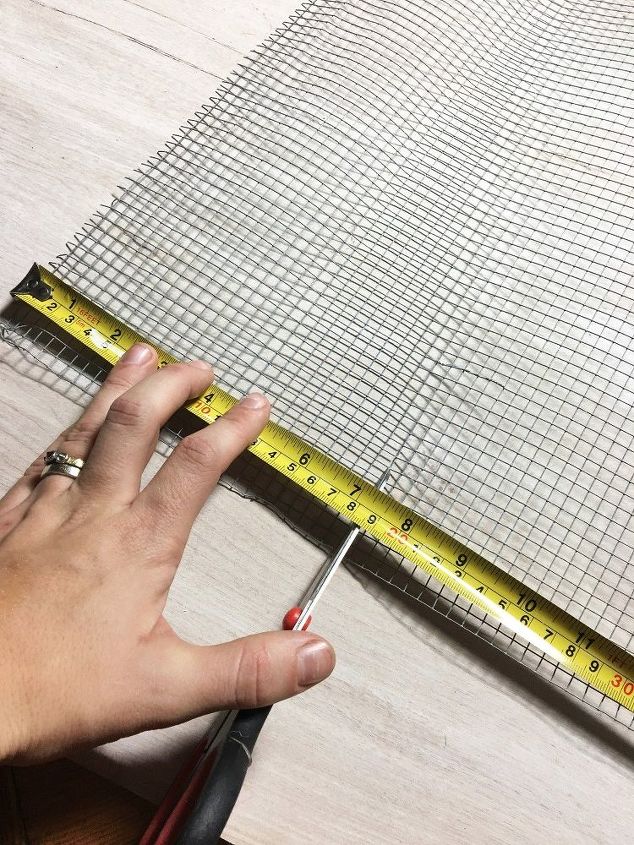
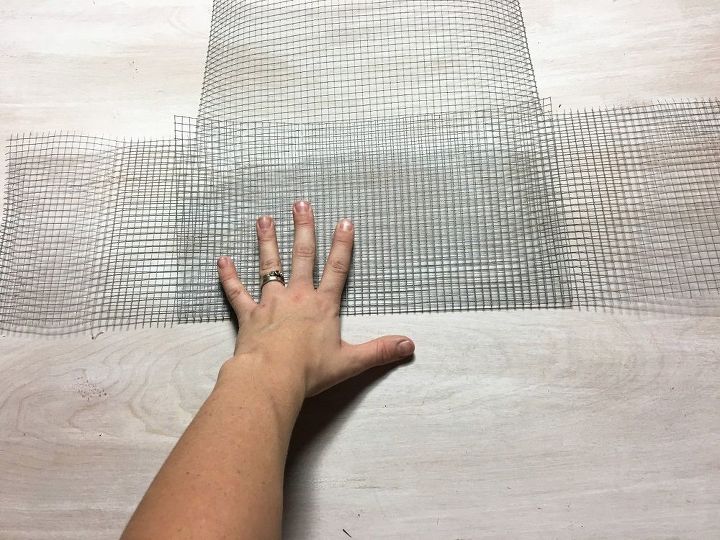
STEP 1: Choose Your Measurements First, you need to decide how high and how wide and how deep you want each basket to be. I decided I wanted the height to be 7" the depth to be 7", and the width to be 13". This means that I needed to cut a piece that is 27" long and 21" wide out of the wire roll. Basically the dimensions are found by adding the width + the height + the height for one side. Then for the other side you need to add the height + the depth + the height. I know that sounds confusing, but I included a picture with some labels below to help a bit.
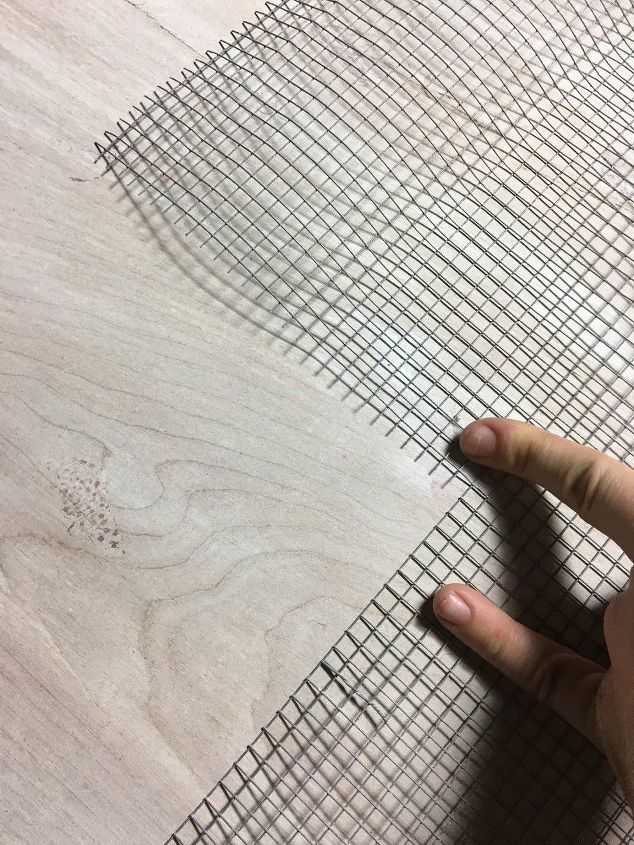
STEP 2: Cut a Square to Make a Corner For the side flaps you will need to cut out a square from each of the corners of your wire grid in the height you are looking for. Since I decided to have the height be 7" I cut out a 7x7 square from each corner. Make sure that each corner has one edge left flat and one with the pokes of the grid sticking out, so you can attach them to each other. STEP 3: Check all Measurements
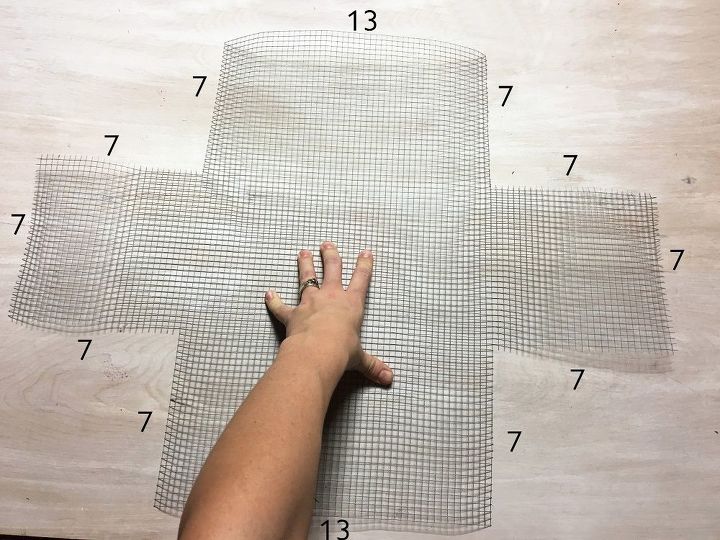
Make sure that your wire grid is cut out correctly with all pieces matching up. It will look somewhat like a big plus sign. (I labeled the measurements for each cut I made so that hopefully steps 1 & 2 seem more simple.)
STEP 4: Bend It to Create Sharp Lines Now take each of the sides and bend them to create sharp edges for the bottom of the bin. You can use a ruler or book or something as a guide, but honestly it is pretty easy to bend it without.
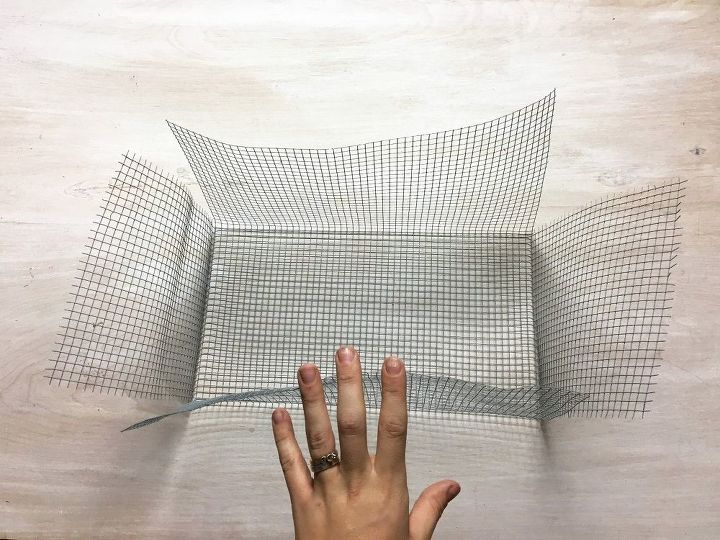
STEP 5: Check to Make Sure Your Ends Meet Up Once you have created a nice crease for each edge you need to make sure each of the sides sits up well and lines up with it's neighboring side.
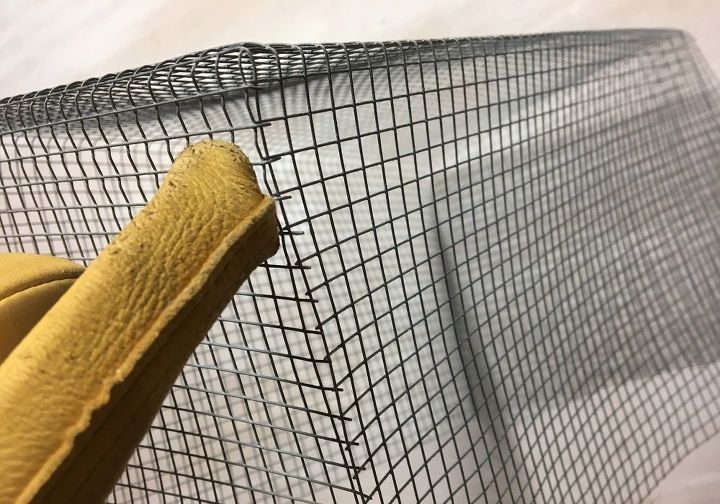
STEP 6: Connect the Corners Now take each corner and connect them to one another by bending the poking wire side around the flat side.
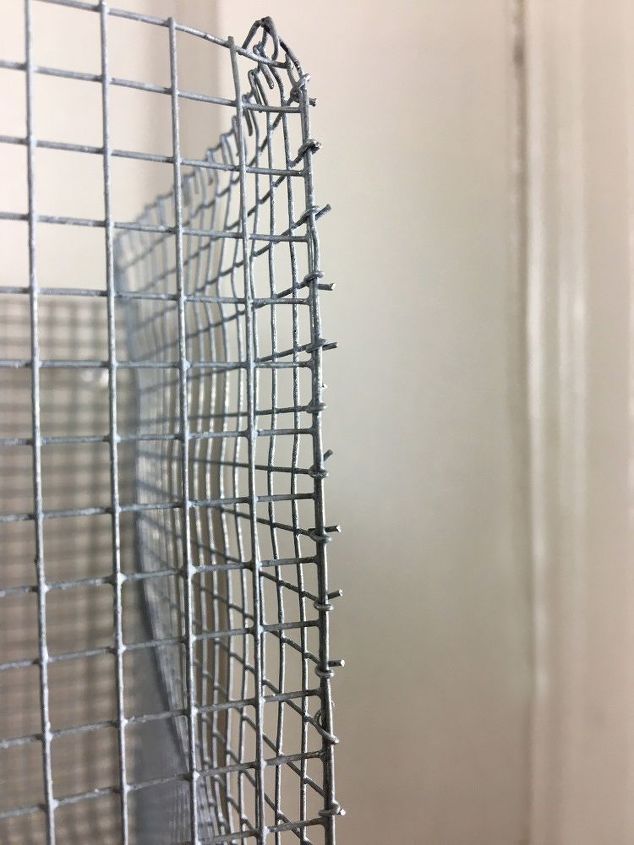
You can secure the twisted corners into place by using tweezers to curl them around the straight edge.

STEP 7: Attach Your Tag Grab your leather strung slate tag and feed it through the front of the bin and tie it into place.
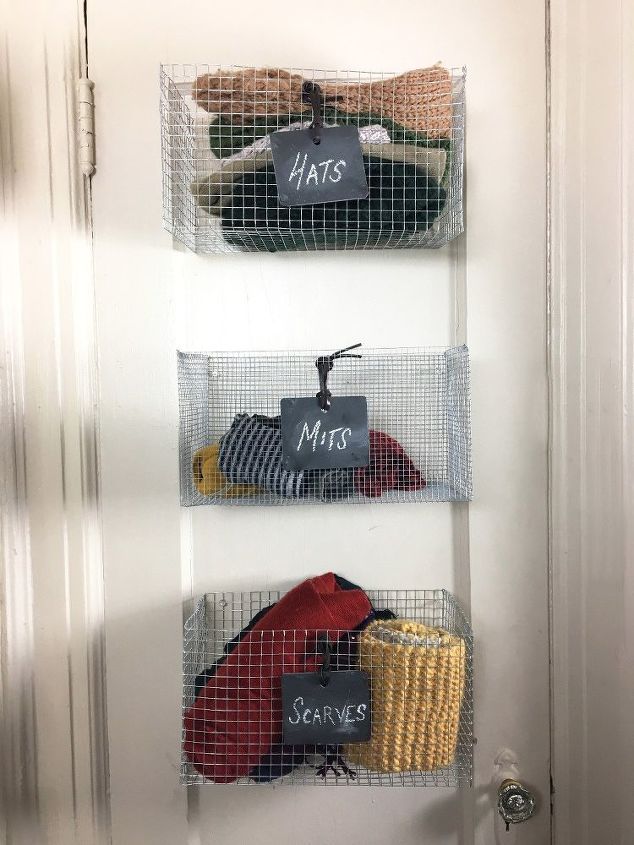
STEP 8: Hang Them or Put Them Wherever You Want Now just hang them on your wall, label them, and fill them with whatever you wish!
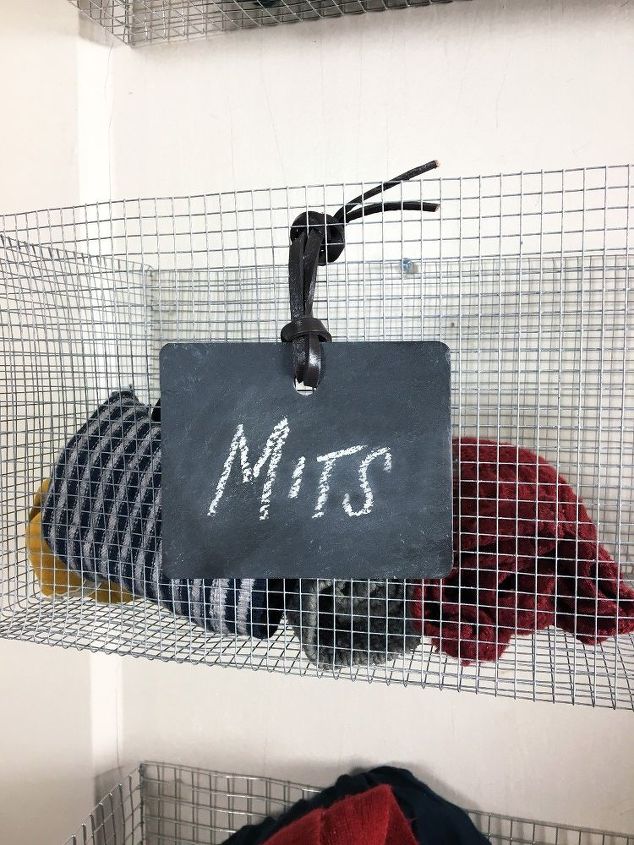
The great part about these slates is that you can erase the chalk and relabel it, if you want to move them and use them elsewhere for something else!
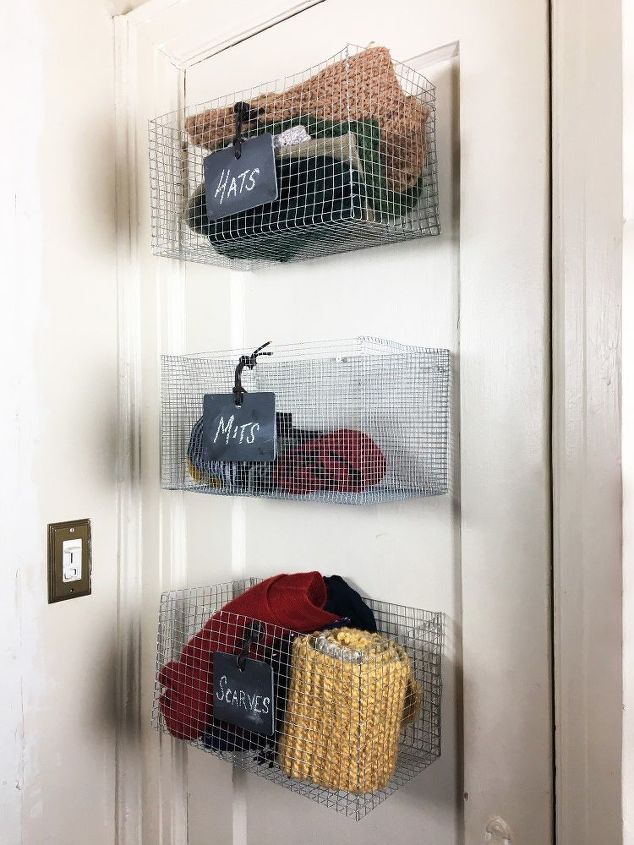
Honestly, I think I am going to spray paint these a fun copper color at some point, but they are nice and rustic looking for now. You can of course make them smaller or larger depending on your needs.
{
"id": "4094721",
"alt": "",
"title": "",
"video_library_id": "8012",
"thumbnail": "https://cdn-fastly.hometalk.com/media/2017/07/31/4094721/easy-wire-storage-baskets.jpg"
}
{
"width": 634,
"height": 357,
"showRelated": true,
"noautoplay": ""
}
Resources for this project:
See all materials


Any price and availability information displayed on [relevant Amazon Site(s), as applicable] at the time of purchase will apply to the purchase of this product.
Hometalk may collect a small share of sales from the links on this page.More info
Comments
Join the conversation
2 of 73 comments
-
So cool! Great tutorial, thanks for sharing!
-
I'm going to try this because I LOVE wire baskets! I'm going to make a couple of changes (as I noted in a reply to Irene.) Thanks for the tutorial!


Frequently asked questions
Have a question about this project?
How sturdy are they?
Hi - The hardware cloth is pretty pricey from Amazon, how much did you need to buy, and, for how many bins? Thank you!
Room divider ideas?